3D Truss Models
-
I do not believe the solution can ever be to lower the price of your plugin to attract MAKE users.
You are in the process of crafting a remarkable professional plugin, and to my mind, you have to stay the course with that group of purchasers and users.An observation from my little perch: purchasers are not drying up, they are WAITING. They are waiting for the plugin (floors, trusses and the WALL plugin as combined...!!!) to mature for daily professional use.
Your own notes clearly tell us what we already know about the present limitations and how much more coding is required:
@unknownuser said:The plugin as a whole has quite of bit of functionality but it also is very limited in many respects. This really jumps out at me when I try to model up some recent homes that I did structural work on a few months ago. The biggest issues seem to be:
- Inability to cut holes in floors or create polygon floor outlines.
- The same issue with roofs in that the plugin is only really good at rectangular roof outlines. The straight skeleton implementation will address this, at least for rafter roofs initially, truss roofs will be a much bigger problem.
- There is no function for editing a roof or floor assembly, it's fire and forget. This feature would be particularly useful when you botched one parameter and just need to go back and edit something minor rather than recreating the entire assembly (not that this is too difficult).
- I'm missing a good staircase creator/editor.
- Not all of the truss types are up to speed with all the recent advanced options, so much to do.
- The manual is almost non-existent.
The list of limitations goes on. The plugin has potential but its certainly a work in progress and far from the polished gemstone it needs to be.
In truth, it is almost as if you have no choice but to go 'underground', complete all of the coding required (as per the essential list above), only coming back out to the marketplace when you have a robust finished product in hand. From there, us professional users, aware of what we already see (and further imagine) could be a world-class addition to Sketchup, will willingly support your marketing efforts.
I am encouraged to read you are not selling the code, but will continue, regardless. You show an entrepreneurs' courage. For this alone, I wish you ever possible success.
-
The plugin is targeted at the professional designer. The complexity and level of detail it affords is the primary reason some designers find it useful. However, this level of detail does not automatically preclude it from being used by the casual user. Typically one can leave most of the setting at their default values and use the plugin with little to no effort and special building knowledge. A completed manual would of course help with the learning curve.
The casual user base would subsidize the more intense development and ultimately the end product that the design professionals can take advantage of.
Its really just a numbers game, if the volume is there then the price can decrease. In the end my development costs are the same whether I have 400 users or 4,000 users. To develop this full time for a couple years is going to cost between $80,000 to $100,000 at an average of $45,000 per year. I figure I'm going to need at least two more years of full time development to make this thing into something fairly substantial.
-
Price dropped to $15.00 for a new license and $10.00 for a renewal.
-
Version 2.0.3 - 10.13.2017
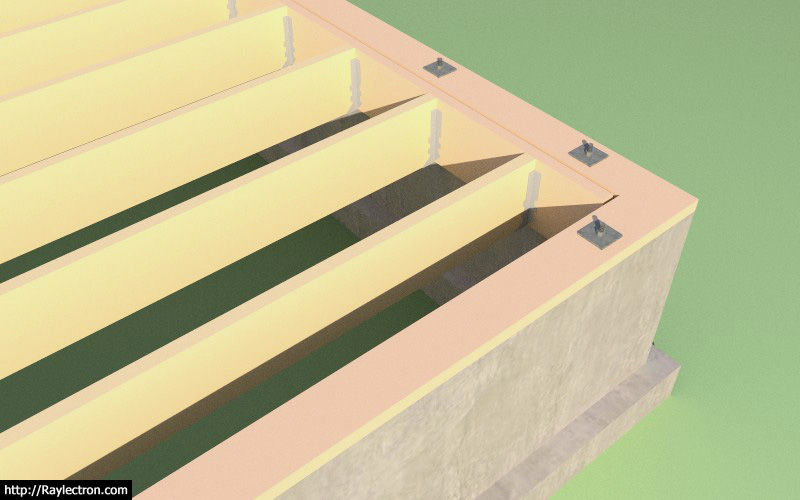
- Added the option to provide a face mount hanger for inset floor joists with ledgers.
- Added the option to provide a top flange hanger for inset floor joists without ledgers.
- Added an option in the global settings to enable or disable manufacturer's logos.
-
The ITS hanger family:
3D Warehouse
3D Warehouse is a website of searchable, pre-made 3D models that works seamlessly with SketchUp.
(3dwarehouse.sketchup.com)
The following hangers are included:
ITS1.81/9.5
ITS1.81/11.88
ITS1.81/14
ITS1.81/16ITS2.06/9.5
ITS2.06/11.88
ITS2.06/14
ITS2.06/16ITS2.37/9.5
ITS2.37/11.88
ITS2.37/14
ITS2.37/16ITS2.56/9.5
ITS2.56/11.88
ITS2.56/14
ITS2.56/16ITS3.56/9.5
ITS3.56/11.88
ITS3.56/14
ITS3.56/16And now part of the truss plugin.
-
Version 2.0.3b- 10.14.2017
- Face mount hangers added for solid sawn floor joists.
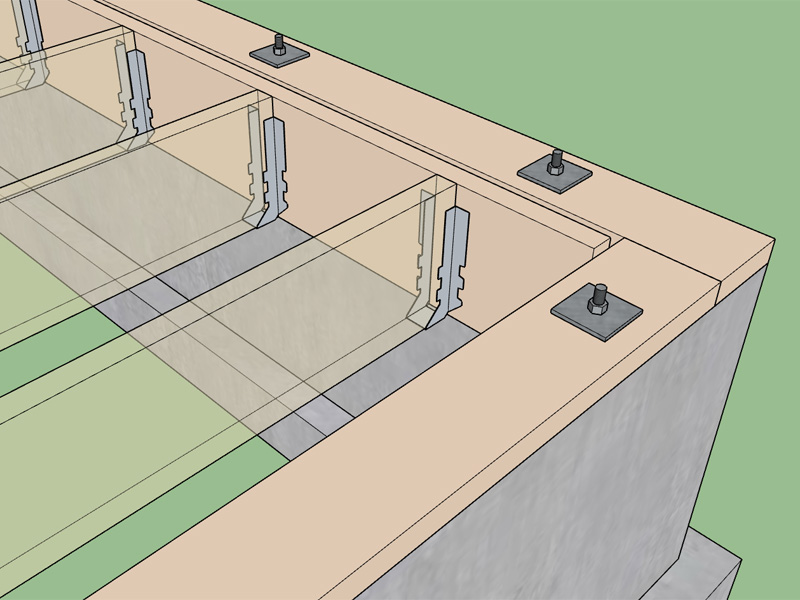
LUS24
LUS26
LUS28
LUS210 (this hanger used by both 2x10 and 2x12 joists) -
Version 2.0.3c- 10.14.2017
- Added Red Built Red-I
 I-joists: 45, 65, 90, 90H, 90HS.
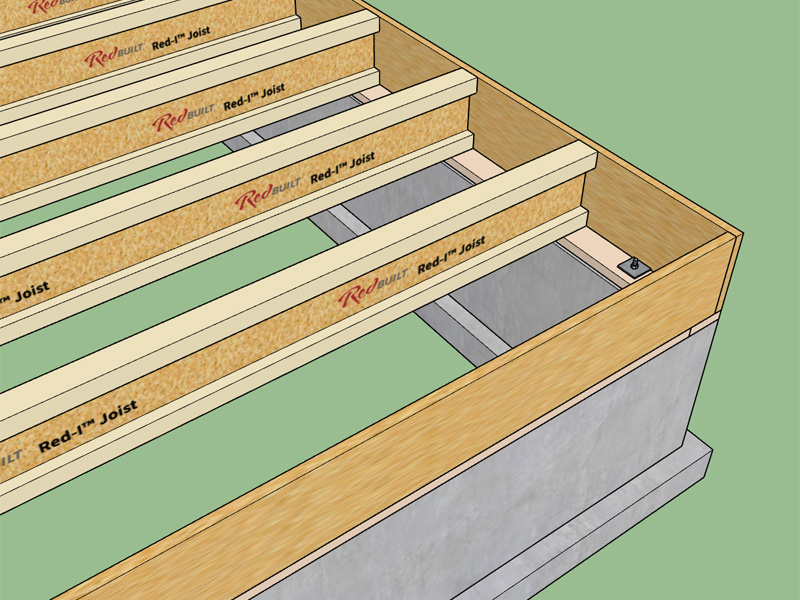
- Added Red Built Red-I
-
Version 2.0.3d - 2017.10.15
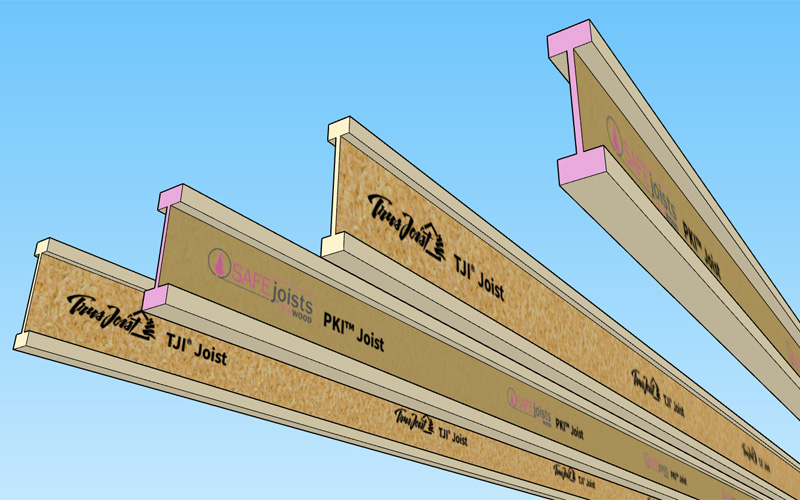
- Added PinkWood SAFEjoists
 I-joists: PKI 10, PKI 20, PKI 23, PKI 35Plus, PKI 40, PKI 50.
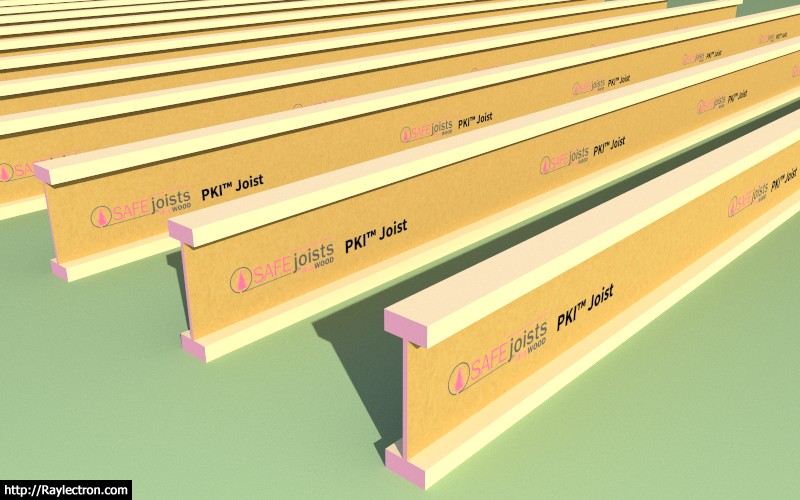
This I-joist manufacturer has a pink protective coating on the ends. The purpose of the end coating is to protect the joist against moisture penetration.
In addition, PinkWood offers Class A and Class B Fire Rated joists often referred to as "SAFEJoists". These joists are protected with an intumescent Fire Rated Coating, and have tan colored coating on the web.
Manufactured in Calgary, Alberta, Canada.
Now that I've got things configured correctly it is quite easy for me to add in new manufacturers and their entire series of I-joists. If you are interested in seeing a particular brand added to the plugin please feel free to contact me.
- Added PinkWood SAFEjoists
-
-
Thanks for the note on those trusses. Always looking for reasonable 1 hr. 2 hr. assemblies.
-
I drop the price and sales decrease rather than increase, this just doesn't make any sense.
Some sort of reverse psychology I guess.
p.s. I moved the price up slightly to $20.00 and $15.00 for the renewal and sales are picking up again.
-
A request today for the barrel vault truss. I had been working on the algorithm for this truss type about 18 months ago but the lack of interest caused me to stop. Below is a matrix of potential configurations:
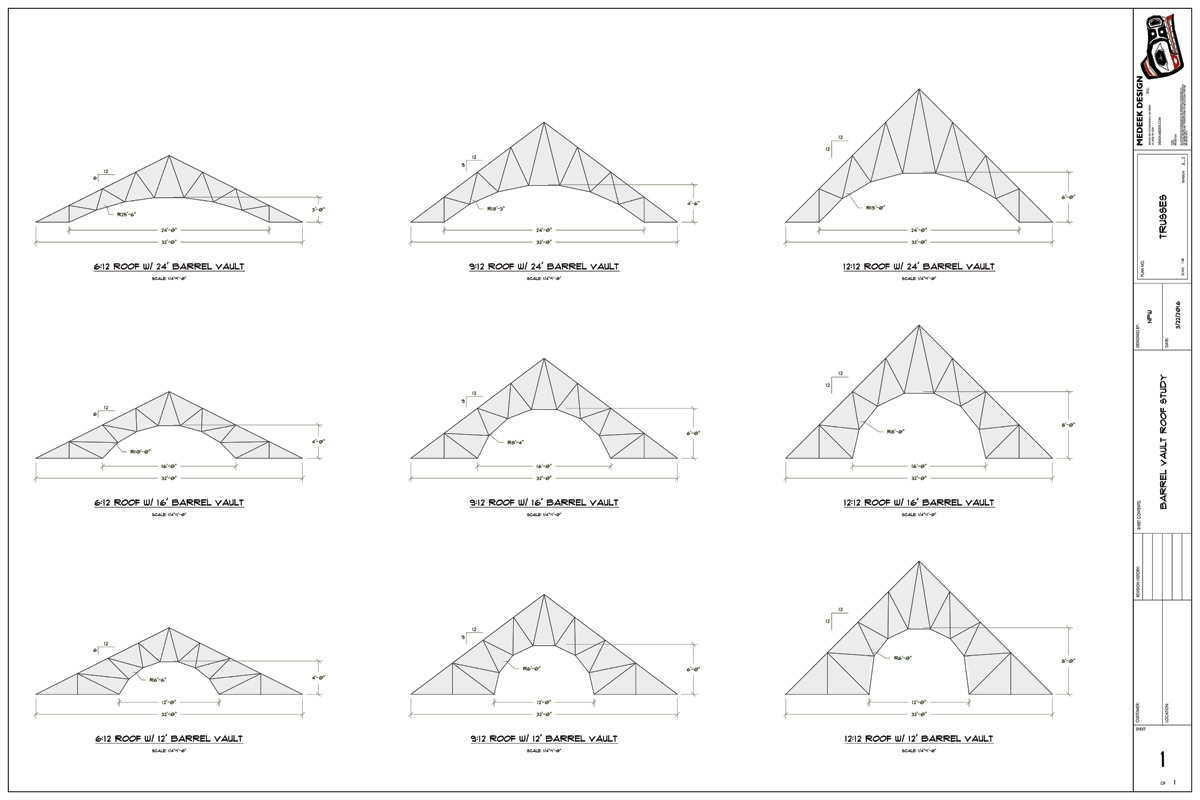
If anyone has some shop drawings for this truss type that they are willing to share I would be grateful.
I will try and knock this one out next week. I will probably utilize an html/svg UI since the look and feel of this truss type will be important to the designer (barrel height and barrel width).
-
I've got some direction on how to deal with engineering for beams and joists, not high on the priority list right now but I've been giving it some thought:

Intersecting Faces or Edges
In the model below you can see that the I-joist is supported or touches three separate faces (surfaces). I am trying to figure out a way to code an algorithm that lets me know all of the bearing points along a beam o…

SketchUp Community (forums.sketchup.com)
At first gathering the geometric information from the model seemed the most challenging aspect of this problem but after giving it more thought, dealing with multi-span beams with various distributed and point loads is also not a trivial problem. My current beam calculator is very limited in this respect and can only handle very simple loading on a single span.
And yet even with the simplicity of the span and loading the logic and calculations required is fairly substantial. The output of the beam calculator will attest to this.
To properly analyze a multi-span beam with complex loading requires some magic from my engineering texts (ie. matrix analysis). Since beams and joists are one dimensional as compared with trusses (two dimensional) the math is not nearly as cumbersome but it should prove to be a bit of a challenge.
-
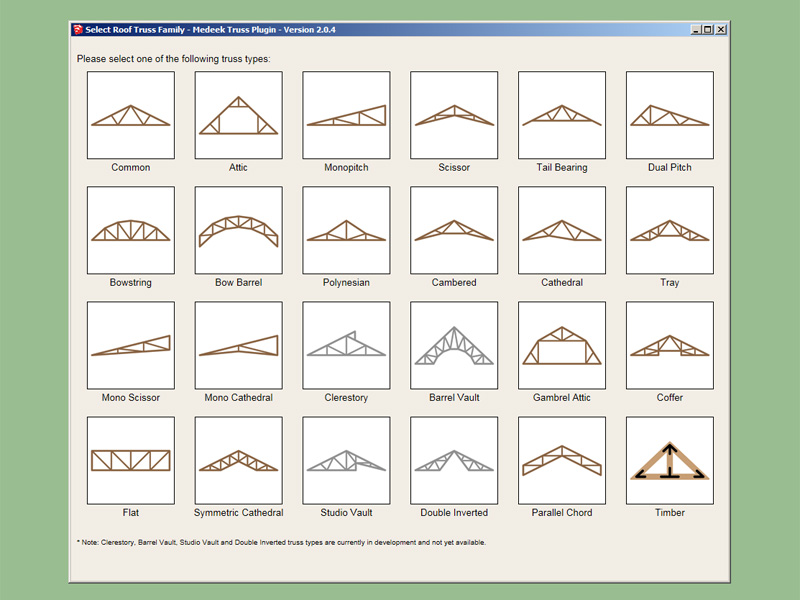
The updated truss menu:
-
Version 2.0.4 - 10.21.2017
- Added Parallel Chord (vaulted) truss type, configurations: (2/2, 4/4, 6/6).
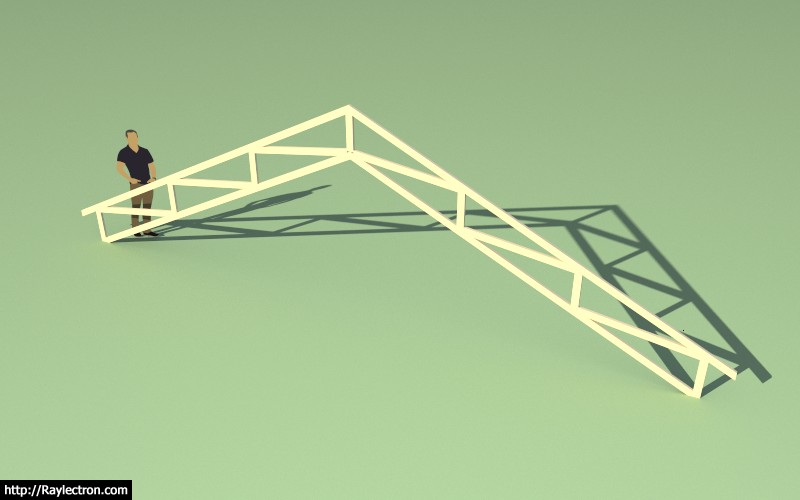
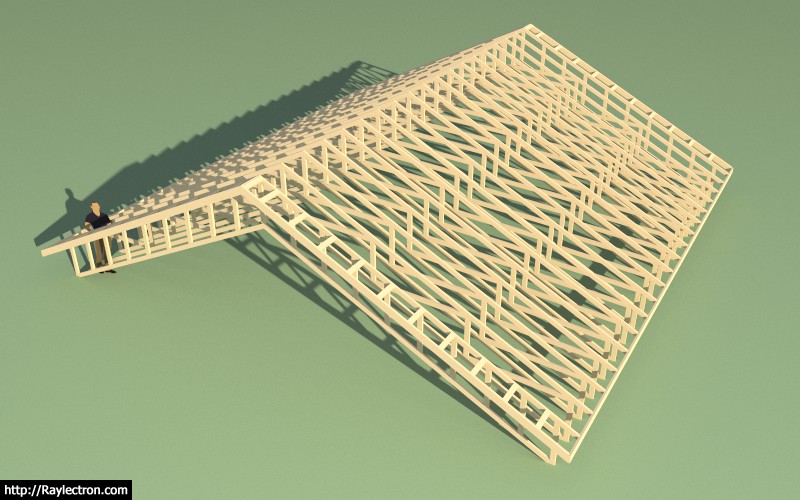
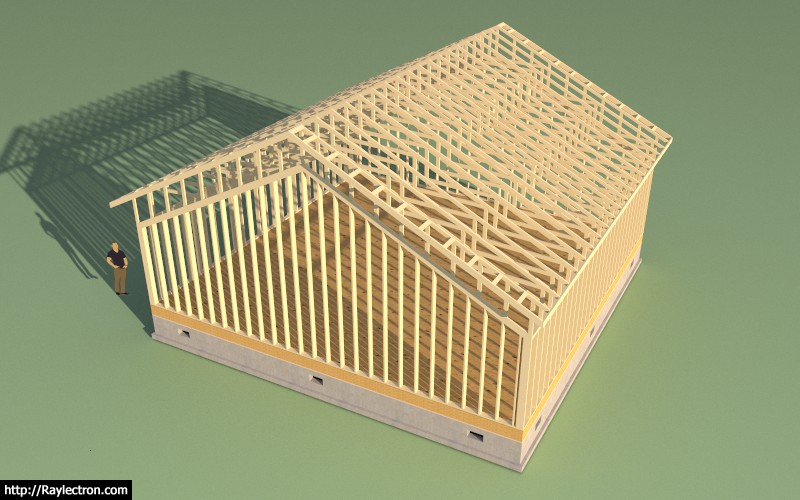
I will still need to enable structural outlookers and plates for this truss type, but everything else should be there:
- Roof Cladding
- Roof Sheathing
- Gable Wall Cladding
- Gable Wall Sheathing
- Ceiling Gypsum
- Ridge Cap
etc...
View model here:
3D Warehouse
3D Warehouse is a website of searchable, pre-made 3D models that works seamlessly with SketchUp.
(3dwarehouse.sketchup.com)
-
I have been hoping for the parallel chord truss. Just great.
Thanks...! -
All you have to do is ask.
This truss type is relatively close to the scissor truss so I was able to bring it together fairly quickly. If there is anything I'm missing on this truss type please let me know. I can also add the 8/8 and 10/10 configuration if requested
-
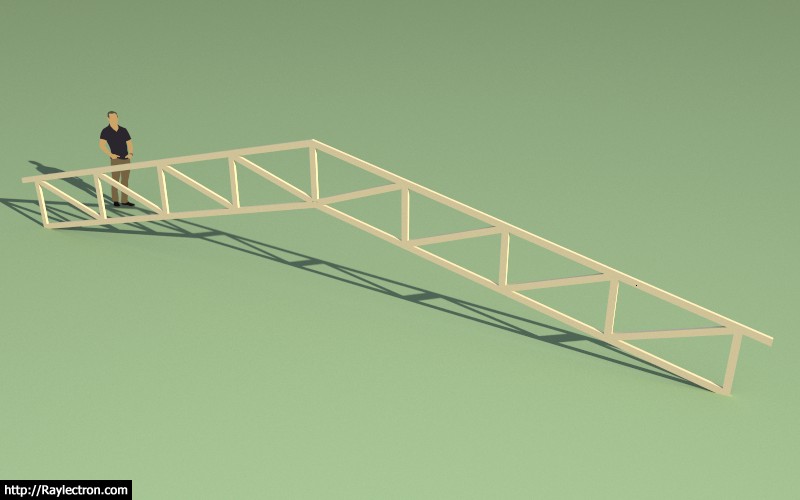
Version 2.0.4b - Added the 8/8 configuration:
-
People have often asked why there is always a guy shown in various screen shots for the plugins next to the truss, foundation or building displayed. The reason for the person in the picture is to give the geometry some sense of scale. I've also received comments as to why the "old guy"? Some have even complained about it. Each release of SketchUp features a new default person for that release. The 2015 release featured an older gentleman. Since most of my audience is architects and designers who are the predominantly of the male gender perhaps it would be more fitting to use a female model to indicate the scale?
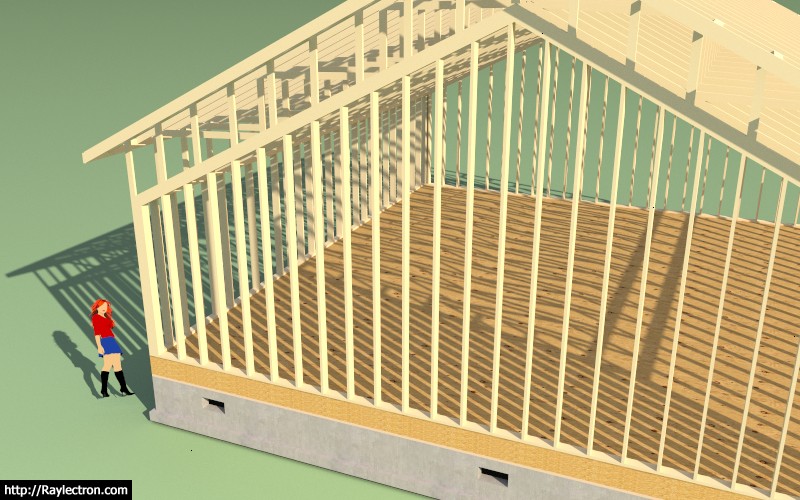
Conclusion: The problem with the female model is she is too distracting. The audience will naturally focus on the model and not on the product I am selling which is architectural modeling software (BIM). The model should only function as a yard stick and should remain secondary to the structure or building component displayed. Bottom line I won't be switching to a female model anytime soon.
Another point worth noting is that a well designed truss or roof is already a thing of beauty, no further marketing gimmicks required.
-
@medeek said:
Another point worth noting is that a well designed truss or roof is already a thing of beauty, no further marketing gimmicks required.
Spoken like a true engineer!
Advertisement


