3D Truss Models
-
It's good to hear the plugin / extension is making headway in the market!
@medeek said:
Looking at my to-do list I probably have enough work to keep me busy for two years working full time (8+ hours a day). At this point I'm not sure how I'm going to get it all done.
Pace yourself, draft an outline plan of what you would like to accomplish, allow for setbacks and possibly minor features / improvements you may want to do. But I'm sure you know all of this and have done so already...

-
I've repackaged the .rbz file this morning so that when it installs into SU 2017 the extension will have the appropriate hash file and appear as "signed". I have not yet rolled the revision (1.7.0) which includes the updates for stepdown hip truss sets, there is still substantial work before I am ready to release that module and version.
-
It appears that writing to the text logfiles within the "logs" sub-folder invalidates the hash and hence the signature in SU 2017. This does not in any way cause the plugin to stop working but it is an annoyance that I did not foresee.
I will work on a solution to this so that the signature in SU2017 remains valid.
When the plugin is first installed the signature will appear valid however as soon as the logfiles are written to the signature will appear as invalid. In my opinion the hash should only include .rb, .rbs and .rbe files and not other misc. file types.
-
When I repackaged the .rbz file I accidentally used my latest code base so you might notice that the general settings now shows the plugin serial number and the ability to update it. I actually did not intend to release this until version 1.7.0 but regardless it is now live. When you install the full version of the plugin you must now enter in your serial number to register it. The serial defaults to "TRIAL" which puts the plugin into trial mode and has some limitations. Once you enter in your serial it is stored in the registry so one could completely reinstall the plugin and the serial number does not need to be re-entered. This hopefully is convenient for those updating the plugin to a newer version.
-
Nathaniel, I know my licence period has expired (about a month ago IIRC) for access to newer versions and I probably need to renew, what are the renewal policies and costs?
-
I haven't got a renewal process in place yet, just "purchase a new license". Don't renew just yet, I will give this some thought over the weekend and see if I can implement something that allows for a license renewal at a slightly reduced cost.
Users should be rewarded for renewing in my opinion so a license renewal should not be the cost of the initial "new" license.
I'm thinking the renewal cost will be $20.00 USD, hopefully this is low enough to motivate existing users to renew and upgrade.
-
Make sure that you offer those of us who renewed (but paid the full boat price since the renewal process hasn't been implemented yet) a refund of the extra dollars or some other goody (maybe apply the overage to next year's upgrade fee?).
-
For those who have renewed prior to the renewal process/pricing I will extend your license and additional 6 months which will make it equivalent in cost to the $20 renewal cost.
-
Thanks Nathaniel - much appreciated!
-
Update on my neck situation:
Follow up visit with the doctor today determined that the injection was not effective. Apparently the herniation is too severe for it to work so now my next option is a fusion or an artificial disk. The doctor figures I am a good candidate for either procedure (44 years young). Any opinions on which would be the better option, or experience with the newer artificial disk technology/system? I am leaning that direction based on my conversation with the doctor but the technology is not as tried and tested as the more conventional fusion.
This weekend I am going to do my best to make some progress on the plugin no matter how incremental.
-
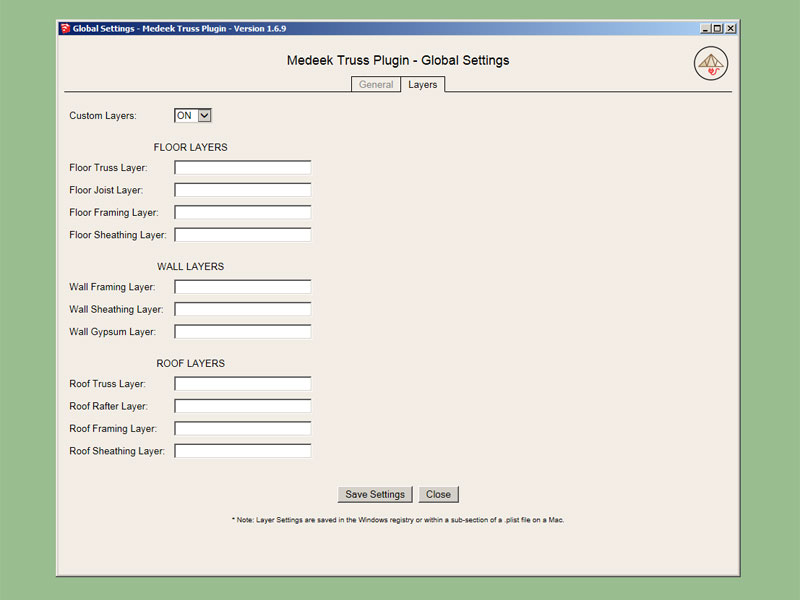
The "Layers" tab in the global settings will look something like this:

-
Version 1.7.0 - 12.04.2016
- Added a "Layers" tab within the global settings; roof, wall and floor components can be assigned to specific layers.
- Enabled custom layers for the common fink truss.
Note that I have only enabled custom layers for one type of common truss (fink). To enable custom layers for all other truss types, rafter roofs and other misc. items will take a few hours of going through each module of the plugin and adding in the "layers" code or conditional statements. My arm/neck is not holding up very well but I thought it would be nice to at least get this out there for the most common truss type for testing purposes and feedback.
-
Looking good there Nathaniel!
Regarding your medical query, unfortunately I'm pretty much "stock standard" still (also 44 years young) without any knowledge of the kind of procedures you're needing, wishing you the best though!
+++ EDIT +++
I see the upgrade section on the Truss Plugin webpage hasn't been adjusted yet? I upgraded anyhow as I know what your resolve was in this, however the link still displayed v1.6.9? -
Where is the 1.6.9 showing up?
-
Went to all the trouble last night to roll the revision (1.7.0) and then somehow forgot to upload it to the server. The version you downloaded yesterday or last night is 1.6.9, please download and reinstall the plugin again to get the latest updates with the layer control. Real sorry about that.
The version available on Sketchucation's PluginStore is 1.7.0, I did manage to update it here last night, just not on my own server.
-
I've had a number of people asking about adding in the connector plates for the trusses. After giving this some thought it doesn't seem like too much work to implement. I will try and work on this today and this evening.
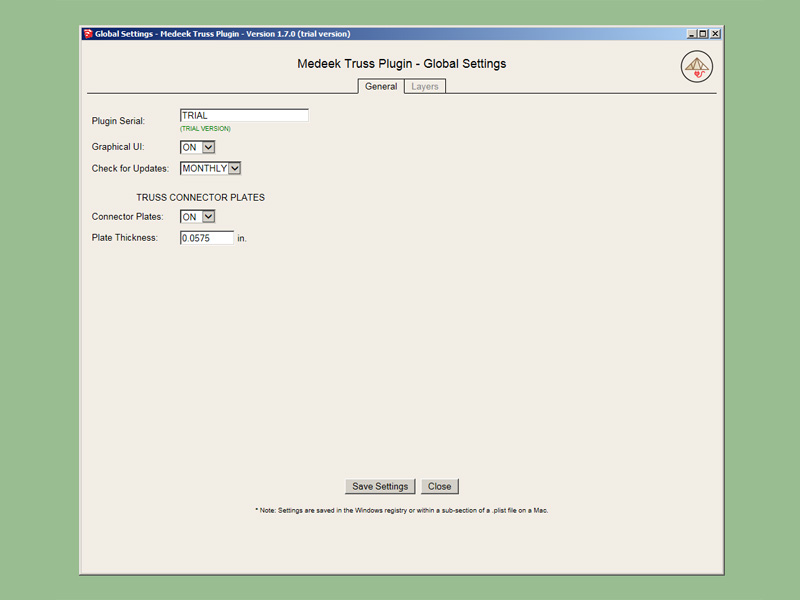
I've already added in the option into the global settings:

Plate thickness can be set by the user (inches or mm). The default will be 0.0575 inches (1.46 mm) which is the total thickness of a typical Mitek M-16 connector plate:
http://www.icc-es.org/reports/pdf_files/ESR-1311.pdf
If I could find some additional help for programming that would be useful right now. I've come to the realization that I cannot realistically program all of the stuff I have planned. I really need to expand this beyond a one man show.
-
Version 1.7.1 - 12.08.2016
- Added truss connector plates within the global settings, plate thickness can be specified.
- Added a "roof_mpc" layer for roof truss plates, connector plates can be assigned to a specific layer.
- Enabled metal plate connectors for the common fink truss.

As with the recent layer upgrade I have only enabled connector plates for the common fink truss. This is to provide a test bed for the connectors then once the interface is fined tuned I will roll it out for all truss types.
At the moment the plate sizes are hard coded in. I am still trying to decide on the best method to use so that the connector plates can all be sized by the user. The objective is to make this a flexible as possible while at the same time not over complicating things.
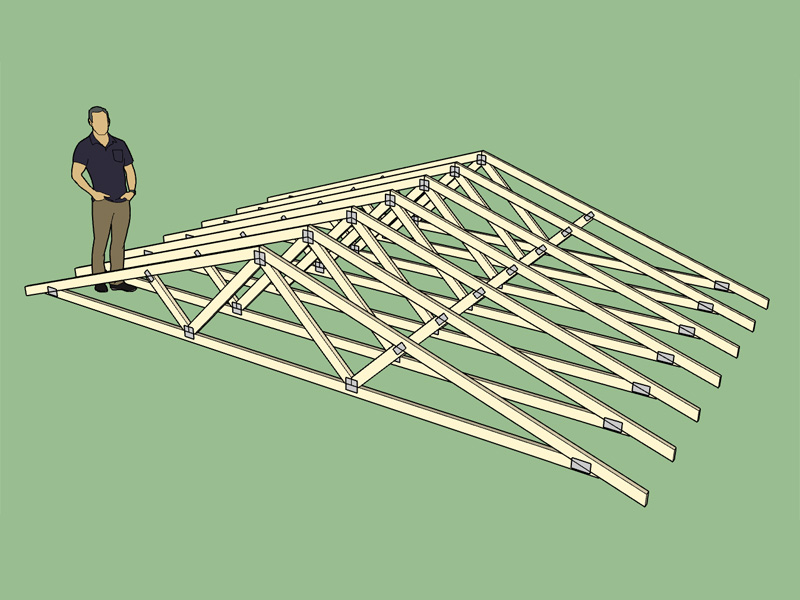
View model here:
3D Warehouse
3D Warehouse is a website of searchable, pre-made 3D models that works seamlessly with SketchUp.
(3dwarehouse.sketchup.com)
-
Auto sizing of the connector plates are good enough from an architectural communication point of view. Maybe have the specifying and customizing of these in an advanced / engineering section of the extension, if you feel this really needs to be implemented.
-
I think you are probably correct on this, most architects/designers would like to have the plugin just auto size the plates.
What I think I will do is add in one more option in the global settings which allows one to toggle the plate sizing to either auto or manual.
If auto is selected I will create a basic algorithm that looks at the truss span, truss pitch and depth of the TC, BC and webs and then sizes the plates accordingly. I already have such an algorithm built into my Truss Designer here:
If manual is selected I will have an additional html input screen appear that shows the location and size of each plate as well as the outline of the truss. The input will look similar to this:

As each plate is adjusted it will immediately change in size showing exactly the configuration of the truss with its connector plates. This involve quite a bit more coding however once I create one such html input, creating more will not be such a big deal. Each plate will be labeled P1, P2, P3 etc...
The only question now is how to handle the gable end trusses. I think for now I will auto-size the plates on them using the same heel and peak plate sizes as the common trusses. For the the vertical studs I can use an algorithm that looks at stud length and then chooses either a 1.5x3 or 2x4 plate for connection to the top and bottom chords.
Adding connector plates adds a whole new level of complexity, but there have been enough requests for it that I think it is a valid endeavor. After all this is the "Truss Plugin" and I might as well get the trusses right.
-
As an interesting side note, one can turn off the truss layer and then measure the volume of the steel plates which yields 113.85 in[sup:1ft9va6p]3[/sup:1ft9va6p]. Multiply this by 0.284 for mild steel and you end up with a total weight of 32.3 lbs. That is actually quite a bit of steel plates in this rather small truss package. No wonder the truss plate manufacturers like Mitek make so much money on the sale of truss plates, the volume of steel is definitely there (194 plates).
The weight of the wood can just as easily be computed, making an assumption on the wood species (G, specific gravity of the wood), and moisture content (typically 19% at dry service conditions).
The appropriate equation to use for the density of wood can be found in the AWC NDS:
http://design.medeek.com/resources/documents/NDS2012_SUPPLEMENT_P12.pdf
For DF No. 2 the density would be 34.2 lbs/ft[sup:1ft9va6p]3[/sup:1ft9va6p]
The volume of the wood is 22.06 ft[sup:1ft9va6p]3[/sup:1ft9va6p], multipled by 34.2 lbs/ft[sup:1ft9va6p]3[/sup:1ft9va6p] yields a total weight of the wood at 754.5 lbs. Steel plus Wood = 786.8 lbs.
It may be useful to provide weight information at both the truss component level and the entire truss assembly, wood, steel and total weight.
Advertisement


