Sandbox roof draping from tip of dome to walls
-
Hello all,
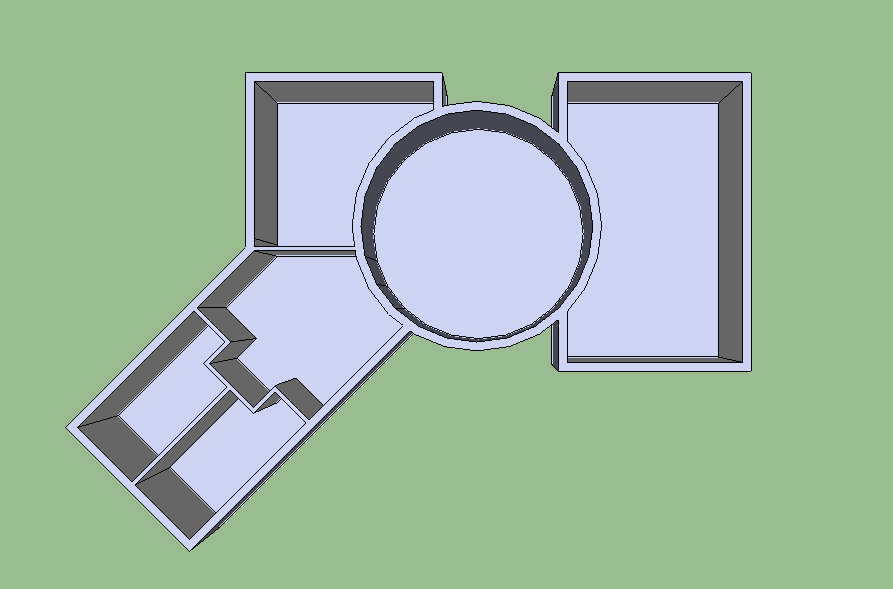
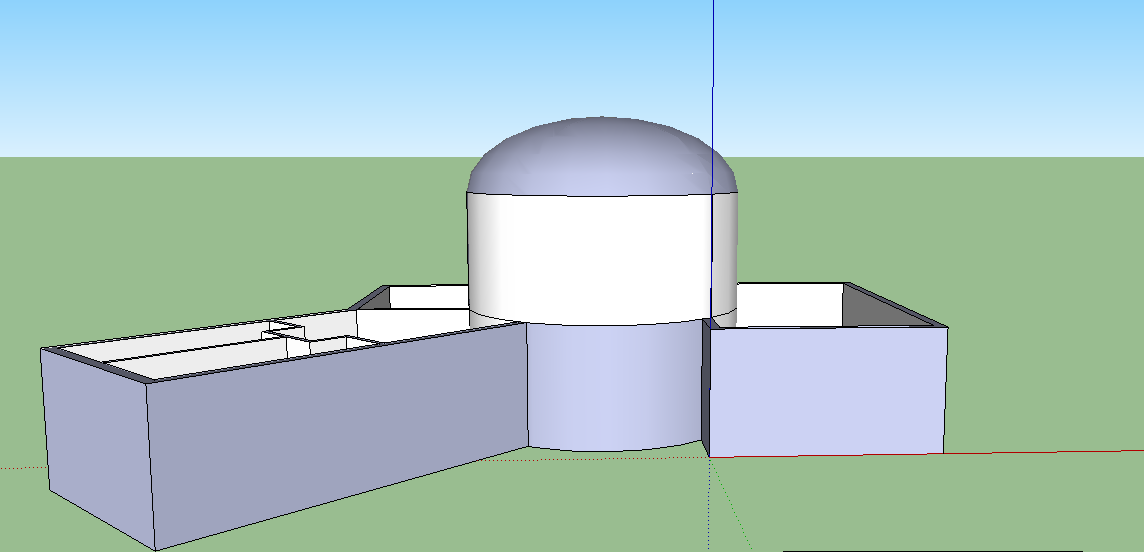
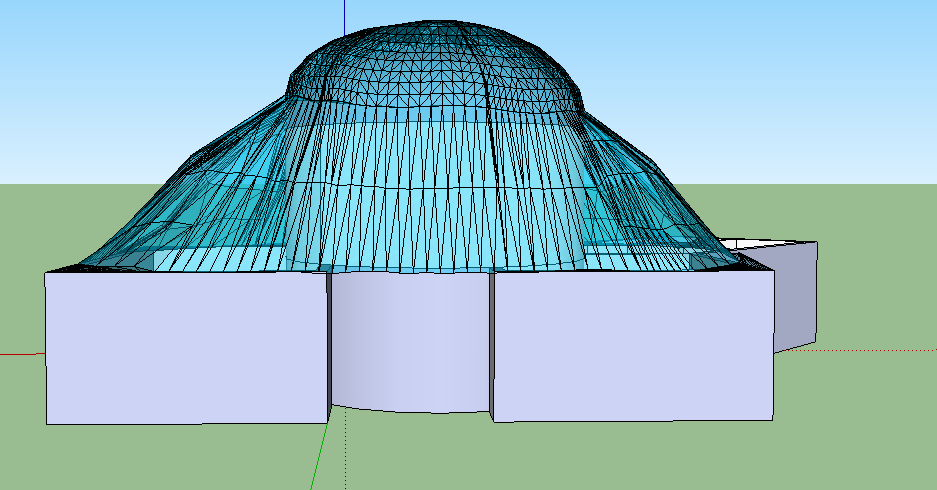
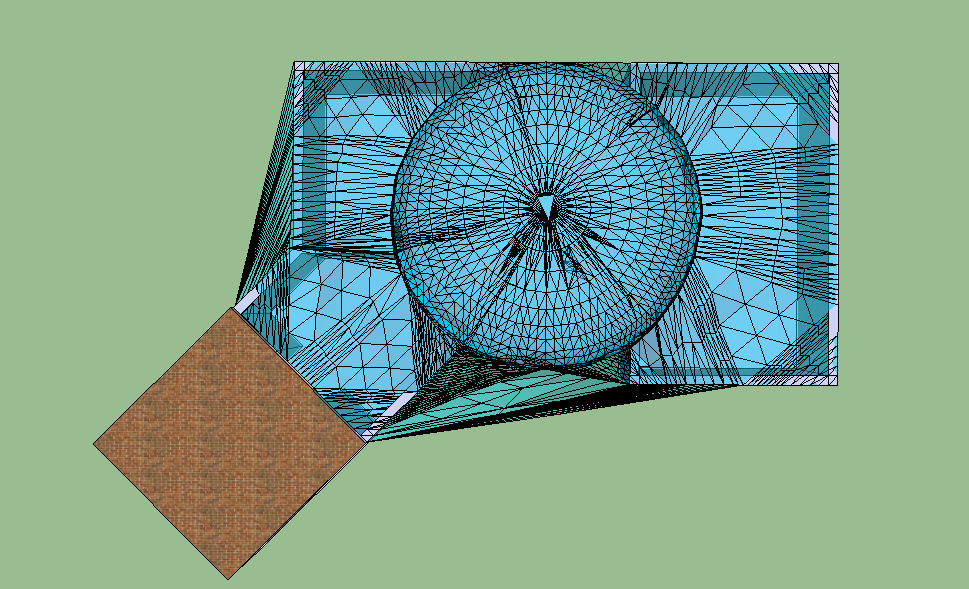
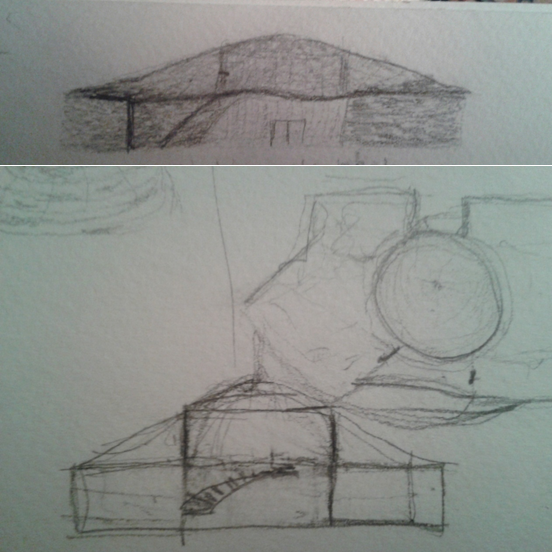
I have a huge problem, I chose to create this sort of draping roof that reaches out from the tip of a central dome and stretches out to the ends of the walls in my plan. Making this work and look elegant is really hard.
I've attached pictures- as you can see the plan itself is pretty irregular. I don't mind having the drape fall to the ground (as conveyed in concept sketch elevation) in the gap between the two rooms and the cylinder but other than that, how can I draw this on sketchup? Perhaps using the sandbox isn't right for what I'm trying to achieve?
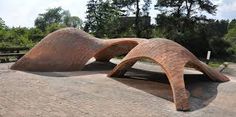
Basically my task is to make a brick building that shows brick's capabilities to its fullest extent (and yes bricks can be used to form curvilinear roofs like the one I hope to model, as shown in attached precedent)and the roof should be made out of glass bricks overall. So if there's a tool I can use to make the roof drape look smoother and less like glass shards, please let me know.
I've checked with my professor and so far the concept itself is doable structure-wise, I just need help modeling this.
Please help!
-
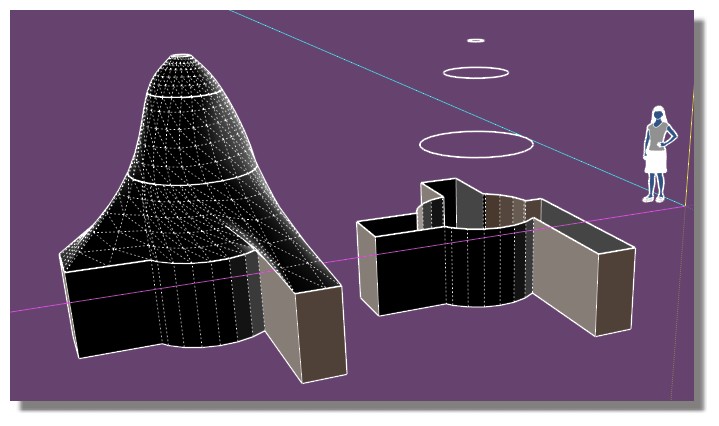
Maybe Curviloft can some help?
Select curves then Loft by Splines
-
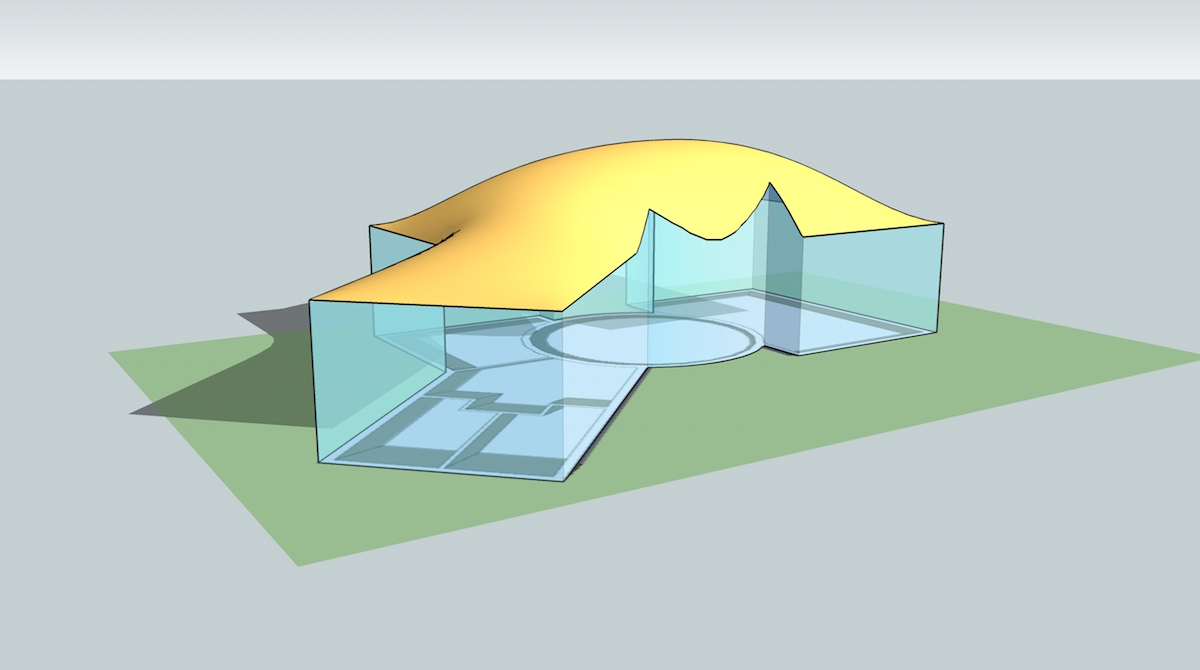
you might have some luck using the Soap Skin & Bubble plugin (available through trimble's extension warehouse)
it's generally for creating tensile structures but could probably be used to help create your roof vision.
a quick example.. (i just used the perimeter of your building for the input.. would need better control curves to get the shape closer to your example.)
-
There are many ways to create whatever it is that you want.
I recommend you learn to use Bezier curves and get familiar with the multitude of possibilities that Curviloft or Extrude tools can give you. You need to learn how to use many different tools to be able to get your own ideas out of your head. If you rely too much on one plugin and what it does you limit your creativity. Not to mention you need to be able to construct, or at least understand, the underlying shape so that it can be reproduced in real life.
The blue grey faces in your model are the back faces and should be turned around. Having reversed faces can cause you lots of problems down the track.
This was done in minutes with Bezier curves and Extrude Edges by Rails to give you some idea of the possible shapes easily produced.
-
@pilou and @jeff hammond thank you both so much for your fast replies, I'm trying to work with curviloft but it's really complicated! Also jeff I will definitely look into using the soap skin and bubble plugin :3
@box I definitely feel like I'm arely scratching the surface of what these tools can offer me but I don't know how to learn to use them to their fullest extent? By extruding you mean using the follow me button (my worst enemy btw) right? And finally, I never knew there was a difference between the blue-grey and white walls..
-
The follow me tool shouldn't be an enemy but there are a couple of things it helps to know about it.
It can have what appear to be problems following a curve sometimes as it doesn't finish the way you expect. Simple fix, it usually works best if your path doesn't stop in the middle of a curve. For example if you want to follow around a semi circle, you'll get a better result by following the full circle and deleting the half you don't need.
It won't cope with Tiny Faces, this is a issue throughout SU. If your geometry, hidden or visible, is attempting to form faces down around 1mm it will most likely fail. Easy fix, scale everything up. You can scale down again when finished and the faces will remain intact. I usually keep the man hanging around to keep track of scale.
And probably the thing that most beginners get wrong, you shouldn't try to drag the tool along to make it follow. Select the path you want with the normal select tool, then get the follow me tool and simply click on the face that you want to follow the path.
See the first animation. Here I have selected the whole face first so that it follows the full perimeter, then I have selected individual parts to form a path.
Having said that, I was referring to two plugins in my post, not the follow me tool.
Bezier Curvers is one for making curves that aren't the standard arc.
And Extrude Tools is a very powerful set of tools for extruding things in different ways.
In this animation you can see me draw two very random curves with Bezier, then turn a straight line into a poly line, also part of the Bezier plugin, then use Extrude Edges by Rails, one of the extrude tools, to create the skin.
-
@box woah, seriously, thank you so much for making these... my only problem is that i have to make a whole system of bezier curves and extrusions and have them seamlessly integrated..will I be able to do so using those two plugins?
-
There are several plugins to join [or aka 'weld'] lines, curves, arcs etc into a single bound 'curve' object, these can then be used in processes, like those in some of my Extrude Tools...
My own version is available in the PluginStore.
http://sketchucation.com/pluginstore?pln=TIG-weld
Preselect a set of connected edges/curves, run the 'weld' tool from the Tools menu item, or setup/use a shortcut key-press... and then it should make a welded curve - but remember there can be no intervening 'branch' edges as these will split the curve where they touch it...
Hello! It looks like you're interested in this conversation, but you don't have an account yet.
Getting fed up of having to scroll through the same posts each visit? When you register for an account, you'll always come back to exactly where you were before, and choose to be notified of new replies (either via email, or push notification). You'll also be able to save bookmarks and upvote posts to show your appreciation to other community members.
With your input, this post could be even better 💗
Register LoginAdvertisement


