Lost a shortcut
-
I don't know if this is a bug or not but it is pretty strange: A couple of days ago I added a few Shortcuts and also remapped the letter T from it's assigned function to "Edit\Item\Texture Position".
Today, pressing the letter T had no effect and so out of curiosity I went into the shortcuts and discovered there isn't a line for "Edit\Item\Texture Position" anymore but if I try to assign the letter T to another Function it asks if I want to take that away from "Edit\Item\Texture Position":
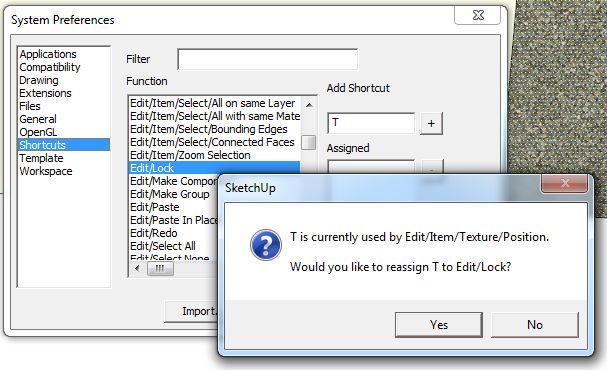
Selecting a face and doing a right mouse click should show the "Texture..." function, but it's not there either.
So where has "Edit\Item\Texture Position" gone and why doesn't the T key execute it?
-
can't see the file you're working with to see the problem so do this:
draw a rectangle
apply a texture
right-click on texturethe texture option will be there now.. select the face and it will also be available in your shortcuts..
(as in- you're (probably) trying to use right-click--> Texture in a scenario which isn't acceptable) -
It sounds to me from your description that one of two issues exist. Either the texture is applied to a group or component wrapper instead of being applied to the face with in or the the texture is applied to more than one face with softened edges between them. Both of these situations would result in your shortcut not working and 'Texture' not showing in the Context menu. In either case, this is not a bug.
-
If you make a contextual shortcut you need to be in that context.
To put it in simple words that even I can understand, unless you have already selected the surface with the texture on it at the most basic level, then hitting T will do nothing.
Bugs are things confirmed not to work, user error is something else. -
@box said:
To put it in simple words that even I can understand....
How condescending. Gee thanks.
I did start off by saying I wasn't sure it was a bug. I'm not sure what was going on... I exited and restarted SU several times and after the 4th restart the function was present again. No idea what was going on.
I have been using SU since Google first acquired it so I'm not a noob.
I will say this: SU 2015 has got some weirdness in it that wasn't present in SU-8 or earlier (I didn't use SU2014). There was that changing the segment count bug for one. I've noticed that doing a <alt> paint bucket to copy a texture more precisely will result in a great deal of weird results when you try to apply that texture elsewhere: sometimes it "paints" the default (no texture); sometimes it "paints" the two tris of a rectangle differently, and sometimes it gets it right. It is utterly unreliable. Can I reproduce it? Not in the exact same sequence with the same weird result but it occurs routinely.
OTOH, using a plugin to copy/paste UV values works perfectly, every time.
-
Inquiring minds want to know. Was the texture applied to a component or group wrapper or was it on a surface made up of more than one face?
-
Containing to paint, just to see what will happen:
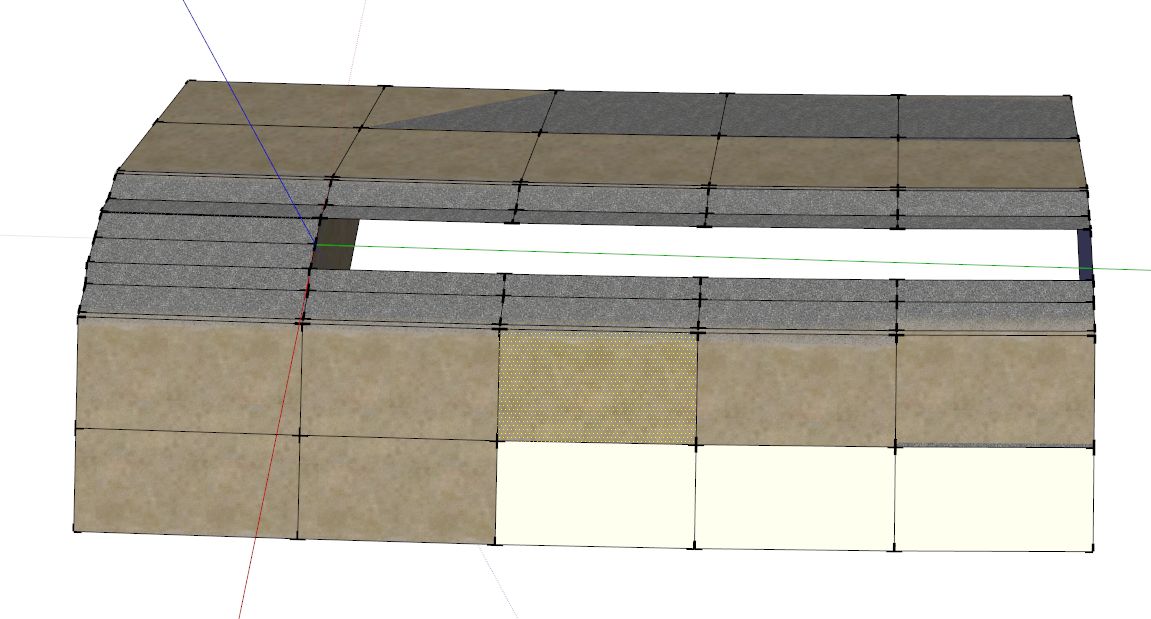
Again, all faces are out in the hope, I do <alt> paint bucket on a face the center column and the go paint, paint, paint moving to the right.
Whodda guessed?
-
@dave r said:
Inquiring minds want to know. Was the texture applied to a component or group wrapper or was it on a surface made up of more than one face?
No... all faces are out in the open, so to speak and I'm painting one face at a time.
I did <alt>paint bucket on a left hand face and painted the face immediately to the right. Obviously one came out funky. Painting it again fixed the problem (no second doing of <alt> paintbucket).
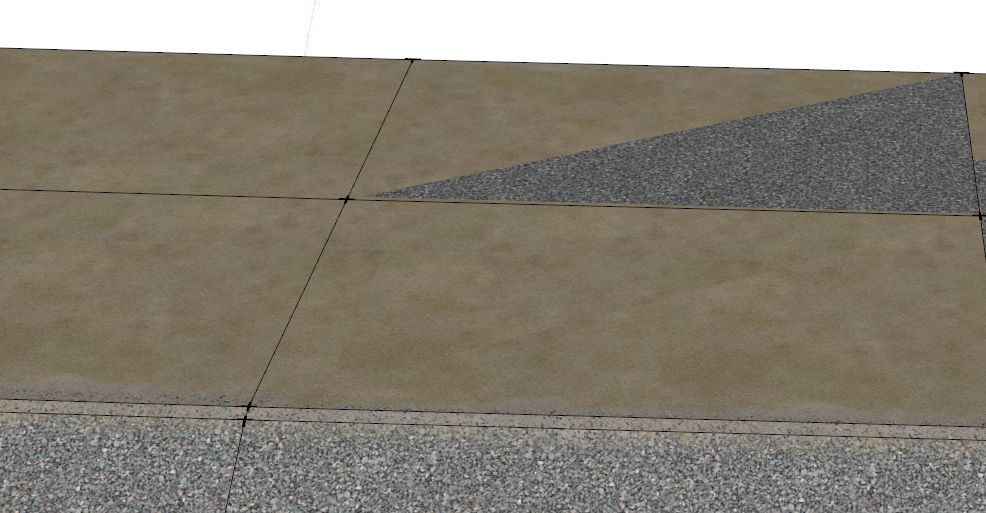
It's intermittent, it occurs on any face on these berms I'm making, and it usually corrects on the second painting, tho not always.
In this next view the left hand set of faces are from the original profile shape, the center column of faces was just painted as I described above and the right hand set of columns are unedited, looking as they do after being created by the Vertical Extrusion plugin.
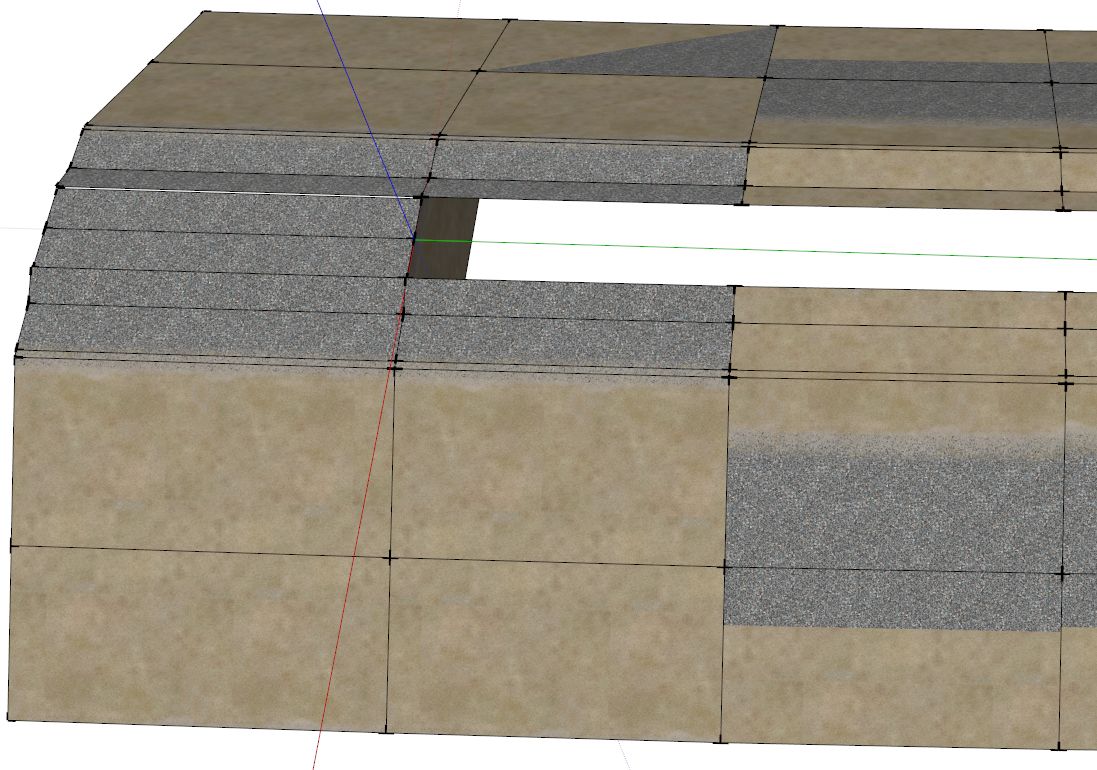
There are no groups or components... everything is a "free" face. The task I'm performing is to copy the texture from the left hand column to the one on the right, make a manual adjustment to account for the fact the shape is curving, and then copy that adjusted texture to faces further to the right (to speed things up I created the shortcut I mentioned several posts ago).
My shortcut T works on the left hand column of faces and a right mouse click displays the Texture... function. The shortcut does not work on the center or right hand columns, nor does the command Texture... appear in the right mouse click menu. And yes, a face is selected when I press T.
Y'all might think it's user error and it might be, but it is totally unclear to me how I might have done something to get into a situation where things work on one face and not another when I've not edited any attributes save what I wrote above.
-
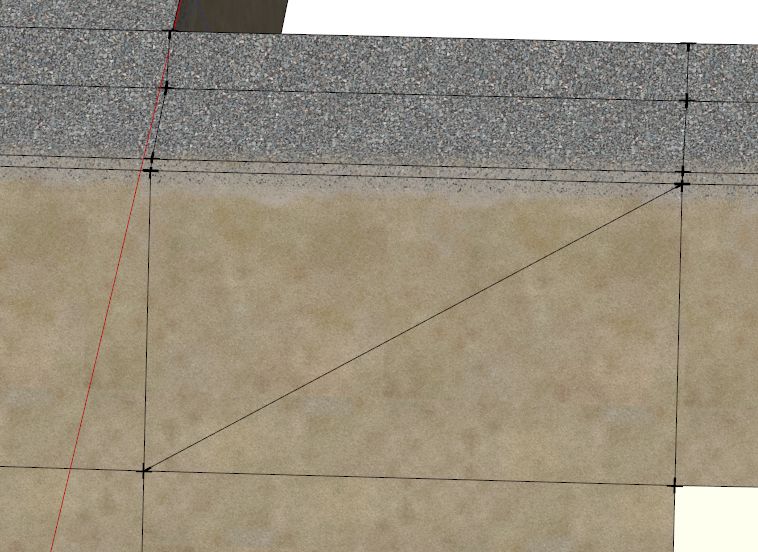
Using the attribute editor I was able to determine the faces that would not respond to the T shortcut were indeed multiple faces. Drawing a line across the rectangle like this:
and then erasing that line changes the face back to one entity and the shortcut/command is enabled:
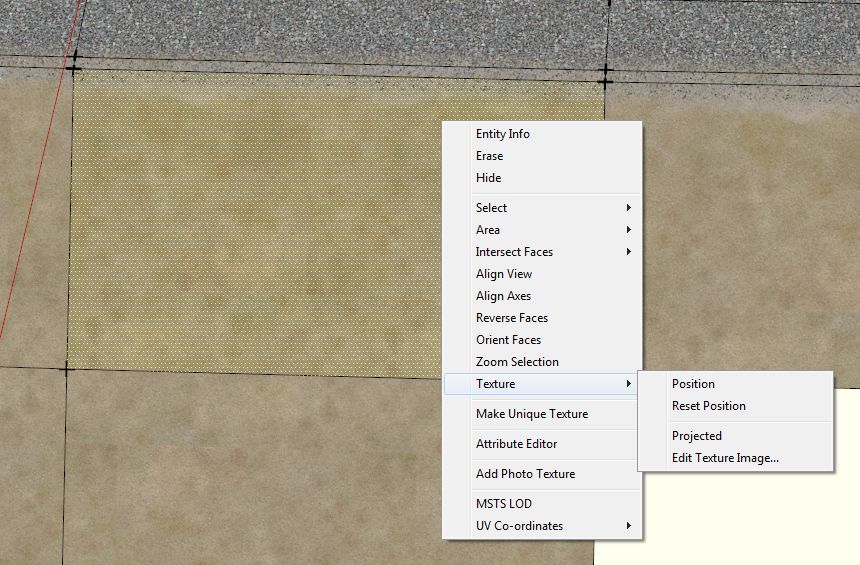
The legacy Followme function (which I've used for many years) does not divide the quad and so it is the difference between the two tools that caught me unawares. It appears the only solution is to draw those lines and then erase them (the Cleanup tool does not "see" these as coplanar faces that can be merged). I think I've got better things to do w/ my time than to draw and erase extra lines so it's back to the follow me tool as at least I know what all of it's quirks are and already have procedural fixes inhand.
-
Out of curiosity, did you try showing hidden geometry to see whether that face was split by a non-visible line already?
-
@slbaumgartner said:
Out of curiosity, did you try showing hidden geometry to see whether that face was split by a non-visible line already?
Yeah, that's how I verified the direction I should use when drawing the line.
As I said before, this wasn't an issue using the FollowMe tool, it was the Upright Extruder. The product of both functions look identical in the middle of the extrusion; FollowMe along an Arc screws up at both ends, the Upright Extruder gets the start correct by has the same flaw at the end. You would not know the faces in the middle were actually quite different in the results of each function until you started texturing.
Hello! It looks like you're interested in this conversation, but you don't have an account yet.
Getting fed up of having to scroll through the same posts each visit? When you register for an account, you'll always come back to exactly where you were before, and choose to be notified of new replies (either via email, or push notification). You'll also be able to save bookmarks and upvote posts to show your appreciation to other community members.
With your input, this post could be even better 💗
Register LoginAdvertisement


