Need help making a face vase
-
I'd like to make a vase based on a cameo-like silhouette as a birthday present. The plan is to create a design in Sketchup that I can 3D-print on Shapeways.
In Photoshop I made a silhouette from a photo, then imported it to Illustrator and turned it into a path. Things got complicated in Sketchup. Sketchup didn't recognize the anchor points, so I added them by hand. I think I need to use the Follow Me tool to turn the outline into a 3D shape of the vase, but I can't get it to, probably because of something that's wrong with the outline.
I'll attach what I've done so far, and if any experienced Sketchup users out there can take a look, offer guidance, or use the Follow Me tool on the outline, it would be much appreciated.
-
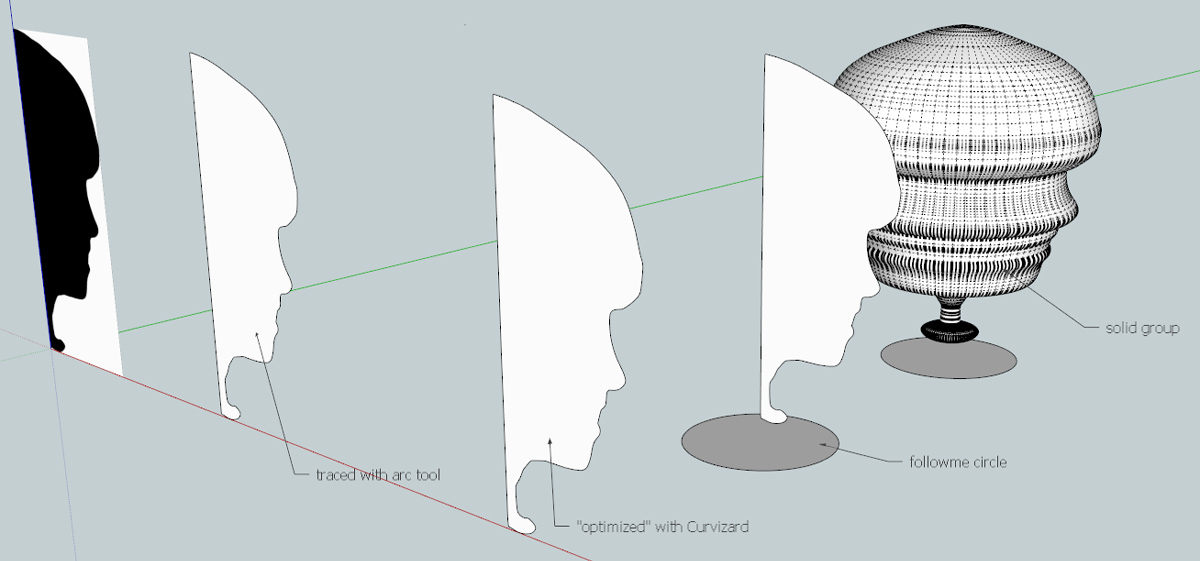
At this stage in your model you have nothing for Follow Me to do. Trace the edge of the silhouette with the line, arc and freehand tools as appropriate and create a face separate from the white background area. You should them be able to create the circular path on the centerline and use Follow Me to create the 3D structure.
-
Apologies, Dave R.! I uploaded the wrong file, that of the silhouette I imported from Illustrator. When that didn't work I traced with the arc and other drawing tools and created another silhouette. That's what I was referring to in my original post. I'll add it as an attachment. Please have a look when you get a chance.
-
-
-
To use FollowMe you need a 'face' to 'extrude' along a path.
Your outline of edges is NOT coplanar - see my side view screen-shot.
So those edges can never form the boundary of a single face.
Therefor you need to remake the 'profile' of edges so that all of those edges' vertices are on a single plane - say flat on the ground.
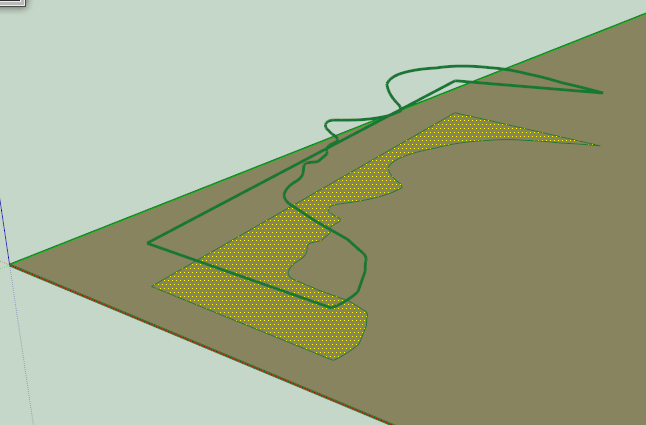
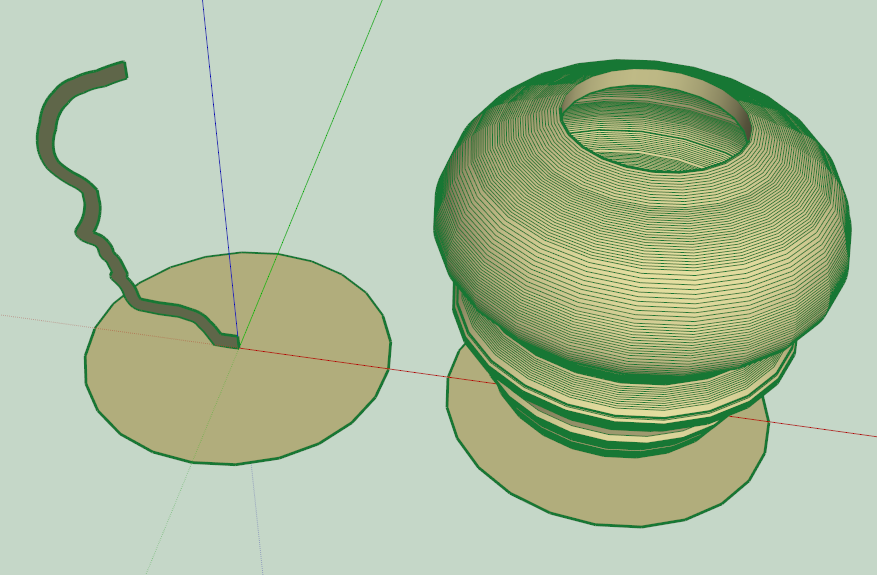
When you gave a face you can use Rotate to stand it up on end so you can FollowMe it around a circular path and form your vase.To fix it either redraw the profile 'flat'... or use a tool like my EEbyVectorToObject and extrude the non-coplanar edges down onto a plane you have drawn using a rectangle, then erase the unwanted upper part and you have the outline 'flat' [first image]... then offset to give the vase a 'wall' thickness, tidy up as you have hundreds of tiny edges that will divide the face otherwise... Then stand the 'wall' on end and FollowMe around a circular path as shown in the second image...
-
Cotty, yes, that's what I attempted to do, but it didn't work, probably because, as TIG says, the outline wasn't co-planar, though I don't know why it wouldn't be. I traced over the graphic I imported, and I assumed the anchor points would all be on a single plane. So thank you, thank you for the file.
Next I'll need to see if I can reproduce what cotty achieved. I'm not clear on where to place the Follow Me circle in the next-to-last part of his illustration. I'll see if I can get the EEbyVectorToObject tool TIG refers to as well. As I said, I'm a total beginner at this, with a specific project in mind. Even the lingo around 3D tools is strange and difficult to follow, even though I suspect what I'm asking about and having trouble with must seem really simple to you folks. Still, it's a challenge when coming at this from zero. Thank you for your time and help.
-
Perhaps you should start with a much simpler example while you learn to use Follow Me. In short, for what you've see from both Cotty and TIG, the center of the circle is on the center line of the profile and perpendicular to the profile's center line. The radius is really unimportant. Just get it centered.
Hello! It looks like you're interested in this conversation, but you don't have an account yet.
Getting fed up of having to scroll through the same posts each visit? When you register for an account, you'll always come back to exactly where you were before, and choose to be notified of new replies (either via email, or push notification). You'll also be able to save bookmarks and upvote posts to show your appreciation to other community members.
With your input, this post could be even better 💗
Register Login


Advertisement