Hello! Newbie saying hi and maybe a little advice
-
One thing I find helps. Try to think about how you would make things in real life and then construct them that way. If you think of it as a drawing you start to do things that may look right but end up being wrong from a different angle.
For example your crossmembers, if you have drawn the squares for the ends vertically the tube won't be the correct thickness, a small difference but it will screw things up for you in the long run.
If you start with a square and push/pull a length of pipe you can then move it into position and cut it to fit. As dave mentioned above, use components to separate your geometry and make repetition easy. ie; make one crossmember, make it a component and copy it across to the other side. There is a lot more to it but that gives you a bit of a way to think about things.
-
@box said:
One thing I find helps. Try to think about how you would make things in real life and then construct them that way. If you think of it as a drawing you start to do things that may look right but end up being wrong from a different angle.
Good idea! I've done some fab work in the past, but I never modeled anything beforehand. Wasted a lot of material. lol. I like that idea.
@unknownuser said:
For example your crossmembers, if you have drawn the squares for the ends vertically the tube won't be the correct thickness, a small difference but it will screw things up for you in the long run.
I'm not sure I understand what you're saying.
@unknownuser said:
If you start with a square and push/pull a length of pipe you can then move it into position and cut it to fit. As dave mentioned above, use components to separate your geometry and make repetition easy. ie; make one crossmember, make it a component and copy it across to the other side. There is a lot more to it but that gives you a bit of a way to think about things.
Forgive the silly question. How do you cut something to fit once it's in place?
Thanks again!
-
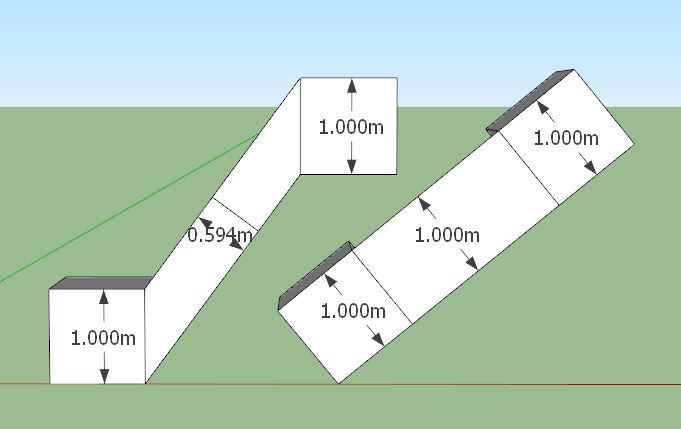
You describe drawing lines between the square at each end. If these squares are verticle rather than perpendicular to the lines you draw then the "Tube" won't be the correct thickness.
See little sketch exaggeration.
As to cutting to size, there are many answers to that depending on what you are doing.
But in the simplest terms, push/pull your crossmember through the vertical section then draw a line on the face of the crossmember in the right place and push the excess off.Or you can use intersect faces to cut things, but that is another step.
-
@box said:
You describe drawing lines between the square at each end. If these squares are verticle rather than perpendicular to the lines you draw then the "Tube" won't be the correct thickness.
See little sketch exaggeration.
[attachment=0:2621jwyl]<!-- ia0 -->Measure.JPG<!-- ia0 -->[/attachment:2621jwyl]As to cutting to size, there are many answers to that depending on what you are doing.
But in the simplest terms, push/pull your crossmember through the vertical section then draw a line on the face of the crossmember in the right place and push the excess off.Or you can use intersect faces to cut things, but that is another step.
That totally makes sense! Thanks! How would I go about making the properly sized tube for the left side? Just matching edges, pulling through and then cutting it off, I assume?
Also, on a slightly different note, in the following picture:
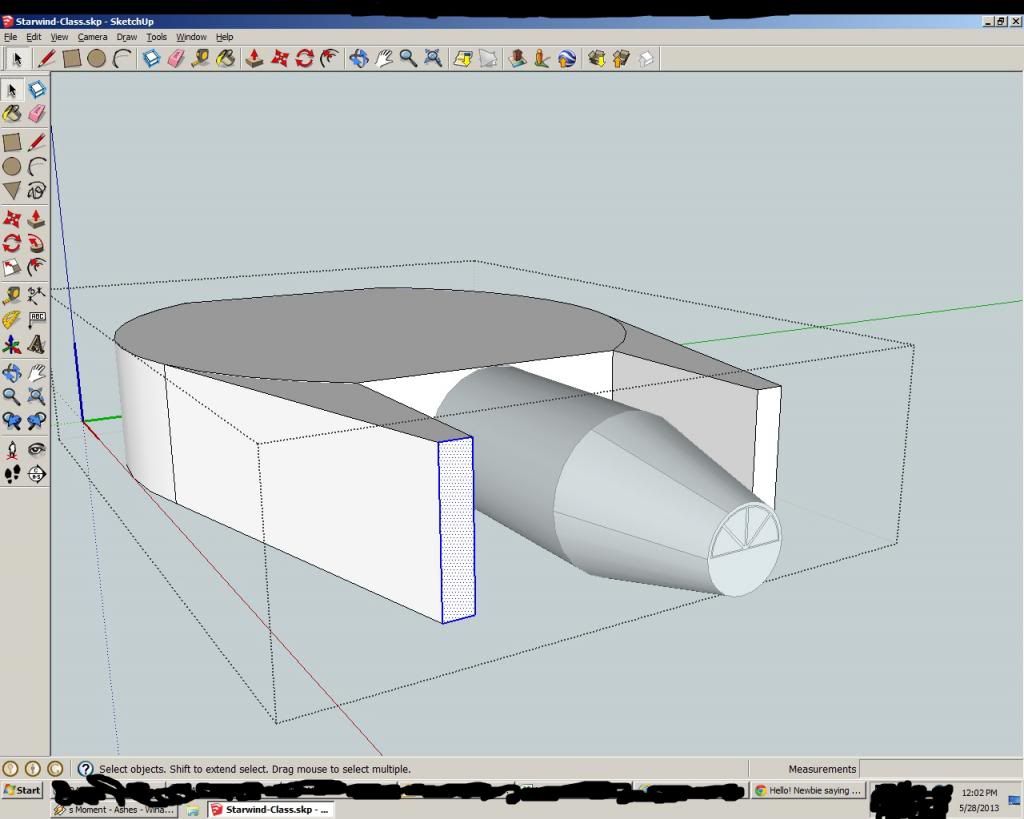
How can I take the selected area (and its twin on the opposite side) and "squeeze" it down, so that the highlighted area is about half the height of the main body, but centered on it rather than at the top or bottom, if that makes sense?
Thanks again for all the help! I'll stop asking and start experimenting more after this.
-
Use the scale tool. Make a selection as you have and choose the scale tool. click on the bottom or top middle dot, press alt and move the dot up. The top and bottom edges should move in towards the middle.
-
Don't work in mm, prefere meter + decimal point
And crop your image before post for better appetizing

-
@pbacot said:
Use the scale tool. Make a selection as you have and choose the scale tool. click on the bottom or top middle dot, press alt and move the dot up. The top and bottom edges should move in towards the middle.
Ya know, as much PC gaming as I do, you'd think I would have thought to look for shift/alt/ctrl modifier keys for everything. Unfortunately, it never dawned on me. Another simple, easy tip that makes an enormous difference.
Much appreciated.
-
@oramac said:
@pbacot said:
Use the scale tool. Make a selection as you have and choose the scale tool. click on the bottom or top middle dot, press alt and move the dot up. The top and bottom edges should move in towards the middle.
Ya know, as much PC gaming as I do, you'd think I would have thought to look for shift/alt/ctrl modifier keys for everything. Unfortunately, it never dawned on me. Another simple, easy tip that makes an enormous difference.
Much appreciated.
Good. Looking at the model, I have to mention that this operation may have an less than predictable result on the upper and lower faces of that wing. Those faces have many edges and angles, so when they are deformed by simply moving one edge (you can just move an edge in blue direction for similar result--may need to press command key when you do), it's hard to know if you will like the result. What SU will do is add edges within that face to keep the outside edges intact. These can be softened if the end shape is OK. Just because some operations are possible, doesn't mean the modeling steps are the best for your model. Often an approach to this sort of model would be to define the outlines of irregular faces and use a skinning plugin (simplest of which is Sandbox) to make the deformed face.
-
@pbacot said:
@oramac said:
@pbacot said:
Use the scale tool. Make a selection as you have and choose the scale tool. click on the bottom or top middle dot, press alt and move the dot up. The top and bottom edges should move in towards the middle.
Ya know, as much PC gaming as I do, you'd think I would have thought to look for shift/alt/ctrl modifier keys for everything. Unfortunately, it never dawned on me. Another simple, easy tip that makes an enormous difference.
Much appreciated.
Good. Looking at the model, I have to mention that this operation may have an less than predictable result on the upper and lower faces of that wing. Those faces have many edges and angles, so when they are deformed by simply moving one edge (you can just move an edge in blue direction for similar result--may need to press command key when you do), it's hard to know if you will like the result. What SU will do is add edges within that face to keep the outside edges intact. These can be softened if the end shape is OK. Just because some operations are possible, doesn't mean the modeling steps are the best for your model. Often an approach to this sort of model would be to define the outlines of irregular faces and use a skinning plugin (simplest of which is Sandbox) to make the deformed face.
Thanks! It actually worked pretty acceptably this time, at least to my eye. I'll post a screen later this week, since my computer is currently down while I move (posting from work).
I have been kinda wondering how to make ovoid-ish shapes, like a flattened sphere or oval. Would this Sandbox thing help with that?
-
@unknownuser said:
Would this Sandbox thing help with that?
Better is use the Scale tool for make ovoïd form from a sphere
-
@unknownuser said:
@unknownuser said:
Would this Sandbox thing help with that?
Better is use the Scale tool for make ovoïd form from a sphere
I'll experiment with that. Thanks!
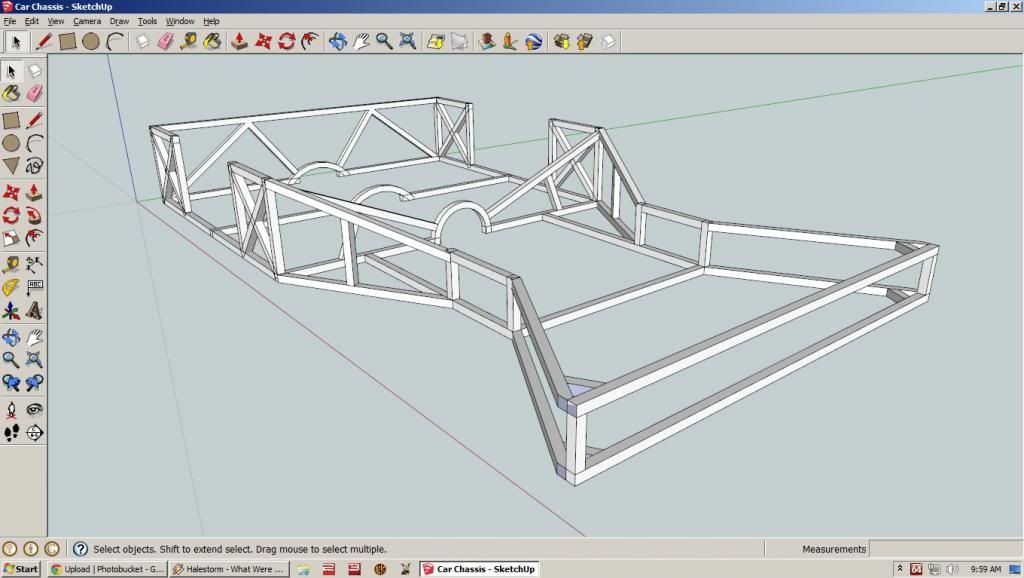
So a few updates. I scrapped my original chassis and started over. I think this one is marginally better. At least, I'm getting used to making components and cutting them to fit.
Here it is. I've no idea why the closest corner pieces show the blue side. I reversed faces and all kinds of things trying to fix it. Overall, I'm shooting for maximum torsional rigidity through the red axis, while keeping weight down.
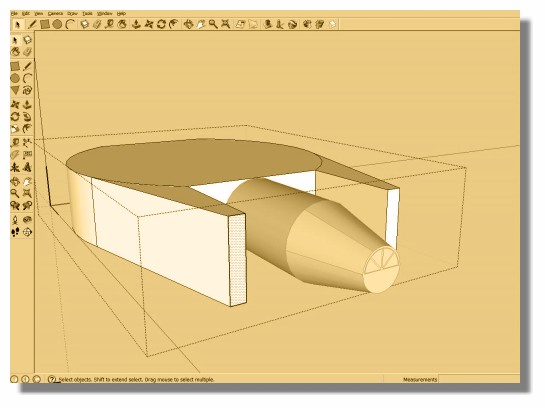
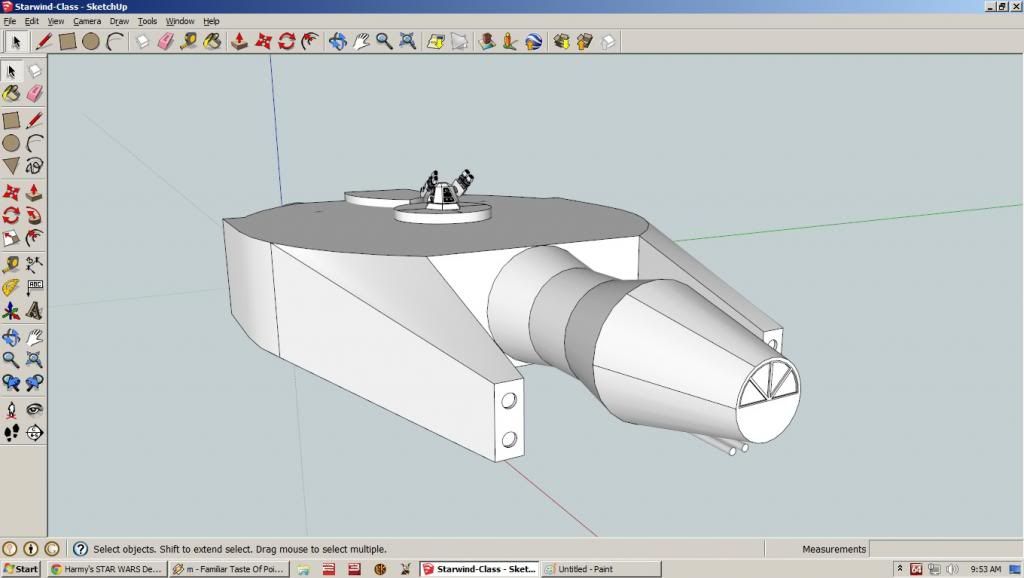
Also, I said I'd post the one ship that I used the scale tool on. It seemed to work fairly well, though it's tough to get a good view of it without being able to orbit around a bit. I used it on the front "forks" on either side of the cockpit.
Hello! It looks like you're interested in this conversation, but you don't have an account yet.
Getting fed up of having to scroll through the same posts each visit? When you register for an account, you'll always come back to exactly where you were before, and choose to be notified of new replies (either via email, or push notification). You'll also be able to save bookmarks and upvote posts to show your appreciation to other community members.
With your input, this post could be even better 💗
Register Login


Advertisement