Grid Search
-
Hi All,
Im fairly new at this and Ive been searching for something, but Im not really sure what it is.
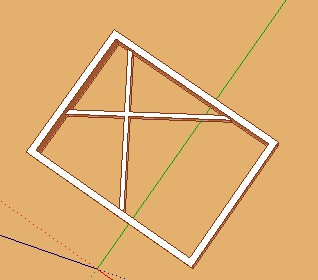
I would like a simple grid to help with design. A grid that has squares and separators (see attached image). It could be a tool, or a plug-in, or a component or just a SU method, Im really not sure, but what I would like is something that:
- I could place modules on, then move them around with referencing
Could be edited to change the dimensions of the "tiles" and "grout"
Doesnt produce shimmers (z fighting), ie no faces between the lines
Hopefully could be coloured lines
Hopefully could be configured to any size or shape
I found something that was very close but not quite what I need, which was the amazing Ceiling Grid plugin (by sdmitch I think his name was).
If anyone could point me in the right direction it would be much appreciated.
Mal

- I could place modules on, then move them around with referencing
-
I think you want Tig's Work Plane.
http://sketchucation.com/forums/viewtopic.php?t=31204 -
Thanks Box for the suggestion and the link. I have the workplane plugin. Im not sure that it can be edited to show the grid with a "tiles and grout" pattern as per the pic (That is pivotal to what I would like).
Cheers
Mal
-
Not very clear

You want something like this or all a rotating grid ceiling without rotate the objects ?
Or other...?

I believe that I have understood
Just Select all / Group (Right Click / Make a group) the Ceiling Grid + the objects
then you can Move / Rote / Copy the exact same Start Grid -
So you want the basic "Ceiling Grid" without the faces?
-
Hi Sdmitch, Thanks for the response. Much appreciated!
Yes the "basic ceiling grid without the faces" is what Im looking for.
I had a play around with the plug in and deleted the t grid and the tiles and whats left is great
a 2D grid without faces on the tiles.Sorry to be a pest, but can the tile size and t-grid width somehow be edited to other sizes? Eg 2000mm x 2000mm tiles with a 100mm grid width?
Cheers
Mal
-
Hi Pilou,
Thanks for your response and sorry for creating the confusion.
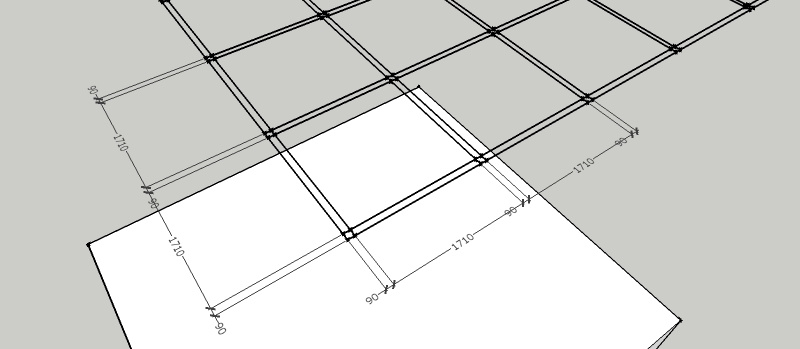
I would like to find a quick, easy and flexible method to make a grid that accommodates wall thickness. All the grids Ive seen are just squares. In the diagram below. I would like to be able to adjust the size of the larger and the smaller squares.
If I could configure the grid to complex shapes, that would be a bonus, but a simple adjustable rectangle would be ok.
If the grid lines could be a different colour to distinguish the grid from the model, that would be a bonus too.
If the bigger squares have faces, it will create a shimmer problem for me.
If the grid lines are guides it will create a "delete guides" problem for me.
Thanks again for your input Pilou.
Cheers
Mal
-
If you don't change the grid very often, you can use construction lines and the repeated copy option of the move tool.
-
Why don't you just make a component to the sizes you want and array it to create a grid as big as you want.
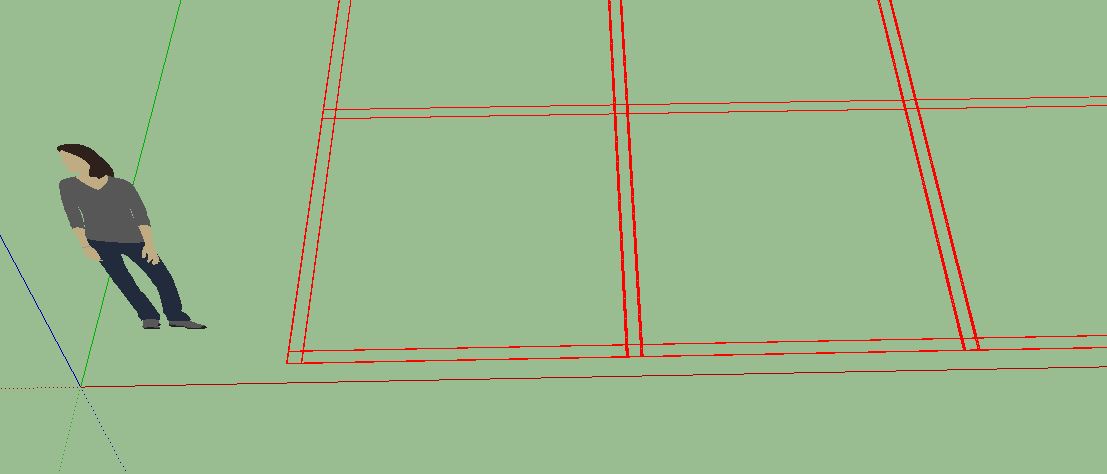
This one is as you specified above. 2m square with a 100mm "frame" I have added a 10mm face that you can colour as you want. Zfighting from those faces would be insignificant and the grid will remain visible if you want to look at your model with edges off.
You can then group the grid and lock it. Making a component and arraying it seems almost quicker to me than entering specs into a plugin and is pretty much infinity variable.
-
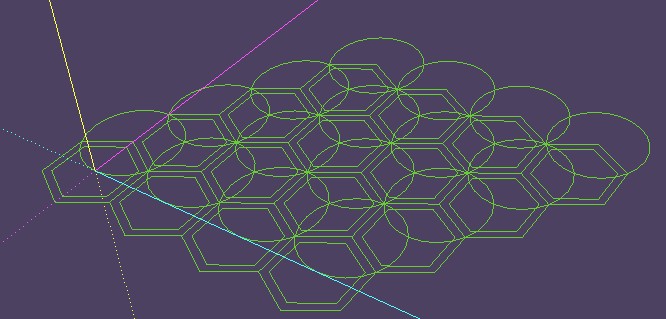
Like Box said you can draw any sort of grides even circular or from curves!

An you can use CPlassais Edge Color for some exotic colors
-
Hi Box, thanks for your suggestions. I did actually use copy and array to make the grids in my pics. I have to make a lot of grids in different sizes, on an ongoing basis.. so Im just looking for a smarter solution. That 10mm colour panel idea of yours is very clever. Cheers for that.
And thanks Cotty for your pointer. I didnt know there was a repeated copy option on the move tool.
Thanks for the edge colour tip Pilou. Id never heard of that. Exotic! Thats what Im looking for! I will definitely check that out. Not sure about the round grid though
Many thanks
Mal
-
You might be over complicating things if you are unaware of the move tool copy function.
Draw a square, select it, using the move tool, hold crtl and click on the corner of the square, move to the edge of the square with the new copy and click again, then type 10x and hit enter.
Now select those 11 squares, use the move tool in the same way but at right angles to the last move and you will have a grid of 110 squares.So by making the original square as you want it and then making it a component, you can create any sort of grid in seconds.
Edit: You can use it to move specific distance and copy too.
So if you start with a 2m x 2m square. Delete the face, select the edges and make it into a component. Now with the move tool, ctrl+click and move on the red axes to the right, without clicking again simply type 2100mm and hit enter, then type 9x and hit enter.
You should now have a row of empty 2m squares spaced 100mm apart. Do the same in the green direction, then select them all and make them a component or group. Use Pilou's suggested tool and you can colour the edges to your hearts content. -
Steve, it loads and is in the draw menu, it opens the spec dialog but it produces nothing when you click OK.
-
Cheers Box, I'll take another look at the code - I think I know what I've done.
I do fiddly little mechanical stuff rather than buildings, so my default template is rather zoomed in - when I just tested with the default SU template to test the download, I couldn't see anything either - until I did a 'zoom to extents!
If I hadn't had the Outliner open, I wouldn't have realised it was there!Seems I've set the default tile size as if for a miniature doll's house, so small that you can't see the grid because the axes get in the way!! Doh!
Seems fine if I type in a new size value - it regains its sense of proportion then.When I get a moment to dig into the code, I'll fire up an editor and try editing the defaults to something a little more appropriate for the intended job.
-
Sorry, no I tried that. And tried again now on another PC, at 1, 2 and 20m nothing.
-
Thanks for testing again Box - I must be not taking something into account to do with how folks have SU set up differently I guess.
I'll move the download to a "Ruby Help" thread for the time being then, to save anyone else the same frustration. -
With many thanks to ThomThom and sdmitch, the trouble should now be fixed - also with better handling of invalid input values (thanks D.Rathburn)...
Seems I was using a Ruby method that looked like a genuine API one, but was actually added by one of the plugins I have installed (RTFM!!!).
The download is available again in the original post above (to keep it with the instructions)
And thanks again, Box - your speedy bug reporting is much appreciated.
-
Hi mal,
The tips you've been shown so far are well worth knowing and practicing - but your post caught me just as I was looking for an experiment to test out some of the lovely Ruby things that I've learned from the guys here.
So, as long as you don't mind being a 'guinea pig' for my first go at creating Ruby geometry, here's a little plugin to do the basics of what you want...
EDIT: Download updated.
v1.0.1 - to fix the bug reported in the posts below. Apologies to the folks that had already downloaded v1.0.0.Just drop the file into your Plugins folder, and it will add a new item to the 'Draw' menu, called "Tile Grid".
You then get a dialogue asking you for the tile and grout sizes, and how many tiles you want.
It's pretty crude - the grid is always drawn on the ground at the origin, pointing along the red and green axes. Measurements are in your chosen model units, and you can get a simple grid of squares by simply putting in zero for the grout width.
The grid is built as a group, so it acts as a single unit, but won't clutter your component browser - and the group is named "Tile Grid" with the sizes, so that you can find it easily.
It will also undo all in one go with CTRL-Z, if it ends up a mess.I've followed the 'safety' guidelines of the Ruby 'gurus' as best I know, and it works reliably here - but as with any new plugin, take precautions! And don't hesitate to give me some grief if it is buggy!
-
It certainly works now.
I'm slightly curious though, it may be unimportant but it creates an unusual structure to the lines. The lines of the grid don't intersect. Are they not all on the same plane? If you throw a surface over them it breaks up into a mixture of overlapping horizontal and vertical bands not squares.I only ask because it surprised me and also made me think would it affect inferencing or measurements if the lines aren't all at 0, which they may well be.
-
@box said:
I only ask because it surprised me and also made me think would it affect inferencing or measurements if the lines aren't all at 0, which they may well be.
Aha - well, this is one thing that I did actually test properly!
If you use the query tool on the interection inferences, the lines do indeed all intersect on the ground plane - but you're right, they don't actually break each other into segments.
IIRC, in older versions of SU, that was the default behaviour, you had to do an explicit intersect to segment the lines - unlike now, where lines made by the tools break up automatically.
As I understand it, when adding geometry from Ruby, the lines won't break apart unless you program them to. But in this case, as the lines are intended only as a reference for inferencing, I kept things simple - so long as you don't add extra geometry inside the grid's group, it makes no difference, and keeps the amount of geometry smaller when a grid is made with a large number of 'cells'.
I think I will look into that as an option though, and possibly a guidelines option too - it is all good Ruby practice, and those other ways of doing it might be a useful alternative for some users.
Hello! It looks like you're interested in this conversation, but you don't have an account yet.
Getting fed up of having to scroll through the same posts each visit? When you register for an account, you'll always come back to exactly where you were before, and choose to be notified of new replies (either via email, or push notification). You'll also be able to save bookmarks and upvote posts to show your appreciation to other community members.
With your input, this post could be even better 💗
Register Login


Advertisement