How to scale a hole the best way?
-
@unknownuser said:
by Gaieus
Use the Ctrl+Shift combination to scale it about the center uniformly on the side grip. Now you can enter exact values adding the unit, too.Don't deselect the object after Step 3... type the required size (4.8mm) and Enter
It would scale down to the required size
@unknownuser said:
by Gaieus
You will need to PushPull the thing back to original length at the end though.
-
Hey Beginner. Thanks. Problem is that the center must be where it was before scaling and the height should not be scaled.

Still didn't find a suitable way with the original scale function but as long as FredoScale works i'm happy.
-
Hi Helmi,
@unknownuser said:
the center must be where it was before scaling
The center of the object stays as it was before scaling (Use the Ctrl+Shift combination) but of course the height is scaling too.

The other option is to select and scale the top and bottom circle of the cylinder separately - it works too.
-
Hi folks.
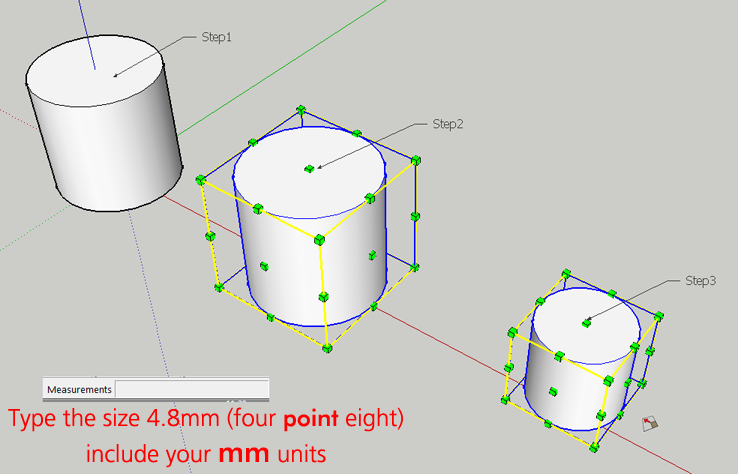
Lets pretend that we have a vertical cylinder to scale to a precise diameter or 4.8 millimeters.
This can be done with the Scaletool. However, the exact sequence of cation is critical. Follow these steps exactly as instructed:
1 - Select the object to scale using whatever method suits you.
2 - Select the Scaletool.
3 - Place the cursor on any one of the four scaling handles that are mid heigth on the corners of the scaling box. This will allows you to do a scaling along both the red and green axes at the same time. Dont bother using the SHIFTkey since it will allow only one number to be entered in the Measurement Window, that is a scale factor and not a precise measure in mm or whatever unit you are using.
4 - Press and keep pressed the CTRLkey. The CTRLkey is for uniform scale about the center.
5 - While still pressing on the CTRLkey, click on the handle to start the scaling operation. You will see two numbers in the Measurement Window. These are the scale factors along the red and the green axes. If they are different, the cylinder will be ovalised. Dont worry.
6 - Click to complete the scaling operation. The Measurement Window is still active and ready to accept input.
7 - Type 4.8mm,4.8mmin the Measurement Window. If you use the comma as the decimal separator and the semi-colon as the list separator, type 4,8mm;4,8mm.
8 - Press and release the RETURN key to validate the input. The cylinder shall now be:
 - round
 - of the exact diameter of 4.8 mm
 - centered where it was
 - of the same length as previously.
Just ideas.
-
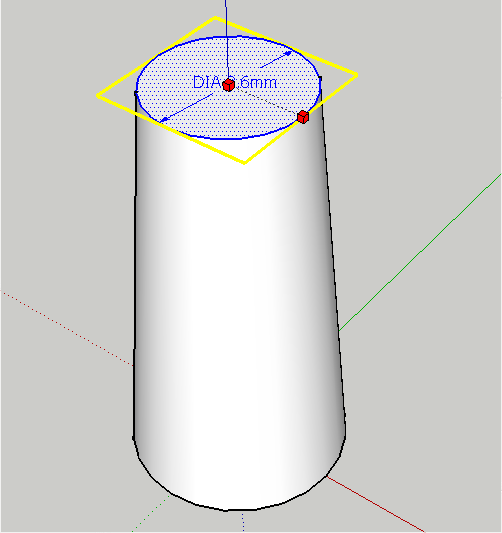
My usual method (used on screw/bolt holes all the time), is to use the 'entity info' window - you have to do each end one at a time, but I find it less fiddly that the scale tool, especially for holes, where the surrounding material can make it hard to see exactly what you're doing.
Just click on one of the end circles, and the 'entity info' should tell you that you have a circle selected, and its radius. Now just type the new radius into the dialogue. Repeat for the other end. The circle centres will stay where they are.
This way works great for drawing countersinks too (sorry no pics, I'm not at home). Once you have your clearance hole drawn, select one of the circles. Using the move tool with CTRL, drag a copy of the circle along the "tube" to the correct depth (locking axes with the arrow keys will help with this). Now select the circle on the top surface, and type an appropriate radius into the 'entity info' - hey presto, a perfectly conical countersink.Note that this will no longer work if some other operation has broken the circle into 'loose' segments - so worth practicing some more with that scale tool too!
-
Hi Trogluddite,
Brilliant hint...
I've seen the settings many times but never 'touched' it -
If all you want to do is make the hole smaller, you could use the Cardinal edge for that and do it in one step.
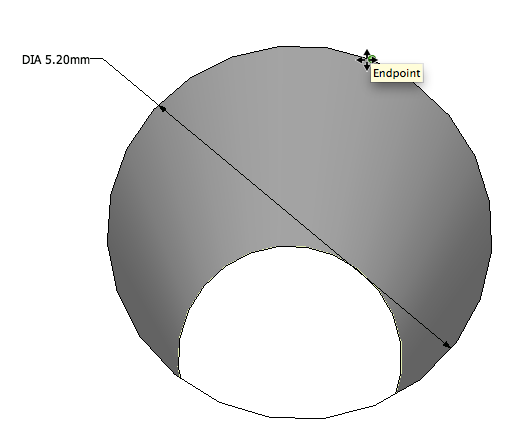
Get the Move tool and hover along the edge of one of the circles until circle turns black and you get the 'Endpoint' message. You've found a cardinal point.
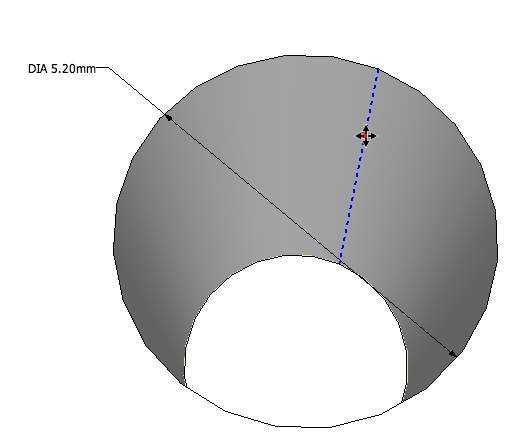
Move the cursor down the wall of the hole below the cardinal point. You'll see the cardinal edge highlight as a blue dashed line. Click and release and drag in toward the center.
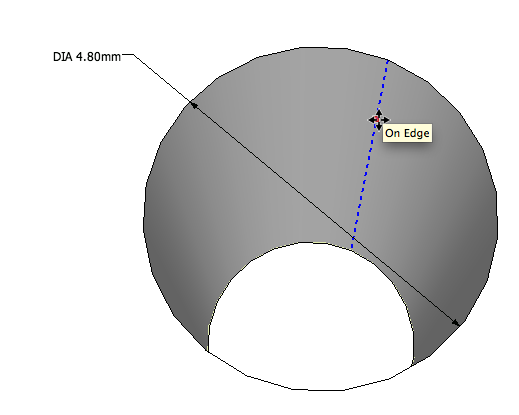
Type the change in radius you're after. In this case ,2 and hit Enter. Finished.
The hole remains on the same center as it is resized. No need to do any gymnastics with the Scale tool. You could do the entire thing with a single finger.
-
DOH!
-
It should be mentioned that the methods from Trogluddite and Dave only works with not exploded arcs and circles (and push pulled versions (e.g.)) ...
-
@trogluddite said:
My usual method (used on screw/bolt holes all the time), is to use the 'entity info' window - you have to do each end one at a time, but I find it less fiddly that the scale tool, especially for holes, where the surrounding material can make it hard to see exactly what you're doing.
.......Really easy solution, works a treat! Many thanks.
Hello! It looks like you're interested in this conversation, but you don't have an account yet.
Getting fed up of having to scroll through the same posts each visit? When you register for an account, you'll always come back to exactly where you were before, and choose to be notified of new replies (either via email, or push notification). You'll also be able to save bookmarks and upvote posts to show your appreciation to other community members.
With your input, this post could be even better 💗
Register Login


Advertisement