Turning a 123D Catch file set into a Edward Hopper painting
-

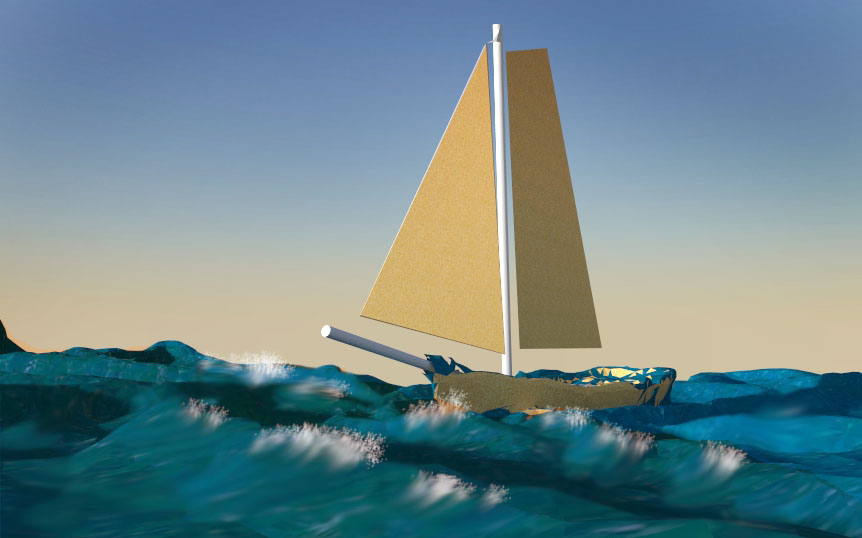
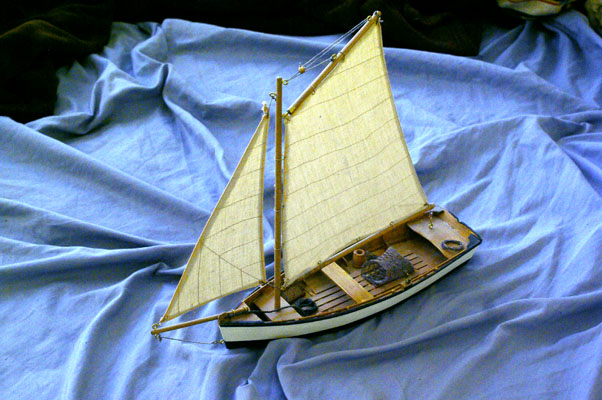
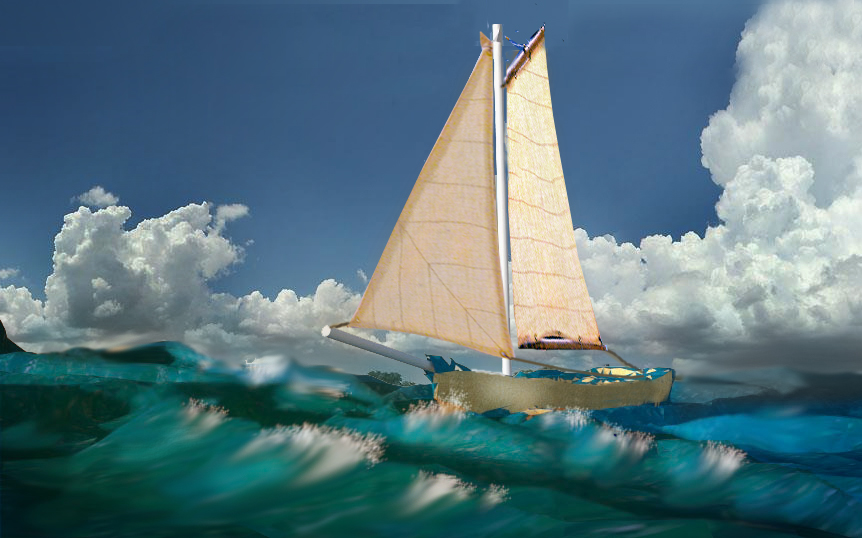
This started out as a 123D Catch photo set of a model boat on a blue bedsheet. The resulting mesh worked like a 3D underlay and was destroyed as I modeled over the boat. The water was left pretty much intact. Then I rendered in Twilight Render. And of course did some post pro in PhotoShop. This was just an exploratory project, but I like the preliminary results.
-
Heres is the runup to the rendered images. I start with a presentation model which I shoot 30 photos of on a blue bed sheet. Then I stitch the photos in 123D Catch and export to OBJ. I import the OJ file into SketchUp. In SU, I simplyfy the boat and compose my shot. Next is a run through Twilight render. Finally I photoShop the spay on the wave tops.

[attachment=0:3mj6i5bj]<!-- ia0 -->boat_skp.jpg<!-- ia0 -->[/attachment:3mj6i5bj]

-
wow! this is a very interesting method Roger...
-
@novena said:
wow! this is a very interesting method Roger...
Right now it is an experiment that may or may not become a method.
-
Now you must re apply the textures of the sailing clothes

-
@unknownuser said:
Now you must re apply the textures of the sailing clothes

You are correct Frenchy and this is one of the reasons the ACAD folks give away the 3D service. The texturing is integrated into their product suite which is expensive. I on the other hand export to an obj file rather than their native format and then I have to jump through hoops to retexture the surfaces. So the trick for me is to develop smooth and efficient work arounds. Soemtimes the well traveled path is well traveled for a reason. It is all about trade offs. Right now, I am too retired to be attached to a corporate entity that will upgrade me until my wallet is empty. If clients were calling me day and night I could just toss money at my problems.
-
well done !
-

And finally the digital painting that started off as an experiment in data capture moved from looking like an Edward Hopper work and ended up channeling Winslow Homer. -
I have to hand it to you Rodger, this is impressive, I don't know much about 123D catch but I have heard about it, how many pictures did you need to create the model in 3D?
-
@roger said:
I start with a presentation model which I shoot 30 photos of on a blue bed sheet. Then I stitch the photos in 123D Catch and export to OBJ.
-
Oops what I mean to ask was is there a requirement for so many pictures to create the 3D view, whats the minimal amount to create a 3d model?
-
Depending of what do you want!
Some programs need ony 2 pictures
of course 3D models will not have the behind but it's sufficient for some works!
You can even play with virtual image
here my test with Chaoscope where you can't export a 3D object !
the up image result is a true 3D obj file![flash=560,315:1l6yxxsd]http://www.youtube.com/v/G8wwrInbnfM[/flash:1l6yxxsd]
-
Now that is very impressive

-
There's an iPhone app for 123D Catch
-
-
I just tested out the app and I got some funky result, it didn't work so well on my iPhone, I'll play around with it again laters and see if I can get any better results

-
Roger, I just came across this site that may be of interest to you: http://www.theopencrowdproject.com/participate/
The guy behind the site is using 123D Catch to scan people from all over the world. He recommends placing little pieces of masking tape all over the person to get better results.
-
3D captures are very dependent on:
Number of photos
Timing
Surface characteristics
Consistency
Lighting
Proper exposure
Image sharpness
Helper gadgetsNumber of photos
123D Catch says 50 to 70 photos. It is a case of the more the better, but more implies rapidly escalating processing times. The photos need to have significant overlap because the 3D data is derived trigonomically calculations of the relative changes in the positions of matching point sets in different photos.
Timing
Timing is comes into play in several ways. Will the object change shape while you are taking 70 photos? Think of the quality you would get while take 70 photos of a hyper active terrier chasing a rabbit. There are cameras capable of 1 million frames per second. But you also have to move the camera between shots. However, and array of 70 cameras triggered simultaneously could capture the data (an expensive option).
Lighting
Lighting should be flat and almost shadowless. You want a 3D virtual model to either compose a render or use in an animation. If the light source in your model is doing one thing and the shadows from a light in your photo source is doing something else it will distort or destroy the 3D illusion. Also if some of your control points are lost in deep shadow or blown away by a bright highlight you will lose the data needed for an accurate model. You don't want shadows in your photo sets. The shadows will come back in a good virtual model from that model's own virtual light source.
Surfaces
Any thing with specular reflections can be a problem. Lets say you photograph a glass building and outside trees are reflected in the glass. One the program will think there are trees inside the building. Even worse the reflection of the trees will move from shot to shot and some surfaces will be totally mangled. There are workarounds but they have their own problems. You think the guy with the shiny mirror-like Ferrari will let you shoot dulling spray or talcum powder all over his car? Some mirrors are not so bad as you can tape paper to the surface and add the mirror finish back into the virtual model.
Image sharpness
Artsy depth of field is not desirable while doing data acquisition. Natural control points will be hard to find if they are fuzzy. And artificially control points may not be immediately recognizable to the computer. The same problem exists with motion blur. There are always reasons for not using a tripod, but the number of usable data sets extracted from tripod mounted cameras will be higher than non tripod mounted camera sets. Also any professional photographer knows that you can generate hurricane force winds simply by bringing a light easily carried tripod to a job.
Helper gadgets
I had a chance to get a deal on some aerial photo sets to capture the topography of some property I owned. Its all covered in waist high grass so finding matching control points would have been a nightmare. After I cut .8 acres of grass with a weedwacker, I will layout emergency rescue panels at high and low points and set them up in differing configurations and colors. Hopefully, I can get the county fair pilots to orbit the property with me in the passenger seat. They have a 240 lb. passenger weight limit and I weigh 235 and the camera is another pound or so. For small objects you can run colored tape through a hole punch and use the colored sticky dots to differentiate control points. Some practitioners of this art set up a back wall as if it were the back corner of a bounding box and put control points on that wall. When the computer is able to reconstruct the bounding box (a simple cube) it has a very good reference for positioning all points within the known bounding box. You could also set up a dozen laser pointers to highlight key points on a subject and use those spots of colored light as control points.I HAVE TO DO SOME OTHER THING RIGHT NOW BUT WILL BE BACK TO EDIT THIS POST AND ADD TO IT.
-
Very impressive results

-
@unknownuser said:
But you also have to move the camera between shots.
If the object is a little object maybe you can rotate the object ?

Or the shadows make something for the recognition ?
Advertisement


