Rounded roof hips
-
What is the best way to produce rounded roof hips. Because they're angled on two planes I've found them pretty tricky. Does anyone have any tips please. My attempt attached, took ages but not very accurate! Cheers

-
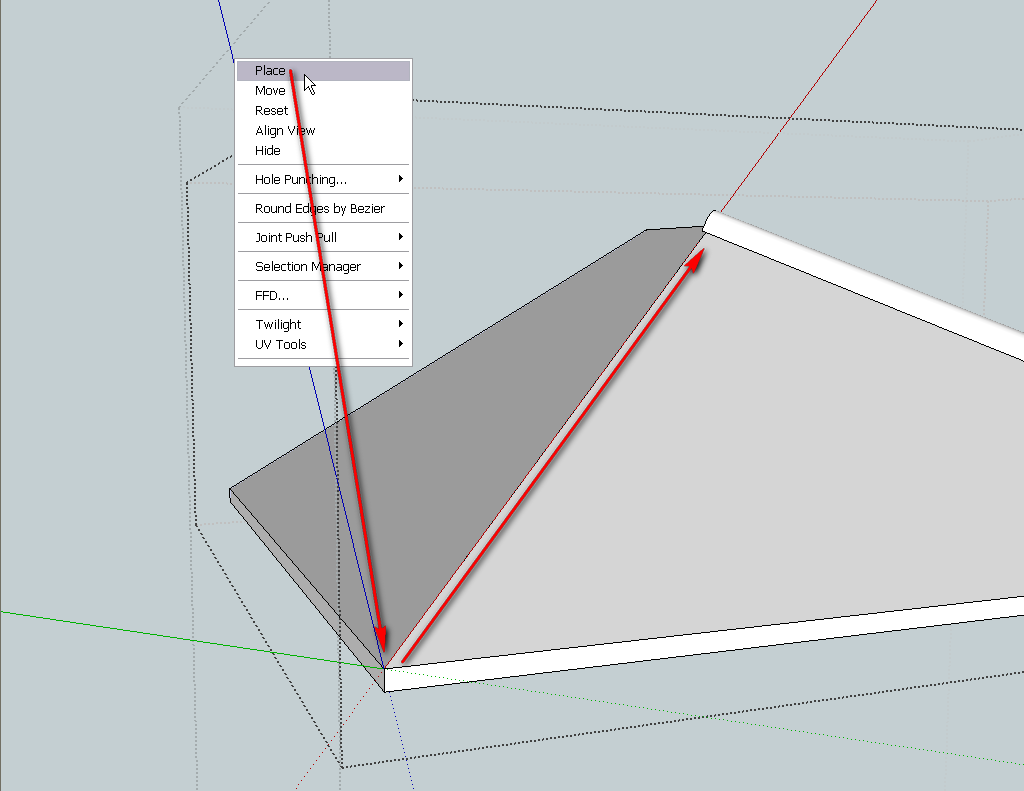
Note that you can always place your axes anywhere and align it with any edge. In this case, aligning an axis to the edge of the roof can already help with aligning the hips.

-
@gaieus said:
Note that you can always place your axes anywhere and align it with any edge. In this case, aligning an axis to the edge of the roof can already help with aligning the hips.
How you mean, are you referring to placing a group or component? -
-
@tig said:
[attachment=0:cttdkkki]<!-- ia0 -->Capture.PNG<!-- ia0 -->[/attachment:cttdkkki]
That's great thanks, just two queries 1. How do you locate the green axis when no reference line is available and 2. How do you align the circle plane to the red without creating a 'surface', is there a toggle command? -
In a case like this you won't need to worry about where the green axis is. It'll be perpendicular to the red one by default and that's all you need.
You could lay out a guideline to follow for the green axis but I don't think it is worth the trouble for the few seconds you'll need the axes moved.
-
There are plenty of things to snap the green to.
A Circle will align to the surface it is hovering over.
If that surface is axial it will take the color of the axis or be black otherwise... OR in the absence if a surface it will align to the nearest current axis otherwise.
To get it to lock to the [current] 'red' axis you need to orbit so you are looking somewhat along the [current] 'red' axis.
When the circle's cursor turns 'red' you know it's on that axis.
To lock it to 'red' hold the shift-key.
Click on the hip's edge to locate it, it will be made centered on that line.
Change its size and segment-count as desired, before you do anything else...
Afterwards you are best to Group it - this will avoid it sticking to other existing geometry unexpectedly, while you are changing it later.
I moved the circle down [locked in the current blue-axis] because a round ridge-tile is only a partial circle, and wouldn't be centered on the hip-line... -
@tig said:
There are plenty of things to snap the green to.
A Circle will align to the surface it is hovering over.
If that surface is axial it will take the color of the axis or be black otherwise... OR in the absence if a surface it will align to the nearest current axis otherwise.
To get it to lock to the [current] 'red' axis you need to orbit so you are looking somewhat along the [current] 'red' axis.
When the circle's cursor turns 'red' you know it's on that axis.
To lock it to 'red' hold the shift-key.
Click on the hip's edge to locate it, it will be made centered on that line.
Change its size and segment-count as desired, before you do anything else...
Afterwards you are best to Group it - this will avoid it sticking to other existing geometry unexpectedly, while you are changing it later.
I moved the circle down [locked in the current blue-axis] because a round ridge-tile is only a partial circle, and wouldn't be centered on the hip-line...Sorted, all understood now. Thanks for that
Advertisement


