sketchucation logo sketchucation
    • Login
    πŸ€‘ SketchPlus 1.3 | 44 Tools for $15 until June 20th Buy Now

    [Plugin] Image 2 Model

    Scheduled Pinned Locked Moved Plugins
    20 Posts 7 Posters 17.7k Views 7 Watching
    Loading More Posts
    • Oldest to Newest
    • Newest to Oldest
    • Most Votes
    Reply
    • Reply as topic
    Log in to reply
    This topic has been deleted. Only users with topic management privileges can see it.
    • EarthMoverE Offline
      EarthMover
      last edited by EarthMover

      Looking for a script to take a folder off the hard drive and batch convert transparent .png files to .skp with a 0,0,0 axis and face camera enabled. A bonus would be if it would hide the perimeter edges of the image. It's not necessary to cut them out for shadows as they will be rendered. Just looking to speed up the conversion process as I have hundreds of plant images that I've taken and isolated and the manual conversion is becoming quite tedious. Not sure if something already exists. Any help would be much appreciated.

      EDIT - Much thanks to SDMitch! Most recent plugin attached.


      Image2Model.rb

      3D Artist at Clearstory 3D Imaging
      Guide Tool at Winning With Sketchup
      Content Creator at Skapeup

      1 Reply Last reply Reply Quote 0
      • sdmitchS Offline
        sdmitch
        last edited by

        Am I correct in assumming that you want each image in its on .skp file and placed at the origin?

        Images are included in a model's definitions but I don't think the .behavior.always_face_camera applies. I believe it only applies to components.

        Nothing is worthless, it can always be used as a bad example.

        http://sdmitch.blogspot.com/

        1 Reply Last reply Reply Quote 0
        • GaieusG Offline
          Gaieus
          last edited by

          In such a case, images should be exploded and the face (bearing the image material) turned into such a component.

          You can turn an image entity into a component, too (and face to the camera) but that would cause all sorts of issues with external renderers as not each can recognise image entities at all.

          Now the ultimate question (if such a script were possible): how to scale those components?

          Gai...

          1 Reply Last reply Reply Quote 0
          • sdmitchS Offline
            sdmitch
            last edited by

            Adam, Would you post an image that I could test. I have been working on your plugin and I want see if it works the same with one of your images as it does with mine.

            Gaieus has a point regarding sizing the images/components.

            Nothing is worthless, it can always be used as a bad example.

            http://sdmitch.blogspot.com/

            1 Reply Last reply Reply Quote 0
            • TIGT Offline
              TIG Moderator
              last edited by

              You set the image size as you import it, but you can reset it later after reading its pixel sizes and basing the inch sizes on those, pro-rata...
              The basic code to add an image is:
              image-entities.add_image(path_to_file, insertion_point, width, [height])
              The width/height are in inches.
              The last argument [height] is optional, if omitted it is taken as being in proportion to the width you have set.
              An added image typically arrives 'flat' at the ORIGIN - if it's a plant or tree you'll probably want to stand it up on its end - you can apply a simple rotation transformation: tr=Geom::Transformation.rotation(ORIGIN,X_AXIS,90.degrees) image.transform!(tr)
              You might also want to shunt the image so that the center of its bas is at the ORIGIN rather than it bounds.min ? Here a simple translation is needed:
              tr=Geom::Transformation.translation([image.width/2,0,0].vector_to([0,0,0])) image.transform!(tr)

              TIG

              1 Reply Last reply Reply Quote 0
              • sdmitchS Offline
                sdmitch
                last edited by

                TIG, Great minds think alike. I originally tried moving the Image bottom center to the Model ORIGIN before making it first a Group then a Component but didn't change the point the Image rotated about when Orbiting. I had to move the Component.transformation.origin instead.

                One thing that I can't seem to resolve is the fact that although I do a "viewFront:" and a "viewZoomExtents:" before doing the .save, the model, when opened, has not been saved that way.

                Nothing is worthless, it can always be used as a bad example.

                http://sdmitch.blogspot.com/

                1 Reply Last reply Reply Quote 0
                • EarthMoverE Offline
                  EarthMover
                  last edited by

                  @sdmitch said:

                  Adam, Would you post an image that I could test. I have been working on your plugin and I want see if it works the same with one of your images as it does with mine.

                  Gaieus has a point regarding sizing the images/components.

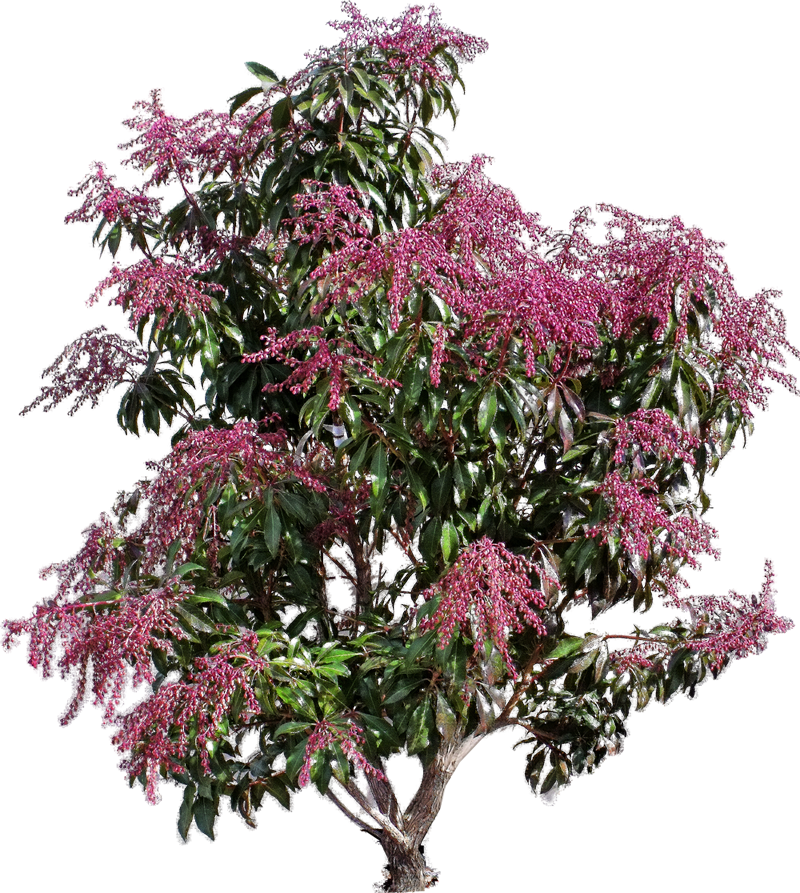
                  Here is one of my hi-res .png files for testing.

                  Yes, I did forget to mention a few steps. The routine is -

                  1. Import and place 'image' in front viewport.

                  2. Center on axis as pivot point

                  3. Explode image

                  4. Select all

                  5. Make Component (Check always face camera, shadows face sun

                  6. Enter component edit and select outer edges and hide them.

                  7. Exit component and 'Save as' image name.

                  Thanks for looking into it Sam and for the help TIG. If something can be manifested it would save hours of tedious work.


                  Pieris Japonica (Dorothy Wycoff).png

                  3D Artist at Clearstory 3D Imaging
                  Guide Tool at Winning With Sketchup
                  Content Creator at Skapeup

                  1 Reply Last reply Reply Quote 0
                  • sdmitchS Offline
                    sdmitch
                    last edited by

                    Adam, Your image worked exactly like mine so I have attached Image 2 Model I. When you execute the plugin, The Open panel will allow you to select the source folder for the images. Next, the Save panel will allow you to select the destination folder for the models. An inputbox will let you choose whether the image is to be "stood up" and the width for the images. Since this is a "batch" process these options will be applied to all images in the source folder.

                    I still haven't resolved the problem of the saved file not being frontview and zoomed extents. It seems that it saves the model however the default template is setup.

                    Check it out and let me know how it worked for you.


                    batch process images into components that are saved in a model file

                    Nothing is worthless, it can always be used as a bad example.

                    http://sdmitch.blogspot.com/

                    1 Reply Last reply Reply Quote 0
                    • EarthMoverE Offline
                      EarthMover
                      last edited by

                      Works great with one exception. Can you perhaps set it to save just the newly created component and not save a copy of "Susan" along with each new .skp? Perhaps that's is the issue you are already referring to. I need to be able to compile these plants through the component folder. Other than that it's working like a charm!! πŸ˜„

                      Also, just noticed that the component is still an "image". Possible to explode that down before the component conversion? Not sure if the final .skp files will work with all render engines with 'images' embedded.

                      3D Artist at Clearstory 3D Imaging
                      Guide Tool at Winning With Sketchup
                      Content Creator at Skapeup

                      1 Reply Last reply Reply Quote 0
                      • sdmitchS Offline
                        sdmitch
                        last edited by

                        If Susan is showing up it because she is in your default template.

                        I take a look at exploding.

                        Nothing is worthless, it can always be used as a bad example.

                        http://sdmitch.blogspot.com/

                        1 Reply Last reply Reply Quote 0
                        • TIGT Offline
                          TIG Moderator
                          last edited by

                          You could always some code at the start to erase all model entities...
                          Sketchup.active_model.entities.erase_entities(Sketchup.active_model.entities.to_a)
                          [or a Sketchup.active_model.entities.clear [edit]]
                          Then .purge_unused for all model components, materials, layers and styles before adding the new image into the now sanitized model.
                          Surely image.explode will do the desired extra step ?

                          TIG

                          1 Reply Last reply Reply Quote 0
                          • sdmitchS Offline
                            sdmitch
                            last edited by

                            Added a .clear! to make sure the new file is empty. Exploded the image and hide the edges.


                            Image2Model.rb

                            Nothing is worthless, it can always be used as a bad example.

                            http://sdmitch.blogspot.com/

                            1 Reply Last reply Reply Quote 0
                            • TIGT Offline
                              TIG Moderator
                              last edited by

                              The 'entities.clear' only erases the instance of Susan [and any other stuff placed in the default template].
                              BUT the definition still remains in the SKP, as do any now-unused related materials, layers etc.
                              It's best to have a '.purge_unused' for these after the '.clear'...

                              TIG

                              1 Reply Last reply Reply Quote 0
                              • sdmitchS Offline
                                sdmitch
                                last edited by

                                I haven't been able to find .purge_unused.

                                sorry, I did find it for materials and styles.

                                Searching returned no results.

                                Nothing is worthless, it can always be used as a bad example.

                                http://sdmitch.blogspot.com/

                                1 Reply Last reply Reply Quote 0
                                • TIGT Offline
                                  TIG Moderator
                                  last edited by

                                  Your search tool is faulty...
                                  https://developers.google.com/sketchup/docs/ourdoc/definitionlist#purge_unused
                                  https://developers.google.com/sketchup/docs/ourdoc/materials#purge_unused
                                  https://developers.google.com/sketchup/docs/ourdoc/layers#purge_unused
                                  https://developers.google.com/sketchup/docs/ourdoc/styles#purge_unused

                                  TIG

                                  1 Reply Last reply Reply Quote 0
                                  • sdmitchS Offline
                                    sdmitch
                                    last edited by

                                    I did the search, .purge_unused, at

                                    https://developers.google.com/sketchup/docs/

                                    which is the Ruby API page and it found nothing. Apparently it was the "." that cause the failed search. Lots of results without it.

                                    Nothing is worthless, it can always be used as a bad example.

                                    http://sdmitch.blogspot.com/

                                    1 Reply Last reply Reply Quote 0
                                    • EarthMoverE Offline
                                      EarthMover
                                      last edited by

                                      First post updated with [plugin] tag.

                                      Got a bit busy and haven't had a chance to truly say thanks! SDMitch, I owe you a beer! Plugin works great. Thanks again!

                                      3D Artist at Clearstory 3D Imaging
                                      Guide Tool at Winning With Sketchup
                                      Content Creator at Skapeup

                                      1 Reply Last reply Reply Quote 0
                                      • guanjinG Offline
                                        guanjin
                                        last edited by

                                        @sdmitch said:

                                        Added a .clear! to make sure the new file is empty. Exploded the image and hide the edges.

                                        I opened the PNG image, the view does not show

                                        I come from China, is to learn

                                        1 Reply Last reply Reply Quote 0
                                        • C Offline
                                          coreymurray
                                          last edited by

                                          Just wanted to say thanks for this plugin, it really is super helpful!

                                          1 Reply Last reply Reply Quote 0
                                          • S Offline
                                            shoopa
                                            last edited by

                                            @Earthmover
                                            can You do a quick explanation video tutorial?
                                            thanks!!

                                            1 Reply Last reply Reply Quote 0
                                            • 1 / 1
                                            • First post
                                              Last post
                                            Buy SketchPlus
                                            Buy SUbD
                                            Buy WrapR
                                            Buy eBook
                                            Buy Modelur
                                            Buy Vertex Tools
                                            Buy SketchCuisine
                                            Buy FormFonts

                                            Advertisement