How to create texture files and import
-
The way I do it is to draw rectangles as long as the materials I'm importing if an image is of a board that is 8' long, I draw a rectangle that is 8' long in the same orientation as the material. If the image is horizontal, I draw the rectangle so the length is along the red axis. The width of the rectangle isn't important because the material will take care of itself for that.
Next I import the image making sure I've selected Use as Texture and apply it to the rectangle. Usually when I do this, I have a number of images to import at the same time so I make multiple rectangles and import the images one after another.
This importing business gets them into the In Model Materials library. To save the materials for later use you can either save the existing materials as their own library--click the Details arrow that points out to the right in the Materials browser, or open the secondary pane (+ sign in the upper right of the Materials browser) and set the second pane to the desired library. Then drag the thumbnails from the In Model library to the desired library.
-
OK I've done that, but it is tiled. Is that a function of the resolution of the image?
-
Real wood isn't seamless so tiling would be natural. It doesn't matter what the resolution of the image is as far as that goes.
That's why I use images of full size boards and not those goofy little square images. For example, the same material image is used for the different pieces of the top of the table in this image but I picked different sections of it for each piece.
And on this hayrake table, I used several plank images to paint the table top. The images were of planks for the same log so the color matches pretty well.
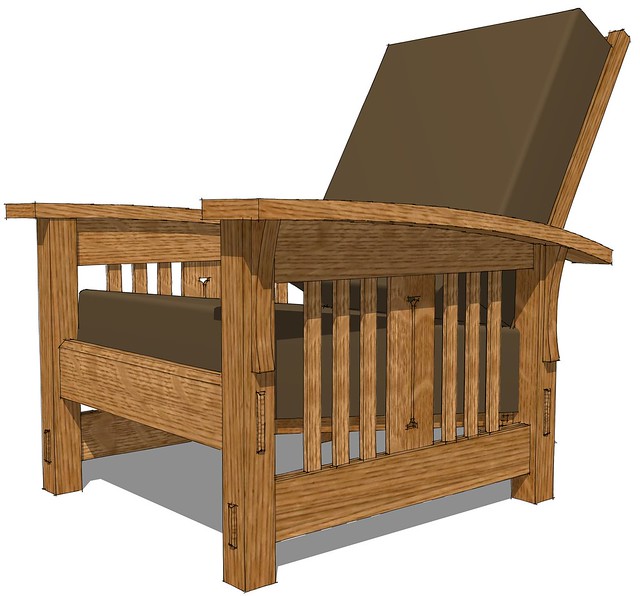
Here's a close up of the Morris chair from the first image. the same thing applies. Only a couple of wood grain texture images were needed because I could pick out different parts of an image for different parts of the chair.
If you want seamless you should go with plastic laminate.

-
See how the image is tiled? Is that normal?

The image on top is the 2 inch x 4 inch x 6 feet component.
The bottom image is a rectangle that is 4 inch x 6 feet.I import the image to the rectangle, as texture, then I paint the face of the component.
The two boxes (~ 2 feet each) shows where the image is repeated instead of spanning the whole component.
-
Can you post the original image?
-
Here's the image.

-
I can't tell well enough from your first posted image but it looks like either the image isn't set to be 6' long or the "board" is longer. I imported the original image as you posted it and applied it to two "boards" One I made 12' long so you can see how the image repeats.
-
Your file is exactly what I was expecting.
I'm not sure what I had done wrong, but I started over from a new file.
Now it's working just like yours
Thanks for the help.
-
I have another question regarding importing.
I noticed that there is a loss of resolution from the image to the imported texture.
(Original image is clearer, imported texture is fuzzier)
Is there a setting that will keep the original resolution?
Or should my original image be a higher resolution to start with? -
SketchUp reduces what it displays to 1024 pixel resolution (or 2048 if you enable "Use maximum texture size" under Window > Preferences > OpenGL settings - but this can low down performance with a slower video card).

-
FWIW, I didn't have Use Maximum Texture Size ticked when I imported your image.
As to what you did differently, before, I guess I don't know. It's possible that instead of setting the length of the material by clicking on the right edge of the rectangle, you clicked on the far horizontal edge and the rectangle wasn't the right width. Might be possible to deconstruct the SKP file to figure it out but since you've now got it sorted, don't look back.
Advertisement


