From SketchUp to Reality
-
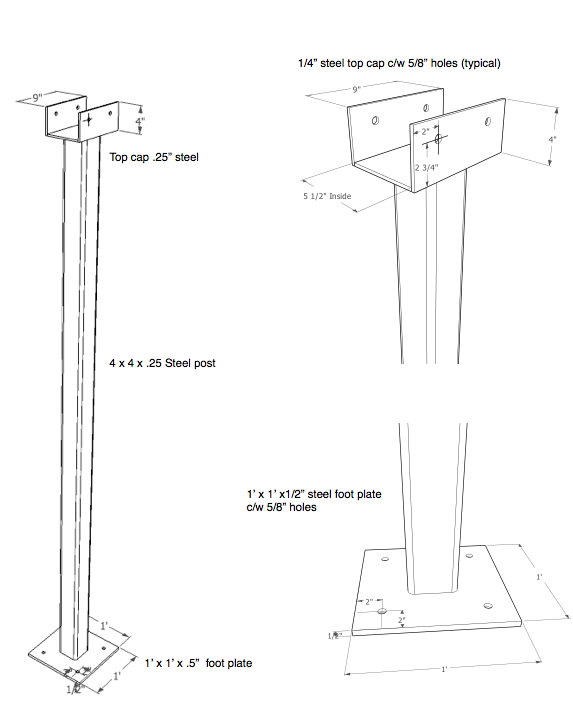
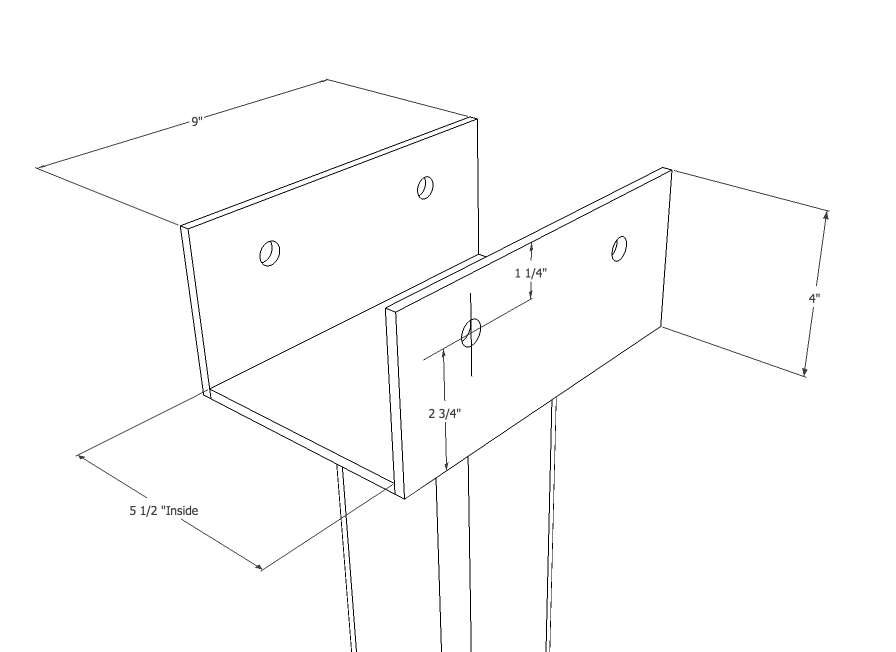
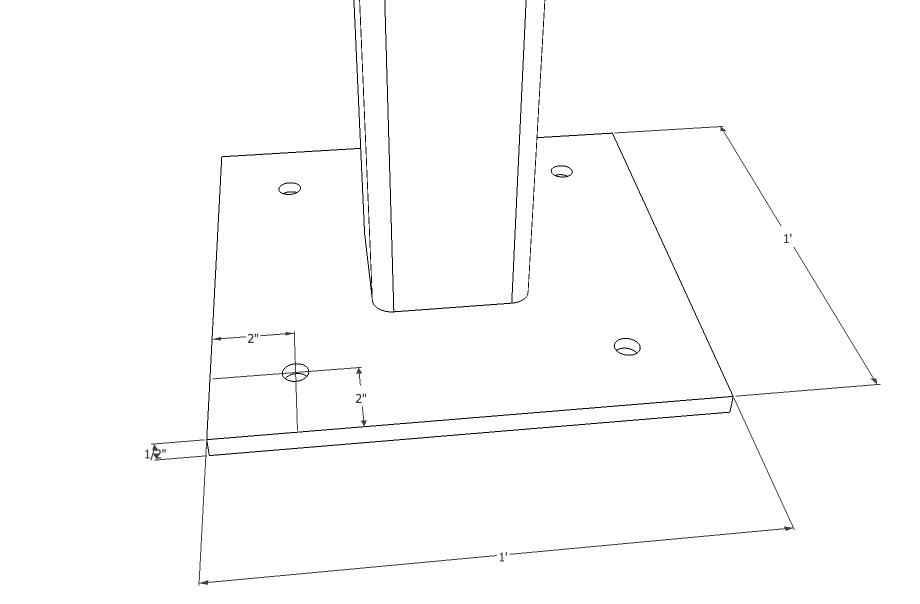
Once again SketchUp to the rescue, as with a floor load that is that heavy, it is not easy to find a pre-made telepost that can stand that load.
So I SketchUpped the post and emailed it to my structural engineer. He made a few changes to bolt hole locations, and we had a local fabricator build it.
-
Looks like this will be interesting to follow. Two comments, based on our experience:
- Gophers seem to love the styrofoam in the ICFs. Maybe the Resisto will keep them out, but I wish the product was available with a hardware cloth covering. If you haven't buried your footings, you could still cover the foam. On the other hand, you mention that you've used ICFs on 18 projects. Have gophers plagued the owners of these houses?
- If you're going to acid stain the floors, remember that everything that happens to the concrete between now and then will telegraph through the stain. Cover the floors, preferably with something like 1/8" masonite. If that's too expensive, a couple of layers of paper, and keep up with all the tears that will occur between now and staining.
-
@llaves said:
Looks like this will be interesting to follow. Two comments, based on our experience:
- Gophers seem to love the styrofoam in the ICFs. Maybe the Resisto will keep them out, but I wish the product was available with a hardware cloth covering. If you haven't buried your footings, you could still cover the foam. On the other hand, you mention that you've used ICFs on 18 projects. Have gophers plagued the owners of these houses?
- If you're going to acid stain the floors, remember that everything that happens to the concrete between now and then will telegraph through the stain. Cover the floors, preferably with something like 1/8" masonite. If that's too expensive, a couple of layers of paper, and keep up with all the tears that will occur between now and staining.
This is interesting about gophers. There are no gophers to speak of in this area, so it is a problem I haven't had to deal with, but could be very important if you are in an area that does.
And as for the floors, I couldn't agree more. We usually put down two layers of untreated building paper tuck taped at the seams,(tuck taped to each other, not the concrete as this will end up as stripes) and keep up with the tears.
It doesn't matter how much you berate the tradesmen, caring for you floor just isn't a priority. -
In the oddball things that happen on the jobsite department:
We let the foundation reach a 7 day compressive strength, and did a bit of back filling to make it easier to get in to the building. The site is on an ancient creek bed, and has lots of very large rocks.
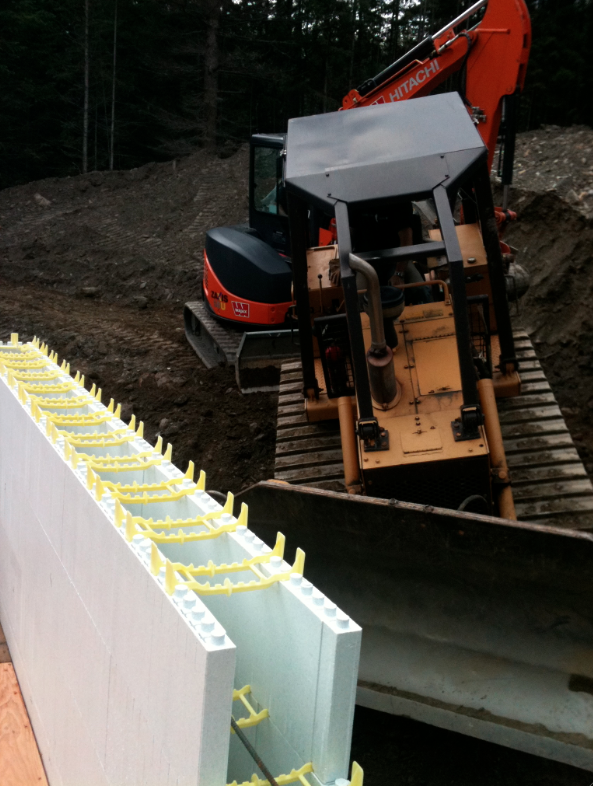
The cat hit a large flat sloped rock, and side slipped down stopping with the blade about 1/2" from the styrofoam wall.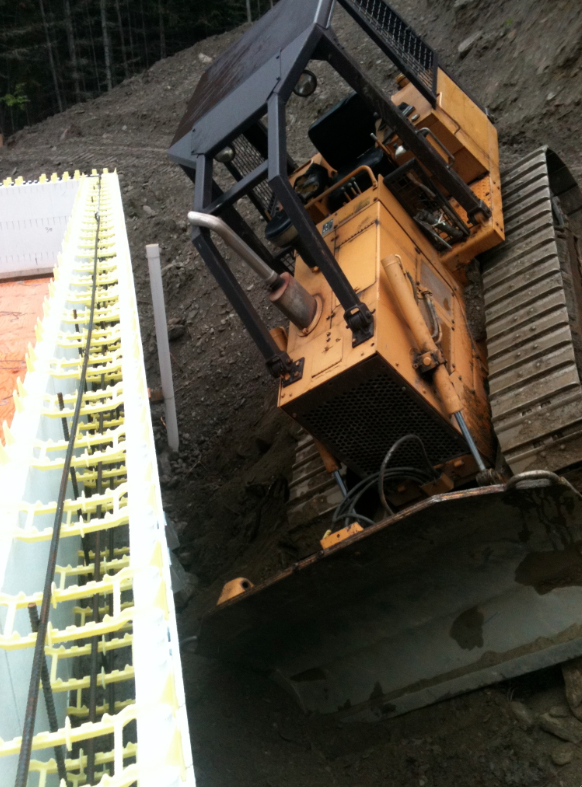
Our neighbour has a little excavator so we got him to come over and help extricate the cat avaoiding a "cat tastrophy"
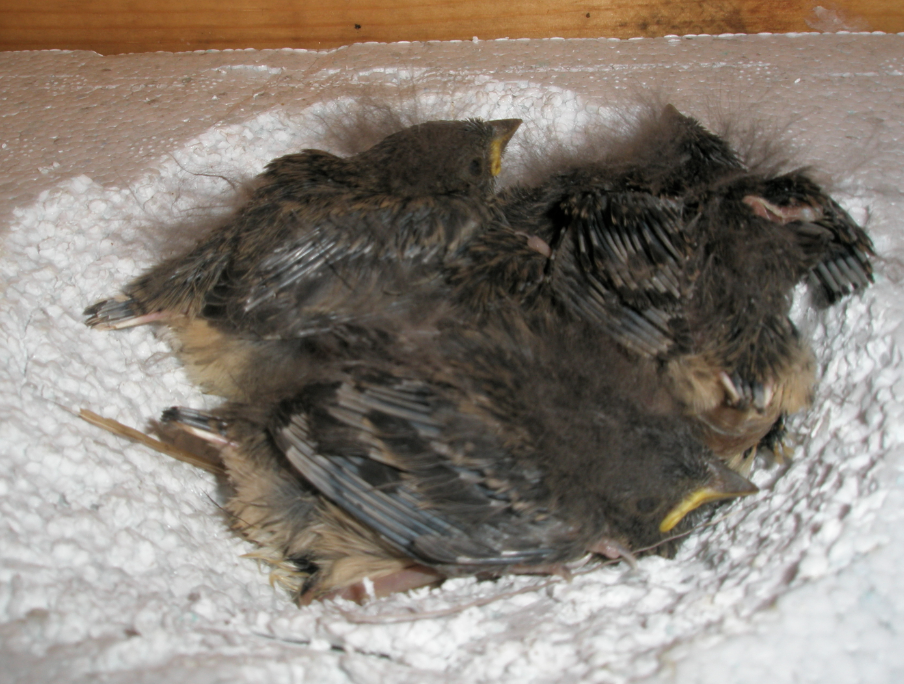
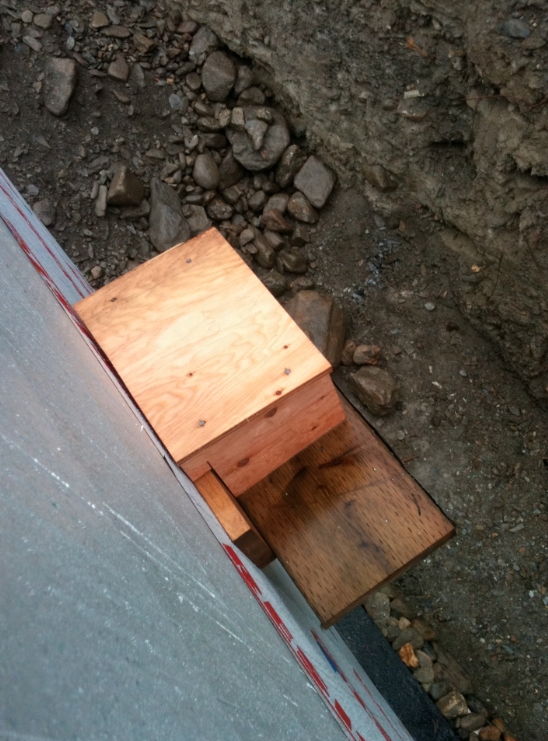
Just before backfilling we discovered a nest of Juncos in the dirt bank of the excavation. We built the a little styrofoam nest, and a plywood condo, and hung it off the Quadlock wall just above where the nest had been in the bank. It took the adult birds a couple of hours, but they eventually found the nestlings, and stated feeding them until they fledged and flew.
-
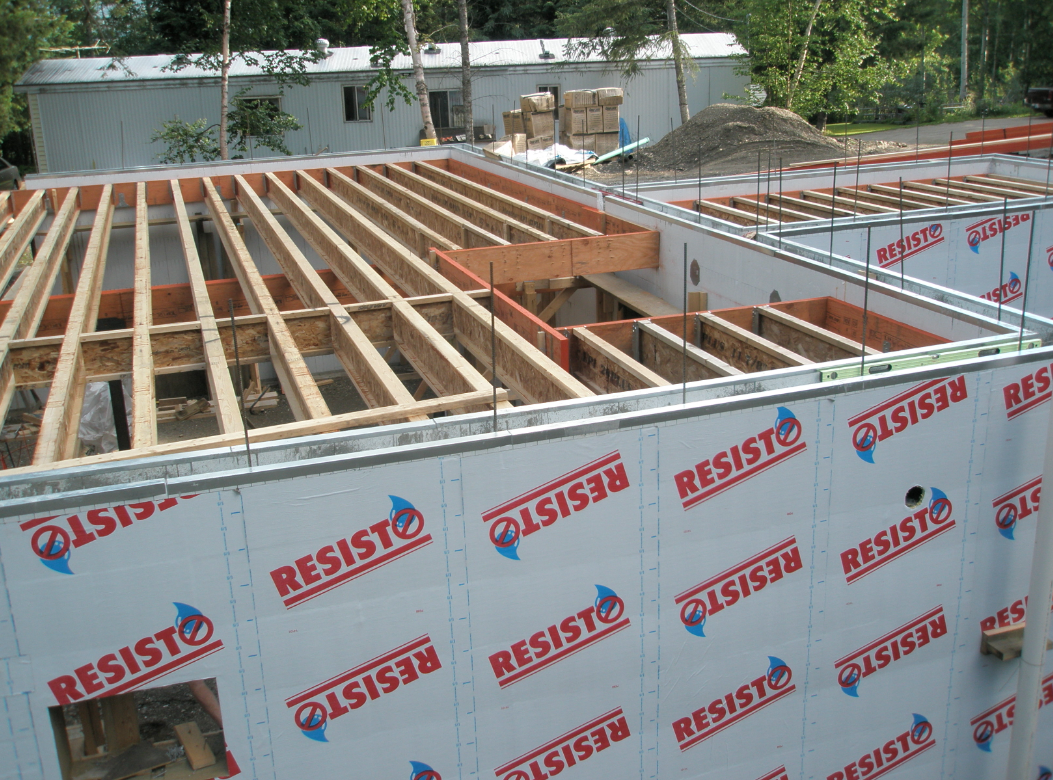
The floor is 11 7/8 TJI's, which as I mentioned we joist hung from the ledger LVLs spanning over top of the main beam. Then we put down a 3/4" (19mm) t&g subfloor and the second floor Quadlock walls up.
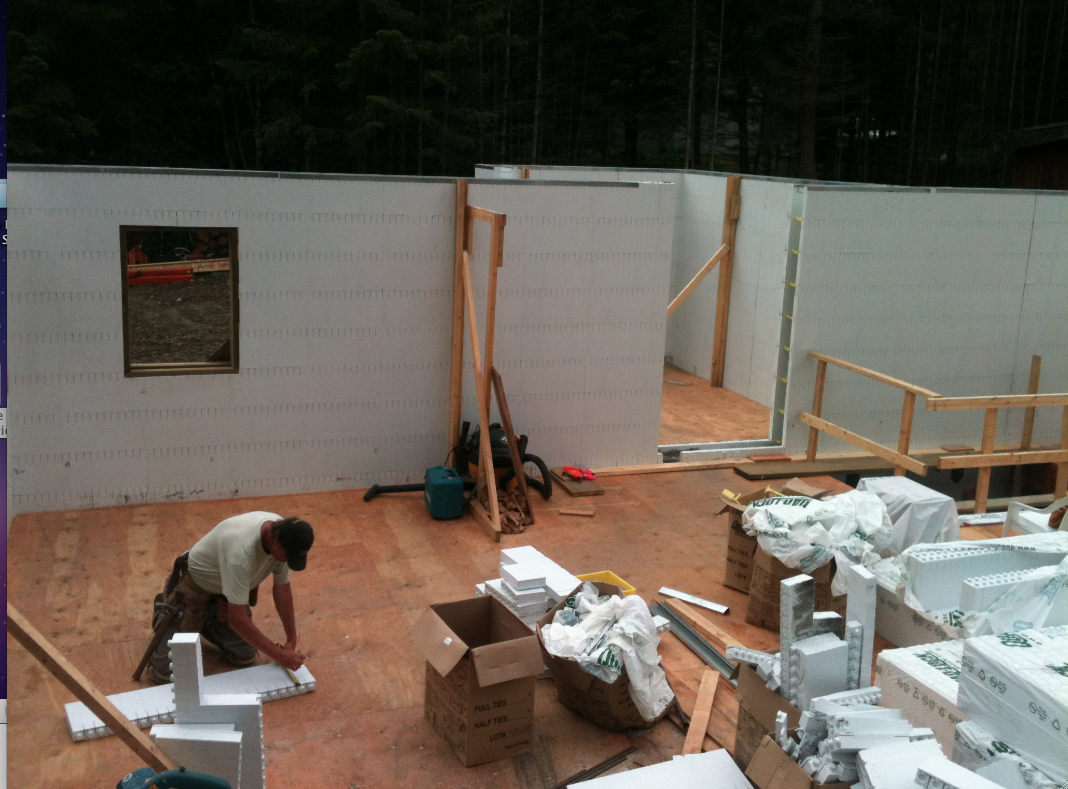
-
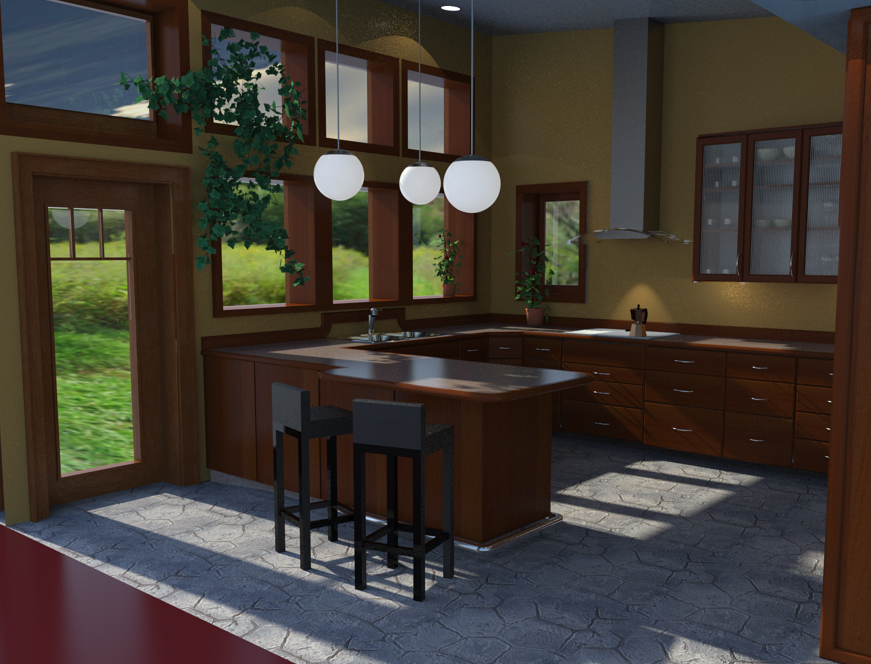
But the nice thing about being able to model is that you can keep refining the design process as you do the grunt work. So, we were busy working out what the kitchen was going to be like.
So back to SketchUp.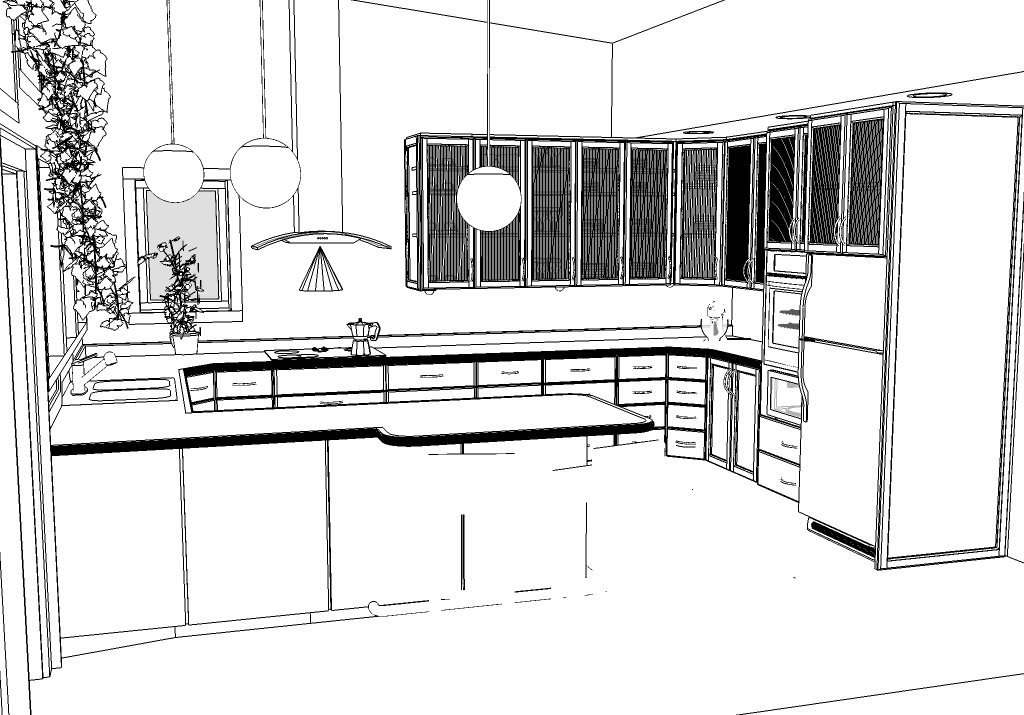
and over to Thea for some visuals.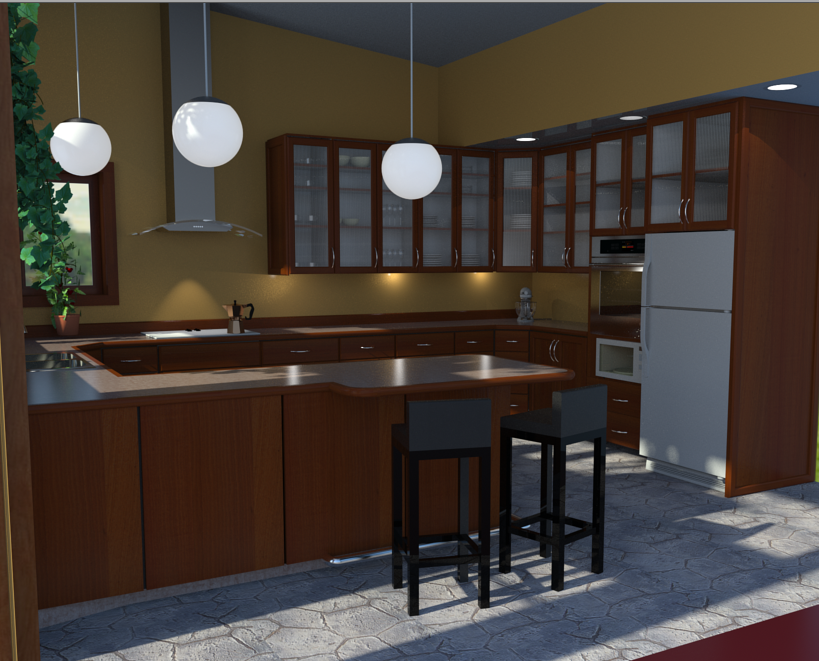
-
Dale,
Following this great thread as it is very interesting and informative. My favorite part is the two pictures of the Juncos! Most would not bother, but you chose to be a steward of your environment and friend of nature. Great to see this!

Dean
-
Dale:
In one of your early posts you mention that the ICFs are 4" of foam on one side, 2" on the other, which would give a reasonably insulated wall. (My pet peeve is the extremism of some folks in massively insulating walls/roofs, where they have long reached the point of diminishing returns compared to improving windows or some other system in the design.) Looking at the picture of the cat nearly hitting your wall, the inside and outside foam layers look the same thickness. Is this an illusion, or are both the inner and outer layers at this point 2" (or 4")?Compared to your situation, we didn't hit a single rock excavating for our house. We're on a mesa (I'm in New Mexico) whose what I'm told is called Aeolian - it's very dense sand deposited over a long period of time by the wind. It's very stable - you can dig a five foot deep trench with straight walls and it requires no shoring. (That's a practical statement, not a matter of safety practice. ) In digging our foundations (42" deep, 3' wide), we didn't encounter a single rock!
-
Dale, this is getting more interesting with each episode you post and turning into a Master Class. We are all following. BTW, did you model the bird house in SketchUp .... you will now have to keep us updated on the fledglings progress also.
-
@llaves said:
Dale:
In one of your early posts you mention that the ICFs are 4" of foam on one side, 2" on the other, which would give a reasonably insulated wall. (My pet peeve is the extremism of some folks in massively insulating walls/roofs, where they have long reached the point of diminishing returns compared to improving windows or some other system in the design.) Looking at the picture of the cat nearly hitting your wall, the inside and outside foam layers look the same thickness. Is this an illusion, or are both the inner and outer layers at this point 2" (or 4")?Compared to your situation, we didn't hit a single rock excavating for our house. We're on a mesa (I'm in New Mexico) whose what I'm told is called Aeolian - it's very dense sand deposited over a long period of time by the wind. It's very stable - you can dig a five foot deep trench with straight walls and it requires no shoring. (That's a practical statement, not a matter of safety practice. ) In digging our foundations (42" deep, 3' wide), we didn't encounter a single rock!
llaves.
Ours is 2" and 2" styrofoam with 8" concrete. I probably should have found that particular visual, as I just quickly pulled this one off the Quadlock website.
Although we get some extreme temperatures here (-40 F ) they seldom last for long.
When we did the heat loss calculations I did as you said, and looked at a cost/performance comparison. I also had a long talk with my contact at Quadlock, who is kind of a roving teacher, technician, and he advised that he uses the 4" combinations only when the temperatures get down really low for extended periods.
I have used 4"/8"/4" combination on the community hall in town here. On that building we were originally going for a Leed Standard, and the heating system is employing waste heat from the Ice Arena next door to it so we wanted to have really high insulation standards.
They are just completing the Ice arena connection now, so it will be interesting to get to see how it performs.
As for windows, I totally agree.We have gone with Low E, argon filled with superspacer. Again we opted out of triple glaze, as the cost performance projection just didn't seem worth it.I envy your rock situation. We have some the size of volkswagens.
When the fellow who owns the property next to ours saw our geo-exchange ground loops, he decided to go with it as well. When he dug he hit all clay, and in 1600 feet of trench hit 3 rocks. -
@mike lucey said:
Dale, this is getting more interesting with each episode you post and turning into a Master Class. We are all following. BTW, did you model the bird house in SketchUp .... you will now have to keep us updated on the fledglings progress also.
Mike
As I said I am a little behind on posting this as in reality we are just finishing framing, so I can tell you the Juncos were a real riot.
When they fledged, they moved in under a pallet of peel and stick roofing underlay, and since they are seed eater, kind of ground birds, they were constantly darting around the jobsite. -
In reality, I can't wait to get to the cabinetmaking part of the project, as this is my favourite thing in all the building process, but....
There is in fact the real "reality" .....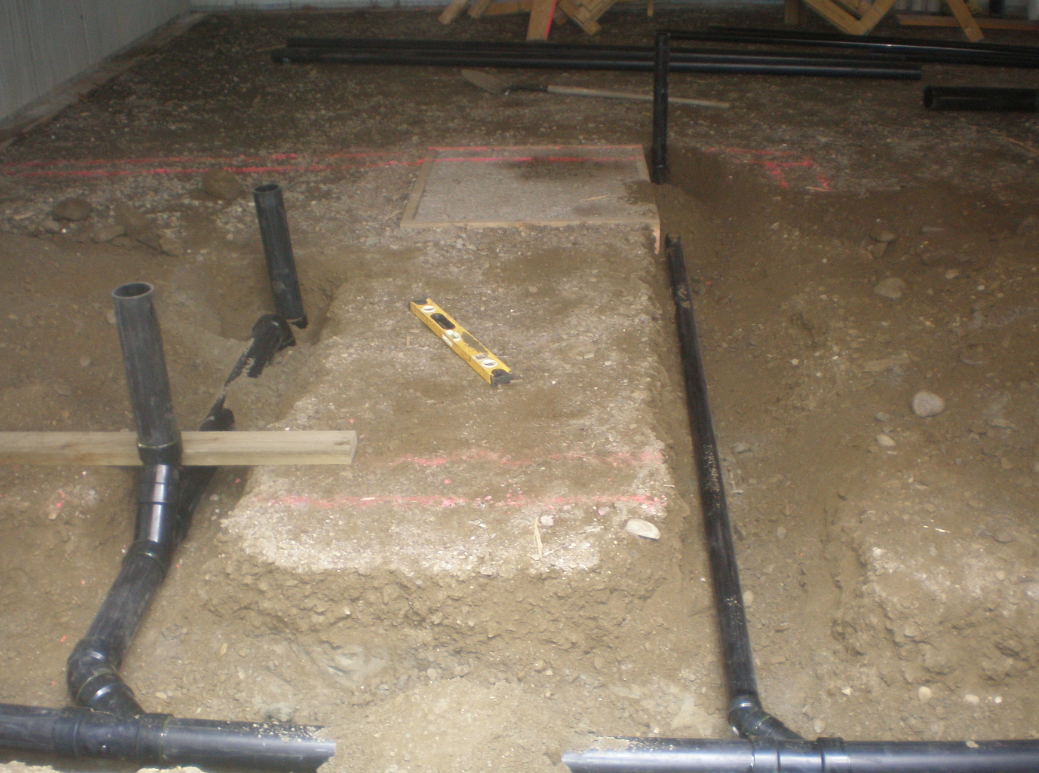
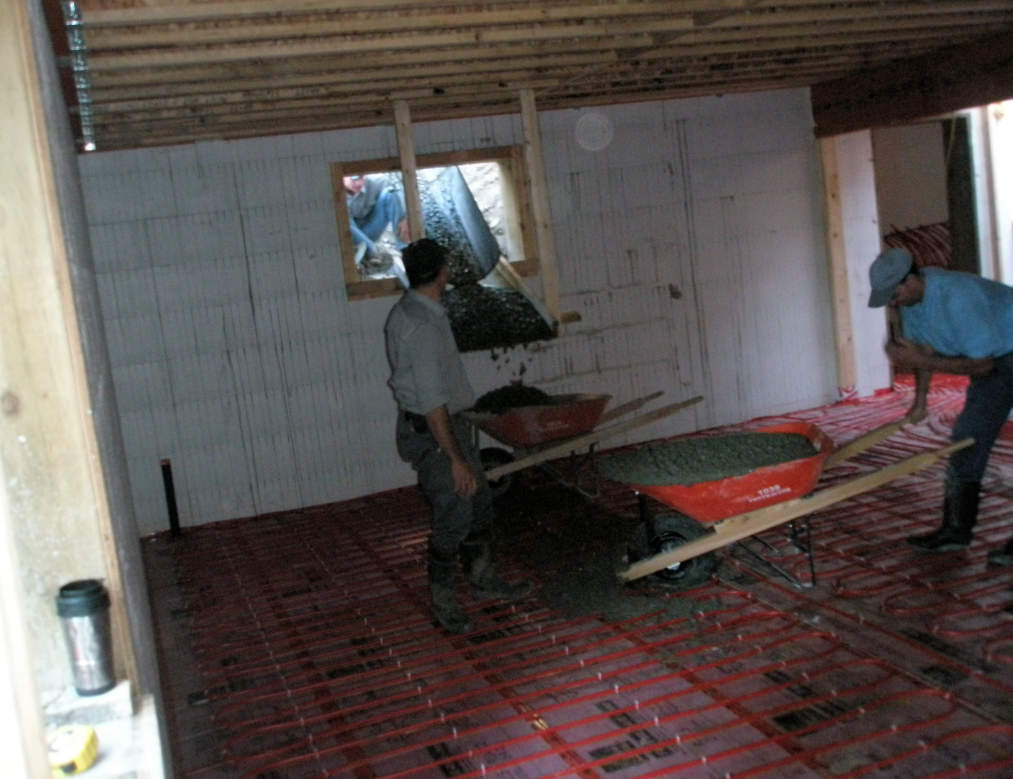
So the underground servicing goes in so that we can insulate the slab for infloor hydronics.
This is code here to have a minimum of R-12 under a heated slab. We have 2" foam which gives us R-14 mostly because R-12 is hard to get.
We also used this as a vapour barrier, and Judy tuck taped all the joints with connection to the Quadlock.
Then we added the 6X6 (152.4 X 152.4 mm )welded wire mesh, and were ready to pour.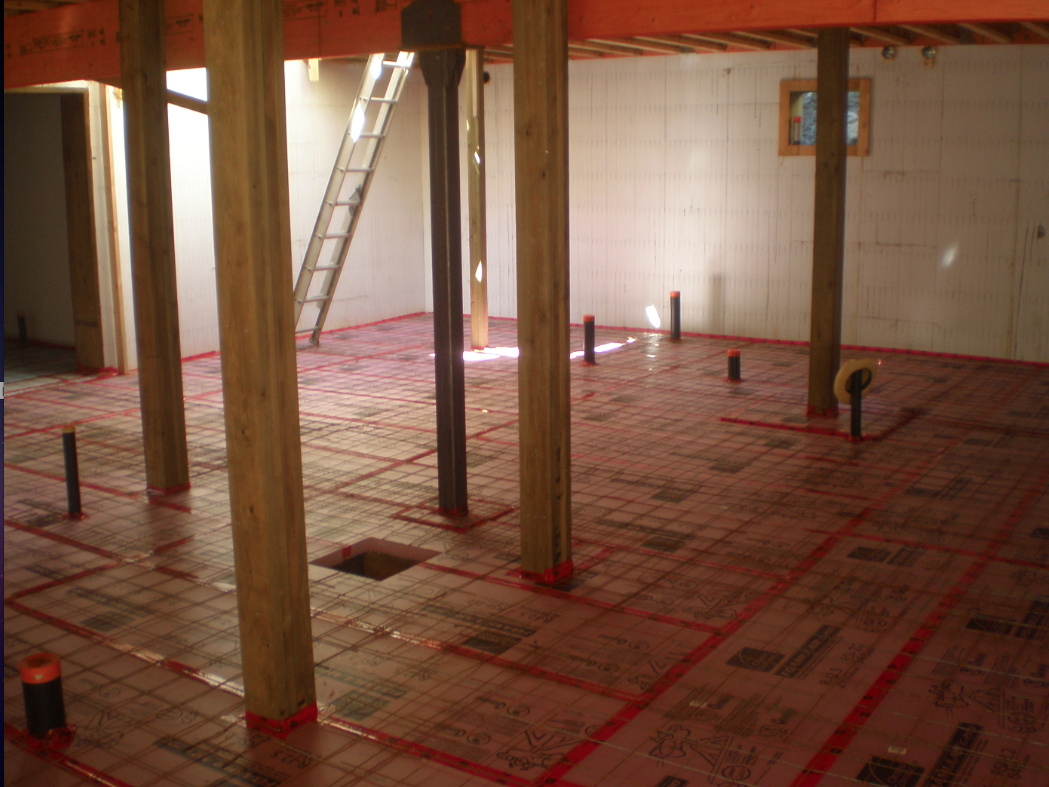
-
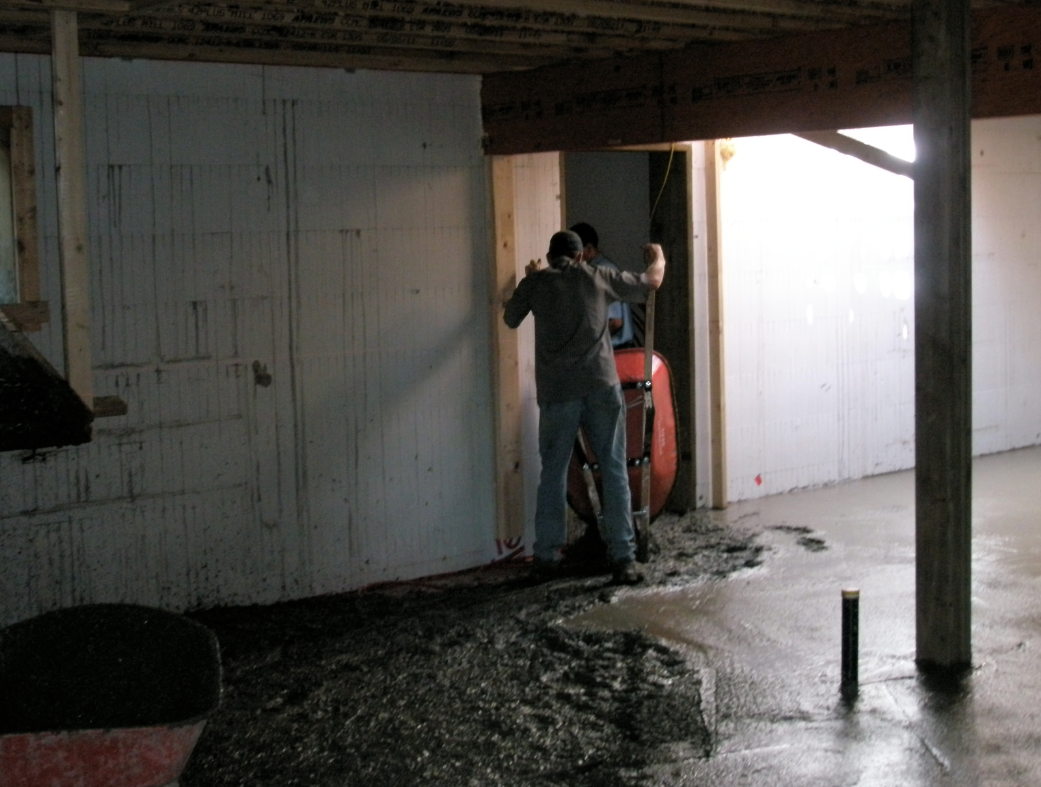
There is a community of Mennonites here, all of which are meticulous hard workers.
We subbed the concrete placement and finishing out to them.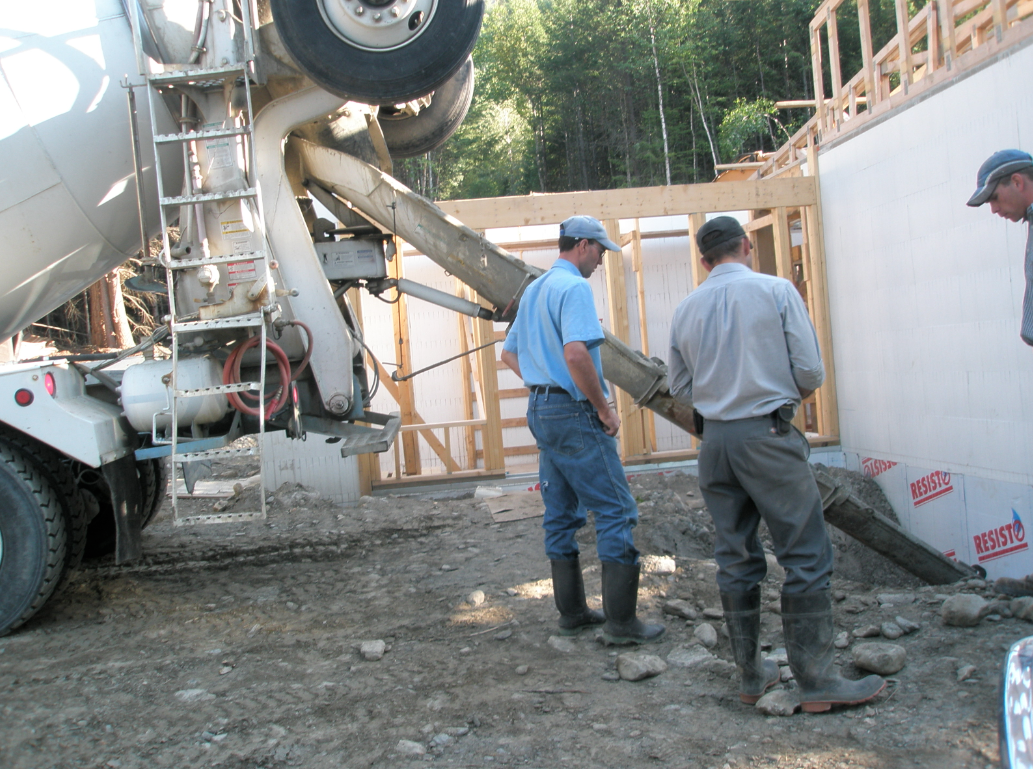
The last photo shows the hydronic pipes tied to the 6x6 mesh. The Geo-exchange system requires shorter loops, an maximum of 200'(61 m), and a 6" centre from pipe to pipe.
This is apparently because the system is more efficient if the water is returned at a slightly higher temperature.
We have done many water based Geo-exchange system, but this is my first ground based system, so I'm asking lots of questions, and generally being a pest.
-
Then on to trusses.
I was pretty specific about the style of trusses I wanted, as we had a few details we wanted to include, like extending overhangs of the lower chord so that it would act as a valance for potlights, and just internal ceiling shapes and heights.
Again SketchUp is just so easy to get your communications across.
I even convinced the tech to down load the free version so he could pull measurements, and walked him through the basics. Needless to say he was pretty impressed.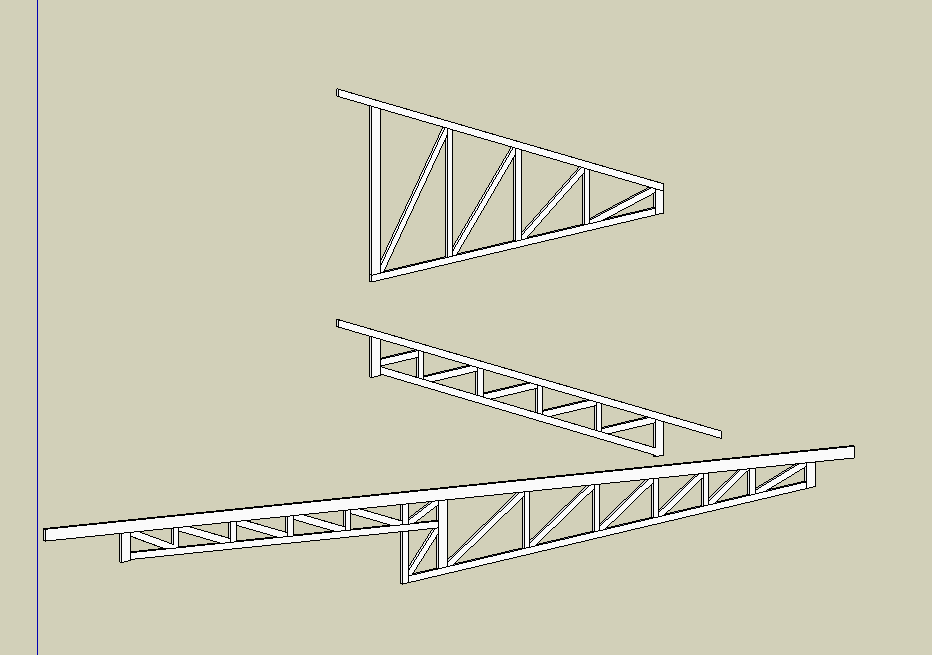
Living room trusses on LVL Beam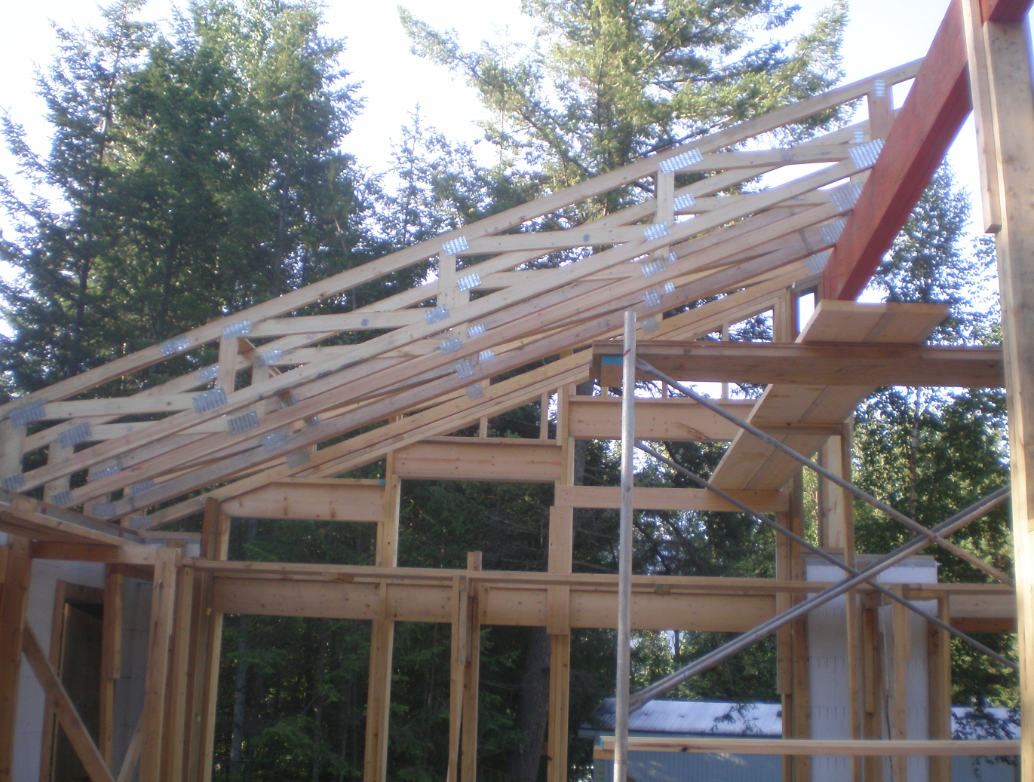
Framing the lookouts.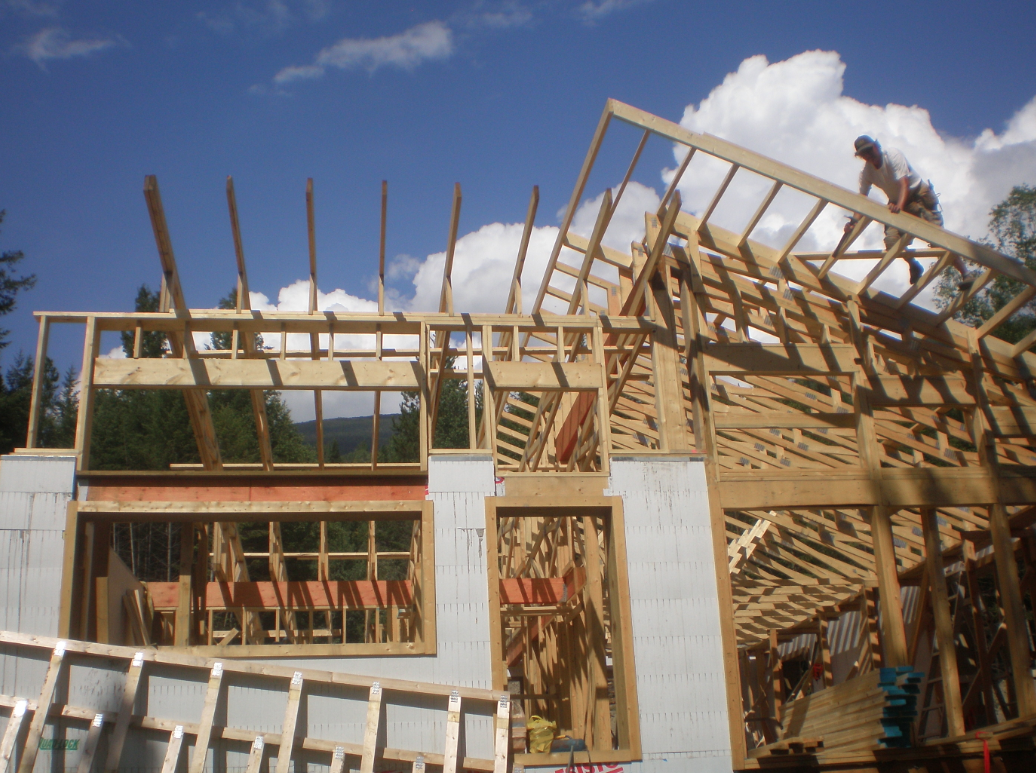
-
very tidy and clean all the process
huge job -
Juan
Thank you a very appreciated comment from you.Dale
-
Great stuff Dale.
Some complex trusses there especially the sloping one over the ??? room. I imagine the void will be useful for services.
Is there any chance we could have a look at the plan layout so we can get a good overview?
Mike
-
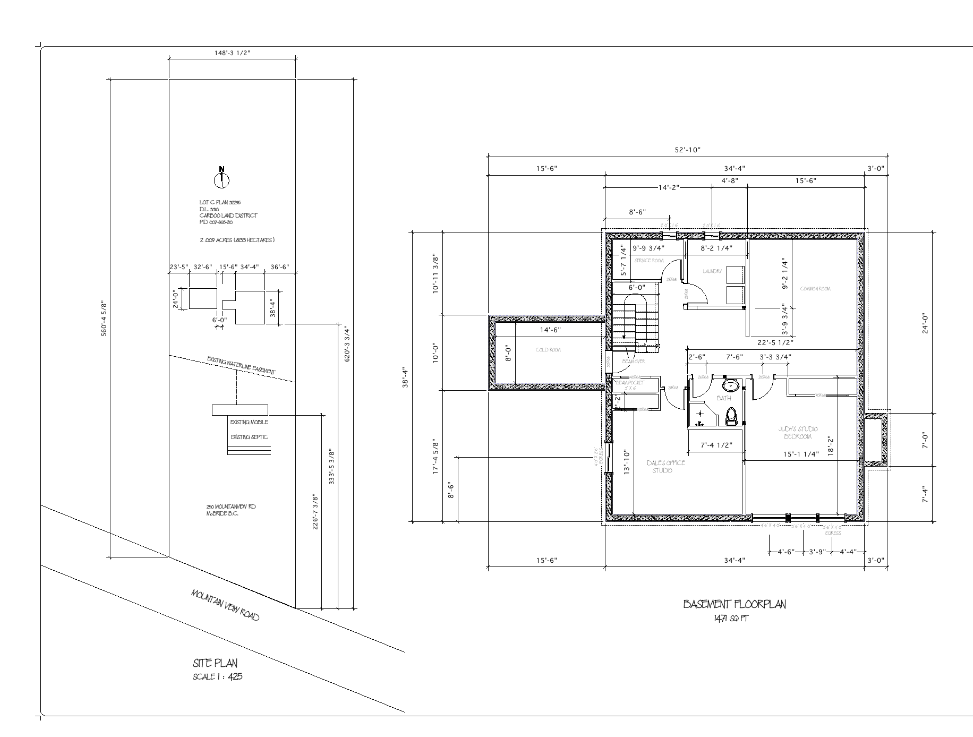
Hi Mike
Here are the floor plans for the main and the lower floor and a section.
Really crazy here right now so I will post some more shortly.
Cheers
Dale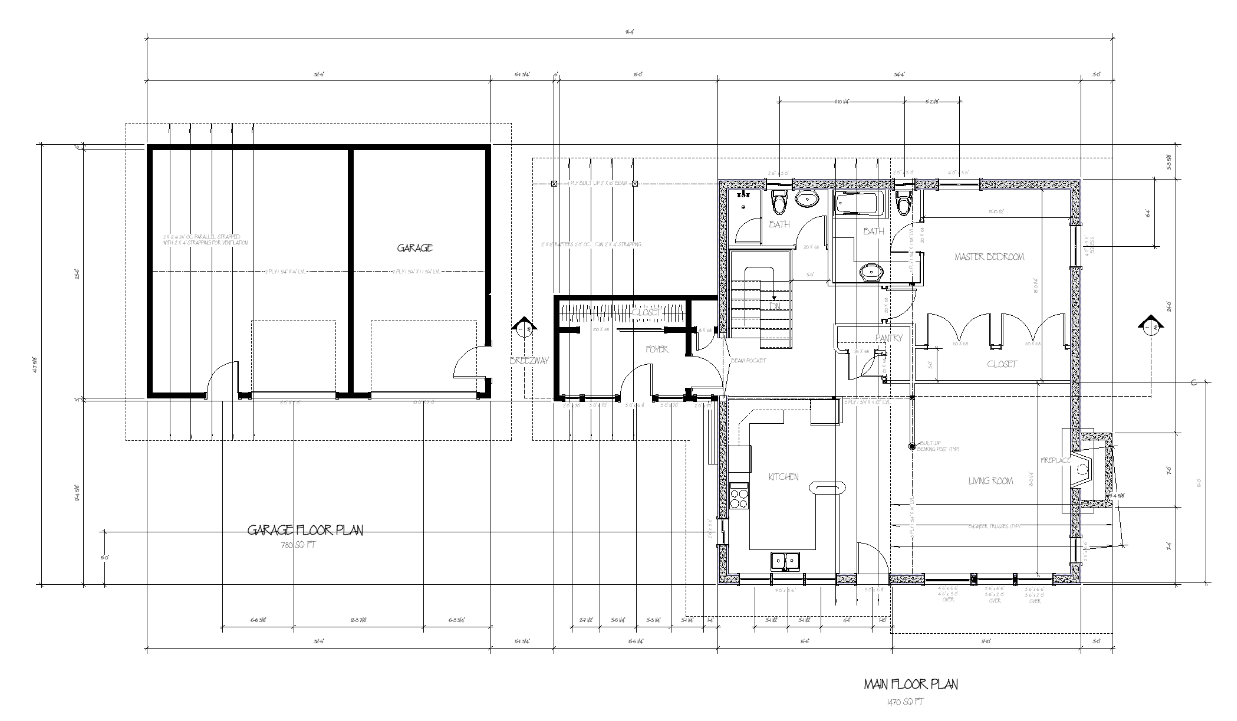

-
This is a hijack your own post notification:
As an aside to my own house project, another project on the books just had a grand opening.
This to was a from SketchUp to reality project, so I decided to include it as an aside.the SketchUp model: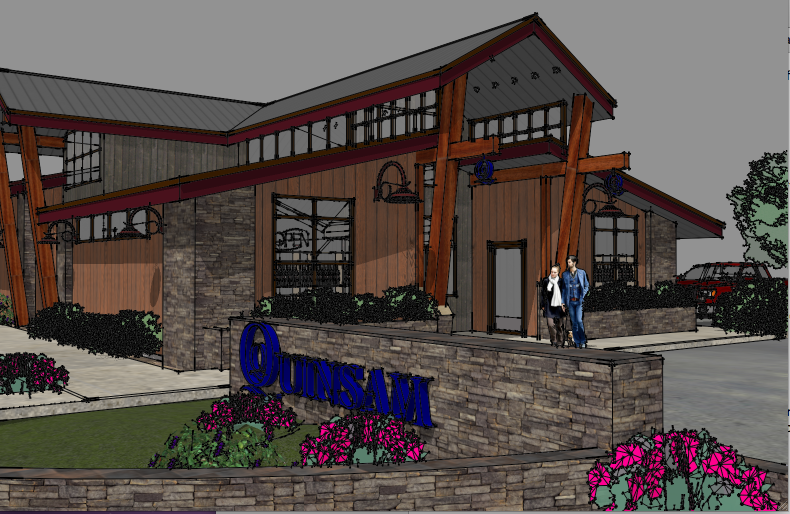
The rendering: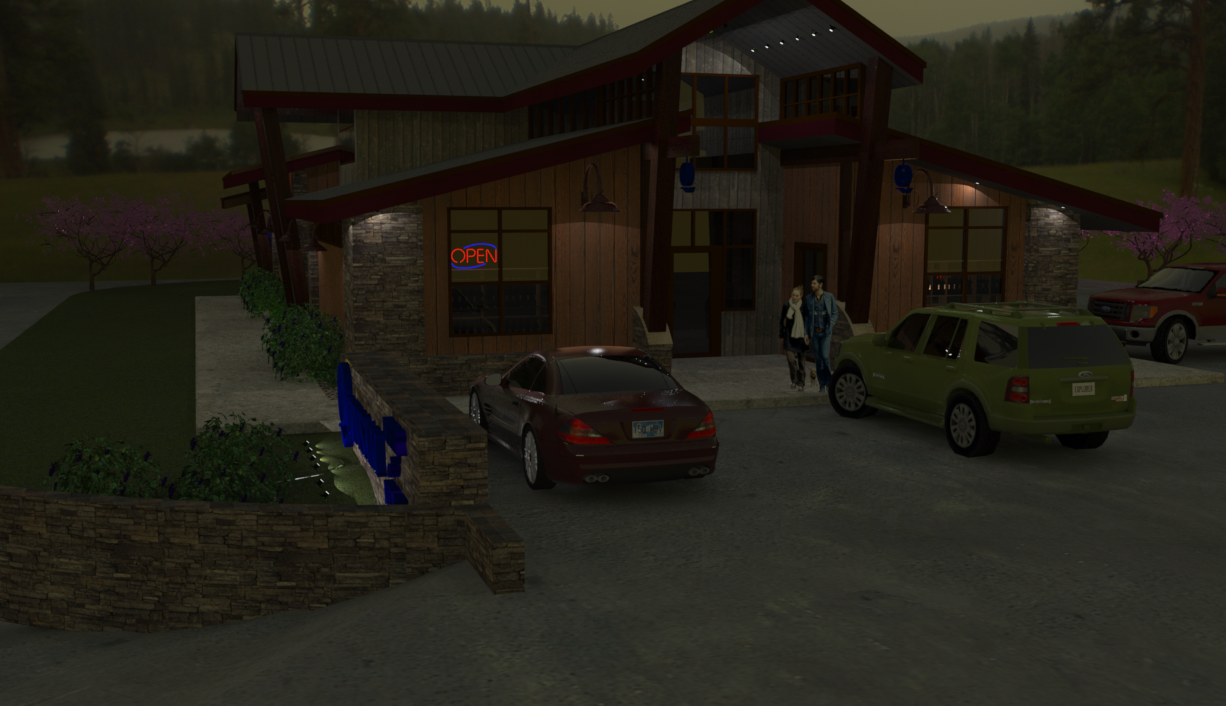
Reality: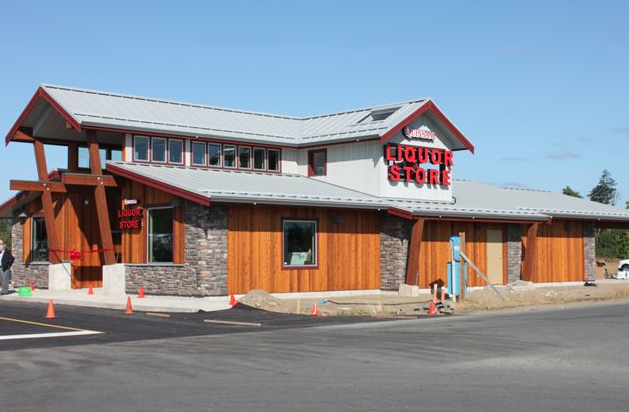
Opening ceremonies ribbon in place: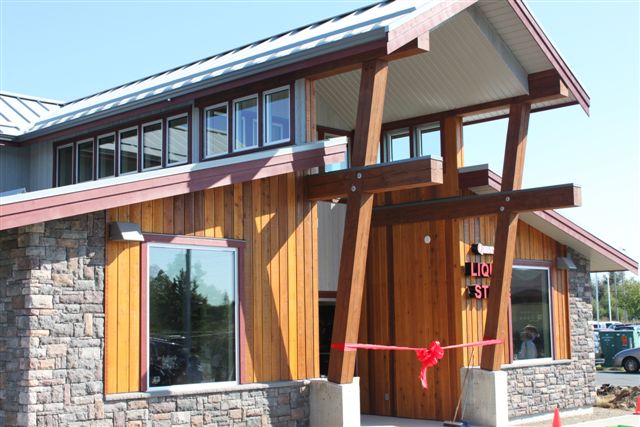
Interior Clerestory
-
Thanks for posting your house plans Dale. The layout works well. The house looks to be designed for two to three residents? BTW, I will be using your semi-circle direction line (on half landing) in my stairs plan in future
Hello! It looks like you're interested in this conversation, but you don't have an account yet.
Getting fed up of having to scroll through the same posts each visit? When you register for an account, you'll always come back to exactly where you were before, and choose to be notified of new replies (either via email, or push notification). You'll also be able to save bookmarks and upvote posts to show your appreciation to other community members.
With your input, this post could be even better 💗
Register Login


Advertisement