sketchucation logo sketchucation
    • Login
    ℹ️ Licensed Extensions | FredoBatch, ElevationProfile, FredoSketch, LayOps, MatSim and Pic2Shape will require license from Sept 1st More Info

    Trimming outside miters

    Scheduled Pinned Locked Moved Newbie Forum
    sketchup
    11 Posts 3 Posters 417 Views 3 Watching
    Loading More Posts
    • Oldest to Newest
    • Newest to Oldest
    • Most Votes
    Reply
    • Reply as topic
    Log in to reply
    This topic has been deleted. Only users with topic management privileges can see it.
    • F Offline
      Florida John
      last edited by

      Hi, I'm looking for a way to trim outside miters when running rope molding, as I have to cut and past each piece the corners are giving me a lot of trouble any help is most welcome.
      John

      1 Reply Last reply Reply Quote 0
      • Dave RD Offline
        Dave R
        last edited by

        John, how have you drawn the molding? You can use a cutting plane intersected with the molding to cut the miter. I've got an image that shows it. I'll post it shortly.

        Etaoin Shrdlu

        %

        (THERE'S NO PLACE LIKE)

        G28 X0.0 Y0.0 Z0.0

        M30

        %

        1 Reply Last reply Reply Quote 0
        • F Offline
          Florida John
          last edited by

          I pasting a rope molding ontop of a extruded crown.

          1 Reply Last reply Reply Quote 0
          • Dave RD Offline
            Dave R
            last edited by

            Did you draw the rope molding?

            Here's a quickie example of cutting the miter. The same process could be used for any molding.
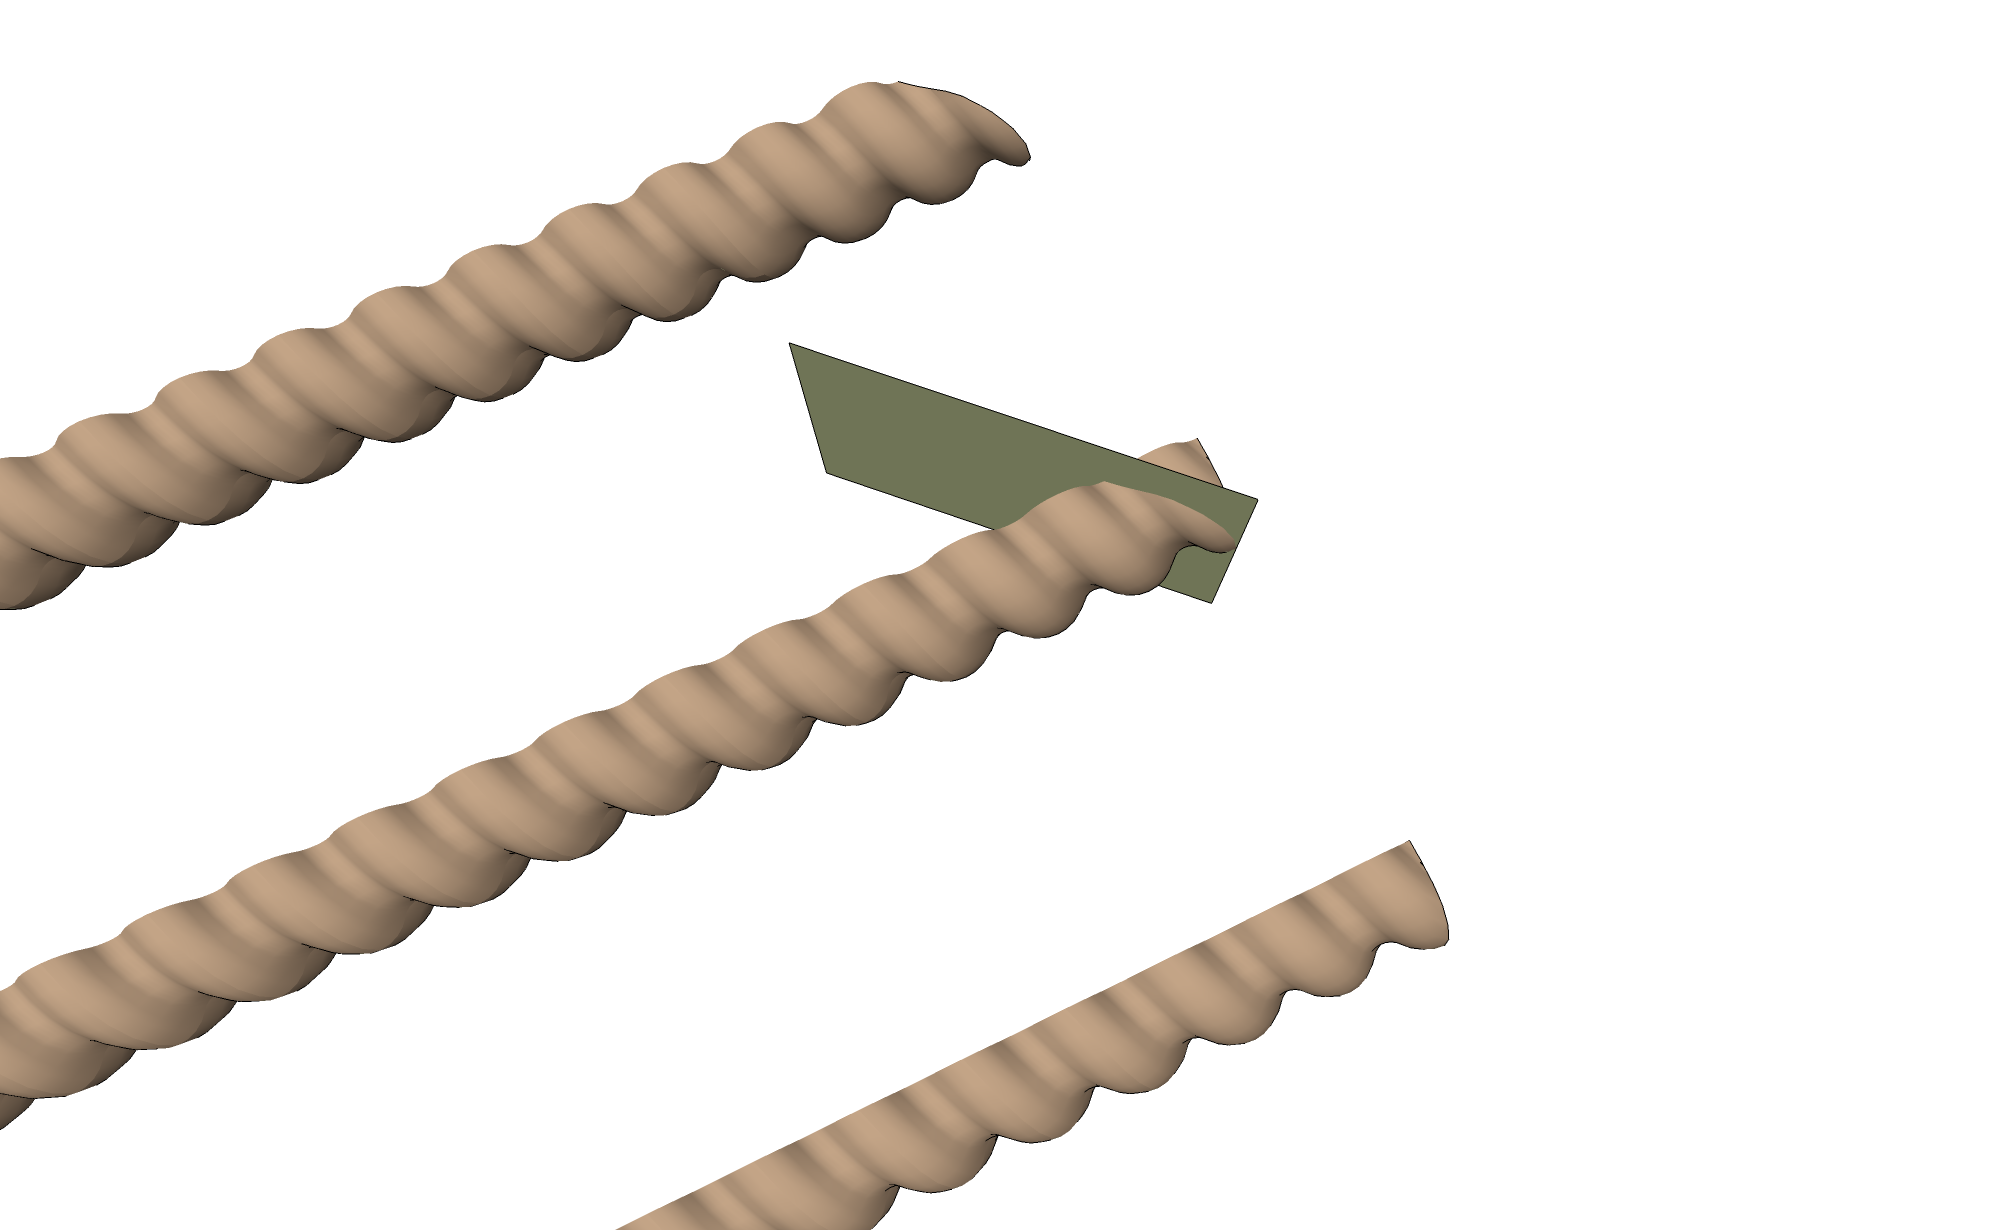
            rope.png

            From the bottom:

            Molding, unmitered.
            Cutting plane draw at location of miter.
            After selecting the cutting plane and the molding, running Intersect with Selection and deleting the waste we have the miter on the end.

            Etaoin Shrdlu

            %

            (THERE'S NO PLACE LIKE)

            G28 X0.0 Y0.0 Z0.0

            M30

            %

            1 Reply Last reply Reply Quote 0
            • F Offline
              Florida John
              last edited by

              THANK YOU DAVID, it's been driving me crazy for several hours this is going to make my life a lot easier.
              John

              1 Reply Last reply Reply Quote 0
              • Dave RD Offline
                Dave R
                last edited by

                Glad to help. Remember, as I said before, this same method can be used for any molding that needs to be mitered.

                Etaoin Shrdlu

                %

                (THERE'S NO PLACE LIKE)

                G28 X0.0 Y0.0 Z0.0

                M30

                %

                1 Reply Last reply Reply Quote 0
                • F Offline
                  Florida John
                  last edited by

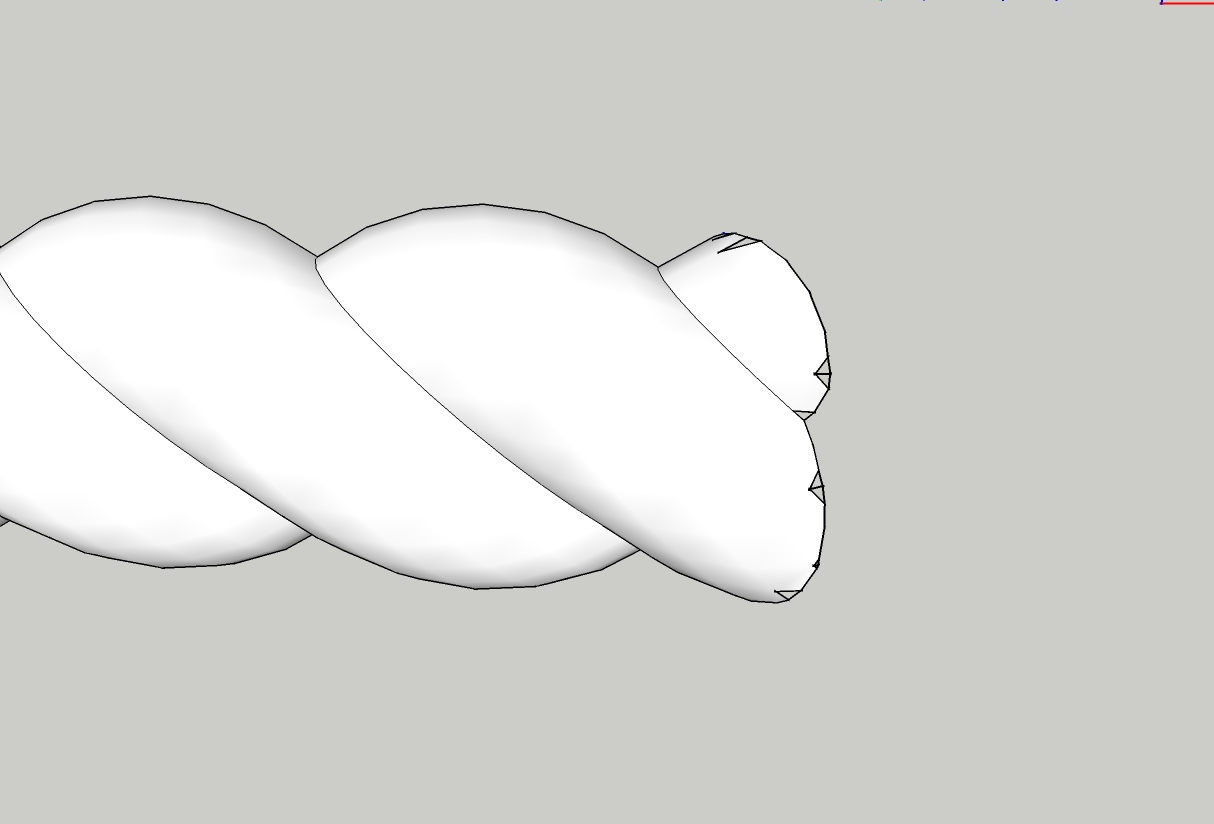
                  Hey David all went well at first and then this stated to happen i.e. fragmented miter joints. I have supplied an image so that you can see my issue, any ideas?


                  Miter rope problem.jpg

                  1 Reply Last reply Reply Quote 0
                  • TIGT Offline
                    TIG Moderator
                    last edited by

                    If you have very small faces [<~1mm] Sketchup/OpenGL has trouble forming them.
                    If the missing faces don't reform by drawing over one of the the edges of the 'gaps' try scaling the miter x10, trim it [it should then form without gaps], then scale down x0.1...

                    TIG

                    1 Reply Last reply Reply Quote 0
                    • F Offline
                      Florida John
                      last edited by

                      Thank you Tig, works like a charm.
                      John
                      P.S. I love this site, thanks to everyone.

                      1 Reply Last reply Reply Quote 0
                      • Dave RD Offline
                        Dave R
                        last edited by

                        John, as you've discovered, TIG is right on with his answer. He always is, though so there's nothing new there. 😉

                        An alternative to the scale up and scale back down process that I find easier is to make a copy of the component and scale that up by a factor of 10 or 100. I'll edit that large copy of the component and then, when I am finished with it, I close it for editing and just delete the large copy.Whatever is done to the large one also gets done to the small one so there are no holes. Of course this doesn't work if you are making groups instead of components.

                        If you do opt for scaling up and then back down, make sure you grab the same scale handle for both scaling operations so that the component winds up in the same place as it was before.

                        Etaoin Shrdlu

                        %

                        (THERE'S NO PLACE LIKE)

                        G28 X0.0 Y0.0 Z0.0

                        M30

                        %

                        1 Reply Last reply Reply Quote 0
                        • F Offline
                          Florida John
                          last edited by

                          Yes david I"m making components and thats a nice tip. Hope that I too have some useful knowlage to share.
                          John

                          1 Reply Last reply Reply Quote 0
                          • 1 / 1
                          • First post
                            Last post
                          Buy SketchPlus
                          Buy SUbD
                          Buy WrapR
                          Buy eBook
                          Buy Modelur
                          Buy Vertex Tools
                          Buy SketchCuisine
                          Buy FormFonts

                          Advertisement