Model This: Training
-
that looks pretty good jeff.. a little more in line with the approach i went with (uploading to youtube is taking forever atm
 )
)you mind showing how you made these splines? are the done in one shot from end to end or multiple splines welded together?
[edit] - now that i think about it.. that's sort of the way i tried doing the accelerate sofa: (building all the splines then skinning)
http://forums.sketchucation.com/viewtopic.php?p=206253#p206253i didn't really even think about doing it like that on this model.. maybe i'll give it a go and see if i can do it any faster/better that way.
-
Very nice indeed! sometimes, in such simple things we can see how powerful plugins are made for SketchUp. I've learned a very strong lesson here, though I consider myself a good sketchup user. Thanks for this.
You could use a tangent arc with 3 segments instead of 15 segments spline, I guess. -
here's a screen recording of the process i used.. now with voiceover

[flash=825,480:cib2xge9]http://www.youtube.com/v/3QaLys482sQ?fs=1&hl=en_US&color1=0x2b405b&color2=0x6b8ab6[/flash:cib2xge9]
http://www.youtube.com/watch?v=3QaLys482sQ&hd=1 -
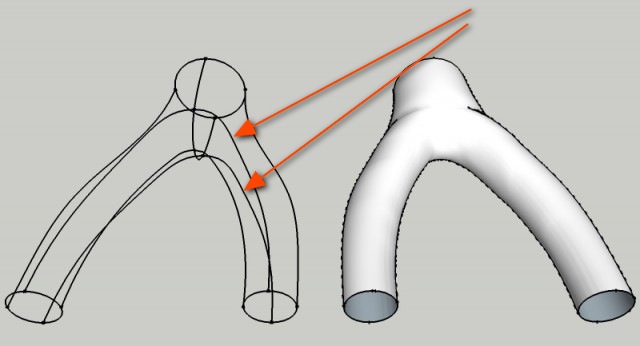
I simplified as much as I could by only doing 1/2 of the model frame, then copying/flipping it; this also gives the benefit of symmetry. The ends are circles. The bottom spline is a bezier also copied to the top, the outside spline is a bezier too. The inner spline is bezier with a basic arc, welded, to make the "groin" a smooth arc.
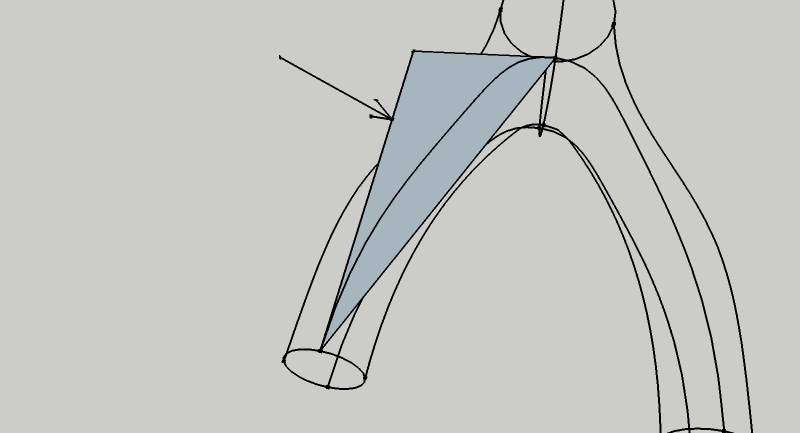
The edge(s) you are pointing to are duplicates. To make the spline I made a triangular "work surface" for lack of a better word, necessary because the bezier tools have minimal inferencing and it would be the only way to ensure that the line stayed within the volume of the object. I inferenced the first edge along the green axis (arrow), then completed the triangle where I wanted the spline to end/begin. Draw bezier as desired; I did inference the "groin" portion of the curve on the red axis in order to make a smooth transition across the arch.
-
Holy sh!t, thanks Jeff - I never thought to use undo to go back in order to copy a face, then move forward to paste it - brilliant.
-
Yea that go back and copy forward is a nice little trick. I probably thought it would violate the laws of causality and entropy and so never tried it. But Jeff, I believe is a Tralfamadorian and I am a mere earthling.
-
@unknownuser said:
It is fascinating to see the differences in the interpretation of the shape. I guess it is about expectation. So far you are mimicking but neither shape look much like the original on close inspection....or is the expectation lower than I think in this case.
it's more about the approach.. which could be applied to actual dimensions if need be.
fwiw, the original picture was drawn earlier today in the same loose manner. it's a lot easier to do in rhino but i wanted to see how people might approach it in sketchup.
[edit] here's how the original one was drawn.. (and you'll notice i took a similar approach in sketchup)
a lot shorter though no voiceover.
[flash=640,385:2113rnjk]http://www.youtube.com/v/iWY0tu_xoaA?fs=1&hl=en_US&color1=0x2b405b&color2=0x6b8ab6[/flash:2113rnjk] -
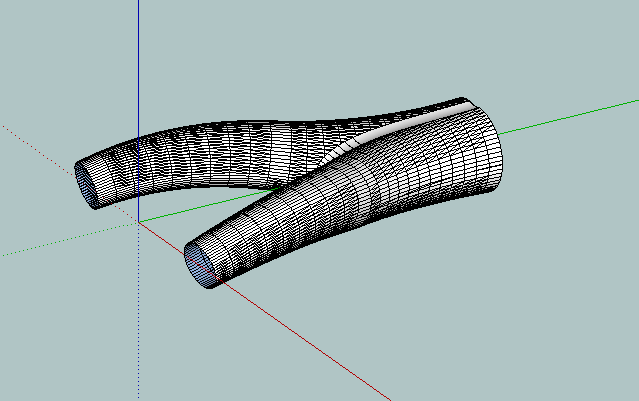
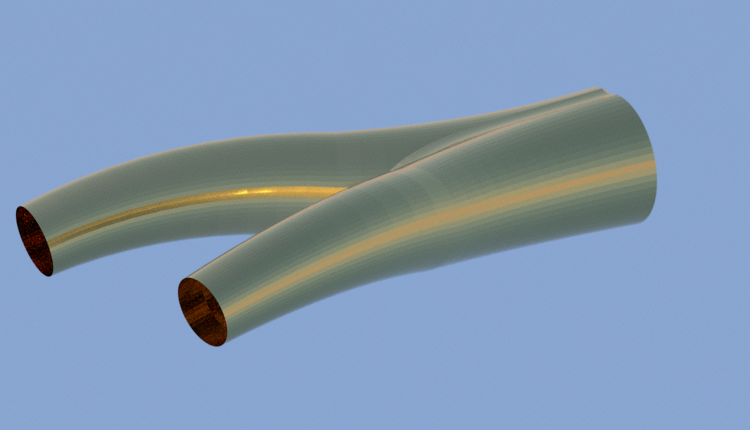
A different method... Taper maker and follow me.. Fun challenge
-
Hey,, Nice training!
Hi Jeff,
I see you pursue with your specific technique using Uniform B-Spline
Bravo for the video which explains very well.
And also I must say that watching the second video, Rhino seems to be an extraordinary modeler!!!thanks, simon
-
Nice Jeff, the video really helps understand the process.
Here's another simple training exercise...I'm curious how you guys model the intersection of a curb and driveway, or curb and crosswalk. I'm hoping there is an easier way than I currently do it. I'll post my method a little later.
Reference image of what I mean...
-
i take it the curb's profile is angled sides with a flat top and rounded edges?
something like this?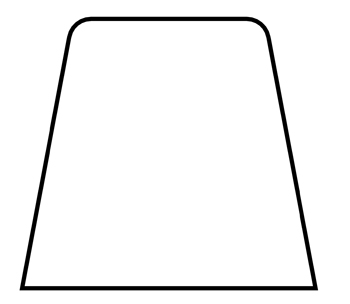
[going with modelhead's advice.. i'll update the top post to highlight&link to additional challenges added to the thread]
-
Like this:
Then it flattens out at the driveway.
Edit...like this:
-
oh, i didn't see your other picture prior to uploading this video but i think you can do it the same way as i'm showing only without the arc.. just an angle down for followme..
[flash=853,505:1qourajk]http://www.youtube.com/v/Uxr3hGcRACw?fs=1&hl=en_US&color1=0x2b405b&color2=0x6b8ab6[/flash:1qourajk]
http://www.youtube.com/watch?v=Uxr3hGcRACw&hd=1 -
Slick!

-
Hi Jeff,
You are "on the fly", please keep it on

RE1:
I would really like to love Su developing team as I love SketchUp and its fair community.. But What they do and what they don't do is unpleasant to me . Boolean Tools is their tool of the year (one tool=one upgrade: I'm not kidding so much) (
  ) and they dig one more step the gap between free and pro versions. I say to u "GSUTeam : your mind is wrong! Can you hear that?"
Anyway I have bought Whaat BoolTools for long and for 10$ and which works perfectly until SU5 so Dear team no matter to spend xxx$ for SU8 pro
Re2:
@jim said:
Holy sh!t, thanks Jeff - I never thought to use undo to go back in order to copy a face, then move forward to paste it - brilliant.
+1
 it is also what I had thought when viewing the video.
This remind me a tutorial which was on the old SCF tutorials section
A tutorial dealing as you do with the "Undo command" and named "Back to the futur"
At this time I was new to SketchUP and the concept was hard to me.
Now I can take advantage of it, it has disappeared...But hey hey
There is Internet Wayback Machine !!
and Here is Back to the future tutorial:Cheers,
simon.
-
@mitcorb said:
Yea that go back and copy forward is a nice little trick. I probably thought it would violate the laws of causality and entropy and so never tried it. But Jeff, I believe is a Tralfamadorian and I am a mere earthling.
LOL.
i had to google some of those words to see what you were saying. funny
@simon le bon said:
Hey,, Nice training!
Hi Jeff,
I see you pursue with your specific technique using Uniform B-Spline
Bravo for the video which explains very well.
And also I must say that watching the second video, Rhino seems to be an extraordinary modeler!!!thanks, simon
that move i do with the extension line for the b splines is basically an adaptation of what i see happening in other modelers only those one usually do it automatically

notice in the rhino video that i don't do any of that stuff because it's already happening within the tools.and yeah, rhino is great.. i'm slowly but surely learning the ins/outs of it and it may just one day eliminate sketchup from my workflow
 [actually, i don't really think it will becasue sketchup is just way too fast to draw simple objects (walls,slabs,etc.) which in reality is most of a drawing i may do.. when the compound curves come into play though, i'll be using rhino for sure.
 -
That's really close to how I made the curb, Jeff. Your way is faster using the Solid tools...I need to learn the ins and outs of them.
Here's what I did:
YouTube - Dropped Curbs in Sketchup
[flash=640,385:vyudgand]http://www.youtube.com/v/u2Hb3NF6ZZg?fs=1&hl=en_US[/flash:vyudgand]I split the curb into 2 sections, made a separate follow-me path for each section, then used Intersect to get rid of the excess (I didn't have SU8 then). Now, I couldn't get good results with Union, maybe because of overlapping faces? I'll have to play more with the Solid Tools.
-
Jeff wrote:
"LOL.
i had to google some of those words to see what you were saying. funny "
"Well, I don't do too much else around here, so, if I can make one person laugh, it's not a total loss.

-
Liking the videos Jeff. Make things seem so easy!
Advertisement


