sketchucation logo sketchucation
    • Login
    ℹ️ Licensed Extensions | FredoBatch, ElevationProfile, FredoSketch, LayOps, MatSim and Pic2Shape will require license from Sept 1st More Info

    Simulate a Wood Carving?

    Scheduled Pinned Locked Moved SketchUp Discussions
    sketchup
    29 Posts 8 Posters 4.2k Views 8 Watching
    Loading More Posts
    • Oldest to Newest
    • Newest to Oldest
    • Most Votes
    Reply
    • Reply as topic
    Log in to reply
    This topic has been deleted. Only users with topic management privileges can see it.
    • M Offline
      mgfranz
      last edited by

      Dave, how ya been? Ya, that is exactly what I am looking for!

      Thanks!

      Mark

      "If you like what you do, it will never be work..."
      In memory of Sam Maloof, 1916-2009

      1 Reply Last reply Reply Quote 0
      • Dave RD Offline
        Dave R
        last edited by

        Mark,

        I'm doing well. You?

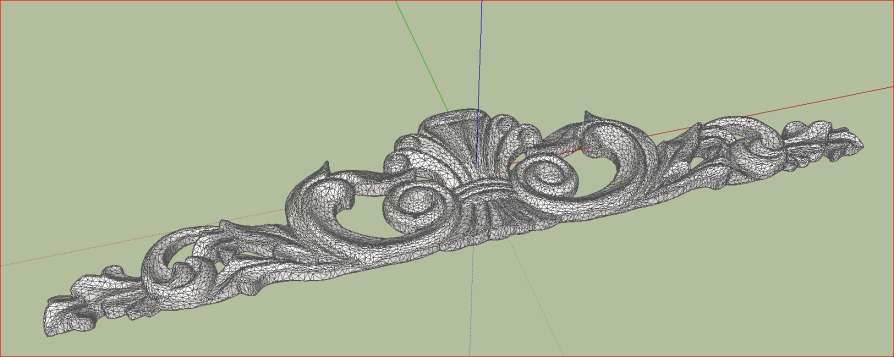
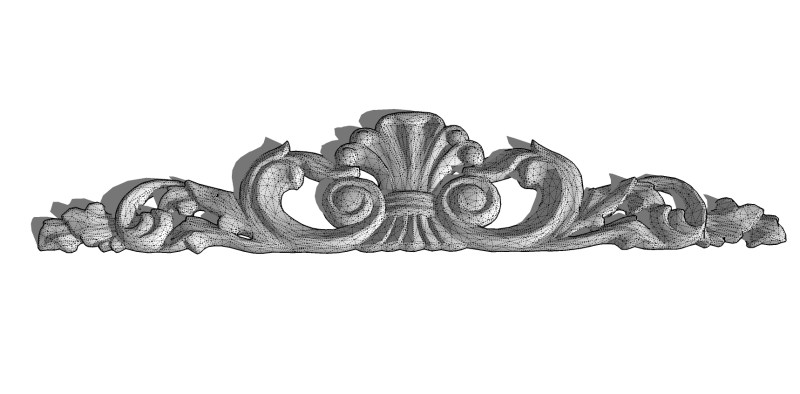
        Have a play with basically what I did in the video. I expect you aren't planning to use the applique to create a pattern but rather to give the idea of what it would look like. So do things to keep it simple like only drawing half of it, making it a component and then make a mirrored copy of it for the other half. Use low segment counts for arcs and other curves so you don't end up with file bloat.

        It's too bad that image isn't a better one.

        cheers,

        Dave

        Etaoin Shrdlu

        %

        (THERE'S NO PLACE LIKE)

        G28 X0.0 Y0.0 Z0.0

        M30

        %

        1 Reply Last reply Reply Quote 0
        • charly2008C Offline
          charly2008
          last edited by

          Hi Dave,

          below a link where you can download 3D models as *stl files. Maybe it is helpfull.

          favicon

          (www.osbornewood.com)

          Charly


          Bild1.jpg


          carving.zip

          He who makes no mistakes, makes nothing

          1 Reply Last reply Reply Quote 0
          • Dave RD Offline
            Dave R
            last edited by

            Yes, indeed Charly. That's the same onlay I worked from although mine is less than 1 Mb in file size.

            Etaoin Shrdlu

            %

            (THERE'S NO PLACE LIKE)

            G28 X0.0 Y0.0 Z0.0

            M30

            %

            1 Reply Last reply Reply Quote 0
            • daleD Offline
              dale
              last edited by

              Simon had a good set of tutorials that may help out..http://forums.sketchucation.com/viewtopic.php?p=62185#p62185

              Just monkeying around....like Monsanto

              1 Reply Last reply Reply Quote 0
              • charly2008C Offline
                charly2008
                last edited by

                Hi Dave,

                I have no idea how you made the model in SketchUp. Would you even show us a start.

                Charly

                He who makes no mistakes, makes nothing

                1 Reply Last reply Reply Quote 0
                • Al HartA Offline
                  Al Hart
                  last edited by

                  These wood carvings are a good use of solid wood materials in rendering packages.

                  Here I rendered the model with a solid wood texture (Which treats the model as if it were carved from the wood - sculpting the grain into the model.)

                  textured-carving2.jpg

                  Here is a closeup of the solid wood grain detail:

                  http://wiki.renderplus.com/images/d/d8/Textured-carving3.jpg

                  Al Hart

                  http:wiki.renderplus.comimageseefRender_plus_colored30x30%29.PNG
                  IRender nXt from Render Plus

                  1 Reply Last reply Reply Quote 0
                  • GaieusG Offline
                    Gaieus
                    last edited by

                    That's nive UV mapping, Al. It is definitely not a nativeSketchUp, planar projection...

                    Gai...

                    1 Reply Last reply Reply Quote 0
                    • GaieusG Offline
                      Gaieus
                      last edited by

                      OK, I see. Nifty technique; I have to bow my head.
                      <bowing head smiley inserted here>

                      Gai...

                      1 Reply Last reply Reply Quote 0
                      • Al HartA Offline
                        Al Hart
                        last edited by

                        @gaieus said:

                        That's [nice] UV mapping, Al. It is definitely not a nativeSketchUp, planar projection...

                        These solid textures - which many rendering packages can do - do not use UV mapping. Instead they define a 3D texture - defining how the wood grain appears based on location in 3D space, rather than a position on the surface - and then "cut" the wood out of the 3D texture.

                        I first saw it when we did our RenderMan interface to ARRIS Cad in the early 90's. But until we had a good sculpting system like SketchUp, it was hard to find good models to demonstrate the technique.

                        Al Hart

                        http:wiki.renderplus.comimageseefRender_plus_colored30x30%29.PNG
                        IRender nXt from Render Plus

                        1 Reply Last reply Reply Quote 0
                        • M Offline
                          mgfranz
                          last edited by

                          @dave r said:

                          Maybe this would give you some ideas about how to make those tapered flutes? The ones I did are all the same and, compared to your example, inside out but the process would be similar. You only need to draw half of it of course.

                          Dave, I'm having a hard time doing the rotation to create the "cone" along the 15 degree line as described in your videos. I created the curved and welded line that is to become the "petal" of the fan, along the blue axis. Selected the curved line then snapped the red axis with the rotate tool, but this is where I get lost, I must be missing a step somewhere cause when I try to rotate no matter what I try I end up with cylinder, it won't use the 15 degree line as it's rotation point.

                          I hope this explanation makes sense.

                          "If you like what you do, it will never be work..."
                          In memory of Sam Maloof, 1916-2009

                          1 Reply Last reply Reply Quote 0
                          • M Offline
                            mgfranz
                            last edited by

                            OK, figured out what I was doing wrong, I wasn't following the 15 degree line with holding the mouse button down.

                            But how did you make 6 separate new lines in one click like that?

                            "If you like what you do, it will never be work..."
                            In memory of Sam Maloof, 1916-2009

                            1 Reply Last reply Reply Quote 0
                            • M Offline
                              mgfranz
                              last edited by

                              @mgfranz said:

                              OK, figured out what I was doing wrong, I wasn't following the 15 degree line with holding the mouse button down.

                              But how did you make 6 separate new lines in one click like that?

                              Never mind, got that figured out too... 😳

                              "If you like what you do, it will never be work..."
                              In memory of Sam Maloof, 1916-2009

                              1 Reply Last reply Reply Quote 0
                              • soloS Offline
                                solo
                                last edited by

                                Lower than 1mb


                                carving1.skp


                                carving1.jpg

                                http://www.solos-art.com

                                If you see a toilet in your dreams do not use it.

                                1 Reply Last reply Reply Quote 0
                                • Dave RD Offline
                                  Dave R
                                  last edited by

                                  Thanks Pete. I haven't had time to do anything to show here so I'm glad you did.

                                  Etaoin Shrdlu

                                  %

                                  (THERE'S NO PLACE LIKE)

                                  G28 X0.0 Y0.0 Z0.0

                                  M30

                                  %

                                  1 Reply Last reply Reply Quote 0
                                  • charly2008C Offline
                                    charly2008
                                    last edited by

                                    Hi Pete,

                                    I have reduced the polygons with Cinema 4D by 50%. But the quality seems worse than in your model. The size is still 1.81 MB. The method that you have achieved it? Or is it your secret?

                                    Charly


                                    Unbenannt2.JPG

                                    He who makes no mistakes, makes nothing

                                    1 Reply Last reply Reply Quote 0
                                    • Dave RD Offline
                                      Dave R
                                      last edited by

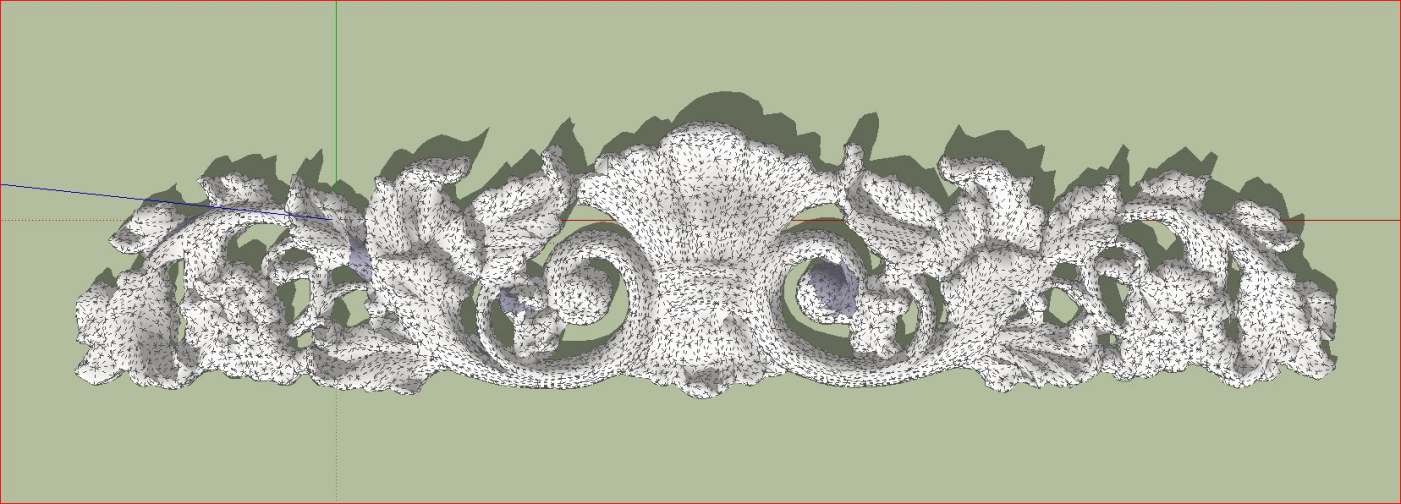
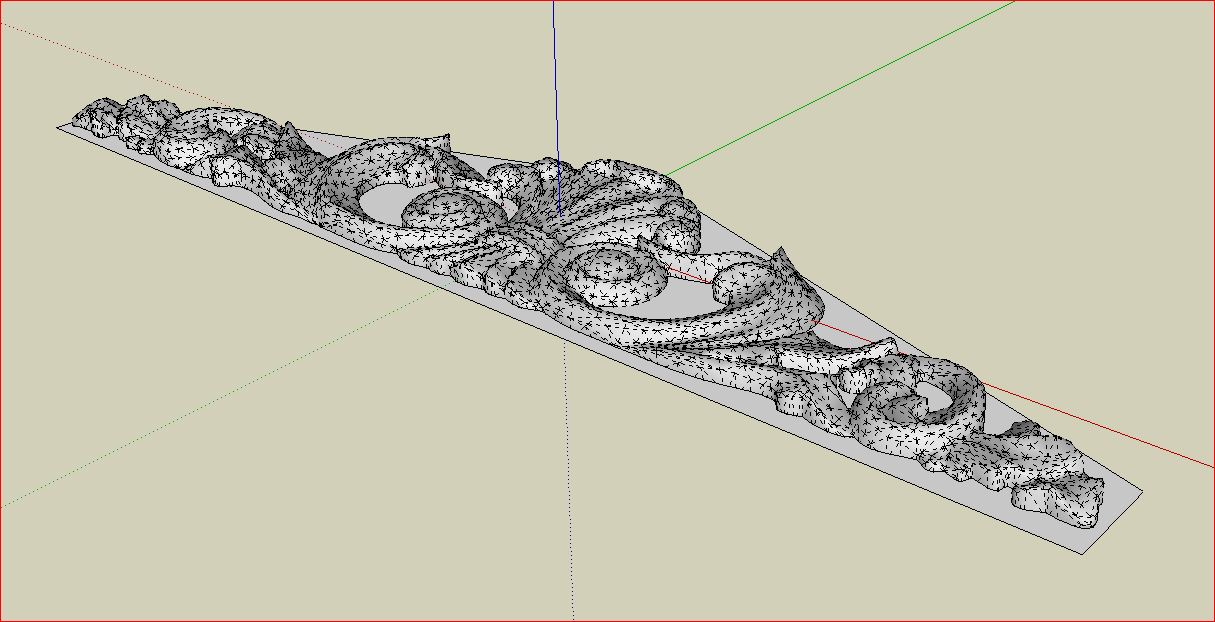
                                      Charly, I've been extremely busy at my day job doing some upgrades to our 70 anesthesia machines so I haven't even had time to open Pete's file to compare it to the way I managed to get the file size down. The way I did it, however was to split the carving in half along its line of symmetry. Then I deleted one half. There was a lot of excess geometry I could delete as well. My version doesn't have a back surface. These things are designed to be applied to another surface so the back isn't needed. Getting rid of it eliminated a large number of edges and faces. Once the half was cleaned up, I made it a component, copied it and flipped the copy. The seam line was then hidden so it looks like one piece.

                                      Etaoin Shrdlu

                                      %

                                      (THERE'S NO PLACE LIKE)

                                      G28 X0.0 Y0.0 Z0.0

                                      M30

                                      %

                                      1 Reply Last reply Reply Quote 0
                                      • charly2008C Offline
                                        charly2008
                                        last edited by

                                        Hi to All,

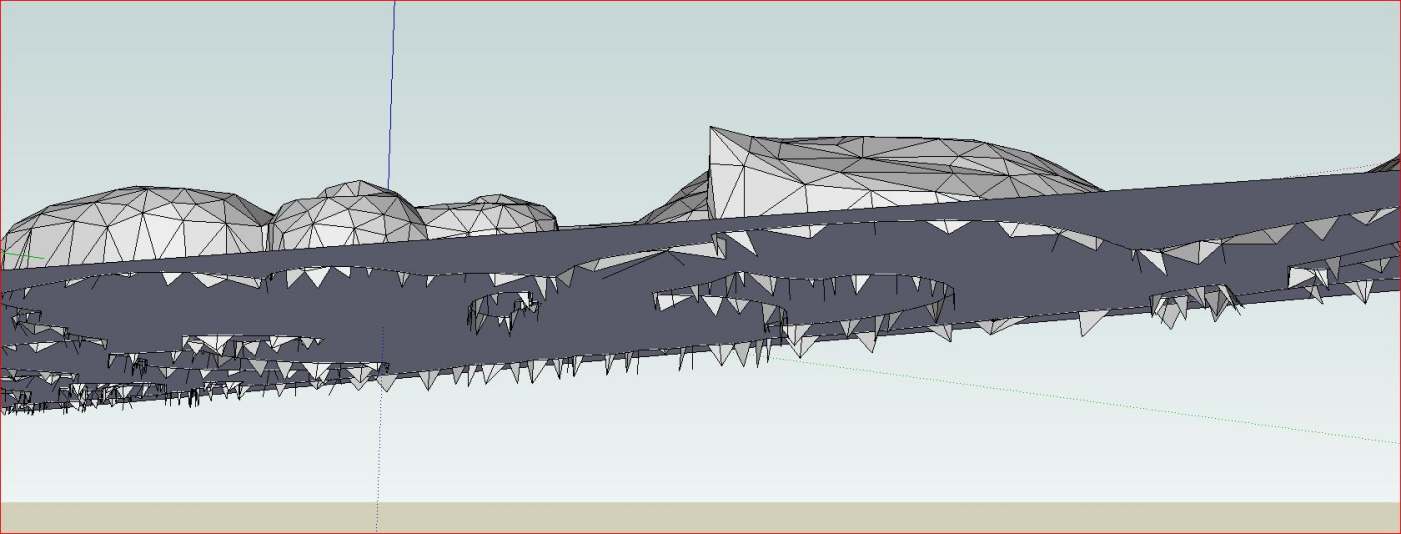
                                        I have again a question to all SketchUp users. If you keep selecting the back of a high polygon model is always a lot to be polygons that are not included. And this has to be erased manually. Is there a trick to select all parts below the surface?

                                        Charly


                                        Unbenannt.JPG


                                        Unbenannt2.JPG

                                        He who makes no mistakes, makes nothing

                                        1 Reply Last reply Reply Quote 0
                                        • charly2008C Offline
                                          charly2008
                                          last edited by

                                          Sorry Dave,

                                          It was not my intention to discourage you from important work. I also expect to a question no lightning-like response. I am happy if I get some time for a response. I know that there are more important things than Sketchup. I now have a bit more time, since I'm retired.

                                          Charly

                                          He who makes no mistakes, makes nothing

                                          1 Reply Last reply Reply Quote 0
                                          • jason_marantoJ Offline
                                            jason_maranto
                                            last edited by

                                            Turn off perspective then pick one of the standard views and use a left-to-right bounding box selection technique.

                                            Best,
                                            Jason.

                                            I create video tutorial series about several 2D & 3D graphics programs.

                                            1 Reply Last reply Reply Quote 0
                                            • 1
                                            • 2
                                            • 1 / 2
                                            • First post
                                              Last post
                                            Buy SketchPlus
                                            Buy SUbD
                                            Buy WrapR
                                            Buy eBook
                                            Buy Modelur
                                            Buy Vertex Tools
                                            Buy SketchCuisine
                                            Buy FormFonts

                                            Advertisement