Acoutical tile ceiling in sketchup
-
Can someone tell me how to show the above ceiling in my model. I know how to draw a typical ceiling,
but I would like to show an armstrong type of ceiling. I know that you can draw it in photo shop, non user
but is there a way that I can show it directly in my model. I do use the 3D warehouse, but it's a real bugger
to import, draw etc. -
Can you add the image...

-
I think he is talking about a suspended ceiling
Regards,
Bob -
This is a relatively easy thing to do
You model a simplified version of it using 600x600 sq tile componnetss, copied in x & y the number of times needed or whatever and some slight PushPulling around the compo's edges to form a 'T-bar' etc. Work in a group to separate geometry.
You need to make-unique some edge tiles to suit 'cuts' and swap them out...
Here are some steps...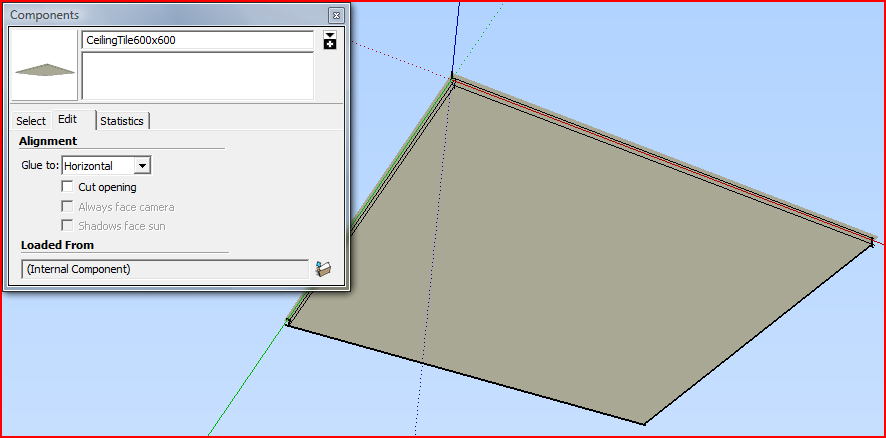 This shows a simple tile component with a 'half' T-grid with hidden edges so it 'mates with its neighbors...
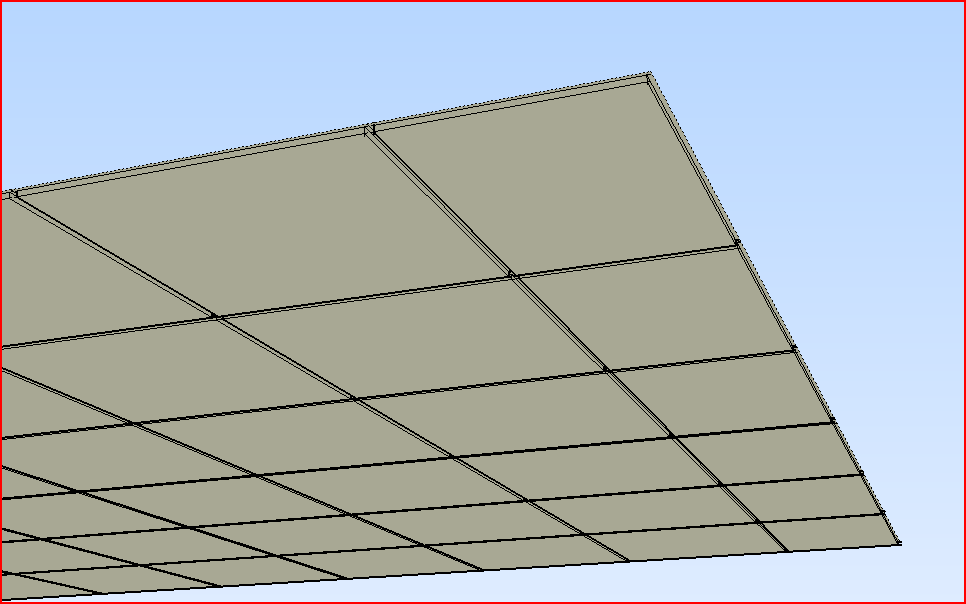
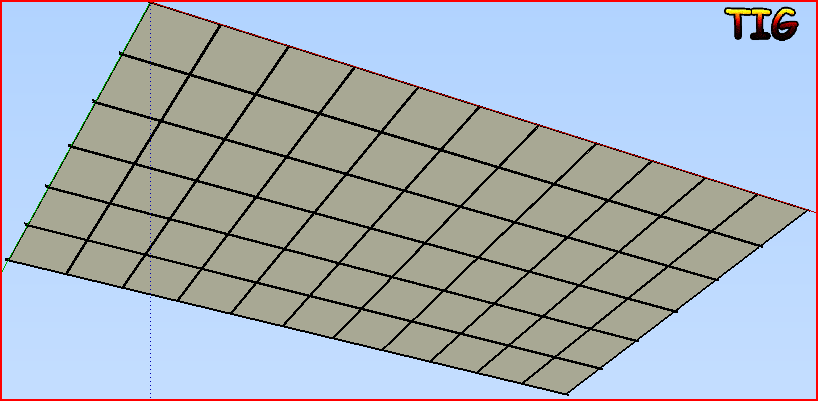 Here it is copied in x & y 6m and 3m - note how the T-bars melt together...
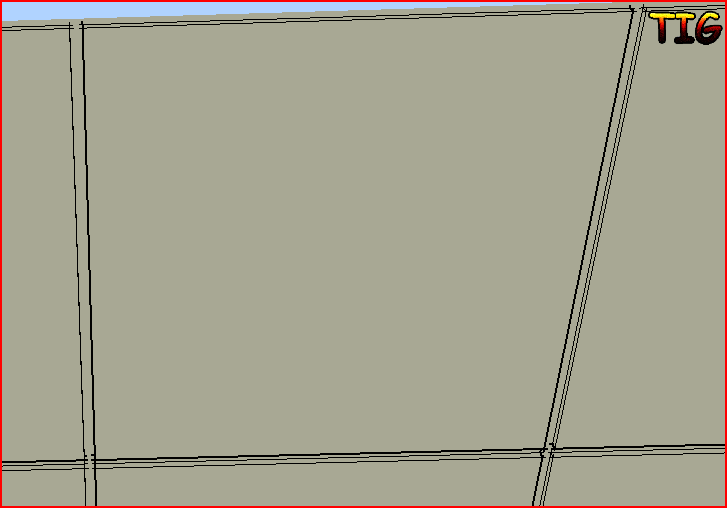
But the room isn't 6m long, it's 5.8m... so the last tile is made unique and renamed as 400 wide 'cut' and one side of tile moved over by 200mm [if you want 'even margins' move the whole ceilinng another 100mm over, and make the cut tile 500 and use it on BOTH ends...]
 swap the edge tiles for the 400 cut version [note this image shows hidden geometry so that you can see the hidden T-bar joins]...
 -
You can also make the topside surfaces transparent -- allows you to look from above through the grid and eliminates ceiling shadow.
-
Thanks, everyone for your reply. One more question I'm new in Piranesi, do any of you know
how to set up a drawing, the book I have isn't that great. Especially when I want
to insert people, objects. Sometime they scale up and down and other times they don't.
Plus the book always works in meters.
Hello! It looks like you're interested in this conversation, but you don't have an account yet.
Getting fed up of having to scroll through the same posts each visit? When you register for an account, you'll always come back to exactly where you were before, and choose to be notified of new replies (either via email, or push notification). You'll also be able to save bookmarks and upvote posts to show your appreciation to other community members.
With your input, this post could be even better 💗
Register Login


Advertisement