Color by Height?
-
I'm thinking that there is already a plugin that would color faces based on height above some datum (the ground plane?) but I searched through Jim's index of plugins and didn't see it. Maybe I'm wrong. If so, I was thinking that a plugin that would paint faces with varying shades of gray depending upon height would be useful. There are some 3D CNC machines that work from shaded image files to determine height and a plugin to create the shading would make it possible to use SketchUp models with these machines. One could then carve things like these fans.

-
Hi Dave,
Colour by Slope by Chris:
http://forums.sketchucation.com/viewtopic.php?t=20635 -
Chris' Color by Slope
http://forums.sketchucation.com/viewtopic.php?t=20635
Havn't tried it out?
EDIT: Pick ME

-
Or, Chris Fullmer'sColor by Z?
-
What about ... oh meh! ...


-
I think Color By Z wins but ThomThom came in a close second.

Thanks guys.
-
Hi,
Maybe my Mesh2Heightmap script will help.
Here is the description:
Generates an image of the model (generally plan view) that can be used as a heightmap.
BMP and RAW formats supported, mask, blur, crop options. Doc included.Can be DL here: http://rhin.crai.archi.fr/RubyLibraryDepot/plugin_details.php?id=585

Hope this helps, -
Thanks Didier, it might work but after installing it and trying to start SU, I get an immediate bugsplat before the program can open it. I renamed the file so it wouldn't load and the bugsplats don't happen.
-
hi dave!
ive actually used Sketchup Fog in the past to export depth maps,kind of explained it in this thread:http://forums.sketchucation.com/viewtopic.php?f=18&t=21987
but basically, switch of all edges, turn fog colour to black, and face colour to monochrome.
works best with objects that aren't too deep, here's an example:

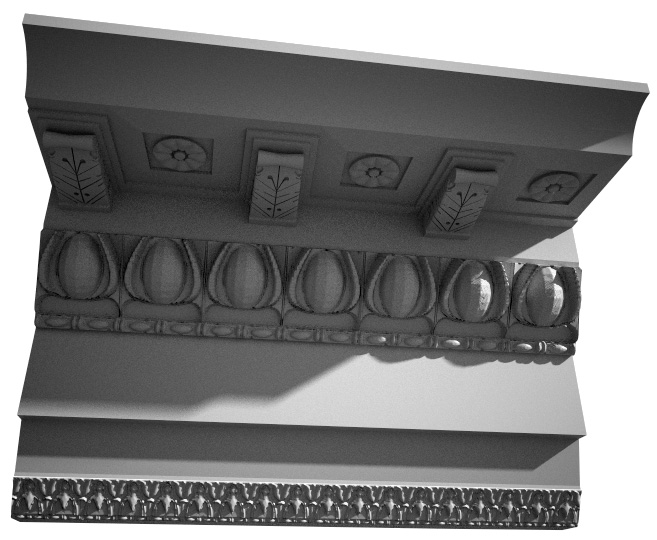
-
Thank you Jopsa2,
I gave that a try and sent the image to my friend. He said it worked very well.

-
With some "calibration" of greyscale-to-depth, I can see this as being very useful, if it will work with the Sears CompuCarve (same as CarveWright.)
I don't have one, as they were a bit too pricy, when first introduced. Perhaps, it's time to take another look....
Dave, "Quando omni flunkus, moritati" ? -- I should'a known...

..."If the women don't find you handsome, they should at least find you handy."
At least, I'm handy....
-Taff
-
Taff,
I don't know a lot about setting up gray scale images for the CarveWright/CompuCarve machines but the friend who was asking about this said that the software seemed happy enough with the image I posted. I looked at the machines with some interest a few years ago when they first came out. I found they were a bit limited for the sorts of things I want a computer-driven machine for so I kind of forgot about them until this came up.
BTW, I work real hard to be handy. Haven't got the other thing going for me after all.

-
Hey Dave,sorry I have not gotten back to you yet. I see that you were able to get something use-able. Color by z could be altered to force it to use only a certain amount of colors for sure, to limit it to 5 or 6 shades. But it looks like you've a system working, so that seems good enough for me

Chris
-
Hi Dave,
This is another extremely cool way of generating these maps!


-
@davidlouis said:
so its Vray friendly too.
Except that VRay doesn't render distorted textures very well. And projection often create lots of it. But if the mesh is triangualted well enough the error might not be particularly visible.
-
Hi Thom
I meant its Vray friendly in the sense that it doesn't generate large quantities (even hundreds) of materials based on the colour graduation as in Color by Z.
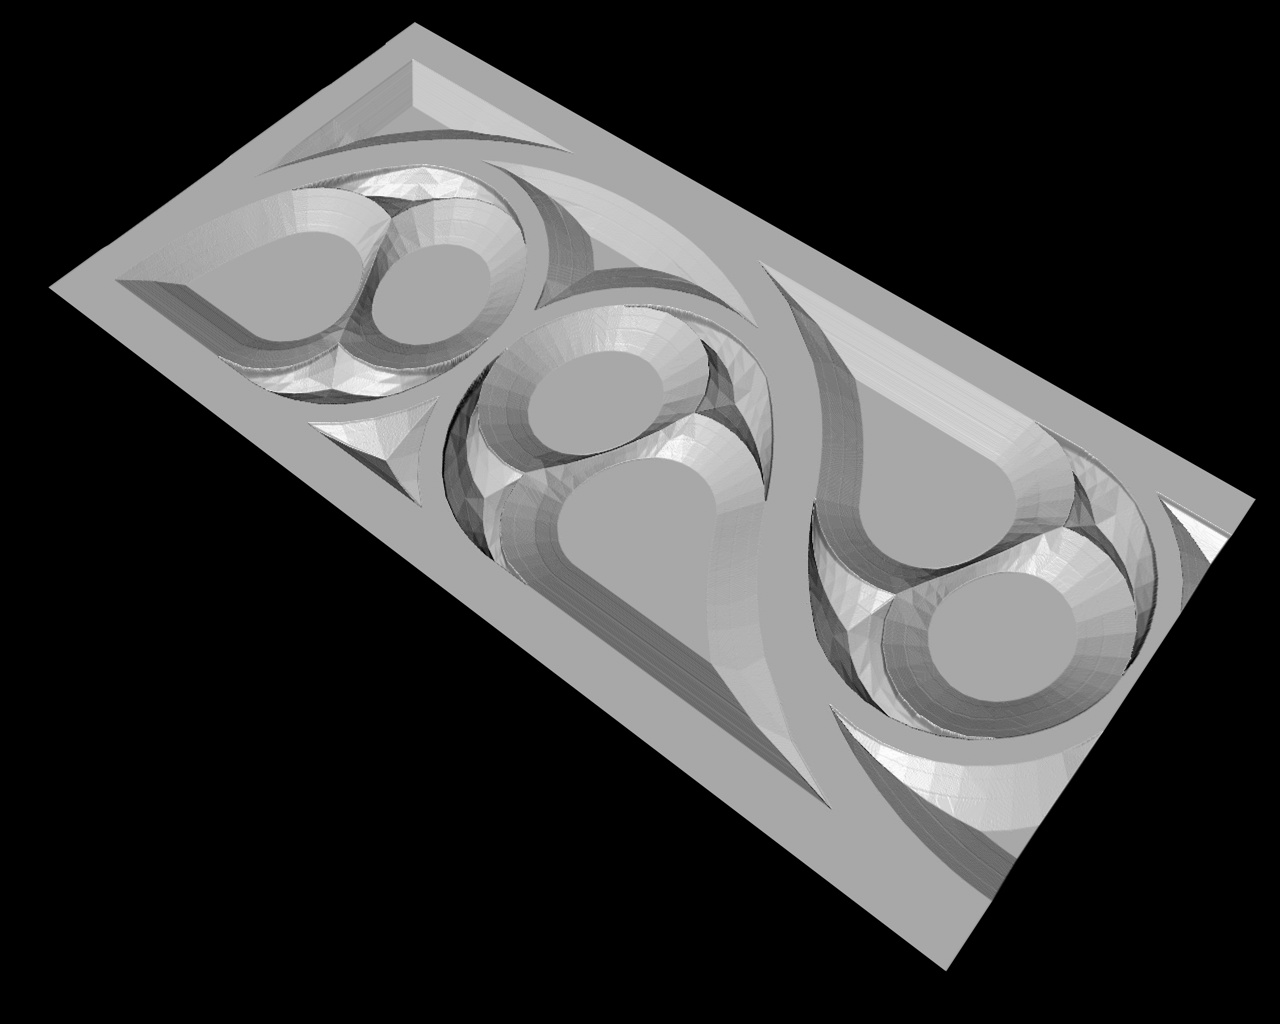
The displacement map generated was a spin off from thread and i figured if i had alrady sucessfully used a colour gradient, why not a grayscale and the bonus of the displacement map out of it.
I agree with you about the Vray displacement map thing... I tested it in vray with mixed results.
Got a pretty decent result out of cinema 4d though! see attached
I'm assuming that the CNC machine thingy might be able to use this too...Dave
-
Nice method David

-
Hi David,
That does seem like a very nice method. I'll pass it on to my friend and have him give it a go. Thank you.
-
If i may add my two cents worth...
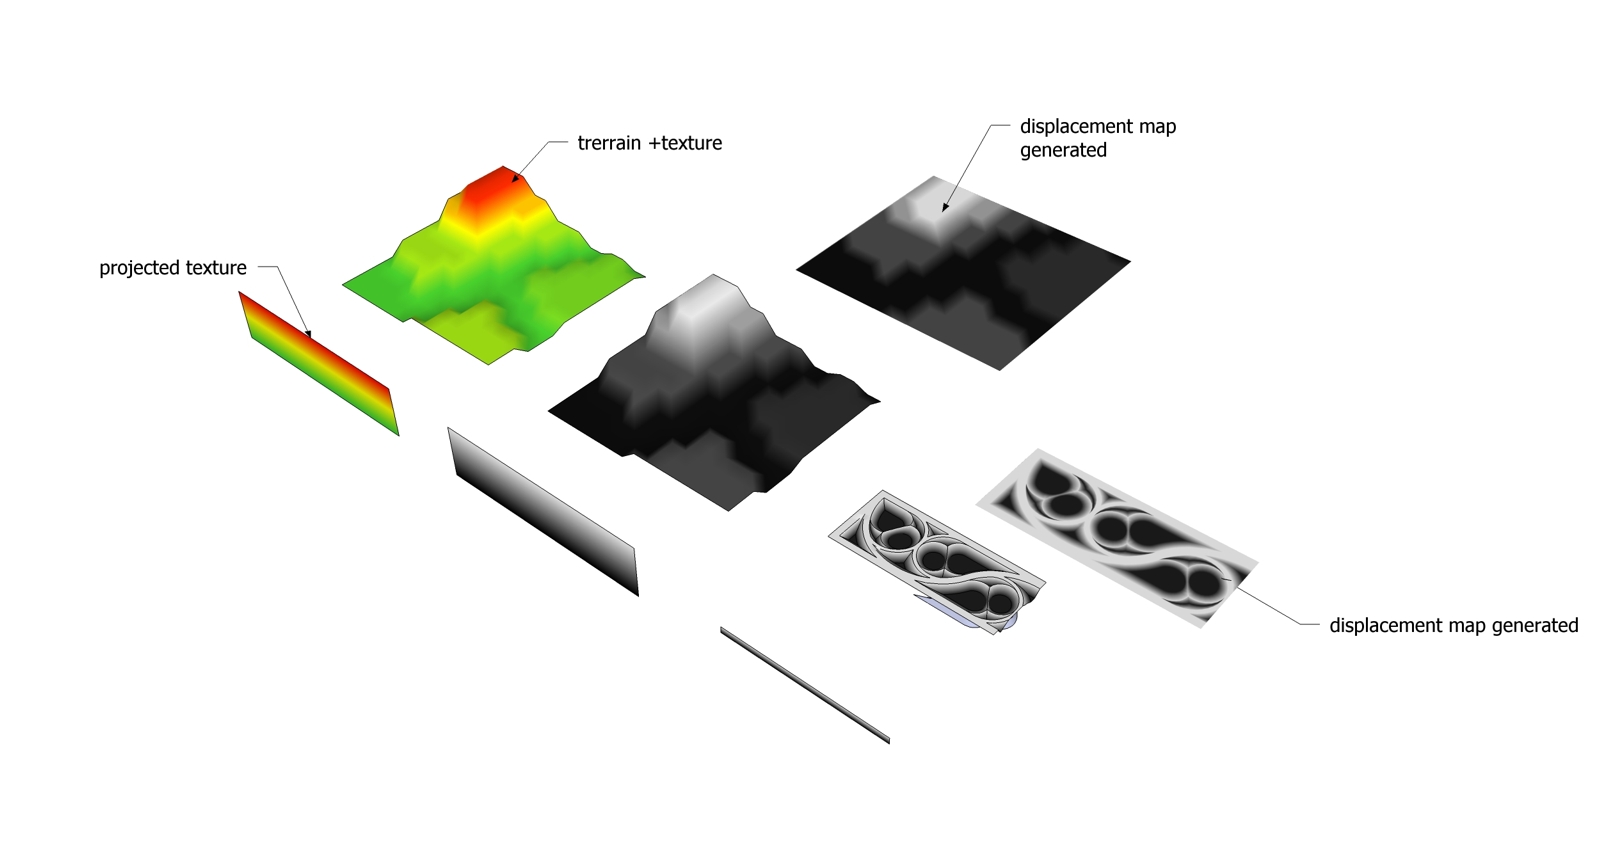
I have been able to produce 'height maps' of terrain studies using a projected texture.
This could basically be used on any 3d objectMethod:
1.Basically you create a color/grayscale gradient image in photoshop or otherwise,
2.Import into sketchup as a texture onto a vertical plane (rectangle) that represents the extent of the terrain. The vertical extent of this rectangle is more crucial than the horizontal.
3.Once you have the texture on the rectangle, go to the edit texture context menu and click on 'projected'.
4. Then sample the projected texture off the rectangle... choose all the surfaces of the terrain and apply.Voila!
additional tips:
A:Do not apply the sampled projected texture to a group, it will not apply properly. You need to assign the material directly to the faces.
B:When making the vertical rectangle to represent the extents of your terrain it helps to overshoot the exact size a bit both top and bottom so that you don't pick up the extreme edge of the color gradient and start of the next tile of the gradient which can sometimes render as a dark colour.This can obviously be done with a grayscale gradient too which i imagine could be used to generate a displacement map (exported jpg from a top view) similar to what Dave R and jopsa2 have been talking about.
Also in comparison to Chris's Color by Z plugin, although this is not technically a plugin, its avoids a multitude of generated materials, instead this one uses just one... so its Vray friendly too.
Attached is a sample image for reference.
Hope this helps.
Dave
Hello! It looks like you're interested in this conversation, but you don't have an account yet.
Getting fed up of having to scroll through the same posts each visit? When you register for an account, you'll always come back to exactly where you were before, and choose to be notified of new replies (either via email, or push notification). You'll also be able to save bookmarks and upvote posts to show your appreciation to other community members.
With your input, this post could be even better 💗
Register LoginAdvertisement


