Copy Array Along Path tool...have a look.
-
Thank you, Chris!

-
Hi Chris,
It's a great pleasure to discover that you were looking apart silently and suddenly come to drop a top cool tool! Component Stringer
You have decided to make the components follows the lines rather than faces.
@chris fullmer said:
Was TIG working on something that would replace a single line with a component and use the line scale and orientation to determine the scale and orientation of the component? Something about that sounds familiar...
Chris
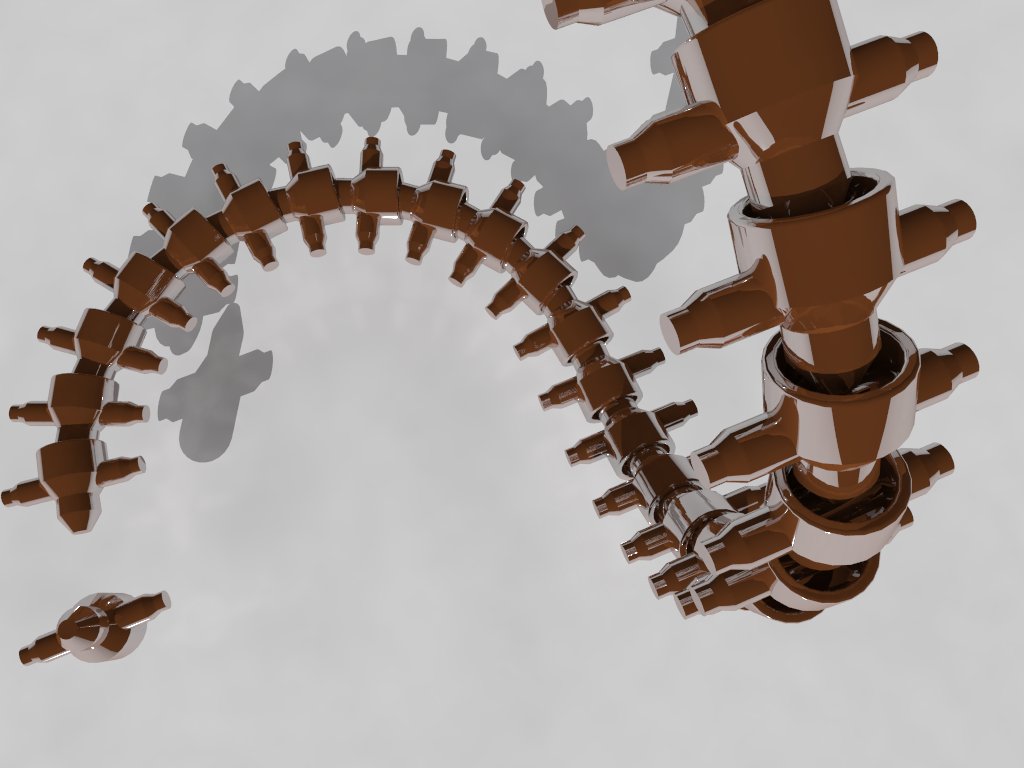
The result is that this tool is wonderful for necklaces
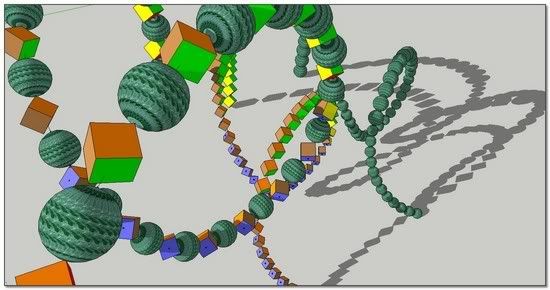
And we have not to use it for imbricated components
One more time, many thanks to you dear Chris,
*simon
-
So, Jeff, how is that SketchUp model of Doc Ock coming along?

-
Hey Miguel,
I might be able to do the arms now but I'll still suck at modeling Doc Oc. I need to put way more hours in to organic shape modeling!!!

Hope everyones weekend is going well....
Cheers,
Jeff
-
Have you tried importing a Make Human model into Wings 3D or Silo and tweaking there? Then you can import the Wings 3D model to SU and add the robotic arms.
-
I'll for sure check those out, thank you. I would still like to get decent at organic in Sketchup though. Here is a quick try at Chris's new ruby. I love it! Nice to be able to edit the component and see it update instantly. Thanks again Chris!
Jeff
-
I pursue the study of my proceeding despite Chris's "Component Stringer" because for the moment(But Chris is working to the speed of the iron horse!!), I think I can master better -the welding of components imbricated, -the mix of various components along the path, _the mix of components following the path with components invariant in orientation.
@bob james said:
However, you and I have a different definition of "fast and easy".

Here is a realtime video (no editing) to show how fast is the process.
We start with a curve and a component.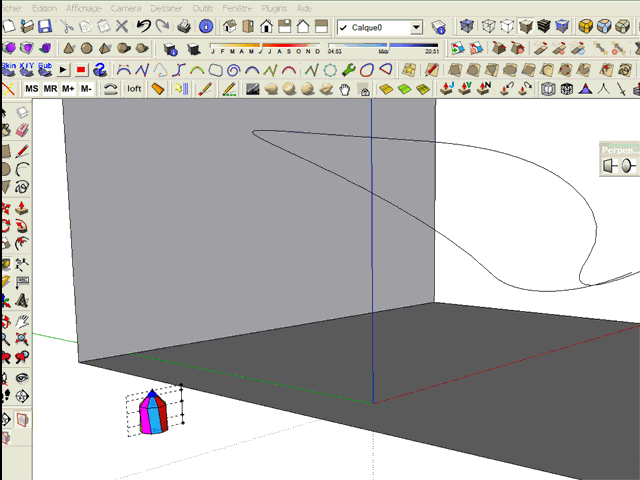
*simon
-
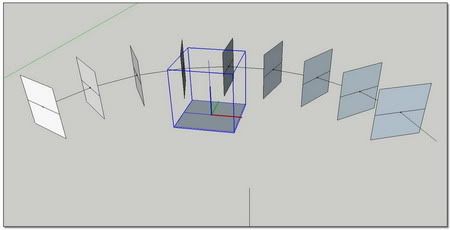
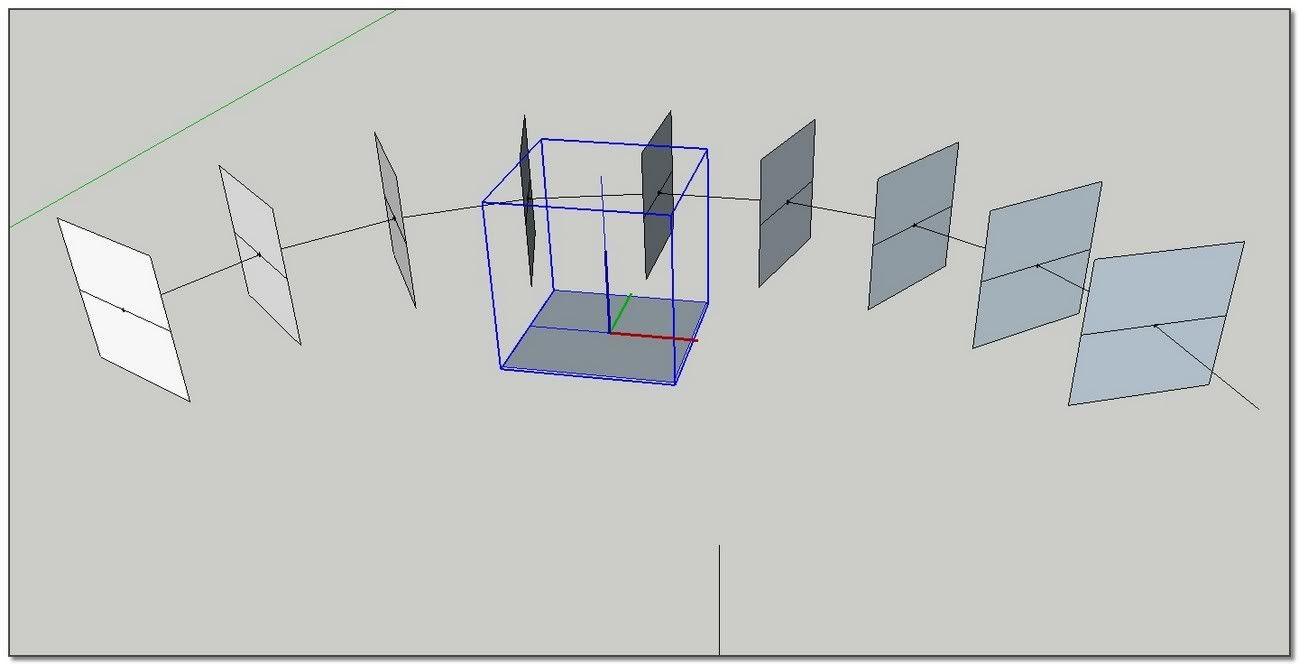
Some help to produce the component to copy along a path.
I)Put the good axes:
If it is for you like for me
 , positionning axes of the component I want to copy along a path is not so evident.
So, make a cube, make it as a component, and......
[flash=500,405:284ps2pd]http://www.youtube.com/v/z81CNzCE4V0[/flash:284ps2pd]II)How to conceive a chain link:
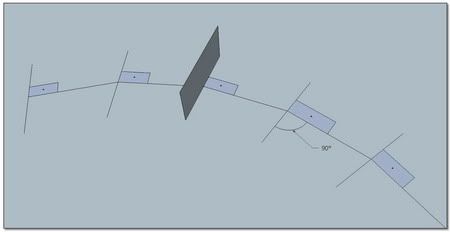
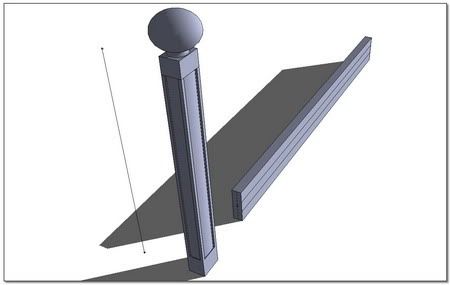
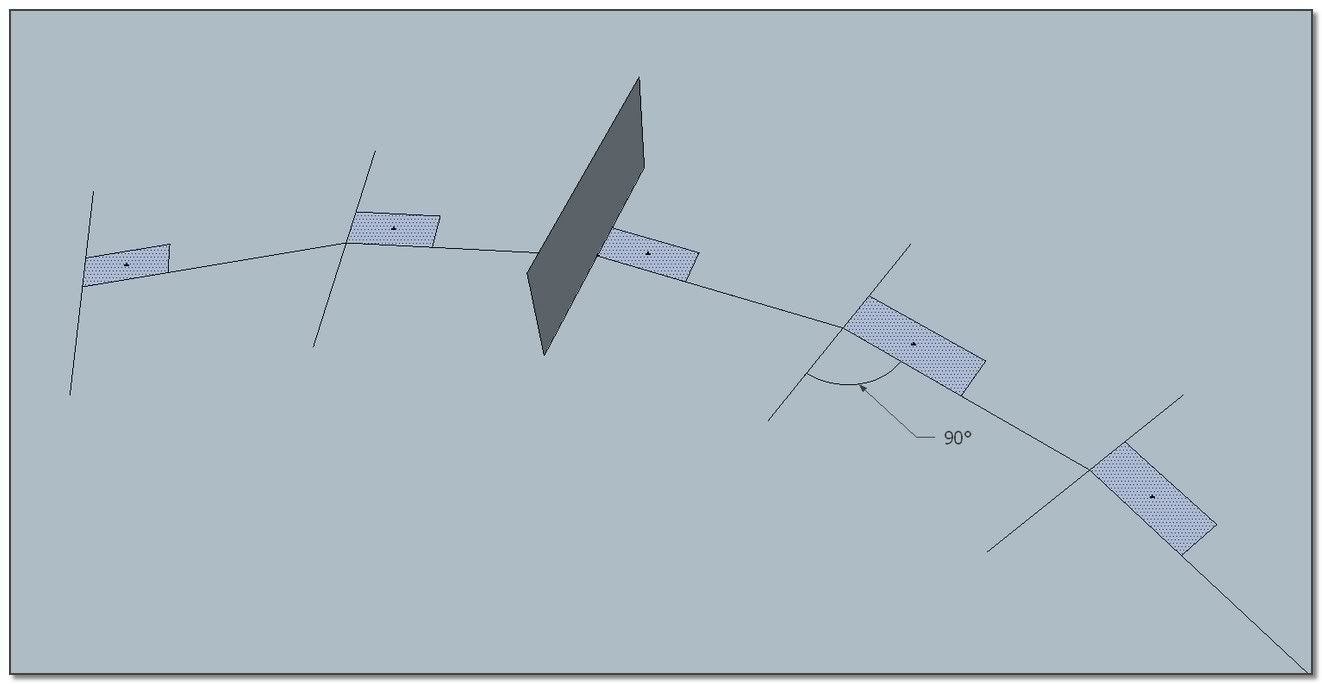
Using one or other method to produce a chain, necklace and many others fences and so on, you will need to think about the shape of the links.
Here is my tip. Just think to draw a portion of curve with the smallest radius you think you are going to use for your path...
[flash=500,405:284ps2pd]http://www.youtube.com/v/PG8aK7fC2LA[/flash:284ps2pd]:wink: simon -
Hi,
Can anyone help me how to download the ruby. It's my first visit to the forum ...
Thanks,
YiannosH
-
Hi YiannosH
A Fresh Welcome to you in our SketchUp Community.
Chris Fullmer's "Component Stringer"
And here all Chris's Plugins:
++simon
-
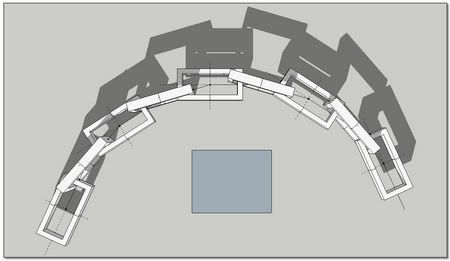
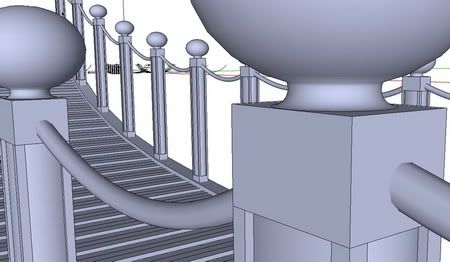
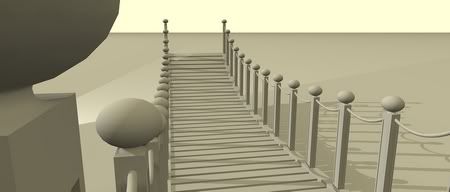
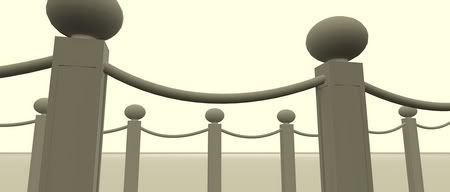
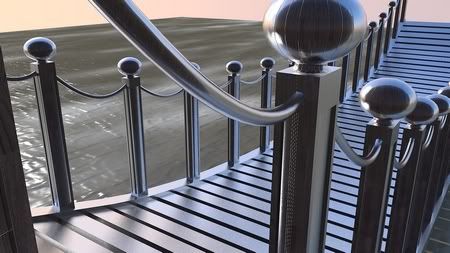
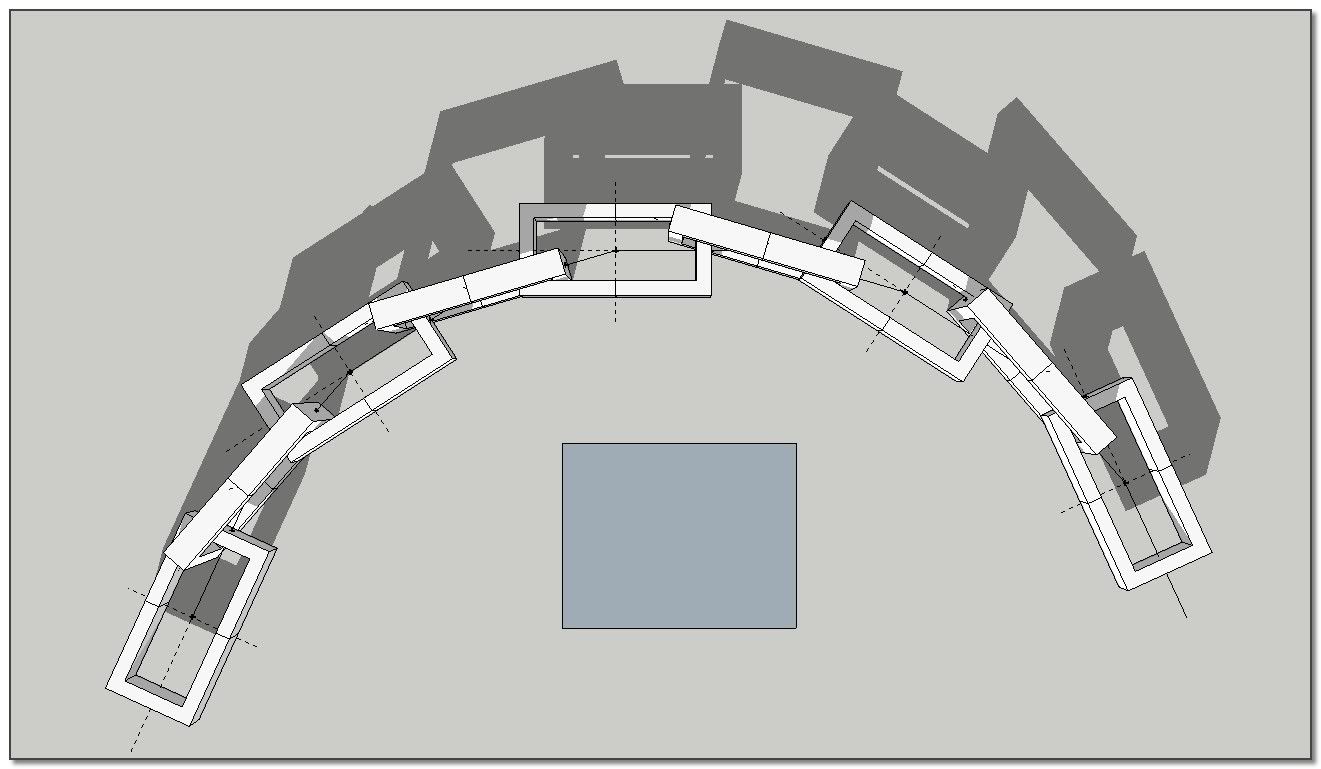
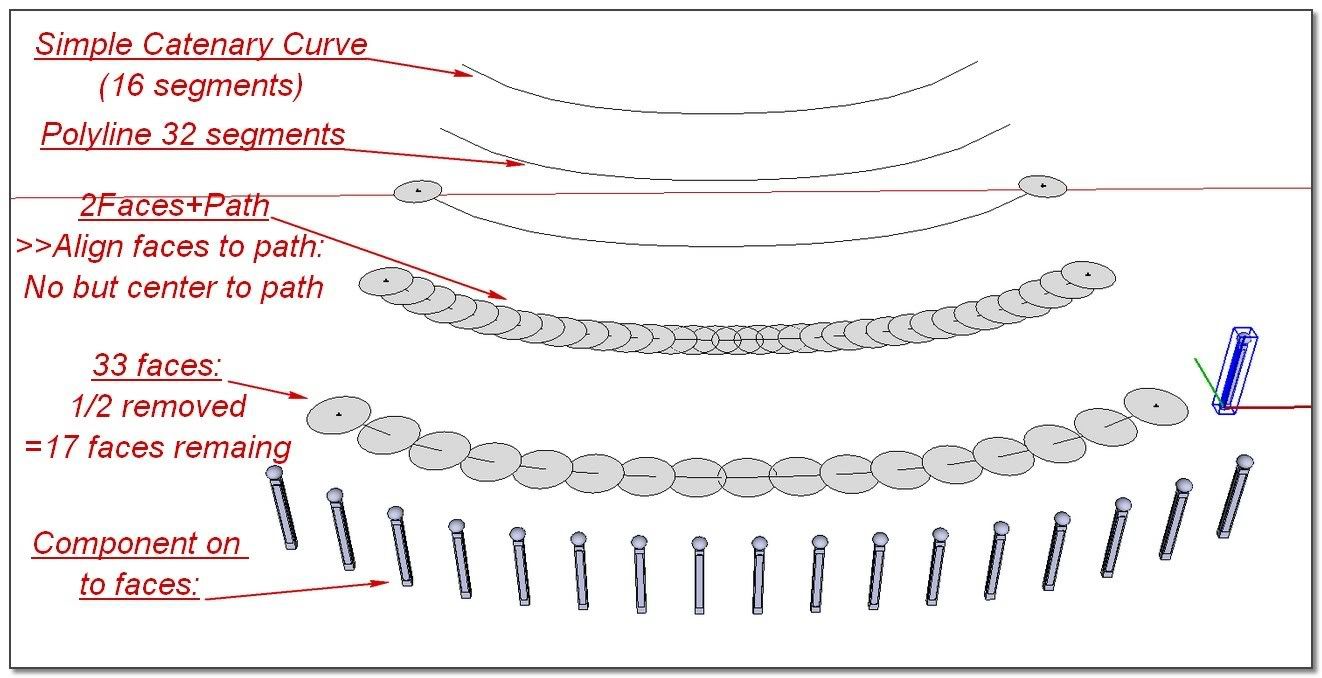
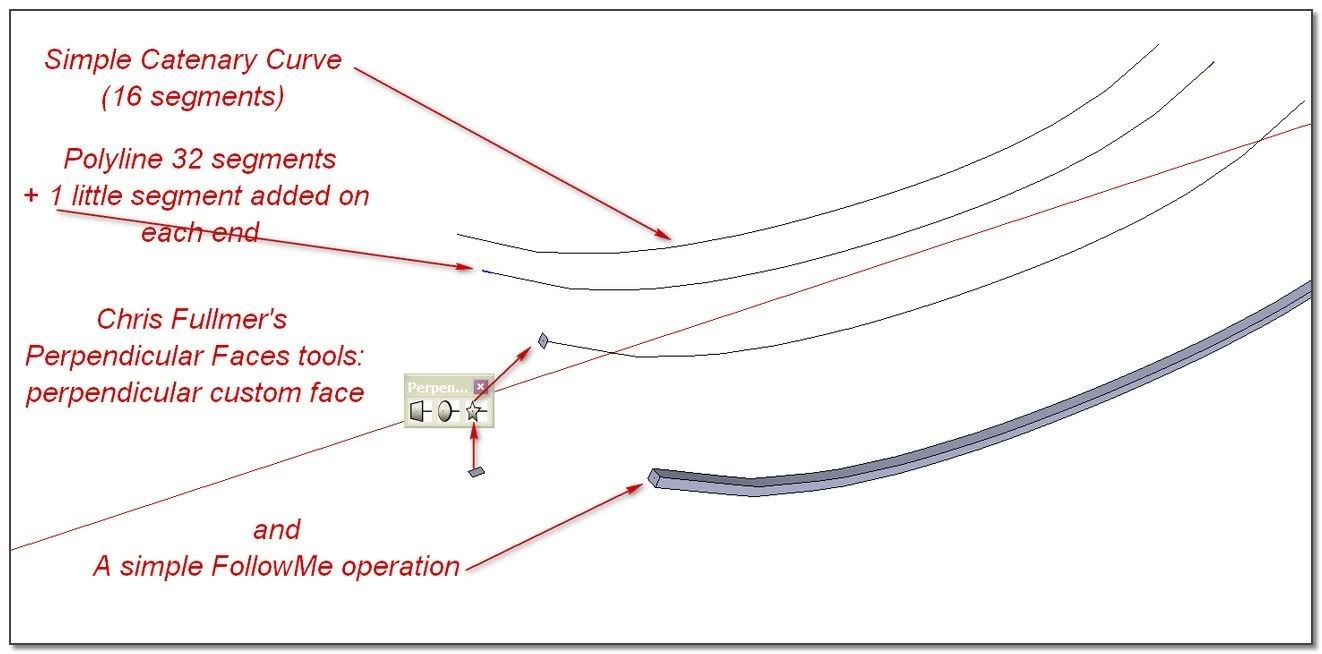
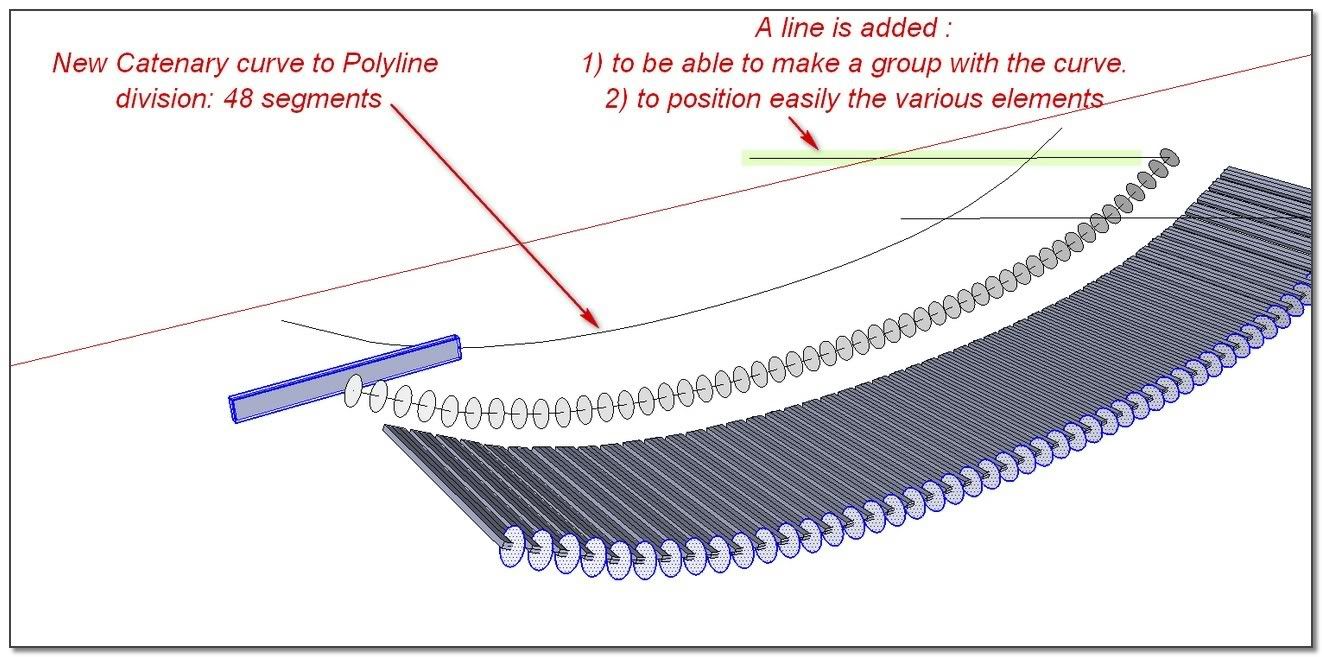
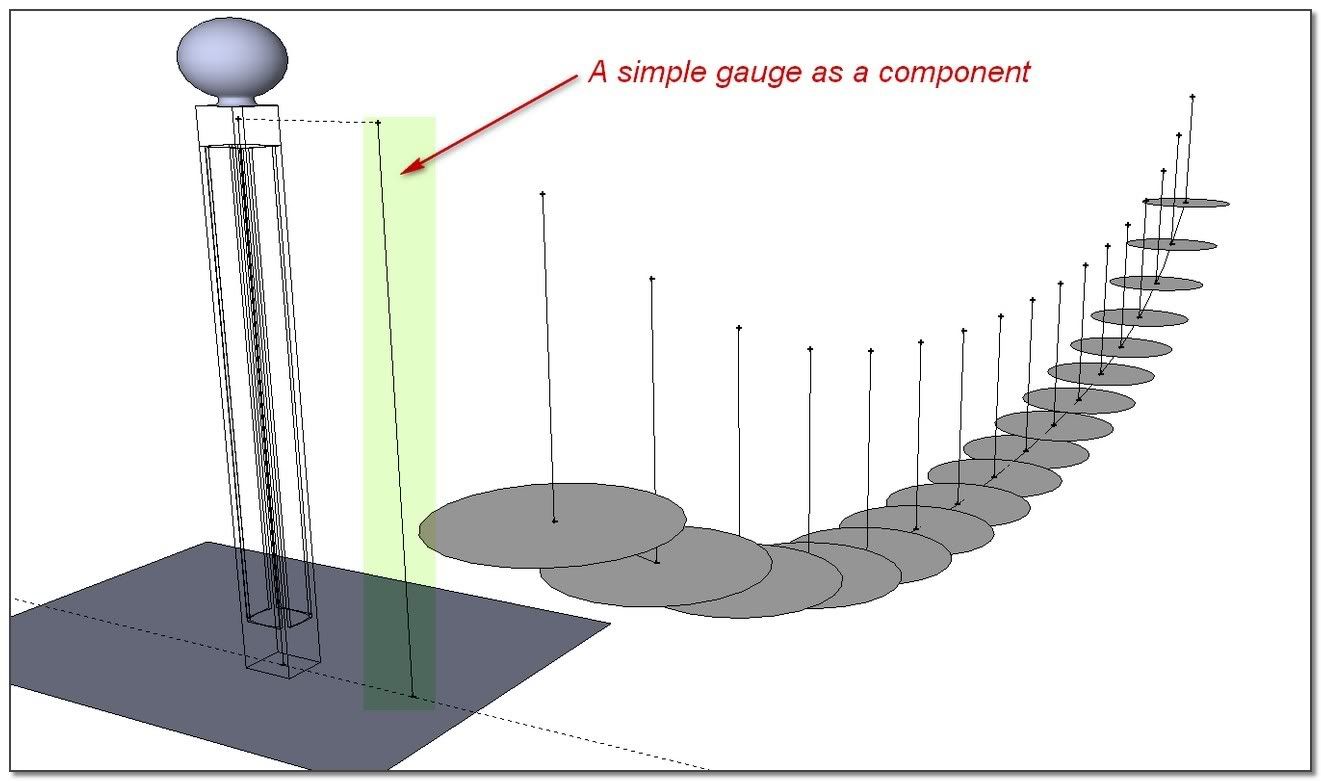
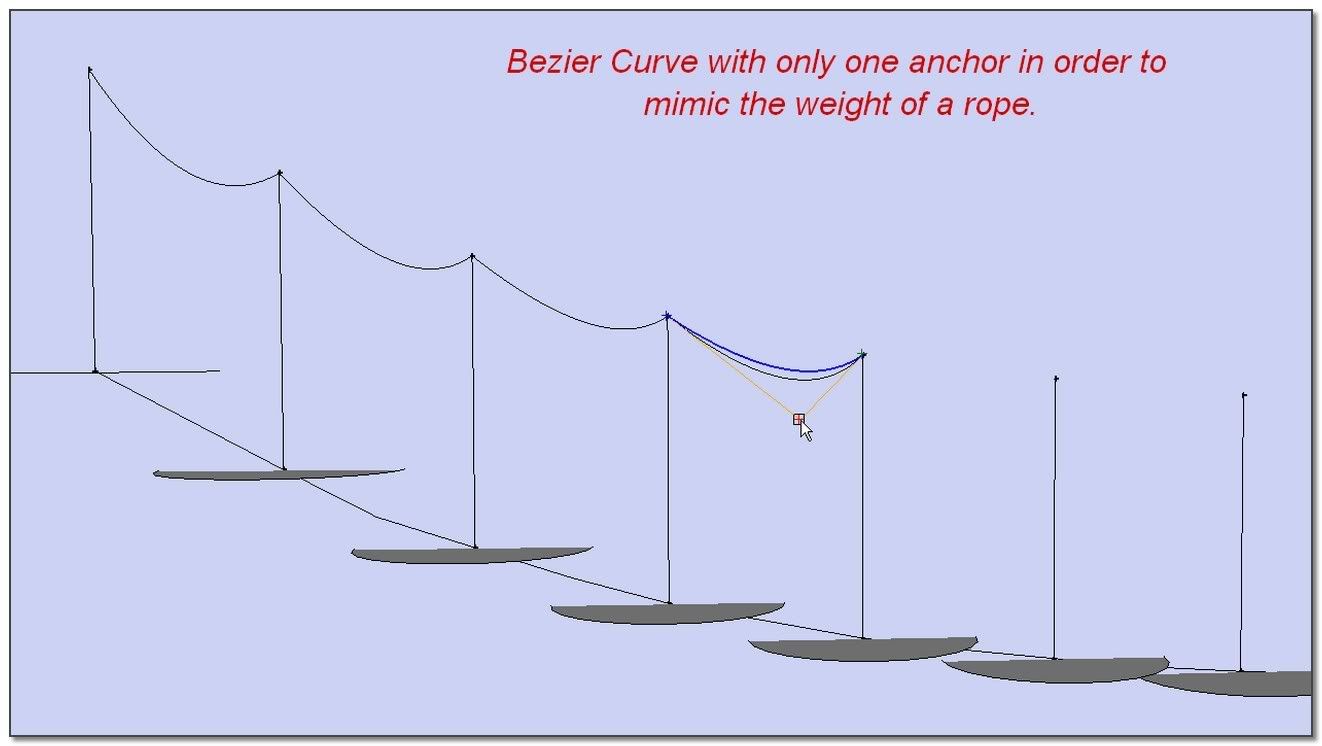
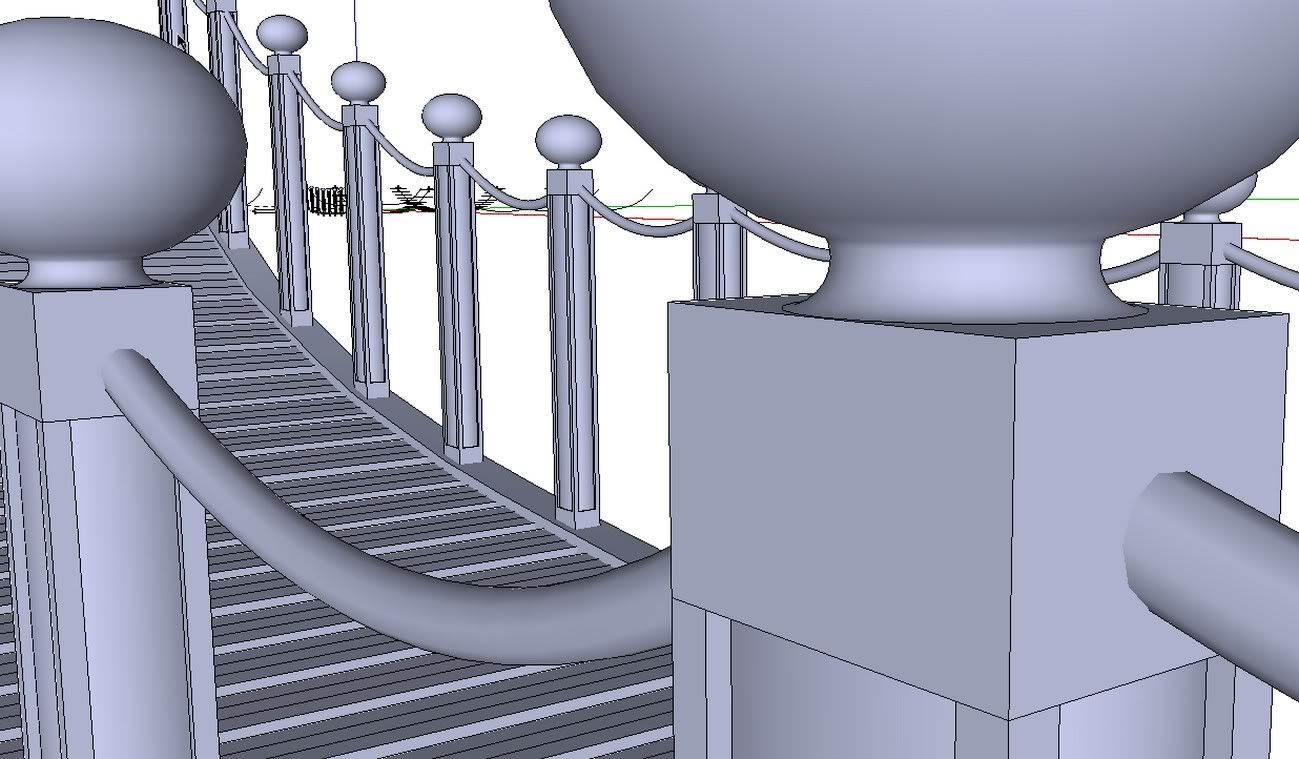
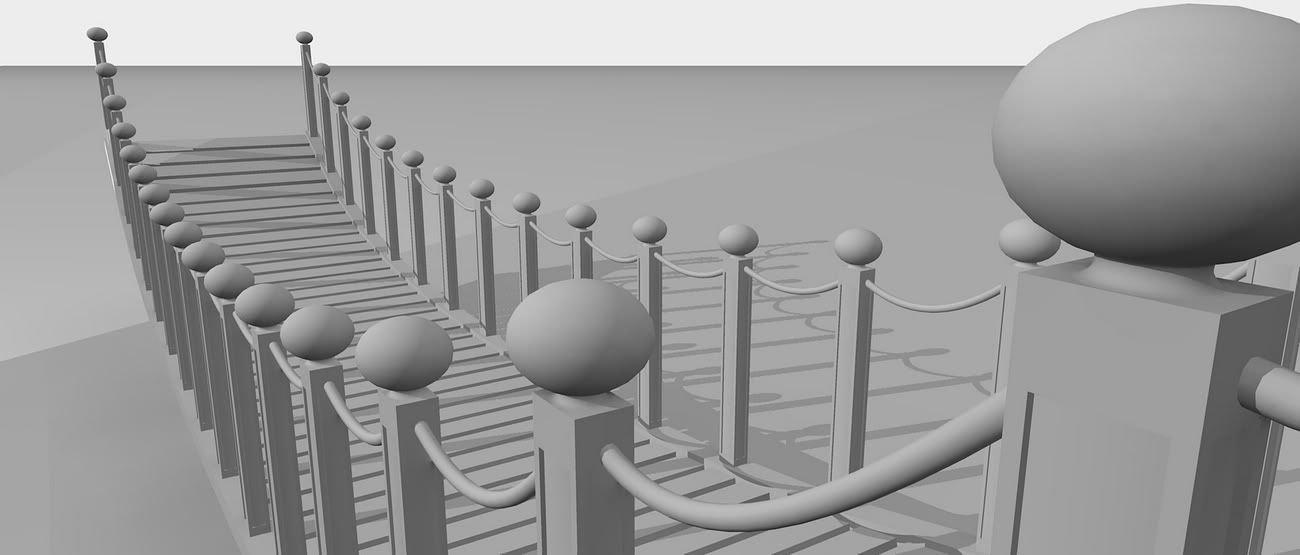
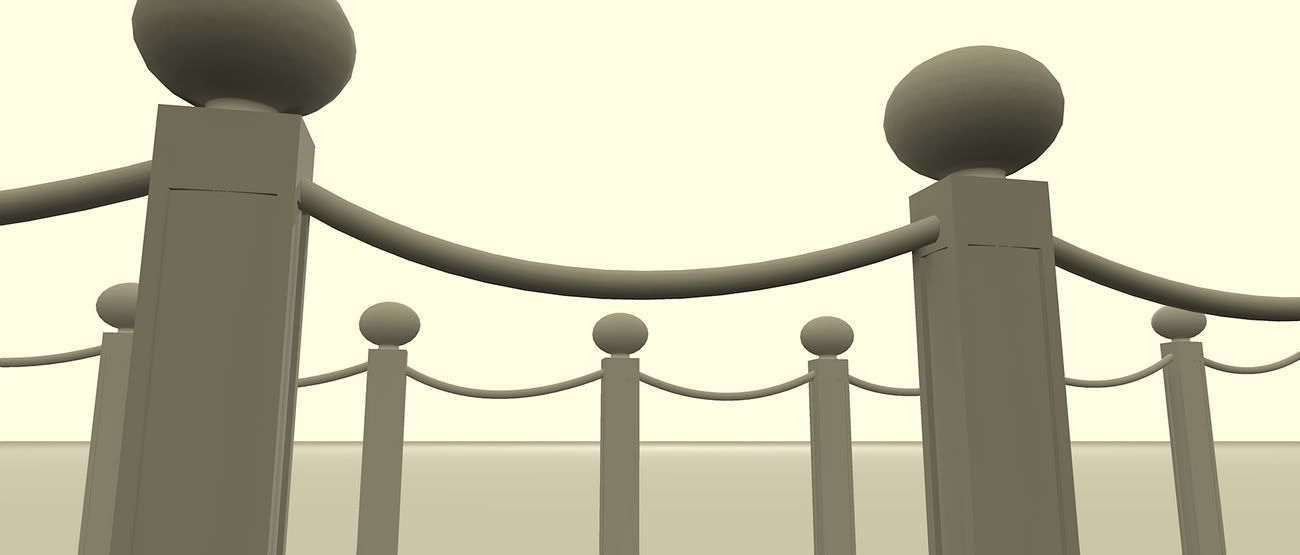
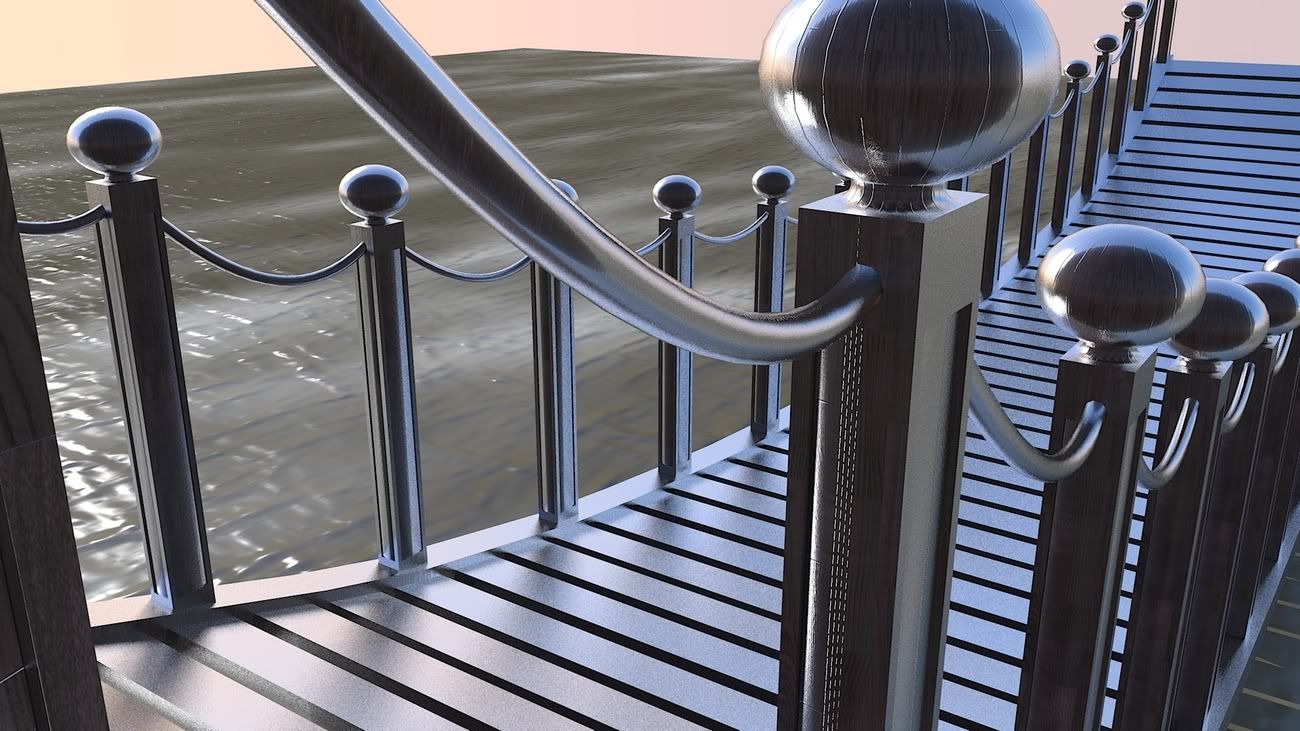
The "How To" of my suspension bridge.
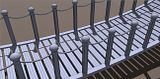
Three Components and One curve.
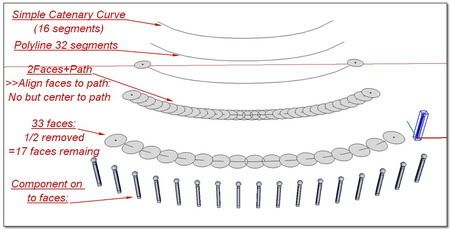
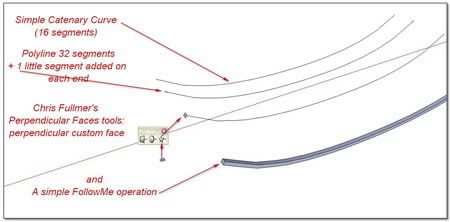


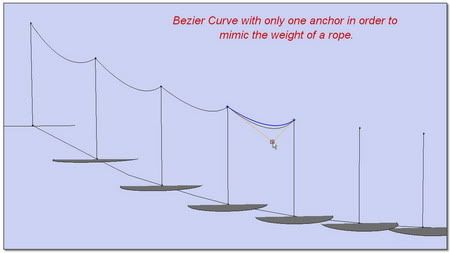
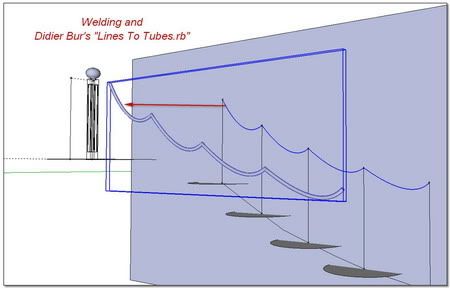
Et Voila!

Kirill _ 2 Faces + Path ver. 1.4
[url=http://forums.sketchucation.com/viewtopic.php?f=180&t=19457:2hagrkqi]TIG_TrueTangents v1.9[/url:2hagrkqi]
-
Great tutorial. Worth to copy for safe keeping!
-
Hi NotaReal!
You are greatly helping me for my first feet steps with Kerkythea.
Here are some renders dedicated to you


++simon


Hello! It looks like you're interested in this conversation, but you don't have an account yet.
Getting fed up of having to scroll through the same posts each visit? When you register for an account, you'll always come back to exactly where you were before, and choose to be notified of new replies (either via email, or push notification). You'll also be able to save bookmarks and upvote posts to show your appreciation to other community members.
With your input, this post could be even better 💗
Register Login


Advertisement