What's your beginners tip?
-
What is a "random dwg file" ?

A file yet existing of some houses drawing or something else like cloud points...? -
my new beginners tip....if you want to highlight a portion of your model...apply transparency to the materials of the rest of the model.
-
Begin the plunge [into Sketchup] by using a venue familiar or interesting. In my case, that was woodworking. Having a more objective sight of [clear-to me] goals, I was quicker and more determined to chew deeper into the subject matter and get results. Put a lot sharper bends into my learning curve.
-
Never stop searching the forums and other such websites for tips and tricks. I have been using Sketchup for a couple of years now and just discovered some cool tips from a Basecamp tips and tricks video posted to youtube in 2008.

One from Chris Fulmer regarding the use of scenes as a tool for working with medium to large models. Great tip!
Watching Gaieus model an Ionic column was impressive. Thanks.
and Susan, thanks for pointing out that components are much more useful (to all) when constructed well.
Here is the link
-
hi im new here who can give me a tour on how to download vray for sketch up 2013 thanks and much apreciated your help
-
Here maybe? http://www.chaosgroup.com/en/2/downloads.html?s=v-ray-sketchup
(need to be registered and logged in) -
@gaieus said:
Here maybe? http://www.chaosgroup.com/en/2/downloads.html?s=v-ray-sketchup
(need to be registered and logged in)Thank you sir
-
This may be hard to explain but a little known tip I use is what I call "move without selection" It works on cylinders to make cones...
Draw a circle.
Pull it up into a cylinder.
Rotate so you can see the top.
Now with nothing selected choose the MOVE toolNow hover your tool around the top edge.
If the edge turns blue you are NOT on a cardinal point and if you move, the circle will move in the direction you move it.
BUT if your point is there as an endpoint and the circle is NOT blue you ARE on a cardinal point.
Moving from there causes the circle to get smaller or larger.i use this method to make cones rapidly.
-
That's scaling with Cardinal Points and it is is both handy and it seems, little known. You won't get a perfect cone but it'll be close. It works for polygons, too.
-
@dave r said:
That's scaling with Cardinal Points and it is is both handy and it seems, little known. You won't get a perfect cone but it'll be close. It works for polygons, too.
Scaling with cardinal points is certainly a more accurate term than mine.
 Wanna try something difficult? Try to find it explained without knowing what its called! Takes a bit of googling.
i didn't know about the polygon part. I'll have to play with that.
Thanks
M
-
Tip_dj no 15
Plugins - InputBox typeThe opening of a ruby plug-in with a InputBox usually opens in the center of SU window.
But if you open a sub window of SU like Outliner and select the top bar.
Then running a plug-in with a InputBox again, now center on the sub window of the outliner
Why is this important to know?
Some times a plug-in cover up what you need to see especially a large InputBox
 -dj
-dj -
Best tip came from Dave R. (moderator). Change your styles to where the back face is a contrasting color, i.e. green or something similar to make it much easier to see when you have faces that are reversed. Thanks Dave.
-
@chris fullmer said:
Always use a 3 button mouse with SketchUp. None of those single button Mac mice....stupidest invention ever.
And use shortcut keys.
Chris
Thanks
 love my mac stuff, but guess youre right

-
Hi!
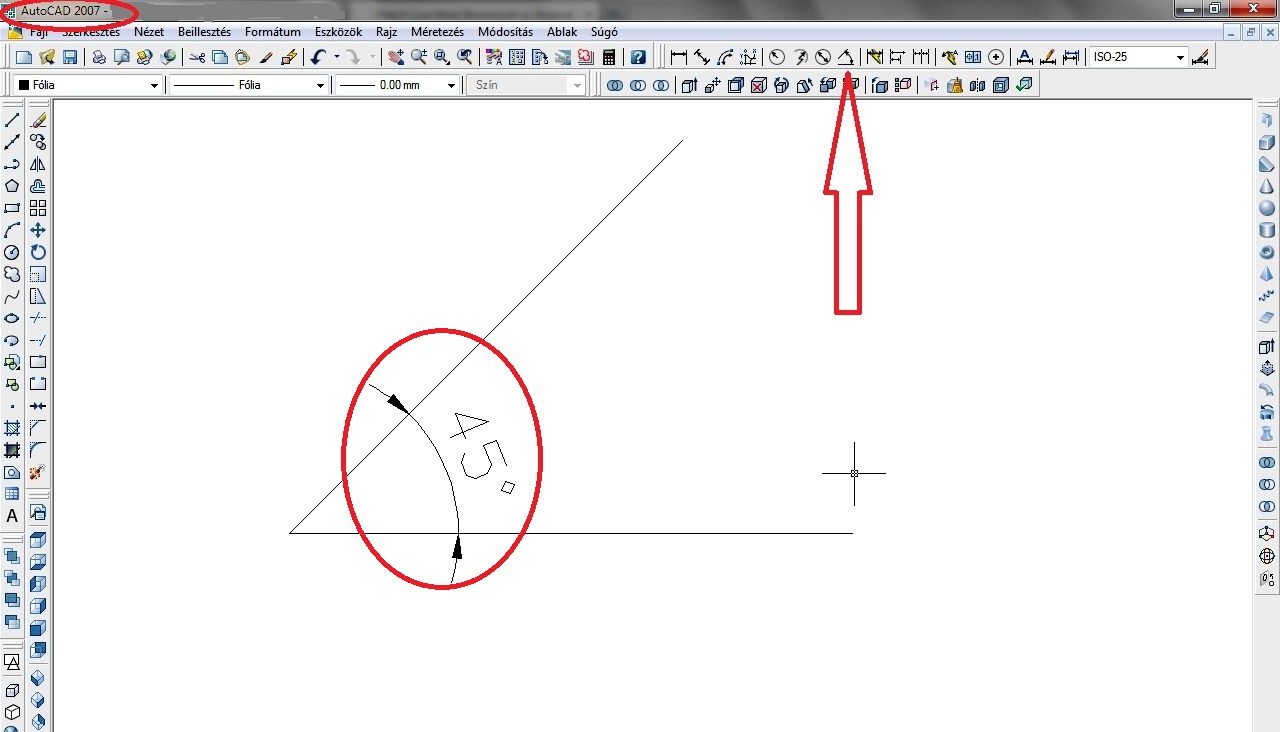
How can I size an angle formed by two lines?
There is this video?(Sorry, google translator)
-
@local do you mean how to measure the angle between two lines?
-
@rafferty94 said:
@local do you mean how to measure the angle between two lines?
Can be measured by the 'Protractor' tools, but is not scaled.
-
Measure using the protractor and then using the rotate tool, rotate the line you wish to move around to match the construction line given by the protractor tool? :-S
-
@rafferty94 said:
Measure using the protractor and then using the rotate tool, rotate the line you wish to move around to match the construction line given by the protractor tool? :-S
It's Okay.
How to scaled (Dimensions)?
-
In AutoCAD:

-
Anyone can jump in on this but I don't think there is a way to input angle dimensions in SU.
Chris Fullmer has created a free plugin called ShapeBender that seems quite good at shaping text to a curve or arc.
If whatever you need this for is just going to be used to see the dimension then I would suggest drawing and arc between the two points and then curving the text (The dimensions of the angle) to the curve.
http://sketchucation.com/forums/viewtopic.php?f=180&t=18210&st=0&sk=t&sd=a&hilit=bender
Hello! It looks like you're interested in this conversation, but you don't have an account yet.
Getting fed up of having to scroll through the same posts each visit? When you register for an account, you'll always come back to exactly where you were before, and choose to be notified of new replies (either via email, or push notification). You'll also be able to save bookmarks and upvote posts to show your appreciation to other community members.
With your input, this post could be even better 💗
Register LoginAdvertisement


