Print to scale - but not using Standard views
-
I got a model where I have two buildings at different axes. I've set up a scene for each building with custom axes to match the buildings.
Now I'd like to print off a parallel view of each side of the buildings in scale. The problem is that the print scale option only occurs when I've clicked on one of the Standard Views. And the Standard views only matches the original axes of the model, not the custom viewport axes.
Is there any way around this? or is the only way to rotate each building to match the original model axis? I'd rather not have to take the model apart and mess around every time I want to do a scale print.
And I don't understand why a Standard view has to be selected to get the print scale options. As long as the view is parallel it shouldn't matter.
-
I remember a thread about the same issue but I cannot find it however I'm searching (maybe it wasn't on this board?).
What I remember however that there was no other solution than to rotate your model.
-
I did a search by my self. Was this it? http://groups.google.com/group/SketchUp3d/browse_thread/thread/38084ae47fa304ed
I suppose I'll just have to add this to feature requests. For architectural models where the's multiple axis it'd make much more sense to have the Standard Views match the local model axis. Actually, I don't see why a Standard view is required as long as the view is parallel...
-
Ah yes, now I know where I remembered it from!

Well, the only thing you can do is to rotate/align the model to the original world axes. True it is often annoying (also during flipping or creating components - as was said there). Could go to the wish list, true.
-
@thomthom said:
I got a model where I have two buildings at different axes. I've set up a scene for each building with custom axes to match the buildings.
Now I'd like to print off a parallel view of each side of the buildings in scale. The problem is that the print scale option only occurs when I've clicked on one of the Standard Views. And the Standard views only matches the original axes of the model, not the custom viewport axes.
Is there any way around this? or is the only way to rotate each building to match the original model axis? I'd rather not have to take the model apart and mess around every time I want to do a scale print.
And I don't understand why a Standard view has to be selected to get the print scale options. As long as the view is parallel it shouldn't matter.
Thomthom,
Try this to see if it works.
%(#0040FF)[- For each face create a scene in which you have the Blue axis running 'down' towards the face that you want in front view. (don't save yet)- Select 'Parallel Projection' (...not yet)
- And right clicking on one of the rotated axes will let you choose 'Align View', (learned that from Suzan, thanks).
The origin will be in screen center and you will be looking 'down' on that particular face. - Pan and zoom to rigth view/position.
- Now save this scene ('as a new style') with the right scene name as a scene, for use any time.
(in top of the screen (left) you will see 'Top')]
I hope this will do the trick. (try with one first)
Wo3Dan
-
Ah, damn, now I vaguely remember something about this (I still don't know where).
an it DOES work just fine!Thanks Wodan (I guess I shouldn't browse the forums after a couple of beers - or maybe I'm just going senile...)

-
-
He... I wasn't following what was going on at the forums back then.
Maybe I should start reading all what's there from the back?
-
@wo3dan said:
@thomthom said:
I got a model where I have two buildings at different axes. I've set up a scene for each building with custom axes to match the buildings.
Now I'd like to print off a parallel view of each side of the buildings in scale. The problem is that the print scale option only occurs when I've clicked on one of the Standard Views. And the Standard views only matches the original axes of the model, not the custom viewport axes.
Is there any way around this? or is the only way to rotate each building to match the original model axis? I'd rather not have to take the model apart and mess around every time I want to do a scale print.
And I don't understand why a Standard view has to be selected to get the print scale options. As long as the view is parallel it shouldn't matter.
Thomthom,
Try this to see if it works.
%(#0040FF)[- For each face create a scene in which you have the Blue axis running 'down' towards the face that you want in front view. (don't save yet)- Select 'Parallel Projection' (...not yet)
- And right clicking on one of the rotated axes will let you choose 'Align View', (learned that from Suzan, thanks).
The origin will be in screen center and you will be looking 'down' on that particular face. - Pan and zoom to rigth view/position.
- Now save this scene ('as a new style') with the right scene name as a scene, for use any time.
(in top of the screen (left) you will see 'Top')]
I hope this will do the trick. (try with one first)
Wo3Dan
I can't get this to work...
- I create a new scene
- I align the model axis so the blue z axis runs towards the face.
- I select parallel projection (you said "not yet.." here, didn't understand that one. if not then, when?)
- I align the view with the axis
- I pan & zoom to fit
But there is no text in the top left of the viewport indicating a standard view, nor do I get print scale options.
What am I missing?
-
No, do this:
- align the axes to the object
- select the parallel projection (and don't do the scene update yet - Wodan was meaning that).
- go to top view
- click on one of the horizontal (R/G) axes.
- pan and zoom as needed.
-
 Still isn't getting it...
I tried following the steps to the letter, but I can't do the second last point as described. Simply clicking the axis doesn't do anything. I assumed you meant right-click and align view. But when I do that "Top" disappears from the upper left part of my viewport.
Also, when am I suppose to update the scene?
-
I retried and the TOP didn't disapper. Did it align your object however?
And only refresh your scene when you have the view that you want (at the end). -
It did align the view to face the my object. But the result where just the same as when I select a face and choose "Align View"; I end up not in a standard view and can't print to scale.
... what SU version do you have? Mine is SU Pro 6.4.112
-
Did you also right click on the axis (say red) and aligned the view to that?
I don't know where you are missing the point.
-
Yes, after I'm in parallel Top view I right click the axis and Align View. That's when the "Top" text in the upper left part of the viewport disappears.
Thanks for trying to help me out, but it seems my brain just can't wrap itself around this. Feels like a Monday...
-
Thomthom,
sorry, I was away for a while reading other things blablabla....
I updatet the text a bit, hoping it will be clearer now:@wo3dan said:
Try this to see if it works.
- For each face (to be printed later) create a scene in which you have the Blue axis running 'down' towards the face that you want in front view. (don't save yet, well you may)
- Select 'Parallel Projection' (you only need to save or update when you temporarely want to switch to another scene. Ultimately you only need one scene for each face) (so do not save yet, you may)
- And right click on one of the rotated axes will let you choose 'Align View', (learned that from Suzan, thanks).
The origin will be in screen center and you will be looking 'down' on that particular face. - Pan and zoom to right view/position.
- Now save (or update) this scene ('as a new style') with the right scene name as a scene, for use any time.
(in top of the screen (left) you will see 'Top')[/color]
I hope this will do the trick. (try with one first)
Wo3Dan
-
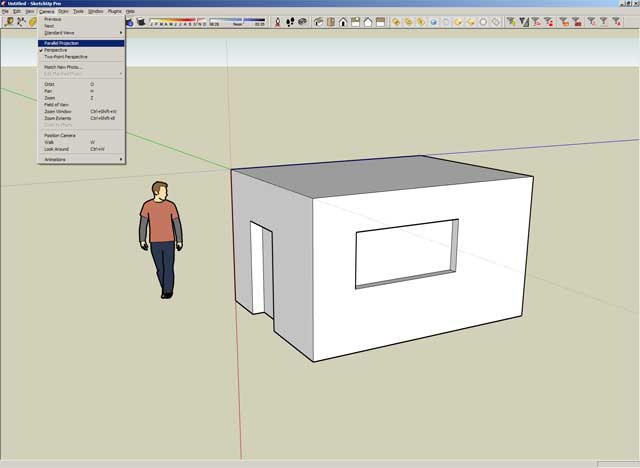
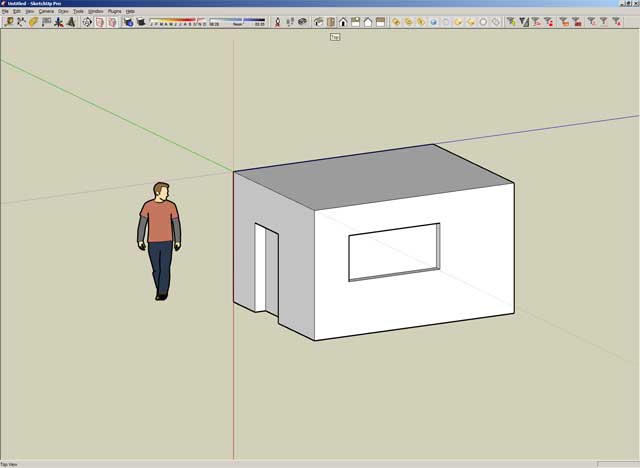
I'm posting step by step screenshots of what I do.
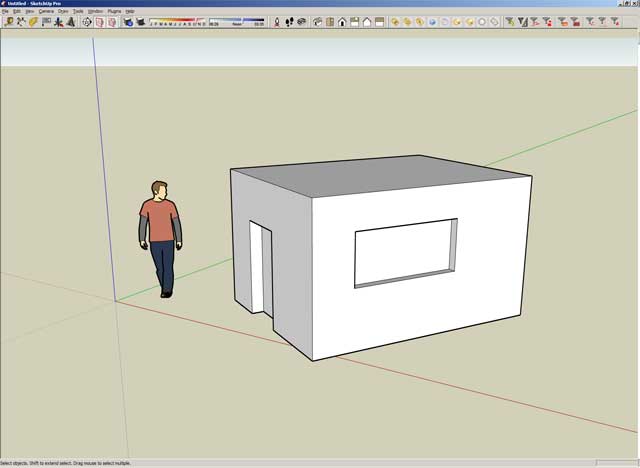
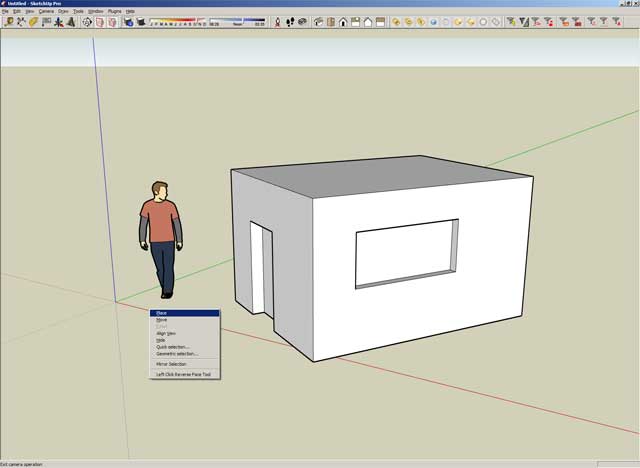
more coming...
-
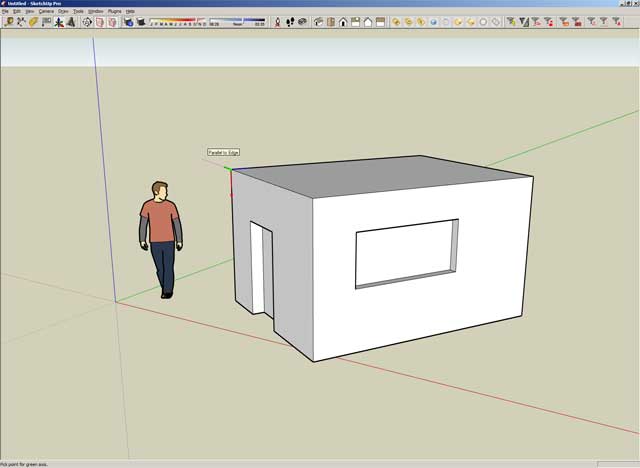
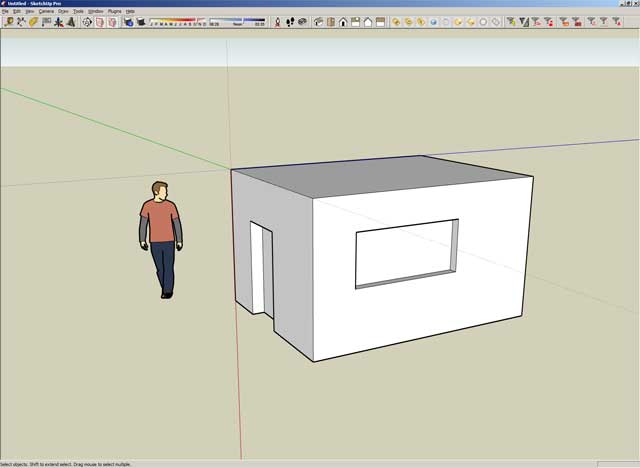
more coming...
-
more coming...
-
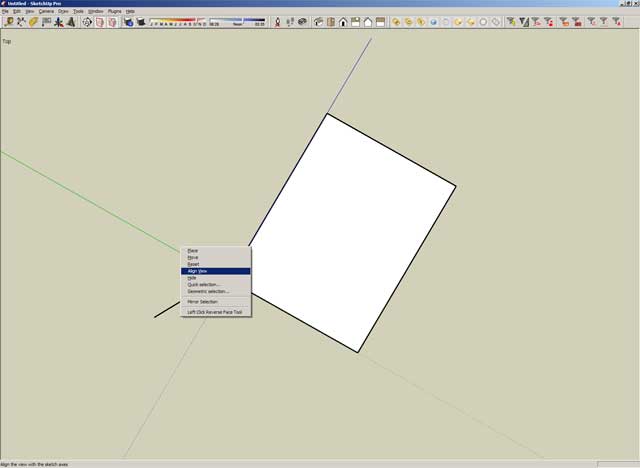
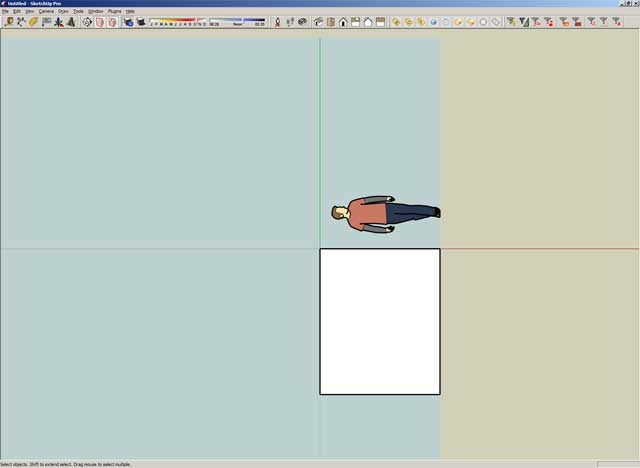
End of screenshots.
Advertisement


