Medeek Floor
-
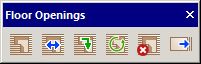
The Floor Opening toolbar will now contain a sixth tool called “Stretch Header” which will allow the user to stretch the opening headers in a more intuitive fashion:
I’m not really wanting to add more icons to my already bloated toolbars but I feel like this will be a very worthwhile tool and it will almost certainly makes everyone’s life a little easier when it comes to these openings.
I am also working on enabling double and triple ply headers, so much to do and never enough time to accomplish it all it seems.
-
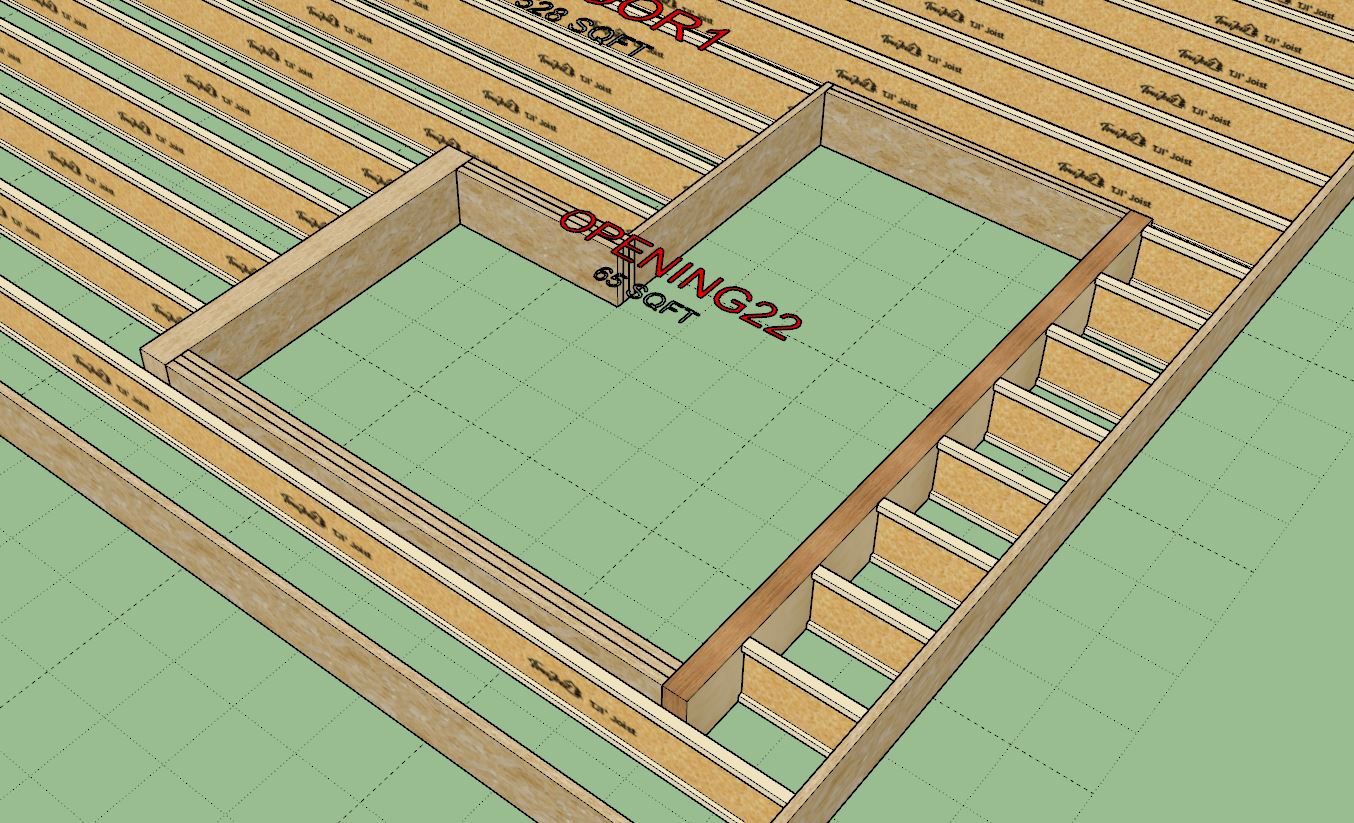
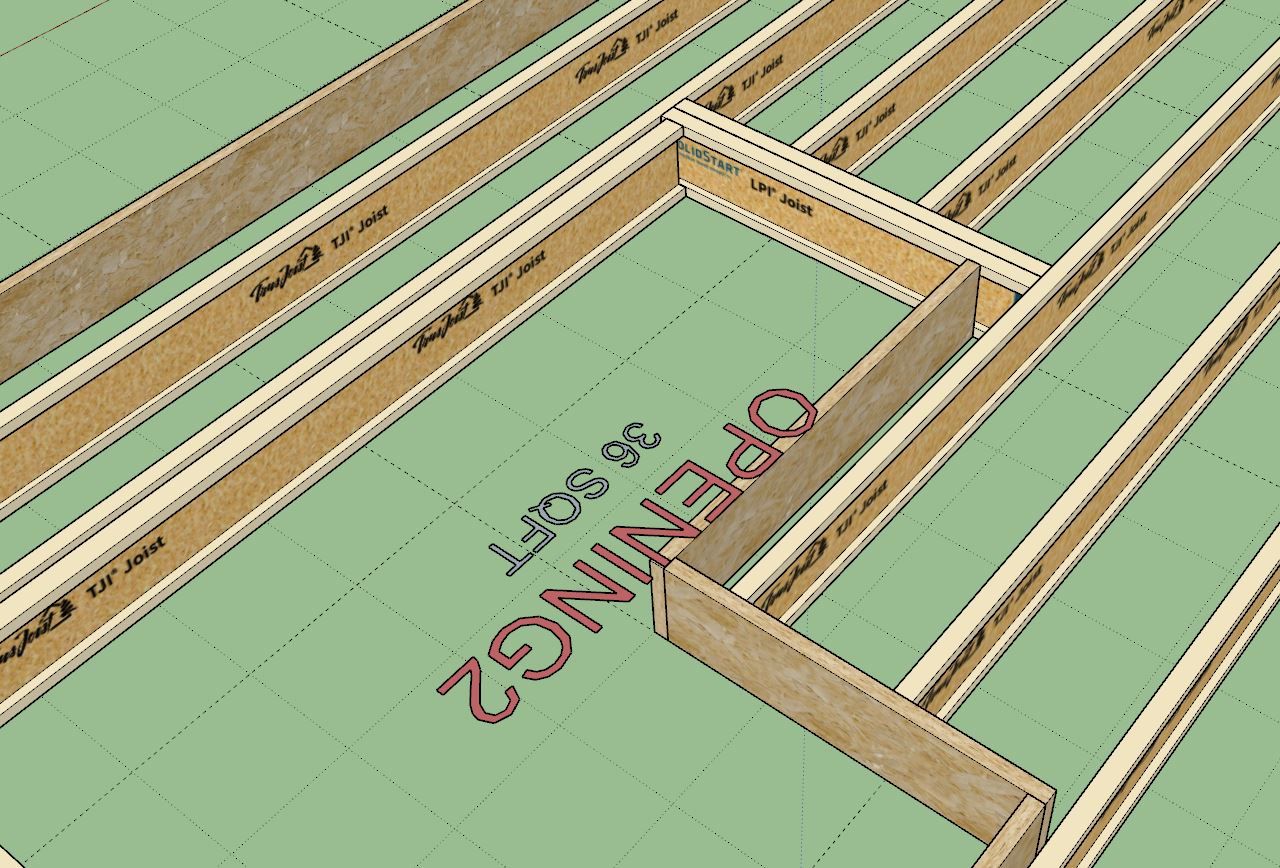
The joists that the headers frame into normally will be doubled as well, or could be a single heavier (different) joist.
-
Version 1.0.2 - 05.22.2025
- Enabled multi-ply floor headers for openings.
- Enabled variable lengths for staggered joists.
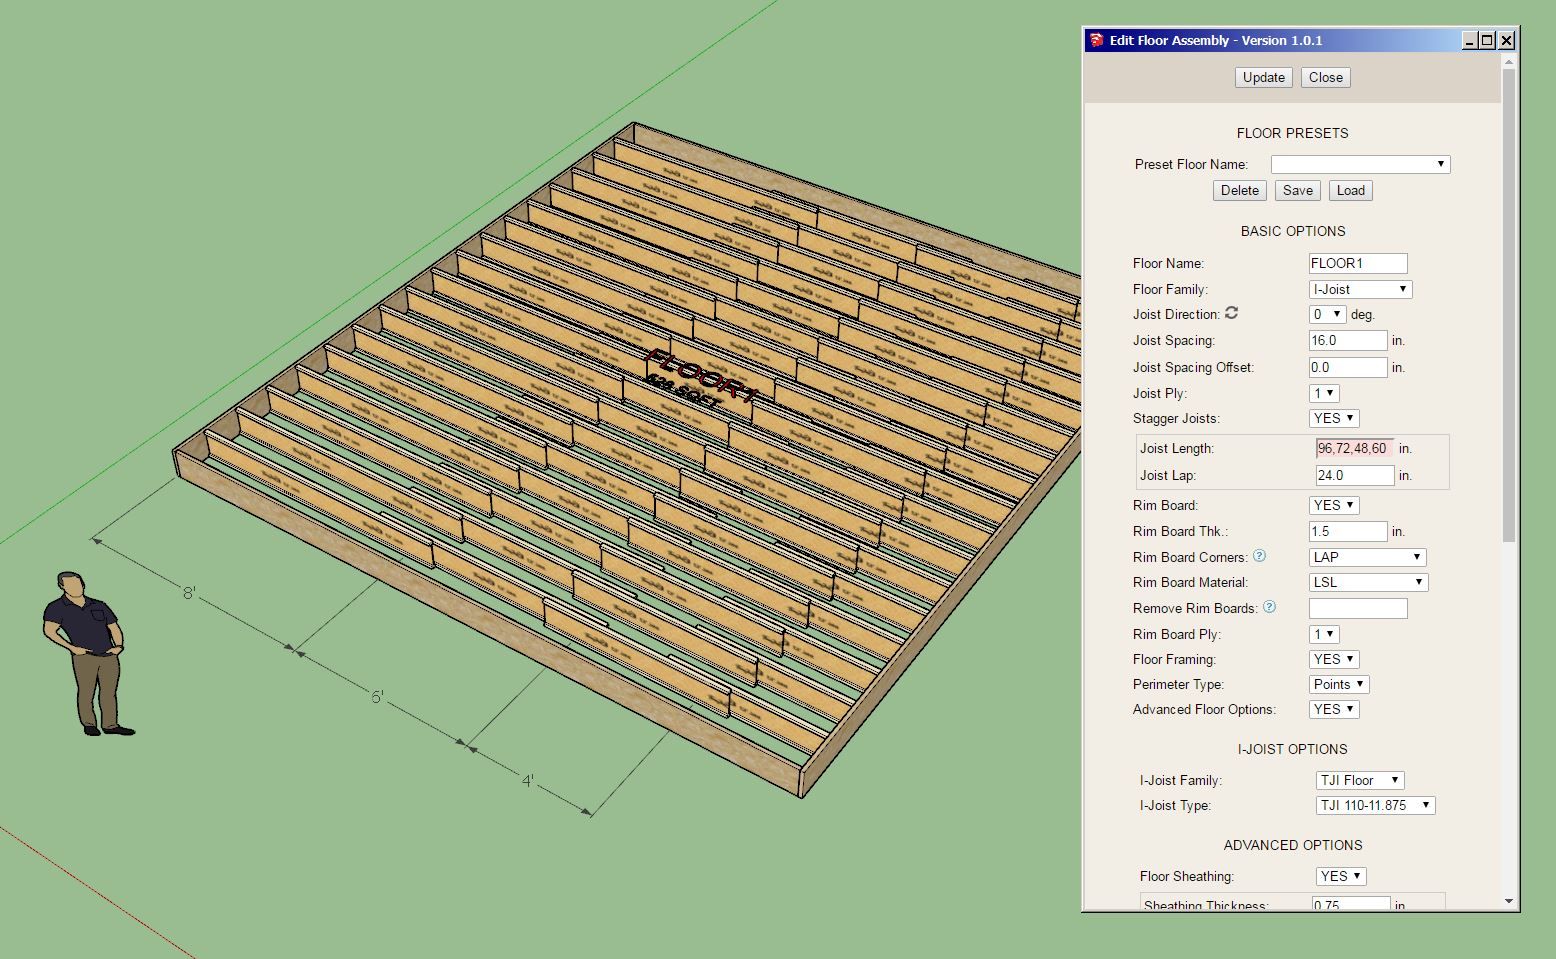
You can now enter in a single value for the joist length or you can enter in a list of lengths deliminated by commas. This update per user request.
-
Version 1.0.2b - 05.23.2025
-Updated the joist removal function for more granular usage when working with staggered joists.I apologize for all of these micro updates, I would have preferred to roll this out after adding a few more features etc... However, the user who requested this specific ability obviously needs it to complete their project so it is simply a matter of expediency.
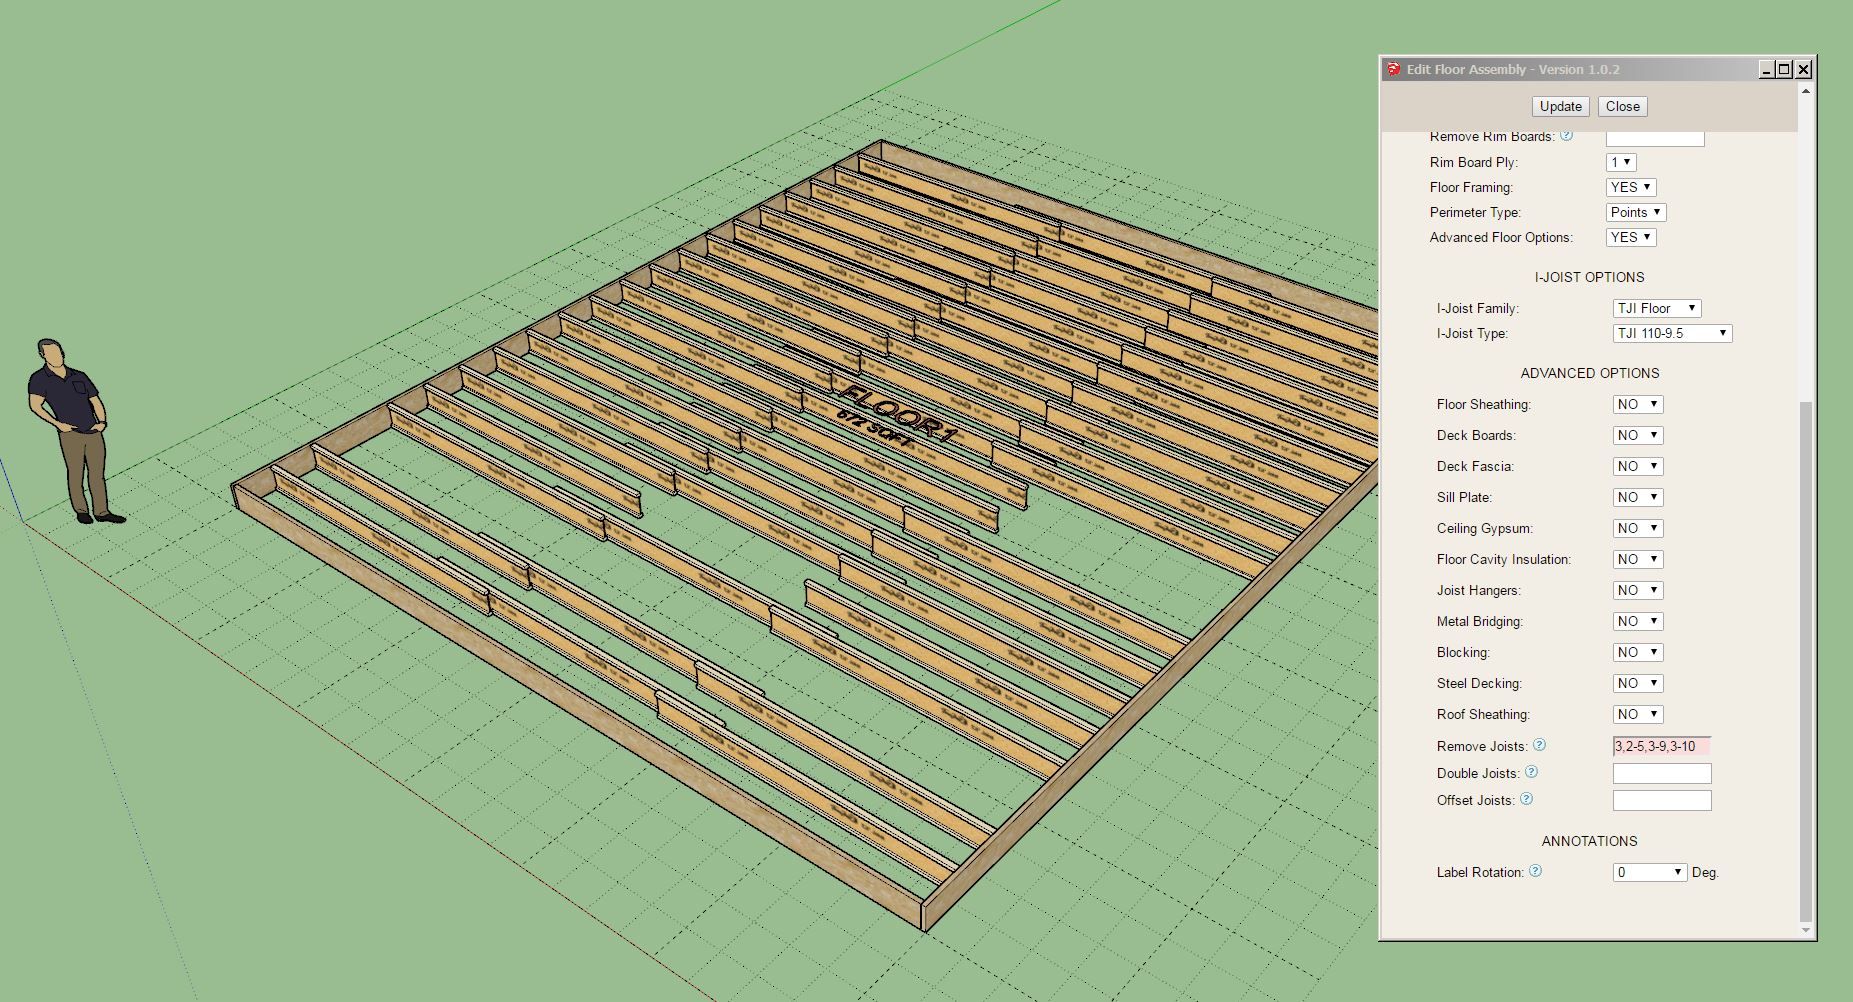
Now one can not only specify a single line of joists to remove but also remove specific joists from a given line, see screenshot above and note the syntax in the Remove Joists field.
-
Tutorial 23 - Joist Removal (8:06 min.)
-
Version 1.0.3 - 05.25.2025
- Enabled I-Joist floor headers for openings.
-
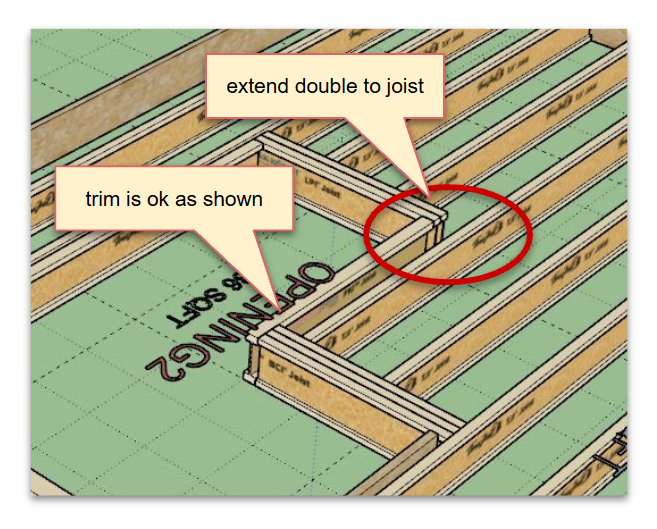
i think the one double on the right side needs to extend to the next joist. the trimmer is ok where it is to size the opening, but structurally always best to have the joists and headers linked.
-
Version 1.0.4 - 05.26.2025
- Enabled joist hangers for openings.
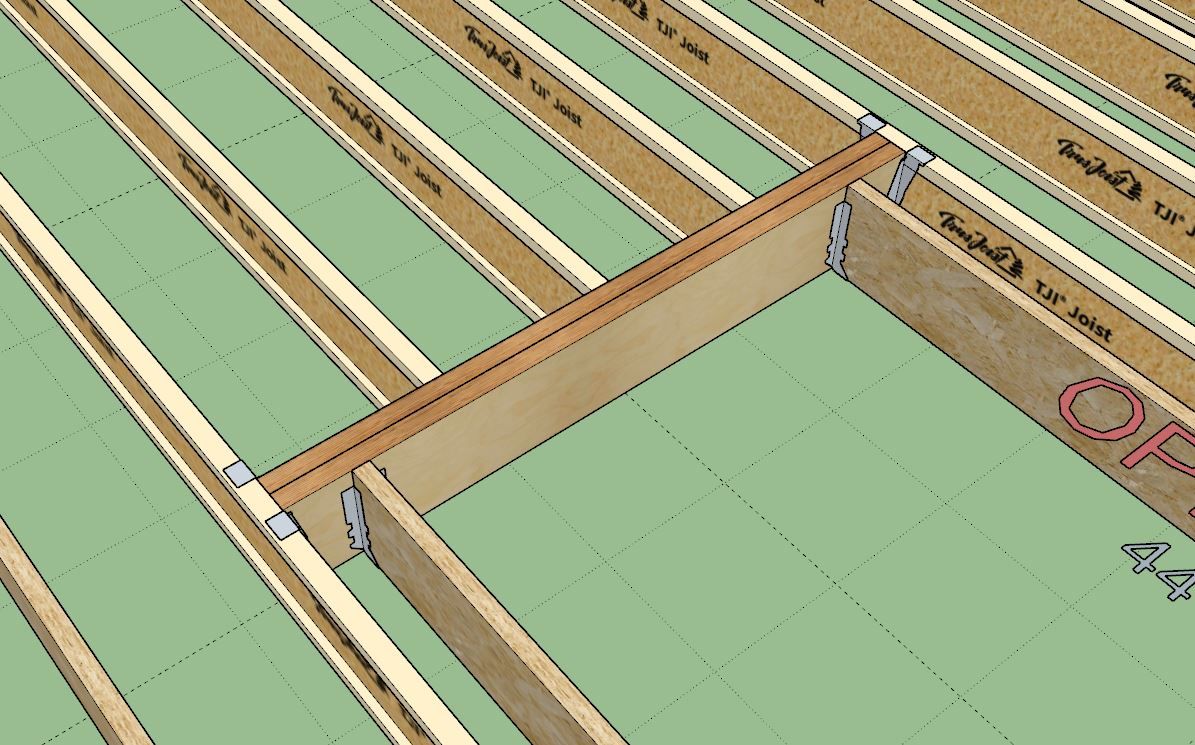
Tutorial 24 - Joist Hangers and Openings (7:58 min.)
-
Version 1.0.5 - 05.30.2025
- Added the ability to stretch opening headers with the "Stretch Floor Header" tool.
Tutorial 25 - Stretching Opening Headers (7:50 min.)
-
i think this is a good solution - otherwise you'd have to do all the other computations for where existing parallel joists are located. whereas here, you let the user crate the extensions on the header as needed or desired. cheers!
-
Version 1.0.6 - 05.31.2025
- Added an edit function to the "Stretch Floor Header" tool.
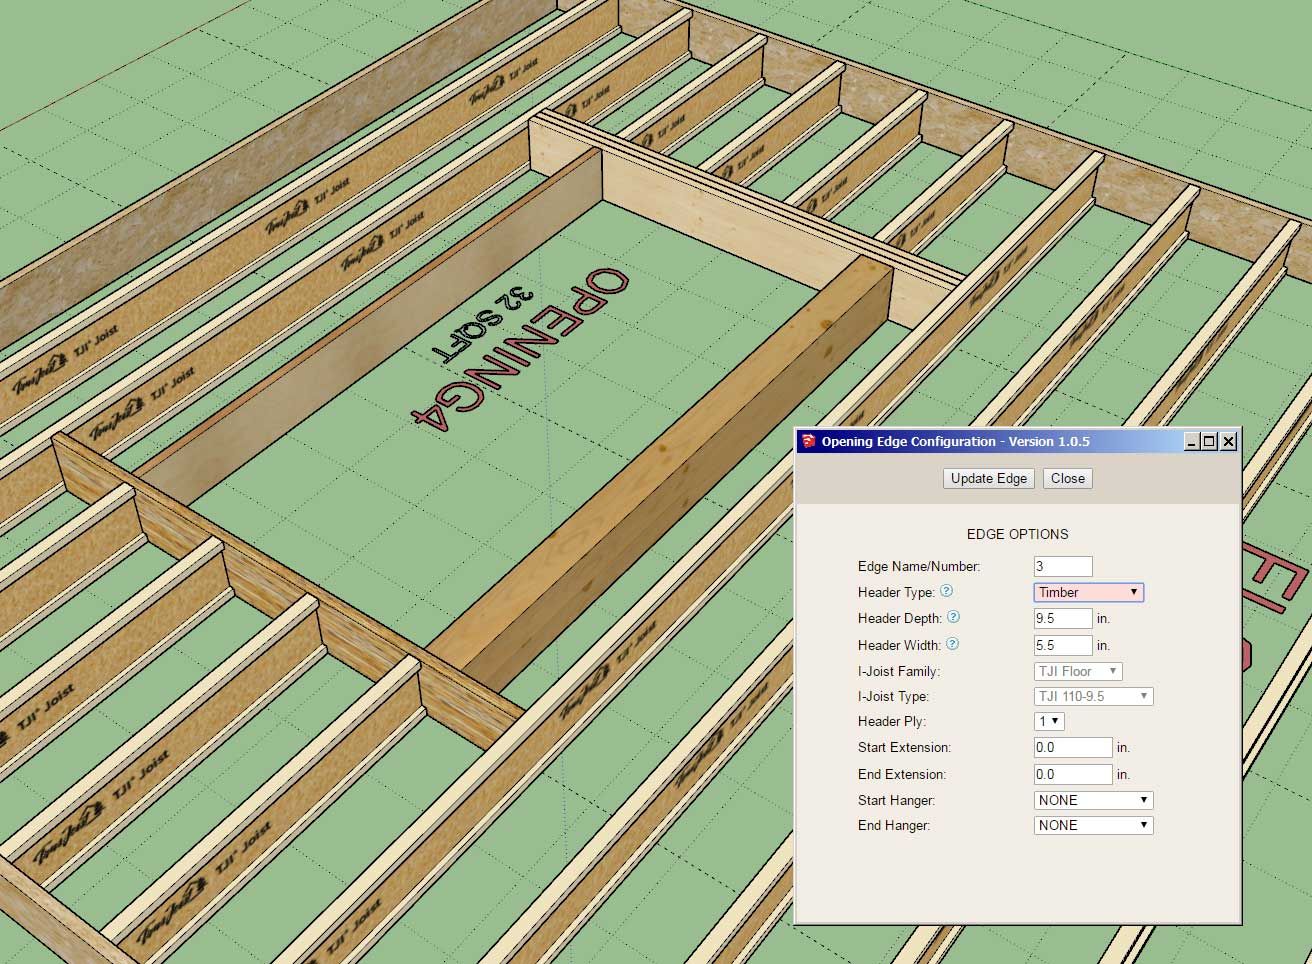
- Added a "Timber" header type for floor openings.
- Fixed minor bugs in the floor opening module.
-
Tutorial 26 - Editing Opening Headers (5:00 min.)
-
After a full day of tinkering and refactoring a bunch of the original floor truss code I think I now have the multi-chase algorithm working:
Note how the chases all line up even though there are five or six different truss profiles within this assembly. I still need to create the web generator between the central sections of the truss profile, there is quite a bit going on here. I am still a few days out from completing the programming and then another two or three days of testing and further debugging.
-
Looks like I’m about 95% there with floor trusses:
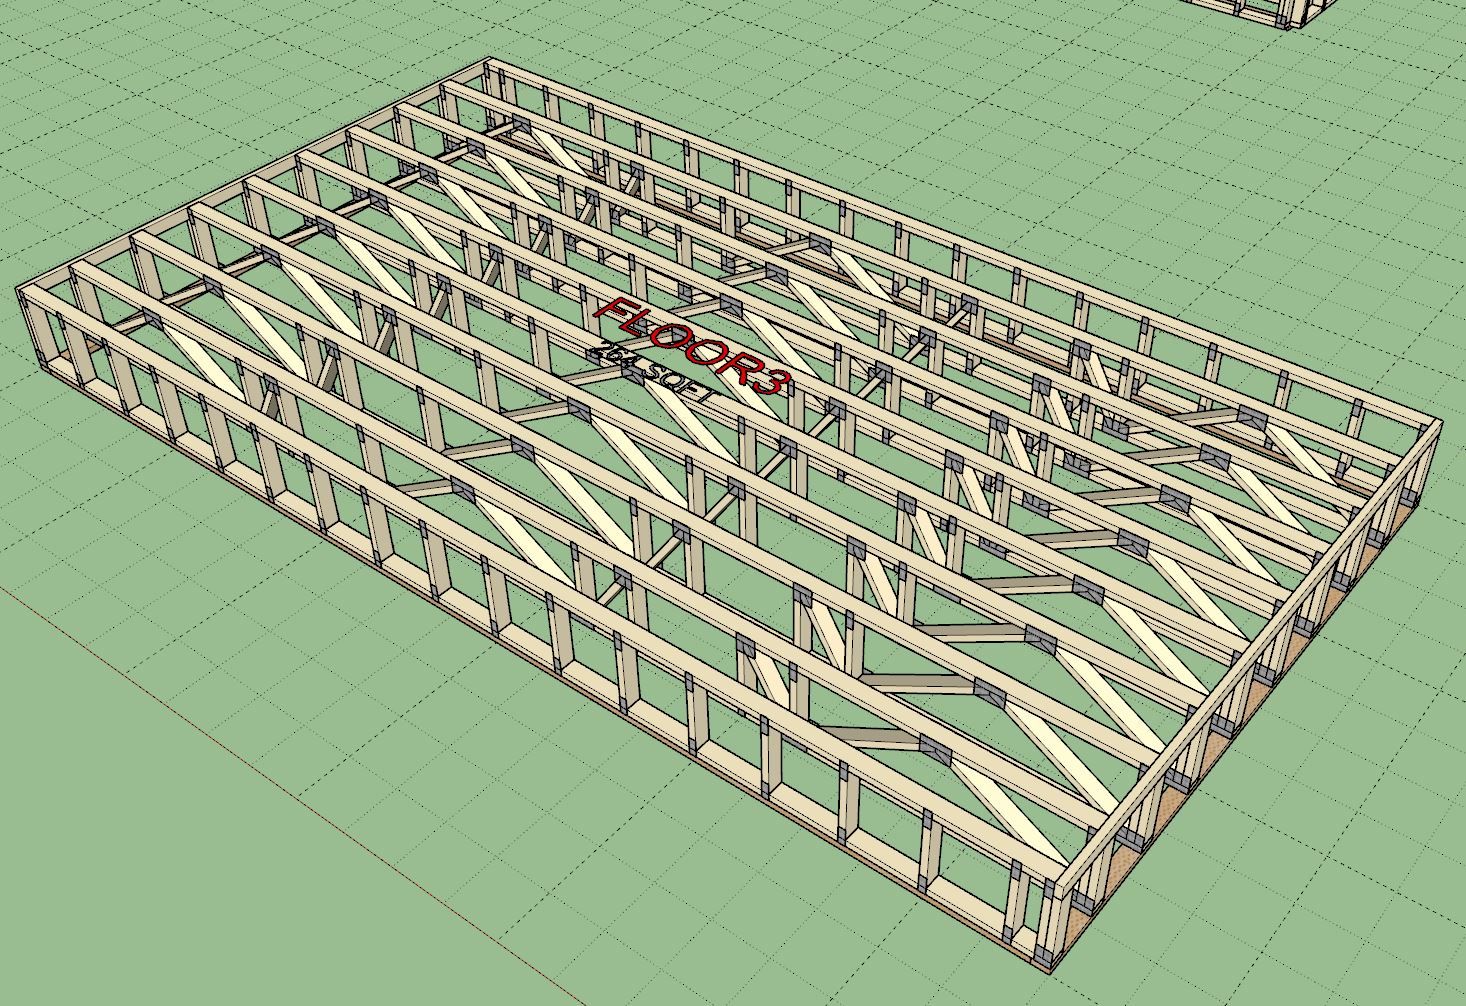
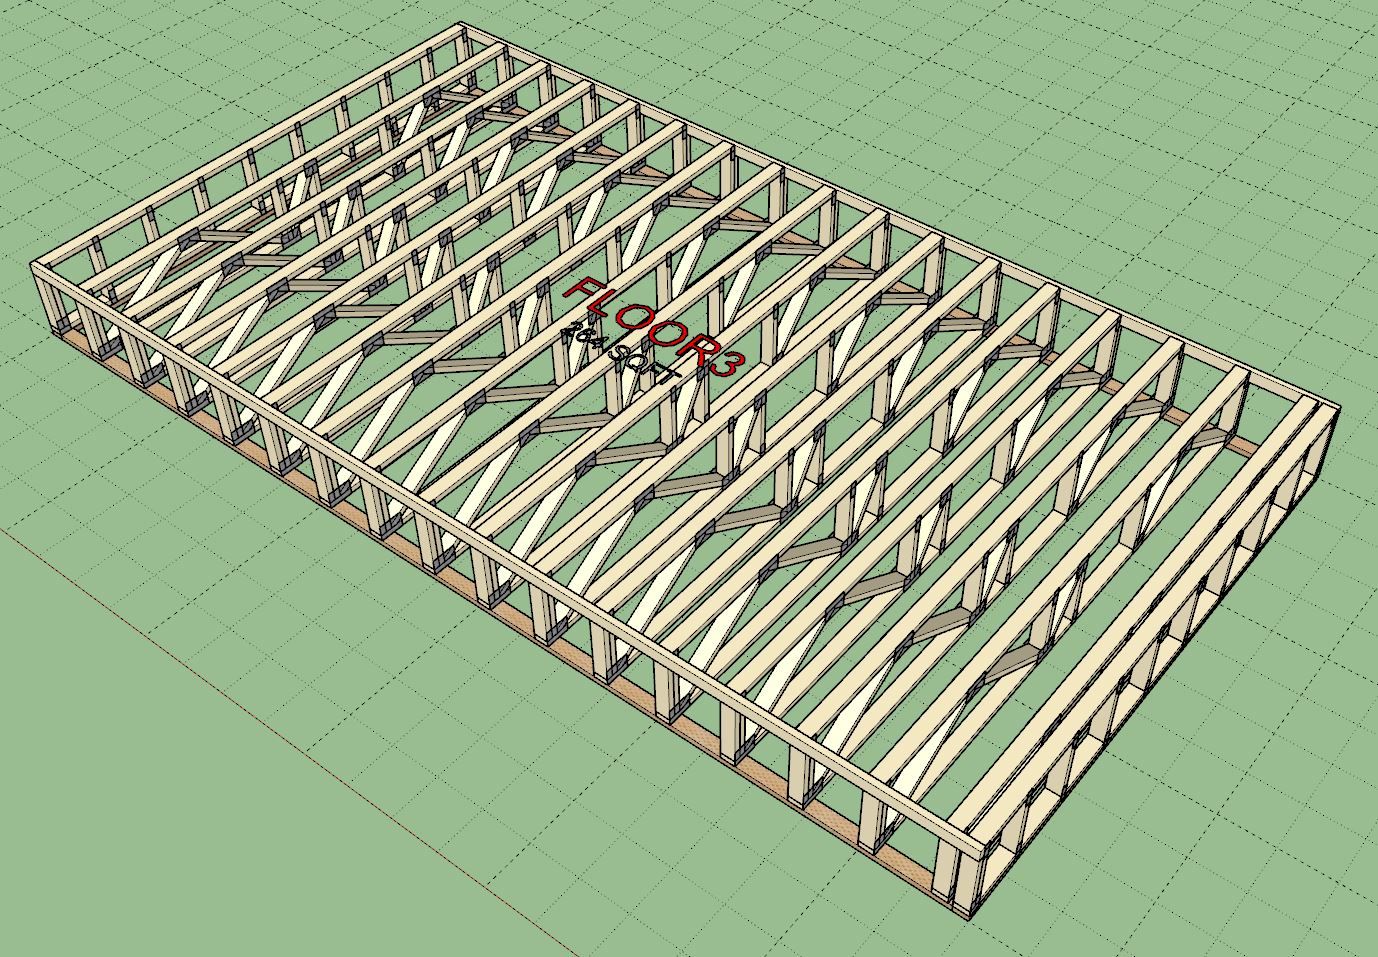
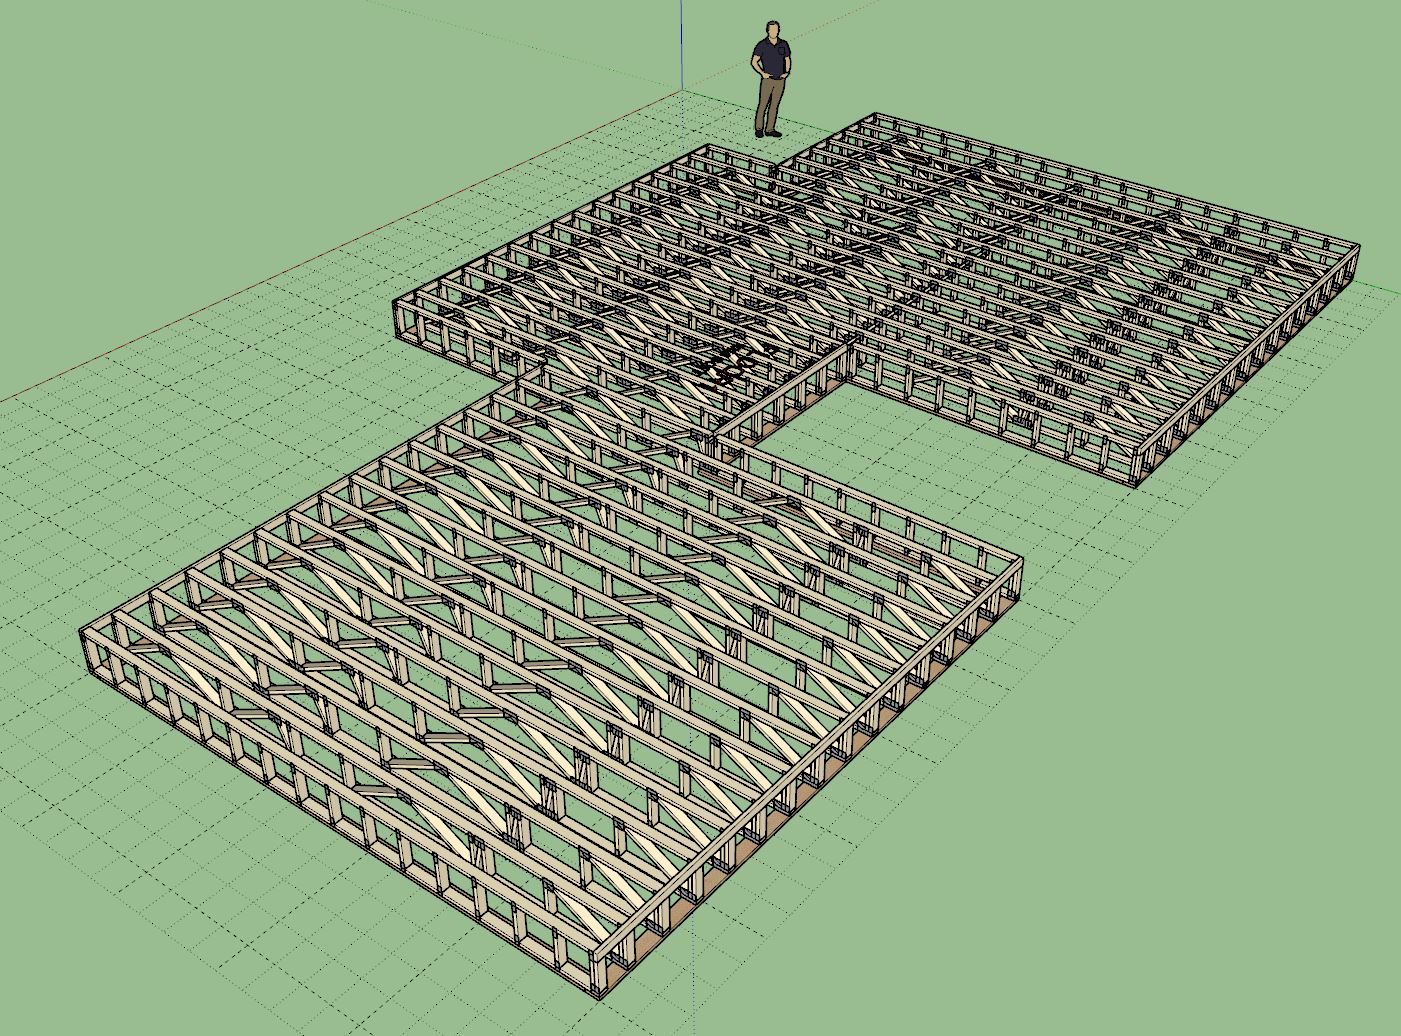
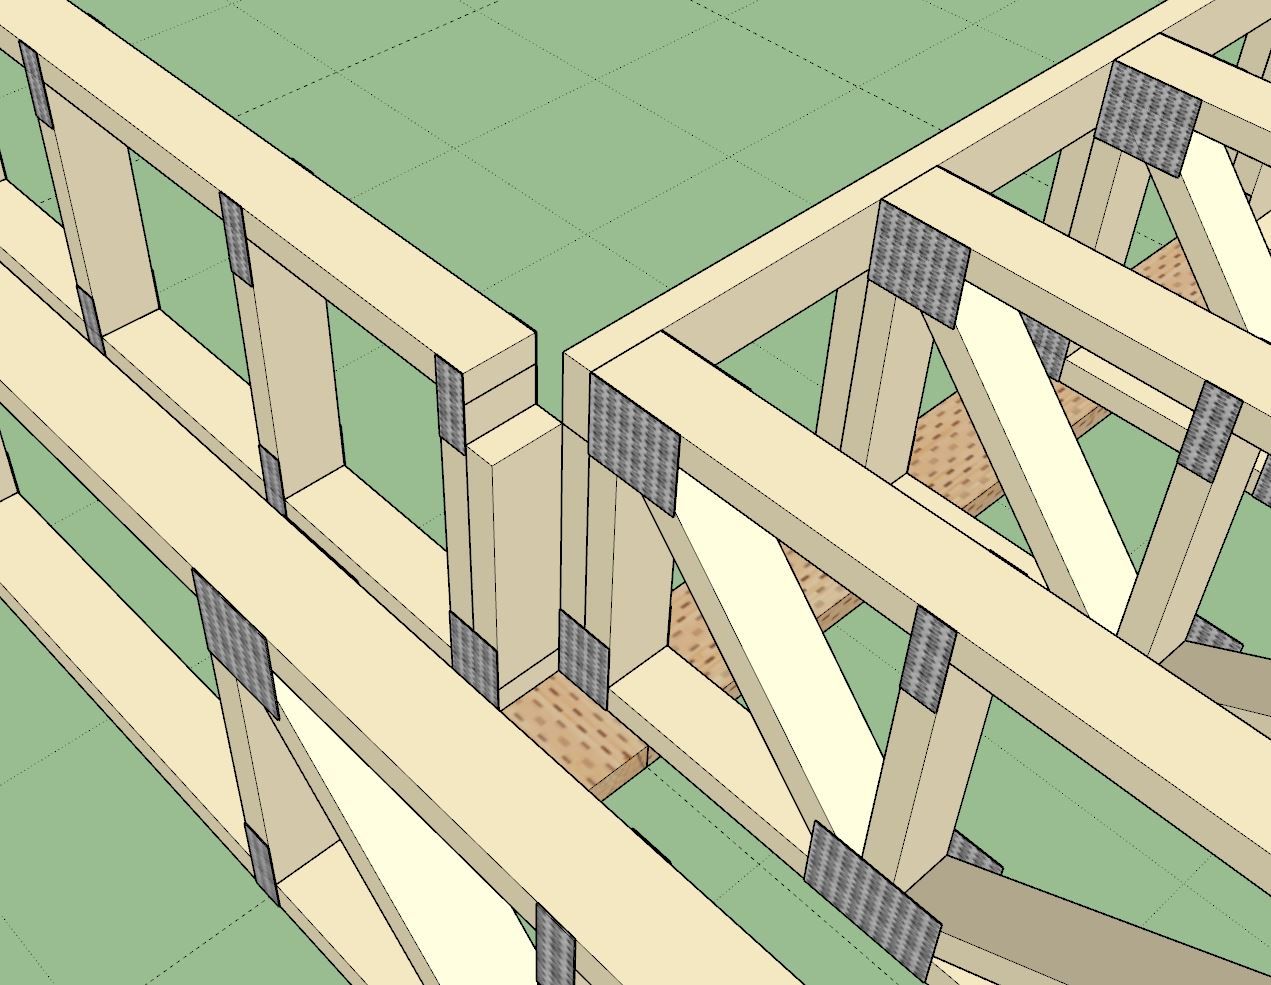
The only issue appears to be what happens when ribbon boards are enabled and you have an inside corner as shown. I probably need to add in some additional logic to eliminate the slot for the ribbon board in these cases.
-
looking good. also - there is some "clumping" of members on the left-hand side of the right-hand chase. likely due to having a second change and the sizing of the middle truss members (maybe instead a long one and clumped one, make two even one as i think this is how they would be manufactured)
-
Version 1.0.7 - 06.06.2025
- Enabled MPC Wood Trusses with ribbon boards, multiple chases and gable trusses.
- Updated the Move Floor Edge tool so that it also toggles the metal plate connector layer.
- Update the SUBTRACT_JOIST feature so that it can adequately handle MPC wood trusses.
Tutorial 27 - MPC Wood Trusses (13:25 min.)
-
Version 1.0.8 - 06.08.2025
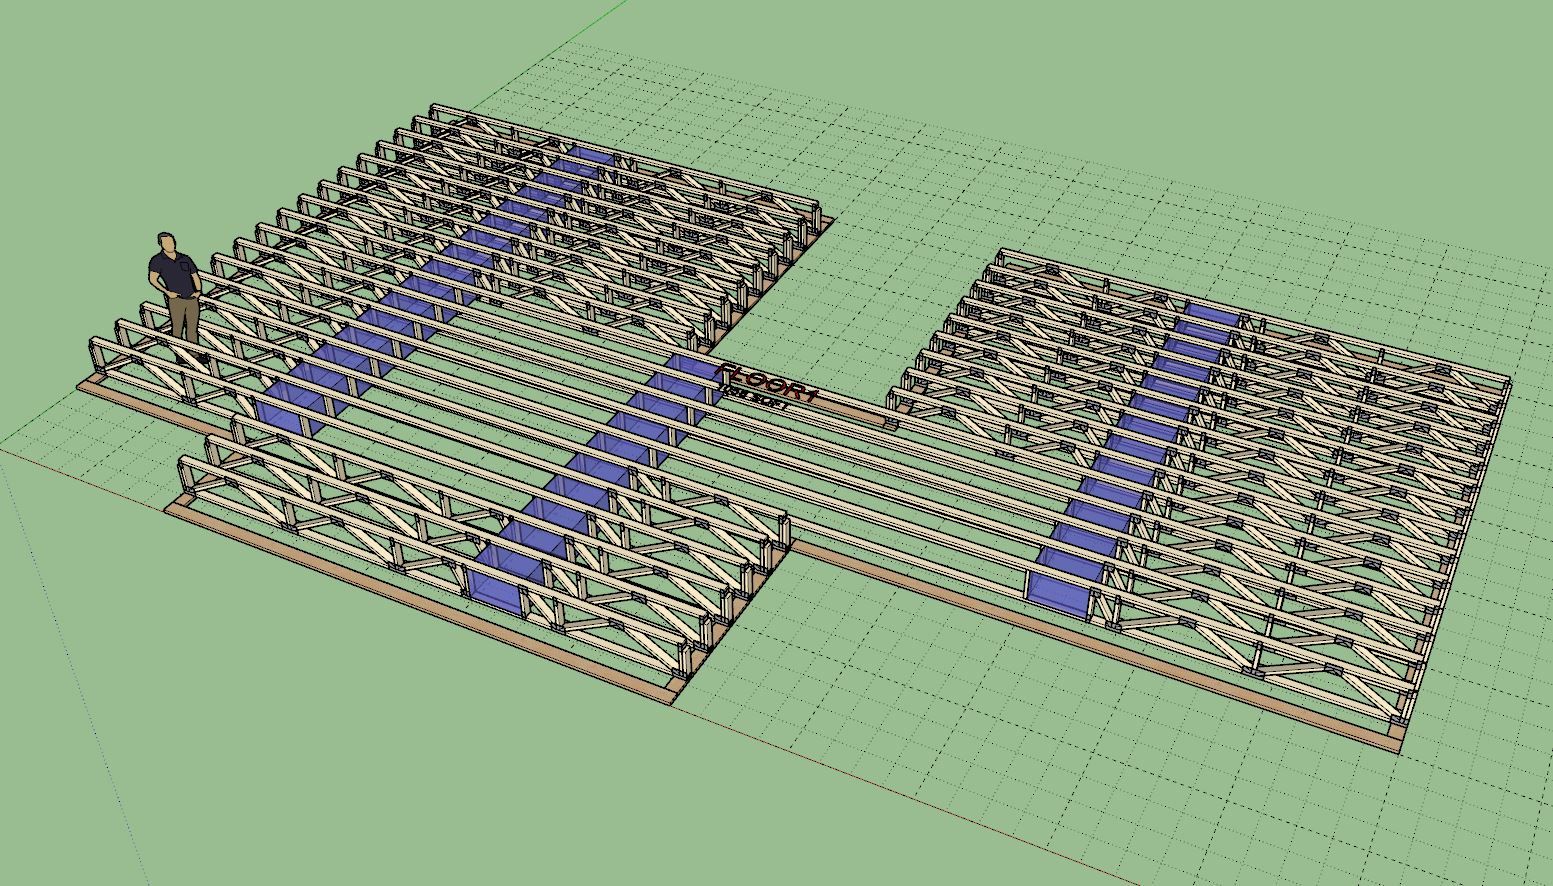
- Updated the SUBTRACT and SUBTRACT_JOIST features so that they can better handle MPC wood trusses, steel trusses and open web "Redbuilt" trusses.
- Updated the Floor Opening module so that it can handle MPC wood trusses, steel trusses and open web "Redbuilt" trusses.
- Added a "None" option for the header type in the draw and edit menus for floor openings.
-
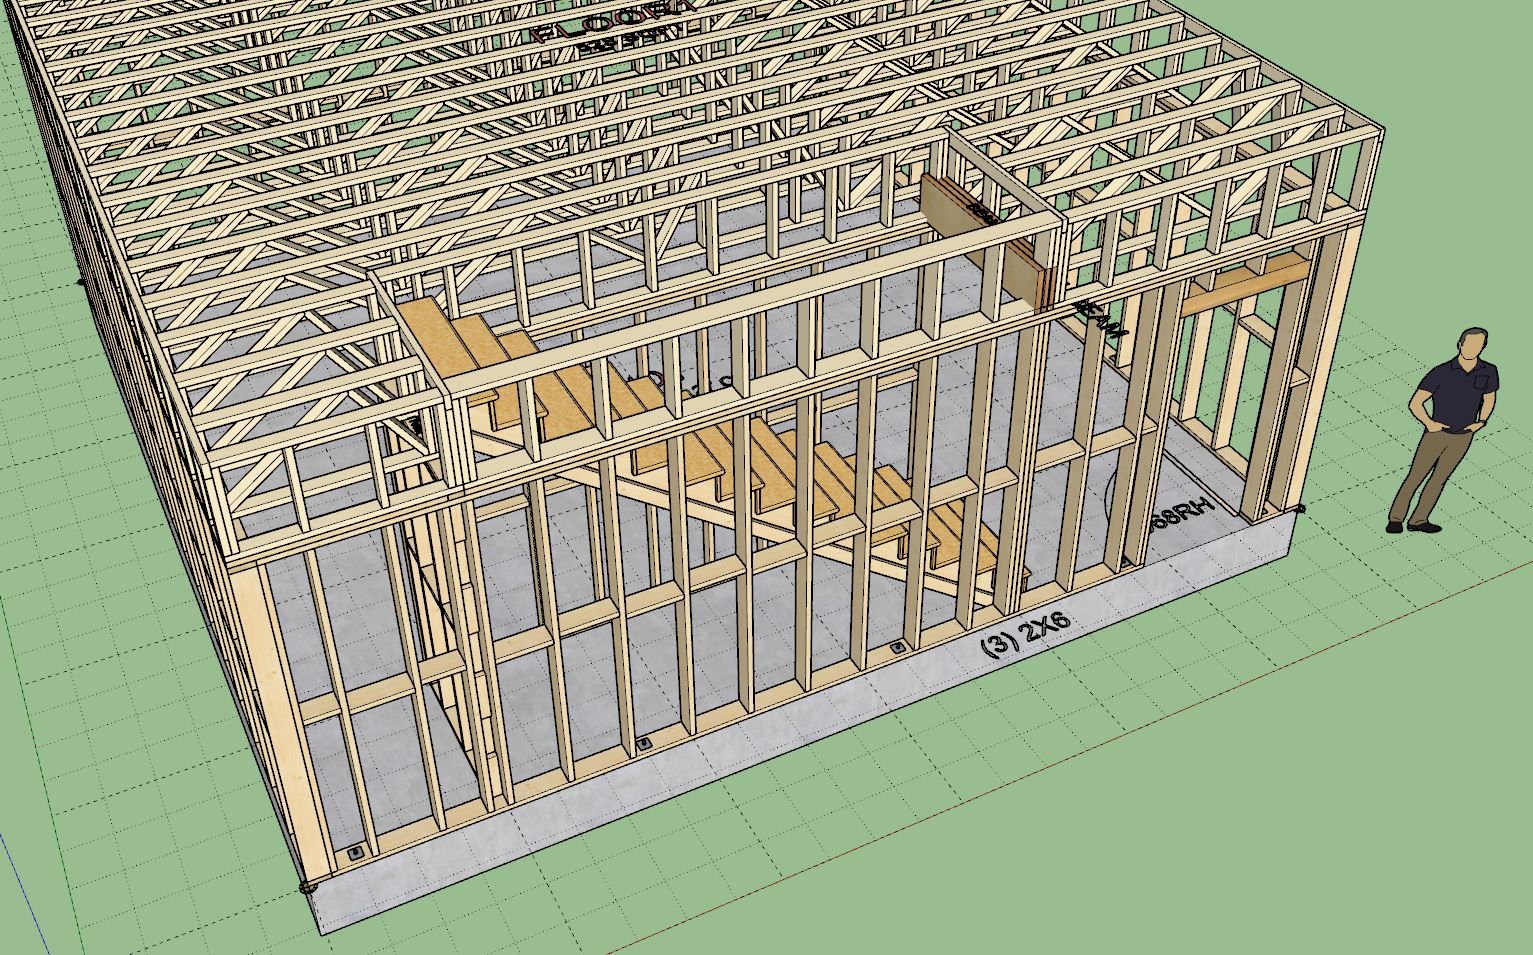
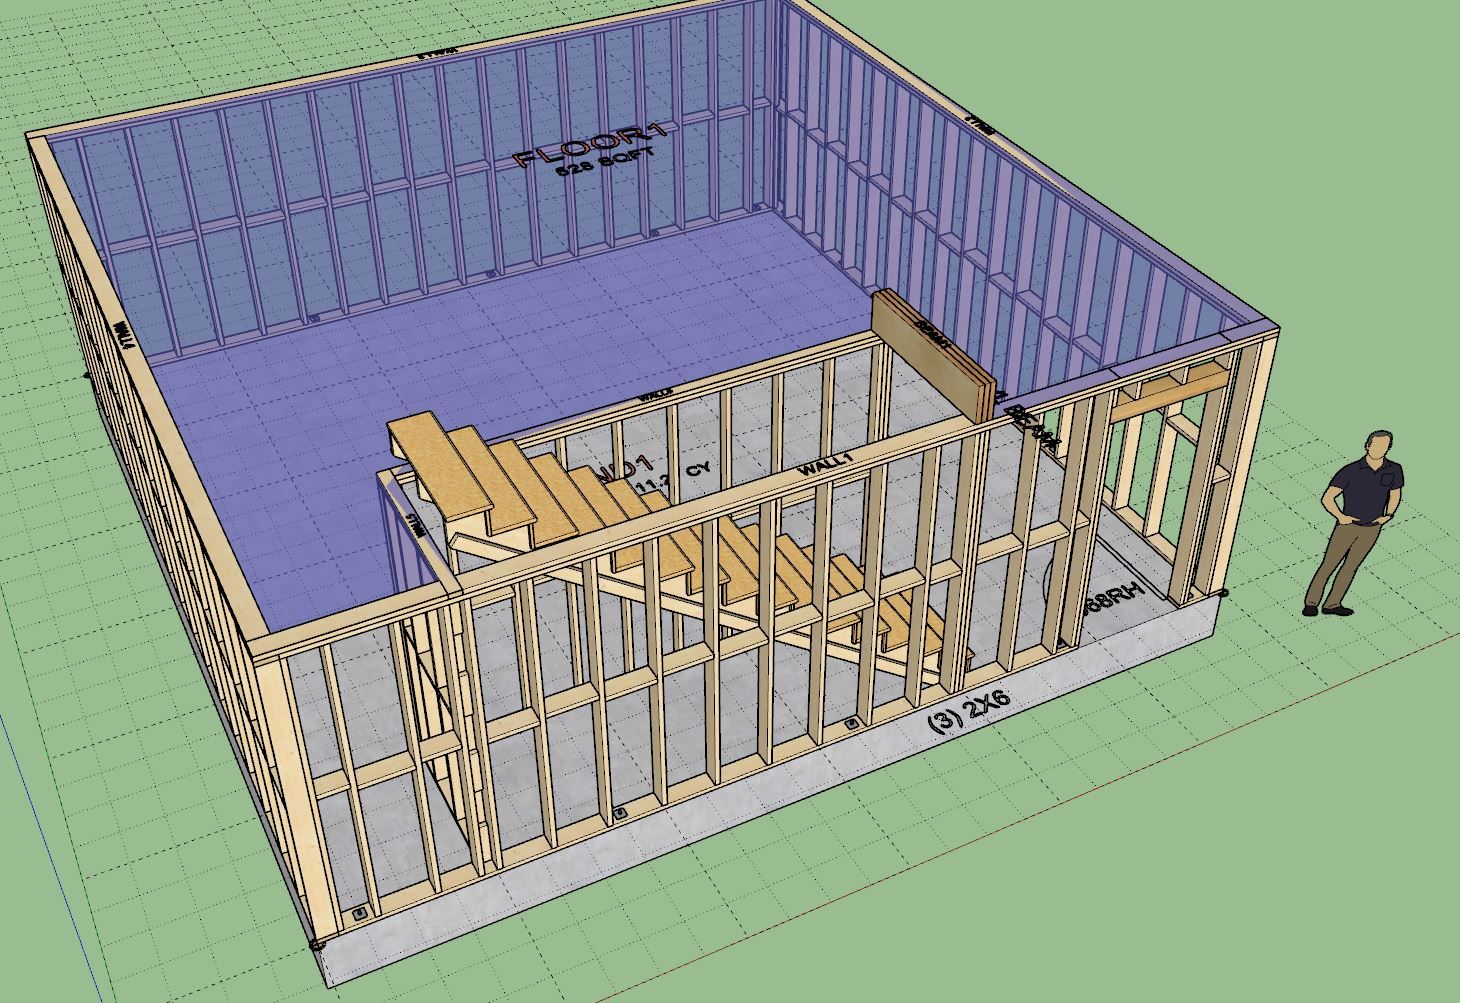
In many cases when you introduce a stairwell opening into a floor like this it will be along the perimeter of the floor assembly as shown. In these cases it is simpler to create your floor perimeter with the opening in mind:
Note, in order to create the additional gable truss (2x6 ply) I first changed my ply width to 5.5" then copied the gable truss at the interior of the stair well, then pasted it in place in the root of the model and then edited the floor assembly back to the typical 3.5" ply width. Alternatively one could simply frame this small pony wall with the Wall plugin (ie. conventional framing) just as easily.
I'm not exactly sure how the trusses would work where the LVL beam/header is positioned at the start of the stairwell, obviously we would need some kind of header at that location.
Here is a link to the model for those who are interested in examining this floor truss example in more detail:

-
Version 1.0.9 - 06.17.2025
- Added the floor truss toolbar with the following two items: Draw Beam Pocket, Delete Beam Pocket.
- Enabled beam pockets for MPC wood trusses.
- Fixed a bug with short span steel trusses.

Tutorial 28 - Beam Pockets with Floor Trusses (8:00 min.)
-
Version 1.1.0 - 12.11.2025
- Updated the file/component loading method for hangers and certain joist types to increase plugin performance.
- Fixed multiple bugs with CFS joists.
Hello! It looks like you're interested in this conversation, but you don't have an account yet.
Getting fed up of having to scroll through the same posts each visit? When you register for an account, you'll always come back to exactly where you were before, and choose to be notified of new replies (either via email, or push notification). You'll also be able to save bookmarks and upvote posts to show your appreciation to other community members.
With your input, this post could be even better 💗
Register Login


Advertisement