Modeling help
-
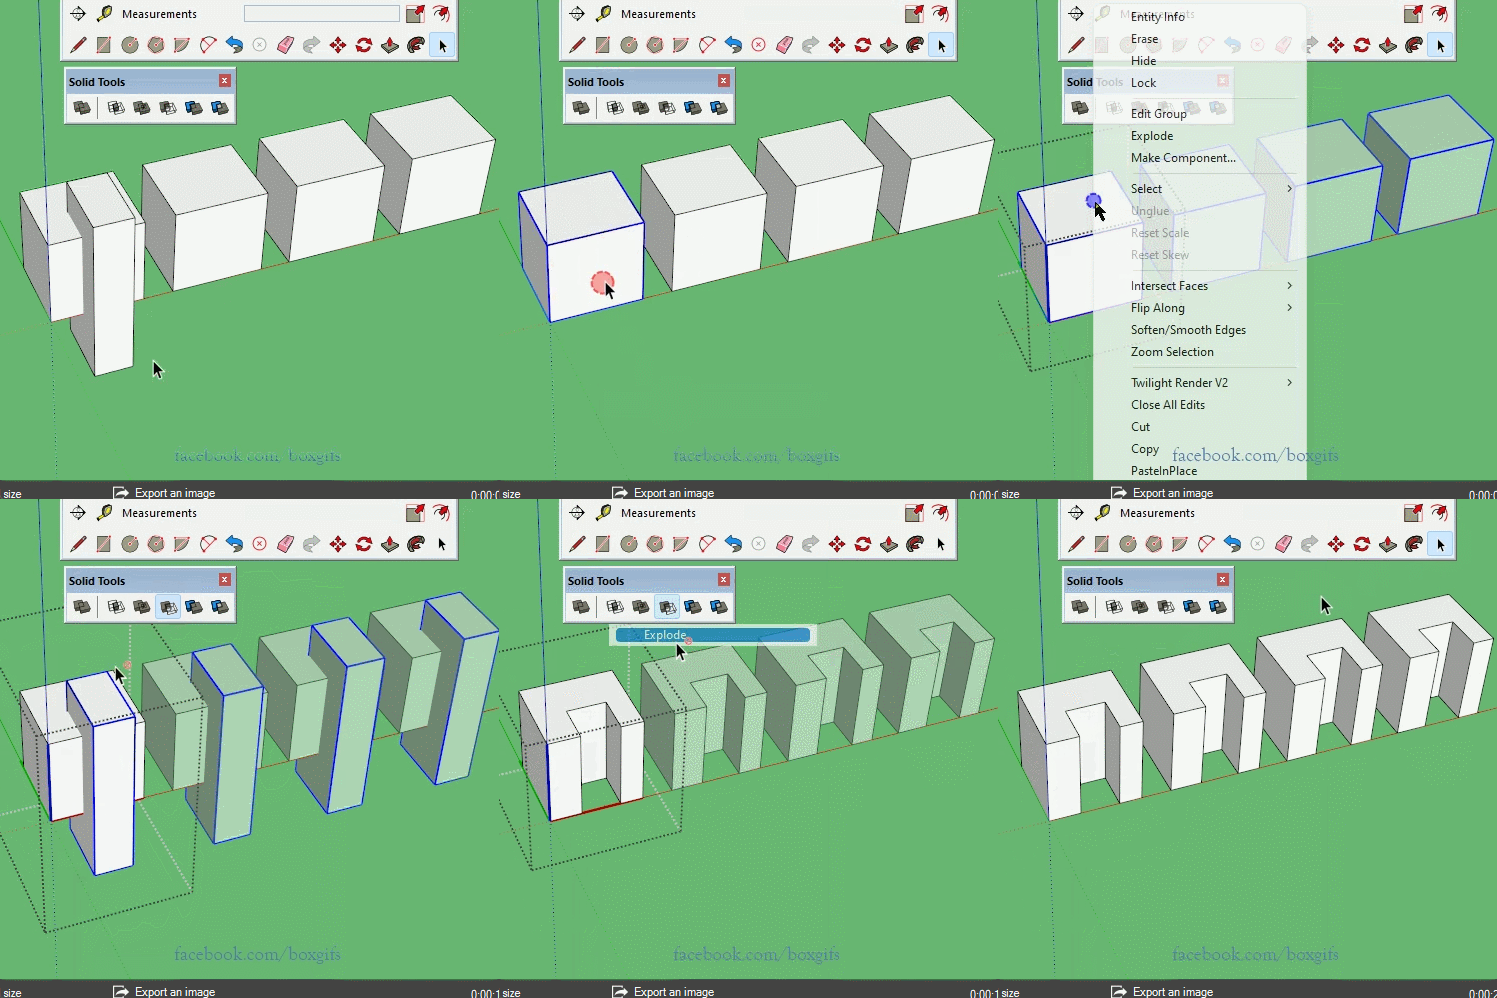
This doesn't address your question about materials but why not use the solid tools make a 'Boolean' cut in the modelled part you made? Create cube for example, rotate it to the angle you need and place it completely across the target object. Use the 'subtract option in the solid tools. This only works if the cube and the extrusion are solids.
The other option would be to buy Profile Builder 3, which would allow you to draw up screen frames to follow any path, and you can use your existing modelled part to make the profile to extrude. -
If a solid try TIG: Cut to Plane (Pro) v1.1
-
@nickchun said:
"....Use the 'subtract option in the solid tools....."
By the way, can you tell me why, when performing a logical action, the object on which this action was performed ceases to be a component? How can this be fixed in the code?
-
@samodelkin_77 said:
By the way, can you tell me why, when performing a logical action, the object on which this action was performed ceases to be a component? How can this be fixed in the code?
If you dig into the component and perform your boolean operation with the component instance then your hierarchy is preserved.

BoolTools 2
Designed with 3D Printing in mind, BooTools 2 outperforms the SketchUp solid tools in nearly every way. Even works with nested solids!

mind.sight.studios (mindsightstudios.com)
This behaves the way you expect it to.
-
@rich o brien said:
@samodelkin_77 said:
By the way, can you tell me why, when performing a logical action, the object on which this action was performed ceases to be a component? How can this be fixed in the code?
If you dig into the component and perform your boolean operation with the component instance then your hierarchy is preserved.

BoolTools 2
Designed with 3D Printing in mind, BooTools 2 outperforms the SketchUp solid tools in nearly every way. Even works with nested solids!

mind.sight.studios (mindsightstudios.com)
This behaves the way you expect it to.
But this plugin is paid, I wanted to do with standard tools...
-
@samodelkin_77 said:
But this plugin is paid, I wanted to do with standard tools...
Well then as Rich mention, temporarily make the contents of the component a group, perform the solid tool action on that group, then explode the result, leaving you with the original component and all other instances edited as you want.
-
We have gone off topic now, but like this.

-
You could learn Ruby and program your own tool too. The world is your oyster.
-
@box said:
We have gone off topic now, but like this.
Thank you, it's more understandable))
But somehow a lot of operations..
Now, after a logical operation, I make a component from the resulting object again...
(but this is in cases when I don't need to edit many components) And so yes, your method is the most suitable) -
@rich o brien said:
A quick and dirty way would be to use your accurate model as a texture.
Put your view to Top and Orthographic and File > Export > 2D Graphic and make sure its .png with Transparent Background checked...

Now bring the image in Sketchup as a texture and go crazy making lo-poly versions..

[attachment=2:2jabwvfk]<!-- ia2 -->extrusion-to-texture.skp<!-- ia2 -->[/attachment:2jabwvfk]
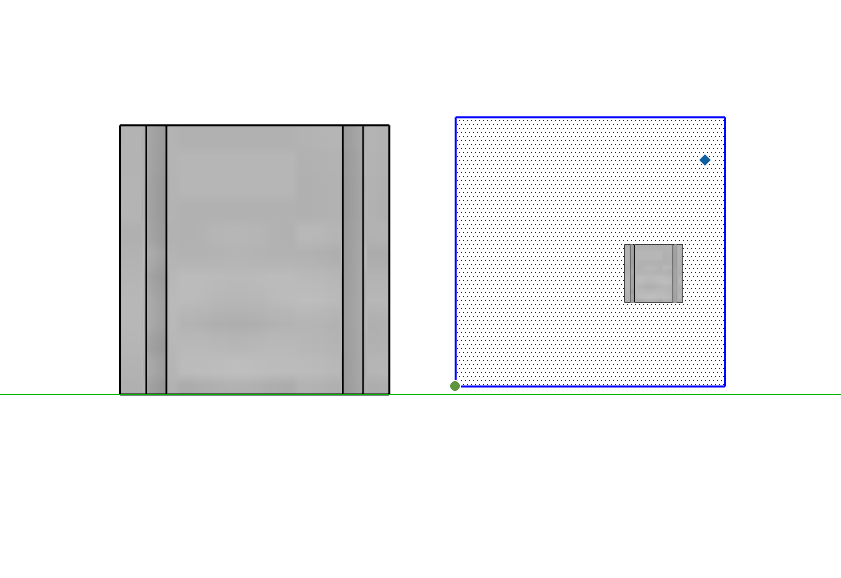
so this is exactly what i want but when i try to do this i cant get the 2d image to lay properly across the 2x2. any idea why? i have attached an image as well at the modeled piece

-
The only added step is to enter the component, triple click, make group, then explode at the end.
If you don't want to make those clicks but the plugin. -
@cadillacjack said:
so this is exactly what i want
Do I win a prize?
@cadillacjack said:
i cant get the 2d image to lay properly across the 2x2. any idea why?
Because the exported png has transparency the same dimensions as the SketchUp viewport. It doesn't trim the transparent away unfortunately.
You can trim it in an image editor or crop away in SketchUp.
-
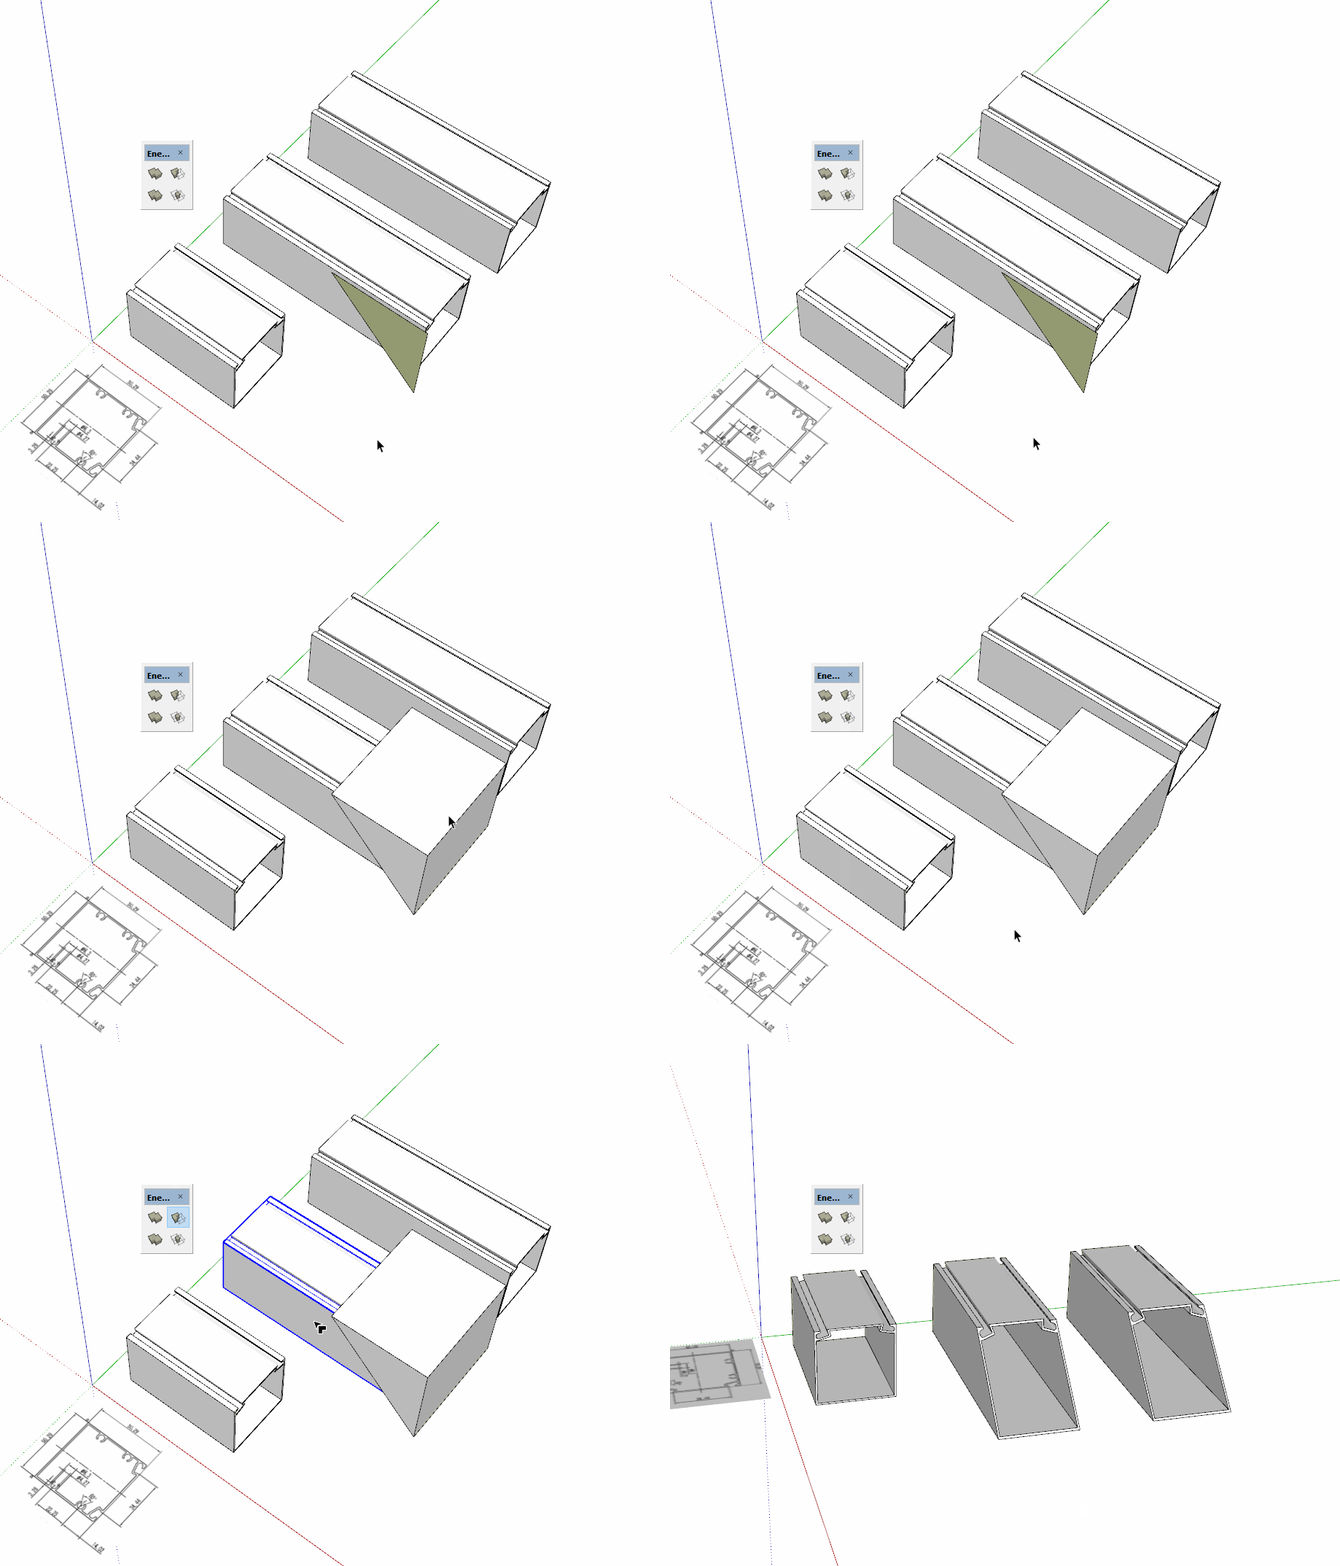
It seems to me that you are making this much more difficult than it needs to be. I don't quite understand why the texture is coming into this at all. Modeling the geometry of the extrusion is simple enough and cutting miters is not difficult and doesn't need to be time consuming. A Boolean operation (Trim or SUbtract) would be easy to set up and quick to execute. If you want to start from a component of the extrusion (I would) and wind up with a component, you could use BoolTools2 as was suggested or you could use Eneroth Solid Tools which are available at no charge.

Simple and quick model made from a screen shot of the dimensioned drawing. No need to add internal channels unless they are important to the model.
-
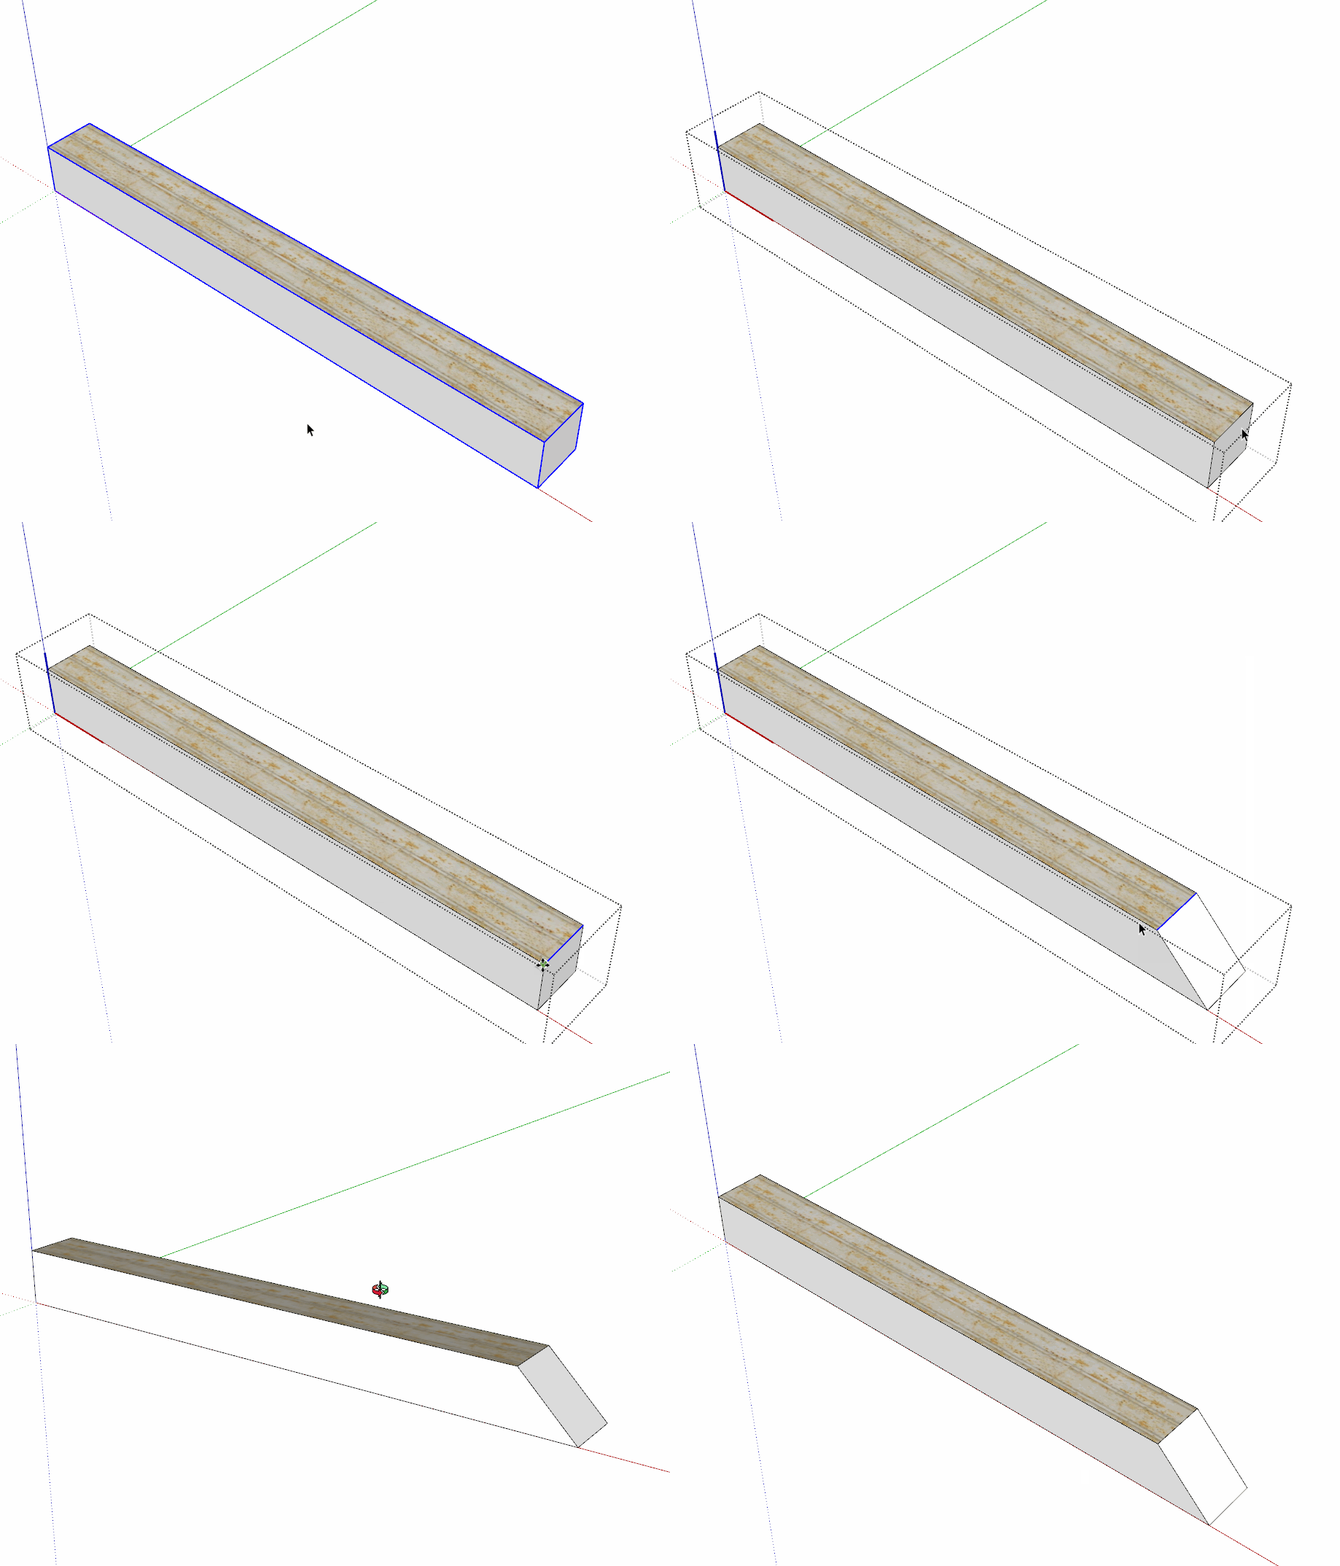
Rereading your OP. If you had an image of the long side with the grooves in it, you could use that as a texture on the one face or a simple extruded box. Then mitering it would be trivial with either a drawn diagonal and Push/Pull or just moving an edge. If you don't need the internal details at all, don't model it as a hollow shape.

Advertisement


