Place guide in round hole center, make an axis
-
If the edge of the hole is identified as a circle, right click on it (with the component open for editing) and choose Find Center.
When I create things like washer and screw components I place their origin at the center so I don't have to have the guides to place them where I want.
-
@dave r said:
If the edge of the hole is identified as a circle, right click on it (with the component open for editing) and choose Find Center.
When I create things like washer and screw components I place their origin at the center so I don't have to have the guides to place them where I want.
I understand this. I want a guide though so that I can also have this guide as I stack more components on top of the base and then easily place holes from the top down. I'm using Profile Builder 3 Hole Tool to place holes so it's easy to find the center where I need it on the face of the new component since the guide is protruding through.
I don't always know what I want or where the holes will finally end up so the guide also helps to visualize while I design. -
That's fine. So as I wrote, if the edge of the hole is identified as a circle. Right click on it and choose Find Center to get a guidepoint there.
-
@dave r said:
That's fine. So as I wrote, if the edge of the hole is identified as a circle. Right click on it and choose Find Center to get a guidepoint there.
Still not what I'm after. I know that placing the bolts was my main example but it's not the only one.
See attached. If I have holes in the bottom plate and I need them to match holes in the upper plates I can easily place holes with the Hole Tool using the guide axis through the components.
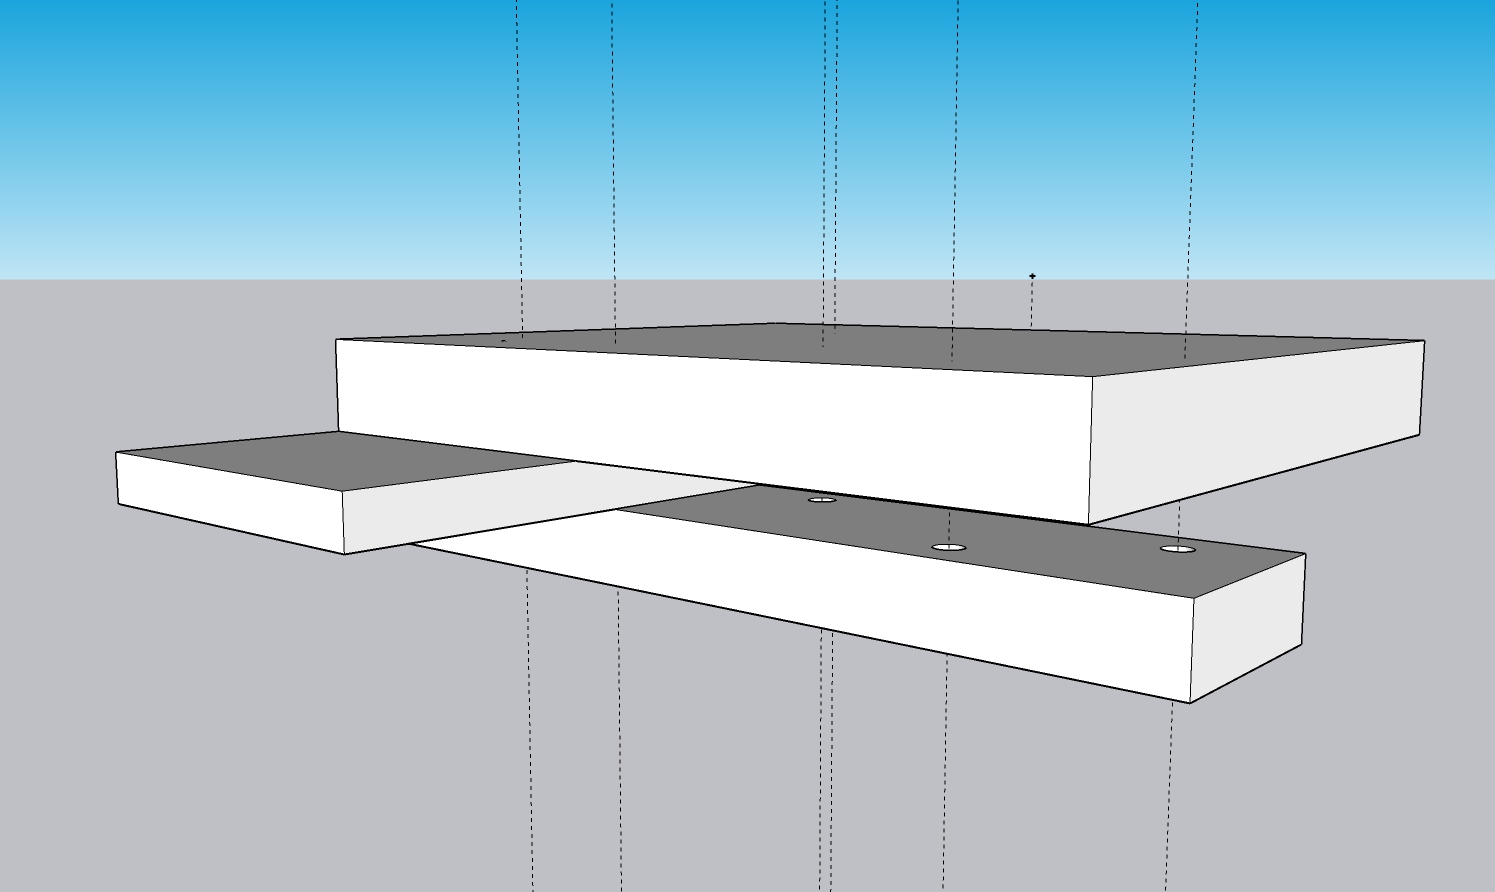
Also, How did you get the bolt to snap to the center of the hole? It did not look like the center point was selected.
Typically, I have the washer and bolt assembly as a component so I don't have to place individual pieces and the washer will hide the center point most times. I've tried xray but with all the other stuff in the model it's hard to grab the center point most times.
I mostly understand how to get this done but I guess I'm just looking for ways to make some of this workflow faster and more of a 'click and go' process as I learn the intricacies of sketchup. Placing a guide is not hard but if I have 30+ holes and I can drop a mouse click and movement to drag the guide and then a pause on the hole to infer the center for each one it saves time.
-
@njsanna said:
Also, How did you get the bolt to snap to the center of the hole? It did not look like the center point was selected.
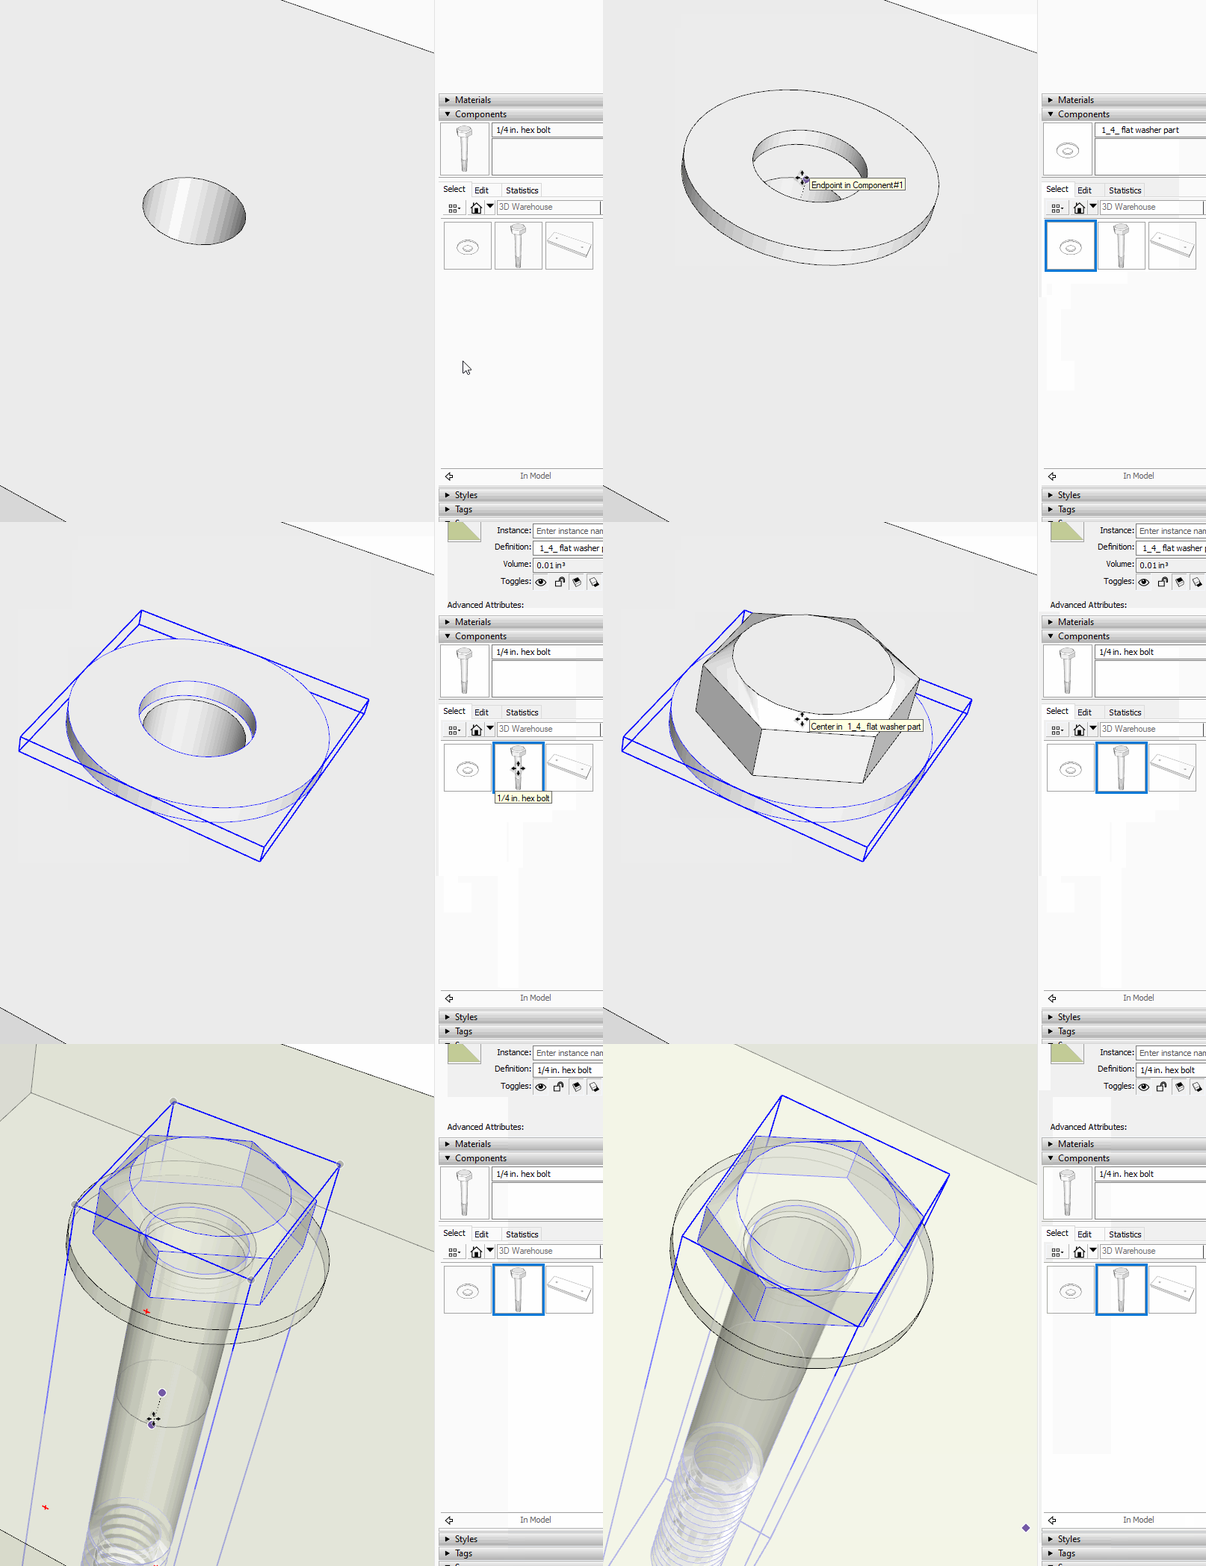
I used inferencing to center both the washer and the bolt. No need to have anything selected. Just bring the component in from the Components browser and place it where I want it. As I wrote before, the component's origin is placed in the center of the washer or centered at the bottom of the head of the bolt.
@njsanna said:
Typically, I have the washer and bolt assembly as a component so I don't have to place individual pieces
I do, too. In fact I had to remove the nut and a pair of flat washers from the bolt component to make that GIF.
@njsanna said:
and the washer will hide the center point most times. I've tried xray but with all the other stuff in the model it's hard to grab the center point most times.
As you could see, I did it without using X-ray and had no trouble.
@njsanna said:
Placing a guide is not hard but if I have 30+ holes and I can drop a mouse click and movement to drag the guide and then a pause on the hole to infer the center for each one it saves time.
There are times I use guides and other times when it is faster not to use them. All of my hardware components are set up so they can be dropped in place with little effort and little setup. Bolts go in as I showed. Flathead screws go in flush with the surface. Door hinges go in to the correct depth, pulls and knobs sit on the surface of the drawer front or door. This also has the benefit of making components like drawer and door pulls quickly and easily replaceable.
-
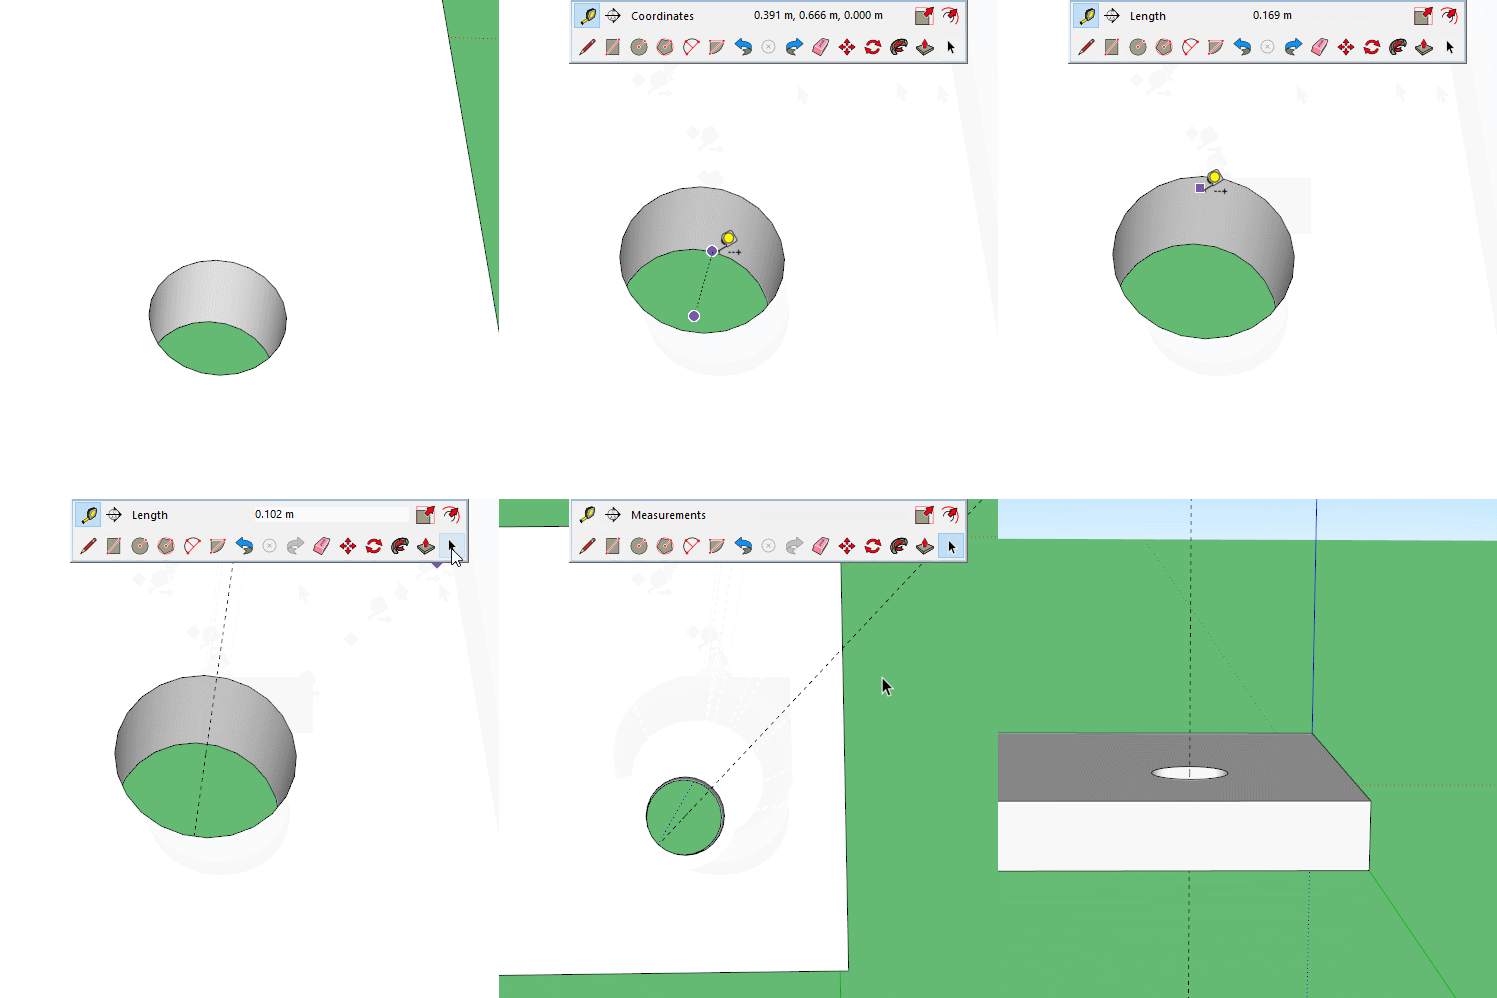
If you really want a guide running through the centre, just inference of the circle and drag to the middle, it will snap to the midpoint.
-
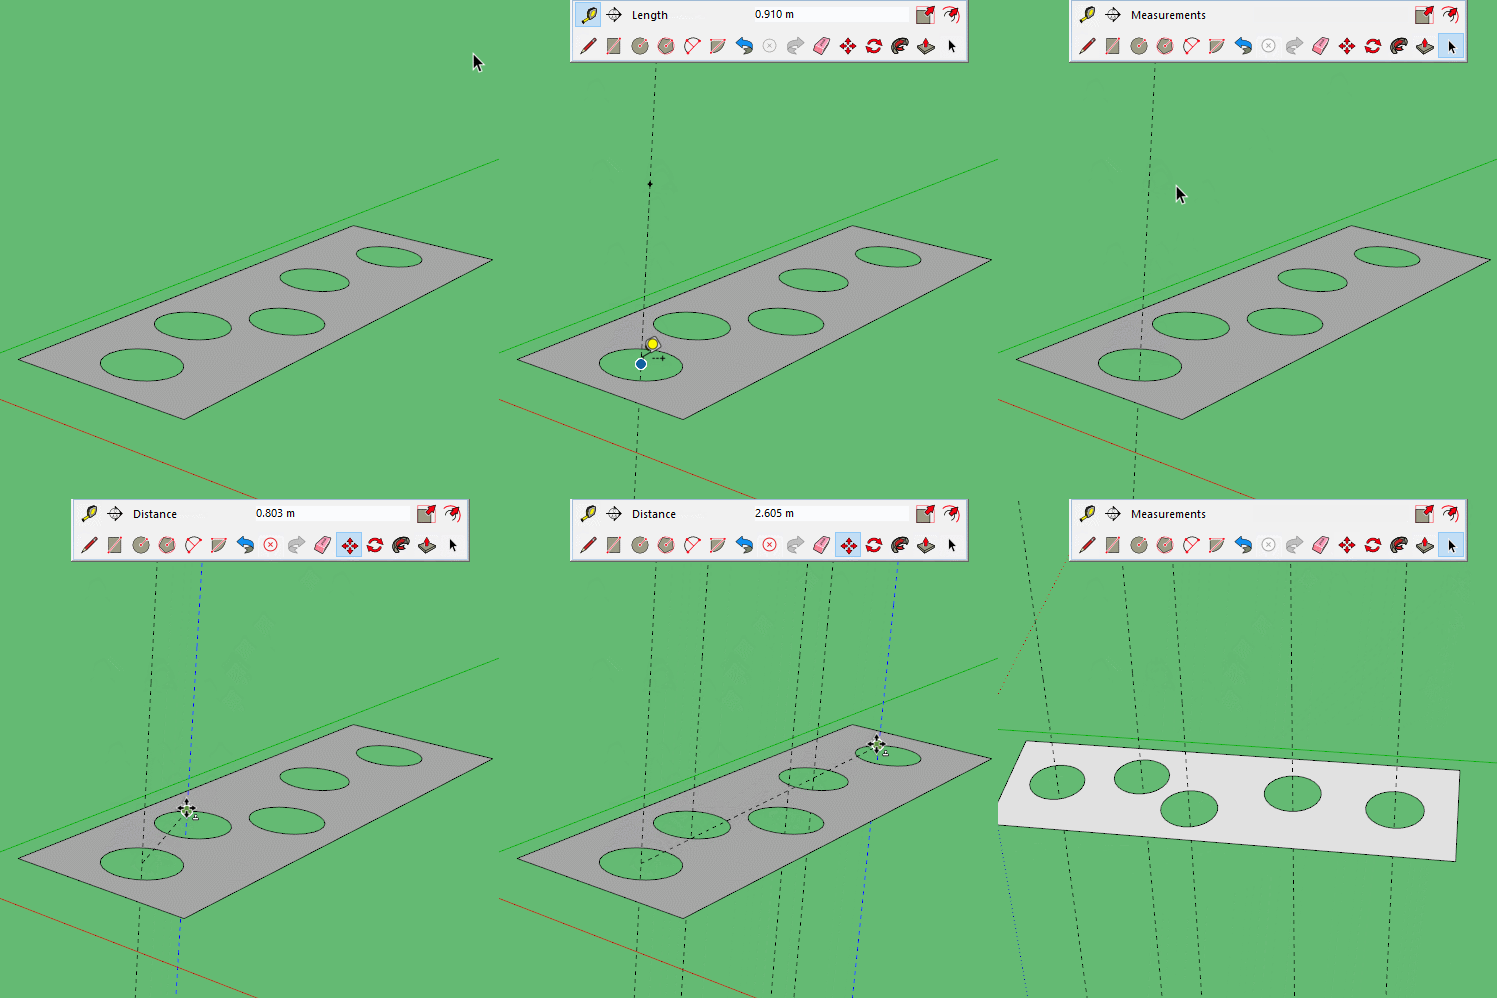
You can do continuous guides or guidepoints with tail by using the new double tap ctrl feature.
-
Thanks Box. Good solutions that I did not realize.
@box said:
You can do continuous guides or guidepoints with tail by using the new double tap ctrl feature.
[attachment=0:whd9vxcu]<!-- ia0 -->Guides02.gif<!-- ia0 -->[/attachment:whd9vxcu]
-
@njsanna said:
Thanks Box. Good solutions that I did not realize.
If it helps, Here's a plugin I use called ArcCenter.rbz
Right click on arc/circle select "Point at Center" in menu and it creates a construction point at the center. You just need to add the guide line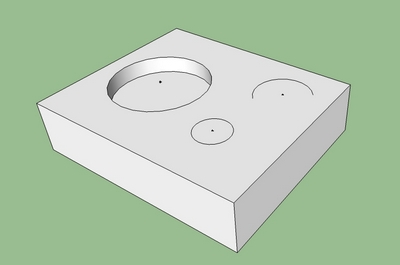
-
@spreadcore said:
If it helps, Here's a plugin I use called ArcCenter.rbz
Are you still using SketchUp 8 as indicated in your profile?
There's been no need for a plugin for this for several versions as it's a native feature.
-
A Demo of the native option Dave mentioned.
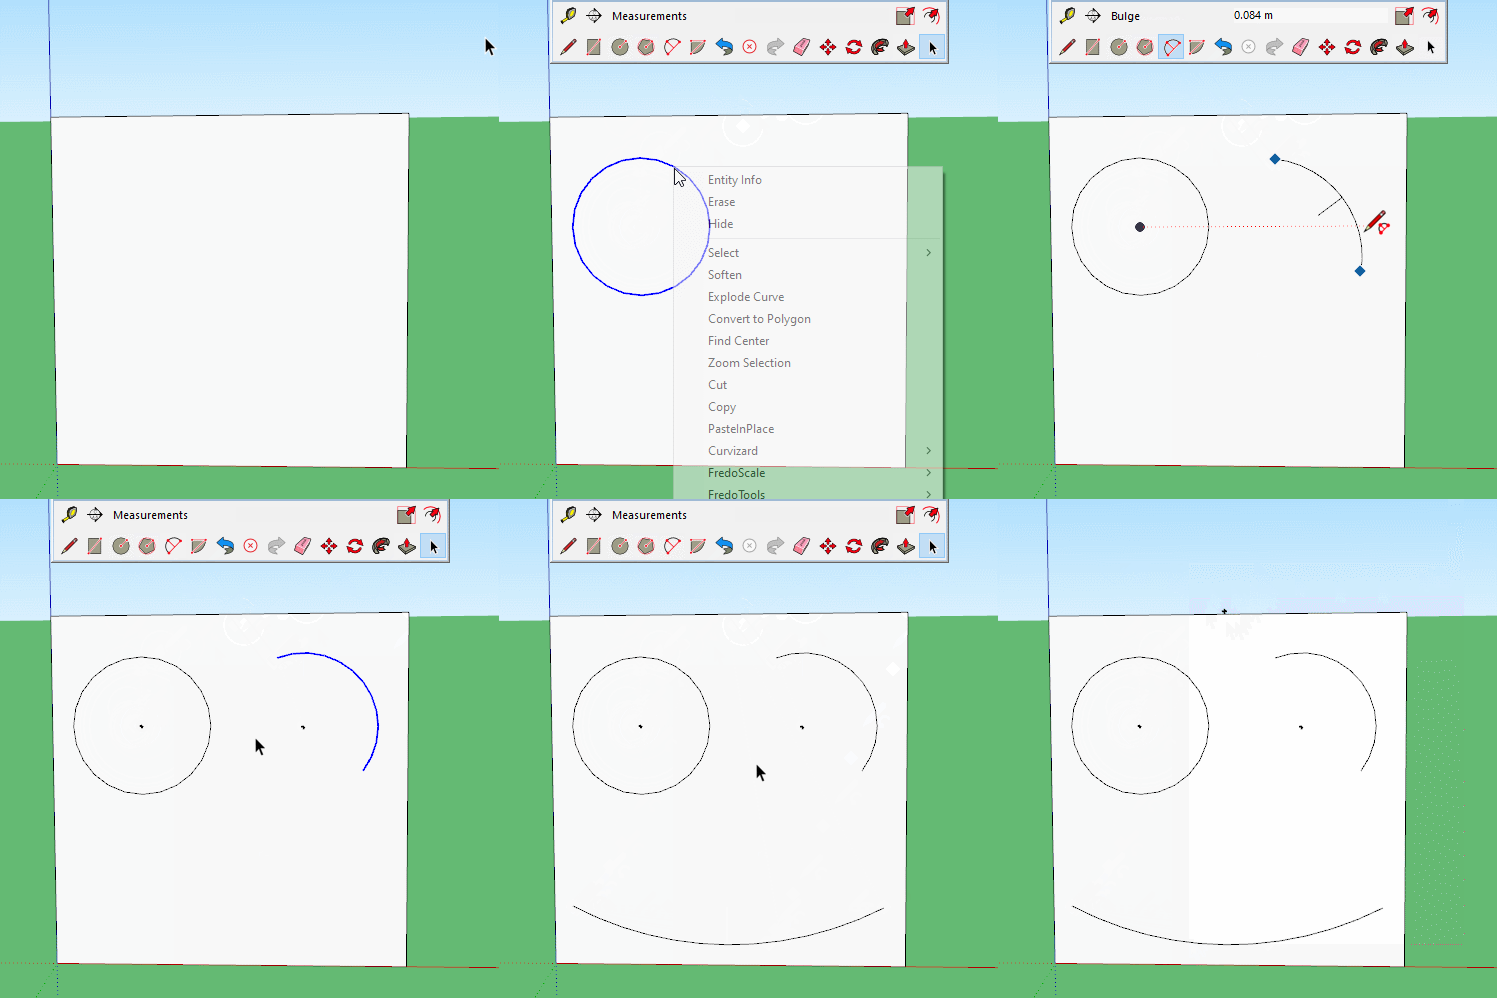
-
@dave r said:
@spreadcore said:
If it helps, Here's a plugin I use called ArcCenter.rbz
Are you still using SketchUp 8 as indicated in your profile?
There's been no need for a plugin for this for several versions as it's a native feature.
Yes, I am. I don't particularly like using programs that I have to be online to use. So I don't use the newest ver. SketchUp 8 works just fine for the little stuff I do.
Sorry the plugin is useless.
-
@spreadcore said:
Yes, I am. I don't particularly like using programs that I have to be online to use. So I don't use the newest ver. SketchUp 8 works just fine for the little stuff I do.
Since you are a hobbyist you could use SketchUp 2017 Make. You don't have to be online to use it.
Advertisement


