Revit to SketchUp my best workflow (so far)
-
Exporting a Revit model to SketchUp in a way that preserves materials and is workable inside SketchUp is not easy.
I've tried ALL existing plugins and file formats and it either comes down to them not getting materials across or not getting a file structure that is workable inside SketchUp with triangulated faces and heavy nested geometry that makes you have to do countless clicks to open a group to edit the geometry deep inside.So far I have found dwg export to give the best file structure while not getting materials across.
Until now...If you happen to have a Revit file which have materials applied to it you can do it like this:
Link your Revit project into a blank Revit project.
Export 2013 DWG from 3D view.
Remember to uncheck "Export views on sheets and links as external references."
Import DWG to Sketchup.Don't ask me why but it DOES work. Materials gets across but not textures.
If you have a Revit file without materials you can do it like this:
Export DWG from a 3D view.
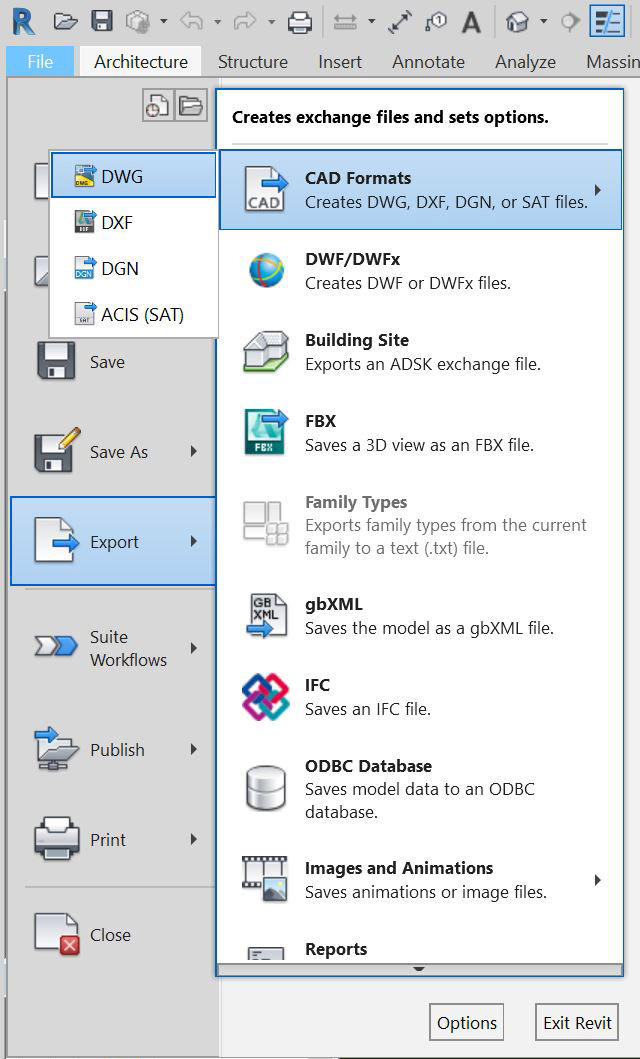
Click on modify export setup.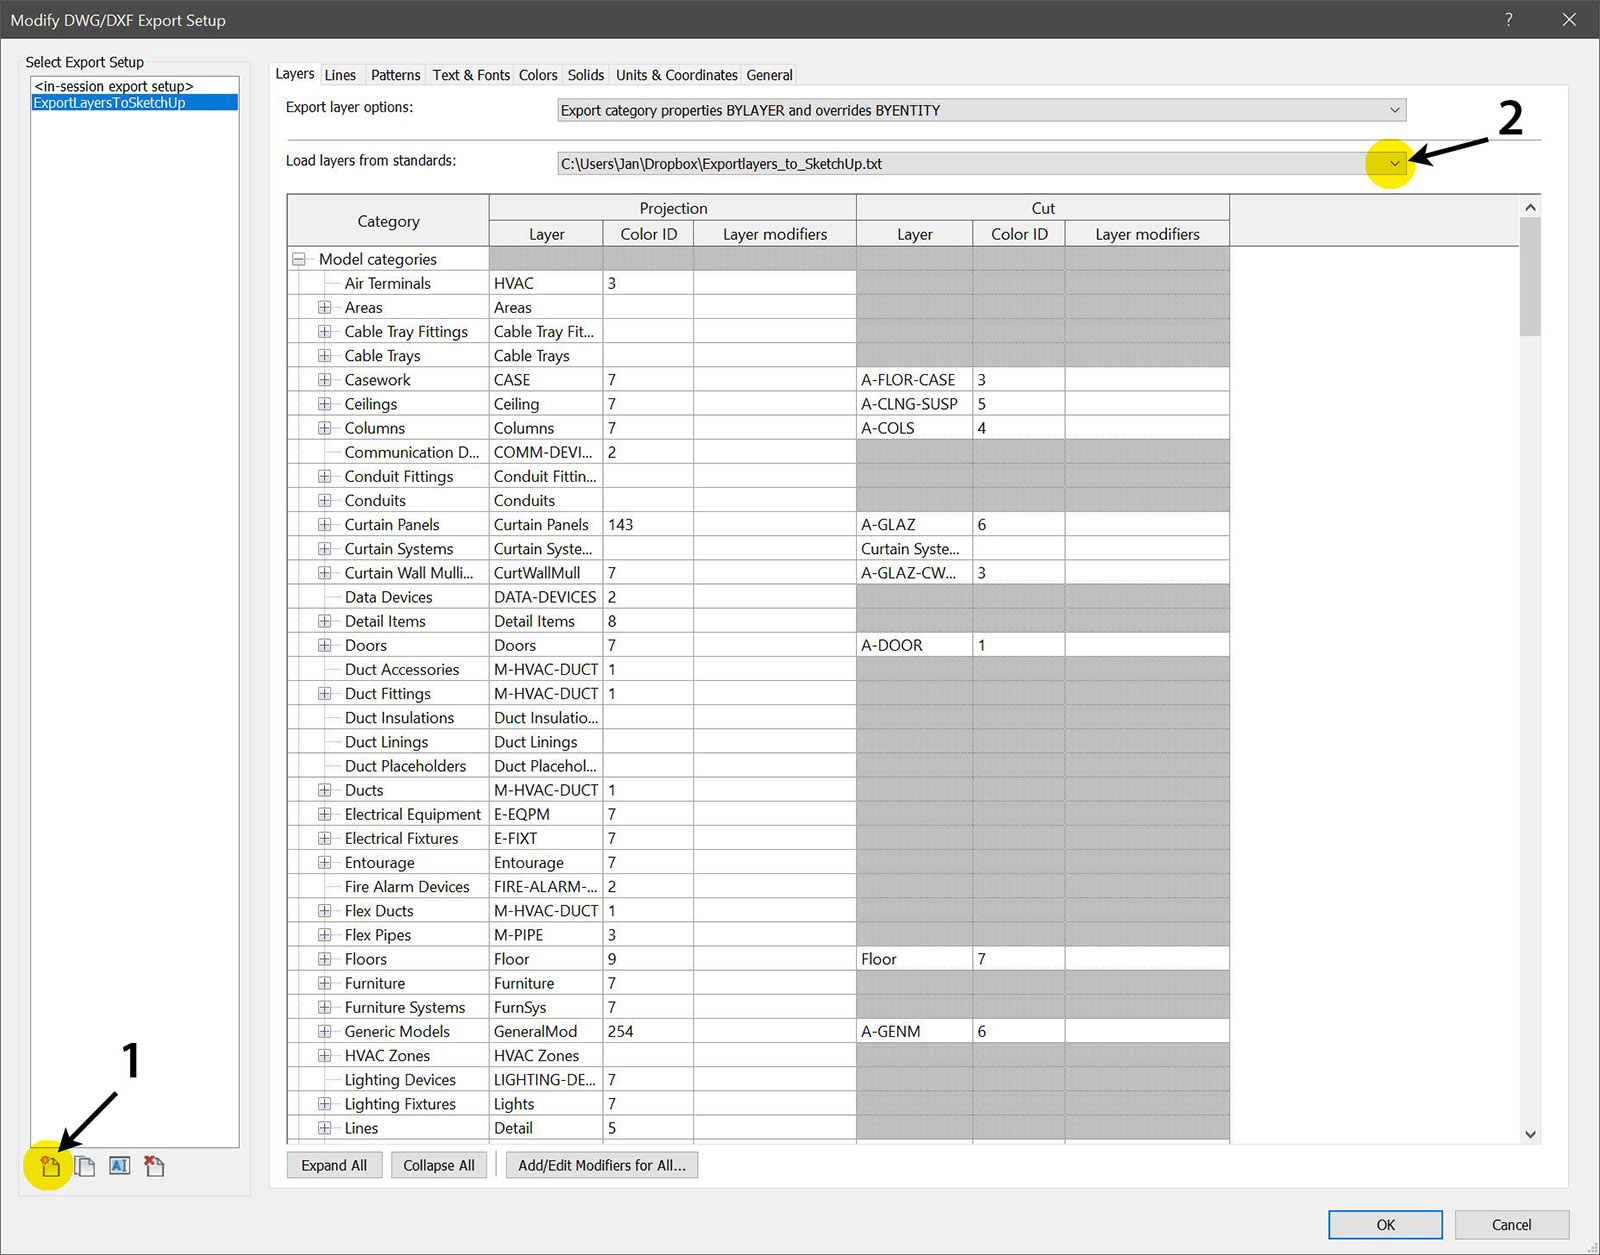
- Create a New Export Setup.
- Click on the "Load Layers from standards" dropdown menu and choose "Load settings from file."
Choose the "Exportlayers_to_SketchUp.txt" file attached. (Or edit and create your own version of it with the settings you prefer.) I have added layer colors and some names that are more readable than the default ones. Edit if you want to.
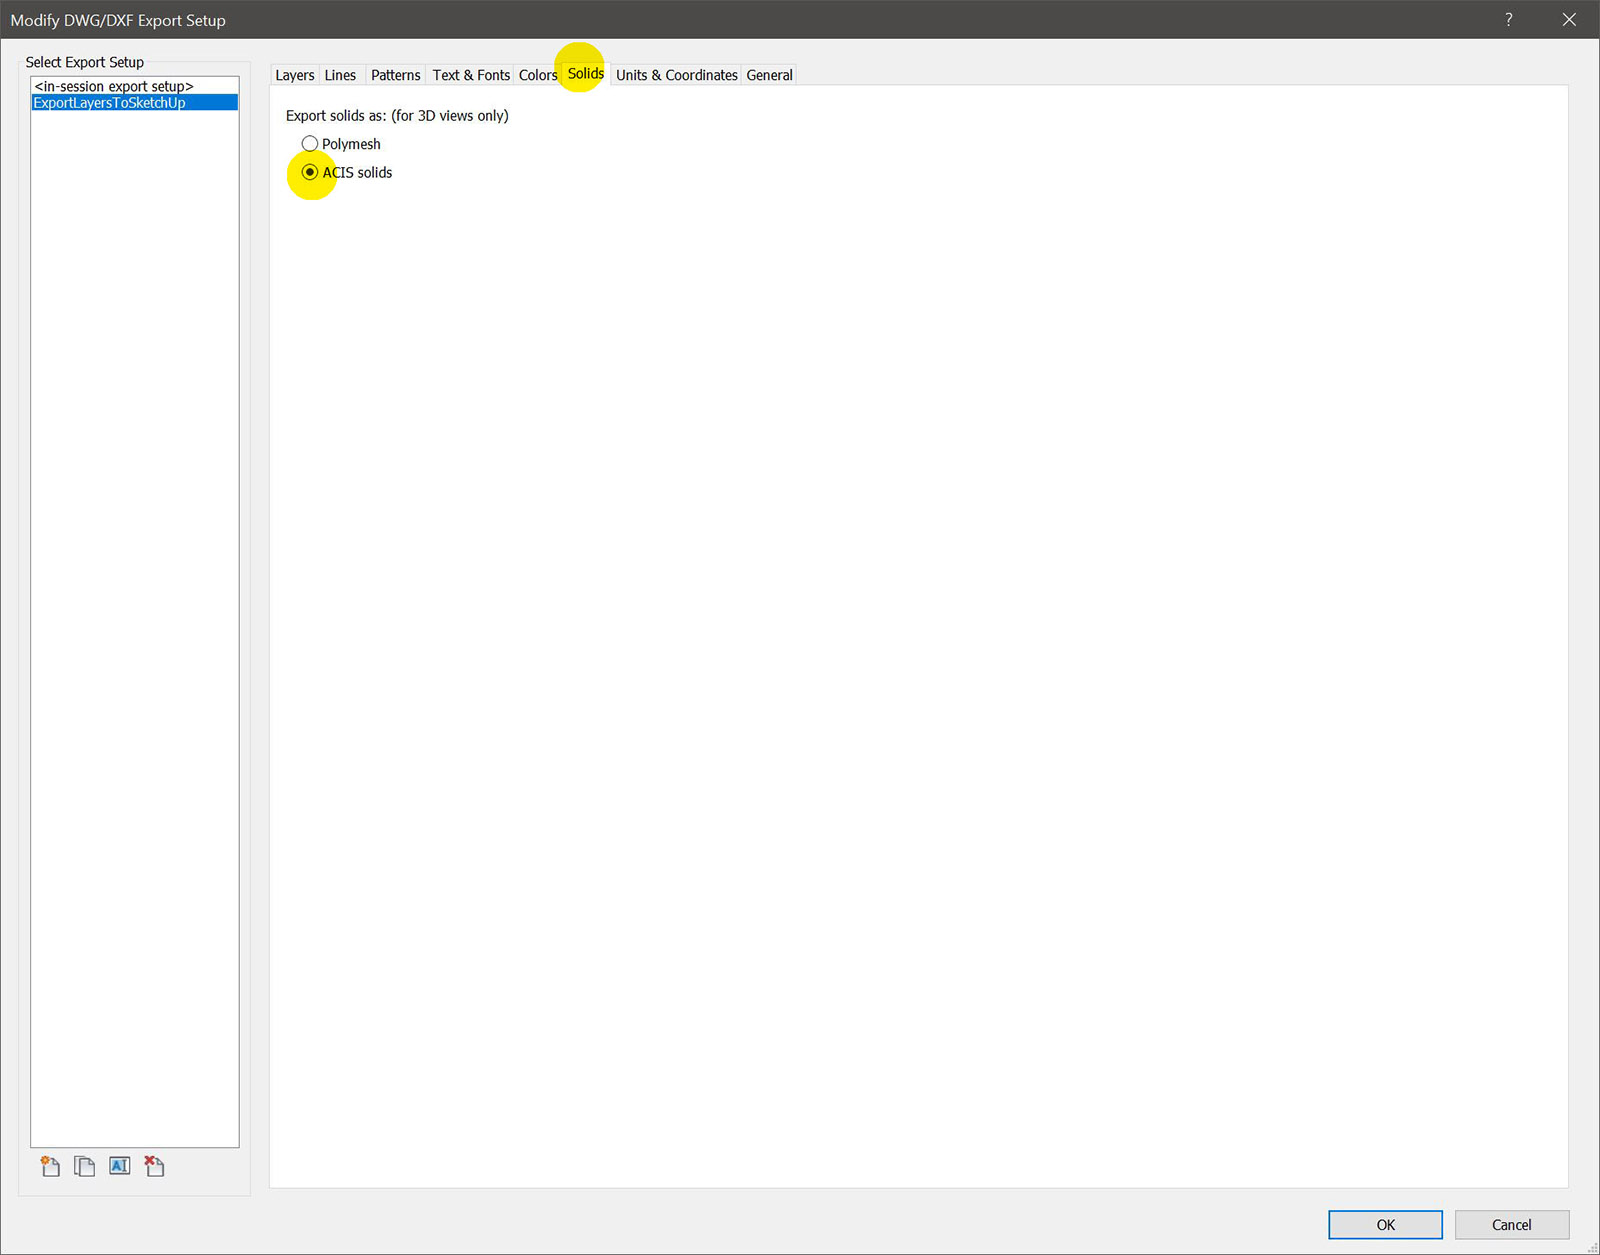
Under Solids tab, make sure ACIS solids are checked or your walls will not be grouped in SketchUp.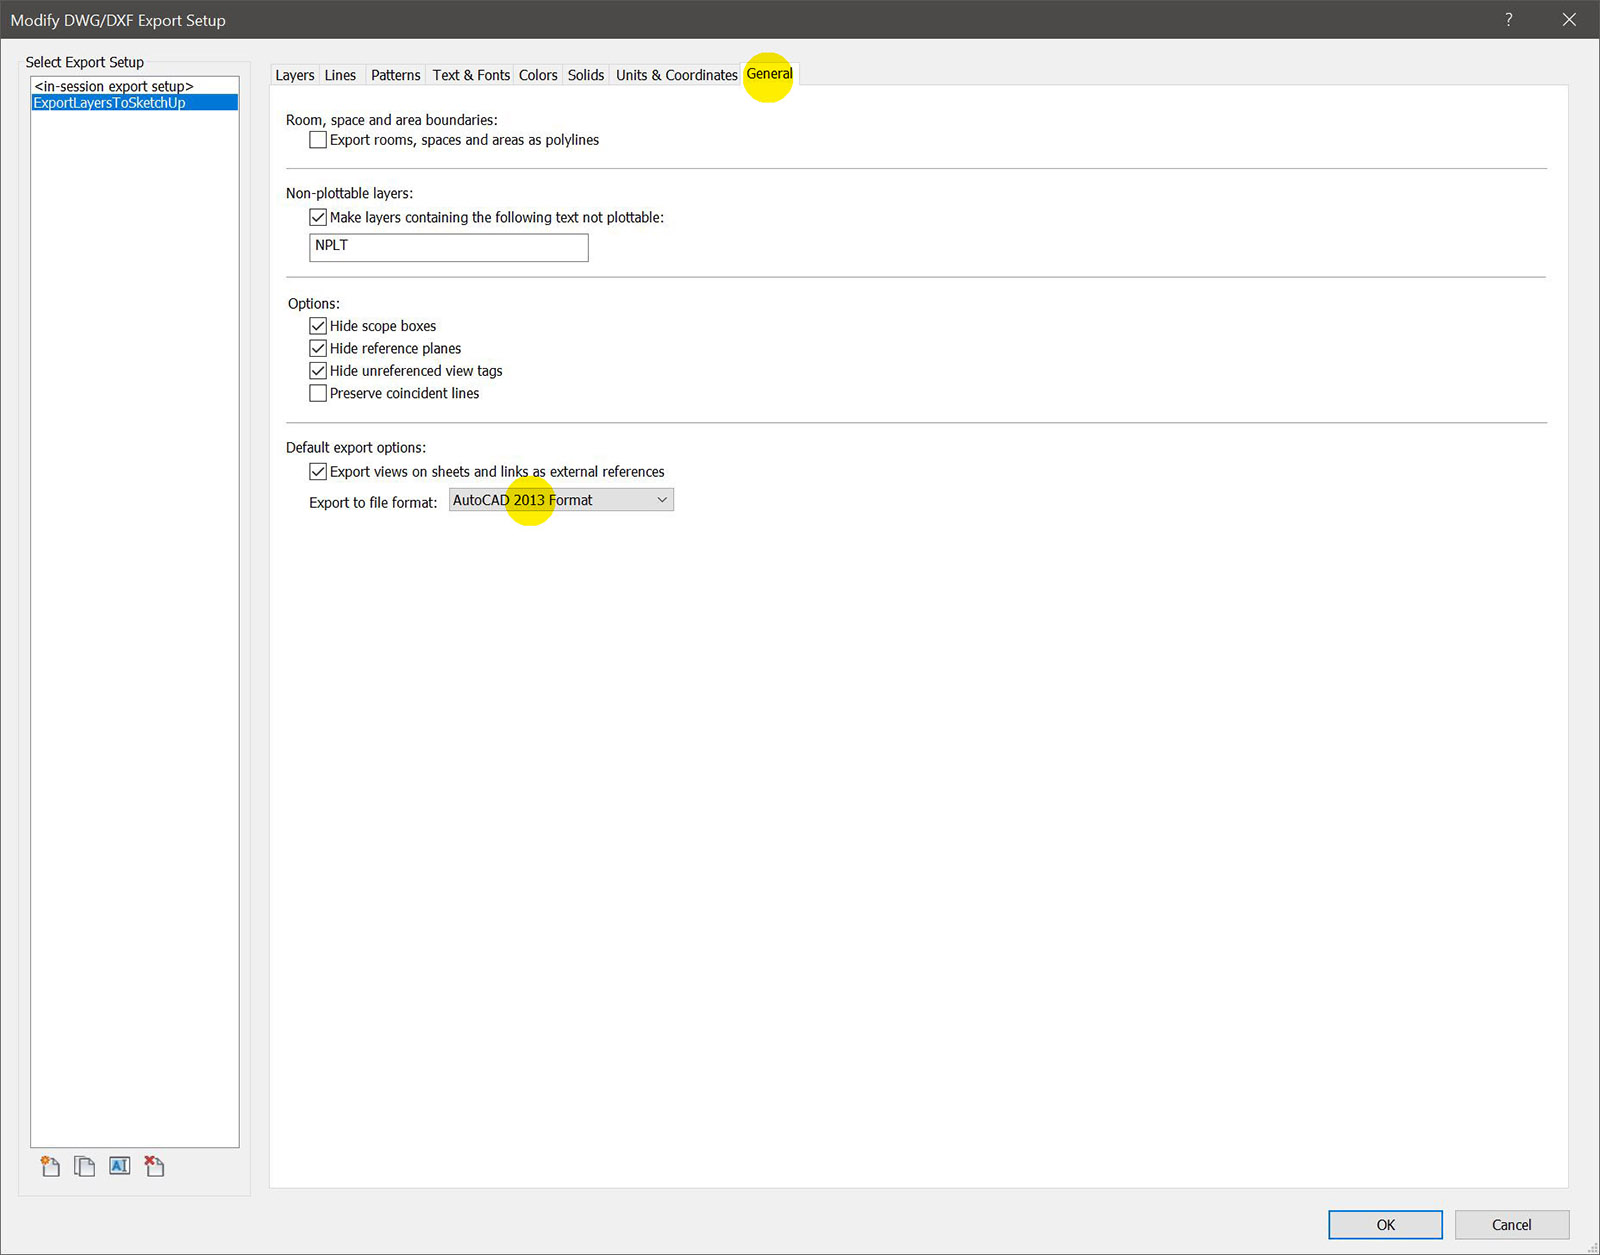
Finally, To avoid possible compatible problem with SketchUp's DWG import, stay away from the latest version of DWG. 2013 seem to work fine for me.
Click OK, then Next and save file as Export 2013 DWG.
Import into SketchUp.Now you need TIGs Layers Material tools.
First run Create Materials From Layers names.
Then run Set materials from Layers Names.
Now You can easily edit the materials and add textures.
The good thing is that if you have to reimport a updated version you can simply skip the "Create materials from layer names" and just run "Set materials from Layers Names" and it will apply your edited materials to the correct faces.To get imported edges soft easily I have used the AMS Soften Edges extension. Install it and just select everything and right click and run AMS Soften Edges.
Hope this helps.
-
I don't use Revit, but I'd think of pinning this post on top of the list. Thanks for sharing Jan!
-
DWG = textures good-buy
Have you tried
http://www.rvt2skp.com/
instead
? -
Yes. As I said I have tried ALL existing plugins and file formats.
The one you link to gives triangulated geometry and also explodes all groups and makes a new group for each face which makes any edits in SketchUp impossible. -
hmm.. if so it's very discouraging. Typical Autodesk.
P.S. There's a great ThomThom's Material Replacement tool, too bad it doesn't have 'preserve recipient mat name' option. It could save tons of efforts. -
Not sure what you're after but my workflows and TIG's plugin mentioned above DOES save "tons of efforts".
-
In your present workflow you have to insert textures manually, material by material.
What I meant is: AFTER all TIG's routines, it could be perfect SWAP texture-less materials with your favorite ones (with bitmaps in) by applying single-click 'material replacer'. unfortunately it doesn't keep original revit names. -
I never said it was the "ultimate Revit to SketchUp workflow". Only that it was my best workflow so far.
If you don't need to edit inside SketchUp you could try the FBX route to keep textures.
The architects at my office seldom put materials and textures on models in Revit so for me the main problems have been:
A. To get the Revit model into SketchUp in a editable way with different materials for Window frames and glass and other such geometry that takes ages to fix manually.
B. To be able to easily update to a newer version of the Revit model and keep materials (with textures) that I have made inside SketchUp.The workflow above does that better than any other existing method I know of.
But I'd gladly be proven wrong if there exists a better way...Edit. You could use TIG' global material changer to change imported materials to your own favorite ones but you would lose the material names and not be able to update the model easily.
@TIG: Maybe a custom version of that script could be made that kept the original material name and just swapped all the other material settings and texture? Including renderer specific attribute settings like Thea or Vray.
-
@unknownuser said:
@TIG: Maybe a custom version of that script could be made that kept the original material name and just swapped all the other material settings and texture? Including renderer specific attribute settings like Thea or Vray.
well it'd be ideal

Let me ask you Why do you bother to import revit to SU? Do you render inside SU or playing with design alternatives? Is Revit too rigid to get refined result?
Since my bosses started to adopt Revit, I see Sketchup as intermediate station between Revit to MaxVray. That's why it's important to keep original naming. -
Well, mainly I create visualization in SketchUp from Revit files and more often than not some things need to be altered or modified for the image that the construction model doesn't have or need.
Sometimes one of my colleagues might want to try different designs in SketchUp because they might be quicker to create there or almost impossible to do in Revit. -
Could you explain step by step how you might do this material rename/replace with color/texture etc 'manually'.
Then I can consider if it's possible in a modified version of my code... -
Lets say you have an imported Revit model with a material named RevitMat.
In SU you have a material named SUmat.
I was thinking you could clone SUmat, (would that keep any render specific settings?) apply it to the model and change the name to RevitMat.
Or something like that.Or maybe it would be easier to copy all material settings including attributes directly to RevitMat?
-
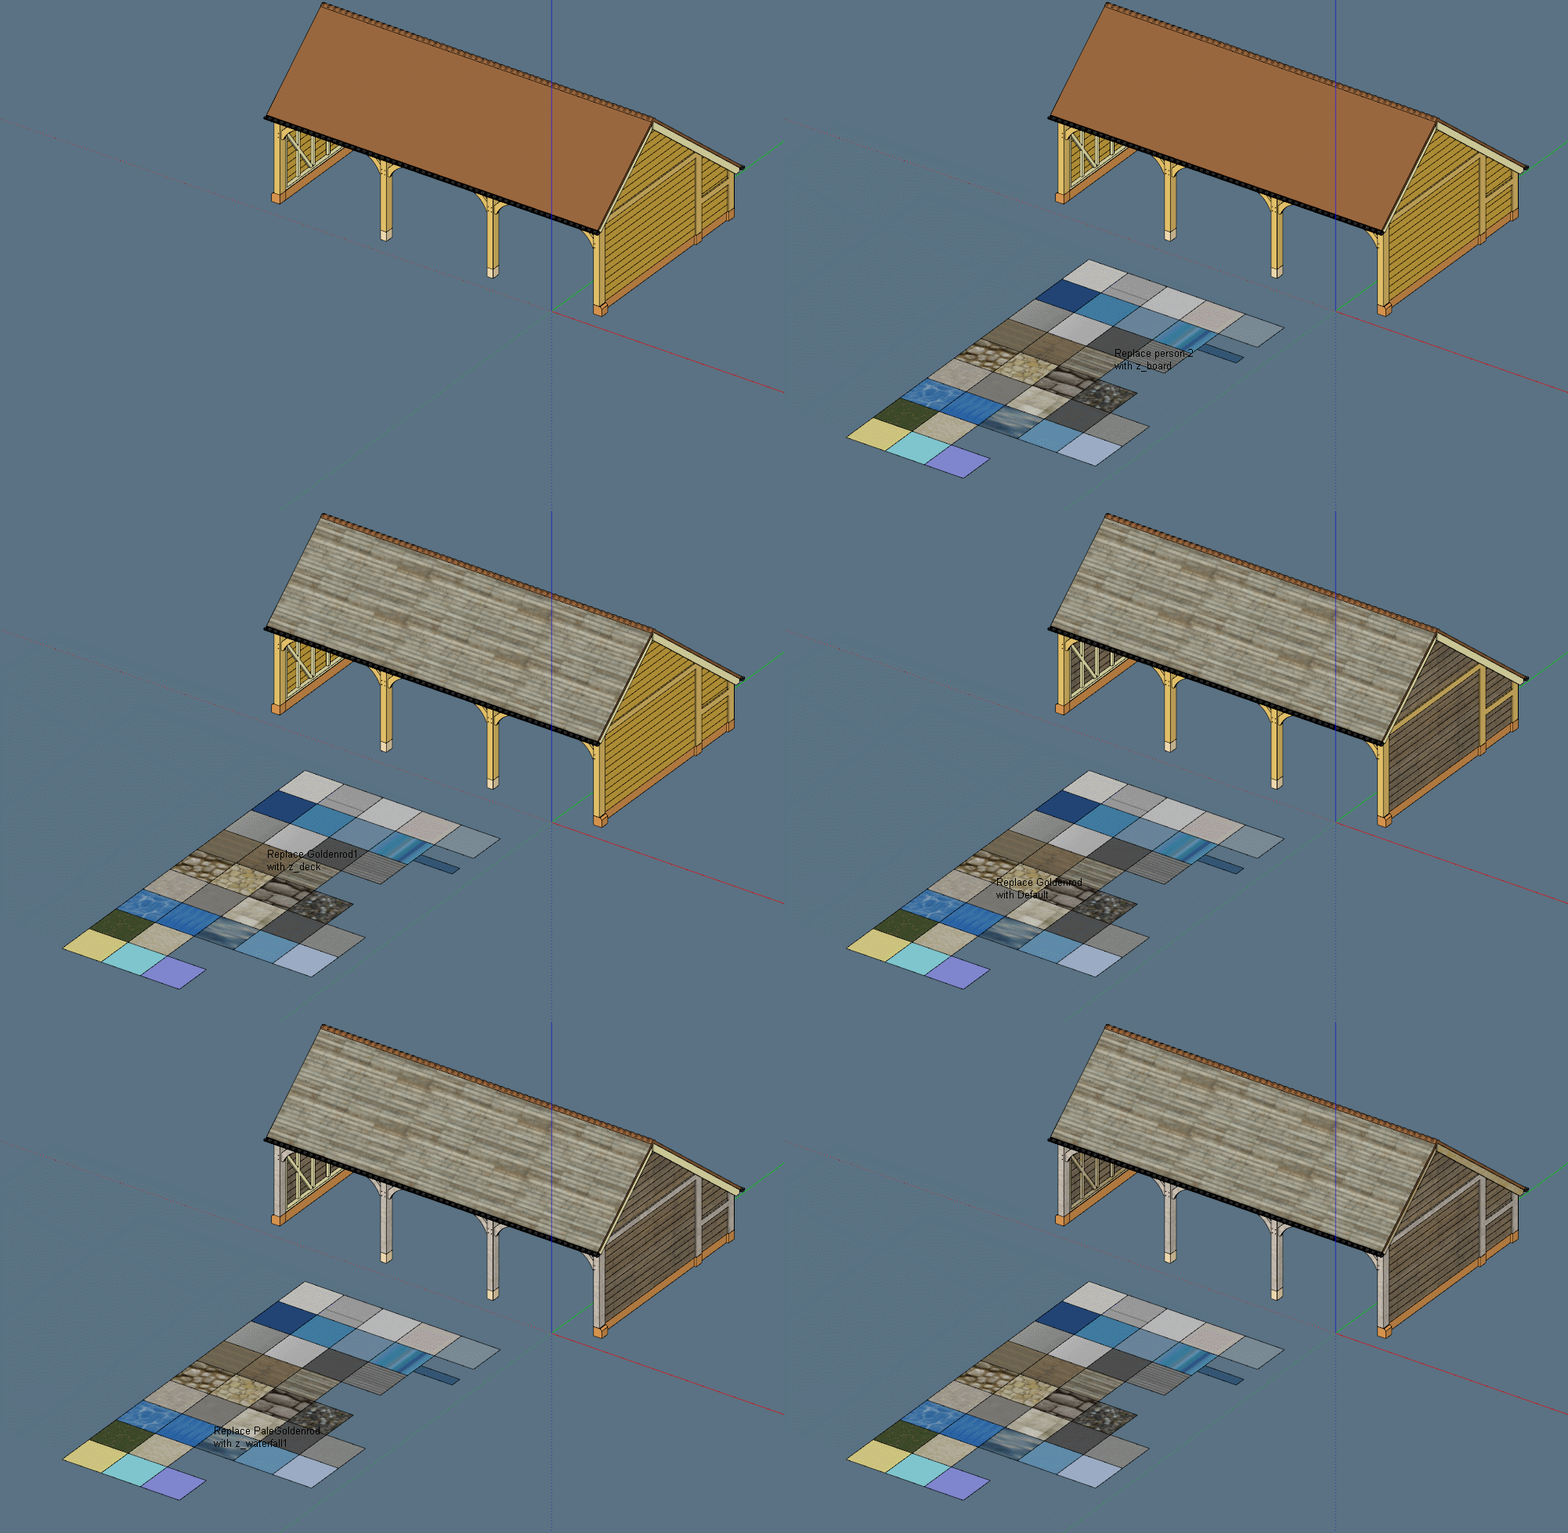
It could look this way:
The Script window has 2 areas (left and right)
In the left one, user would load (need corresponding button) materials from a certain library.
In the right one, user loads materials from preselected 'recipient' geometry.Then user would start to form pairs from left and right window ( from left it'd take all properties, from right- name); after pairing entities in both windows should change color)
Script should allow multiple use of the same donor material (from the left field)There should be an extra button:
'Apply material replacement from existing material collection (with the same names)'
-
Or, simply edit existing TT's Material Replace tool so it would keep the recipients mat name.
It doesn't allow automatic material swapping in the future, but still better than nothing.
-
I agree with Pixero on this one. This is the best workflow. I have been doing the same for years on many projects. Also, when your client sends an updated Revit export, you can just use the method above and then use ThomThoms replace material from the old model to the new model. The entire process is very quick.
The one caveat with working with Revit imports is that I always find that SketchUp tends to run very weighed down, so try to replace as much Revit garbage as you can such as railings, fixtures, furniture, etc. with SU components that are clean.
Jut yesterday I imported a model with terrible columns that had millions a tiny little triangles. They were so heavy and the 10 min it took to swap them out was well worth it.
Advertisement


