Foundation Plugin
-
Note that the polygon tool does not create interior holes, there will be a separate tool just for that, similar to my trim and extend tools.
With the rebar in stemwalls, interior footings and edge footings the issue shown above is not a problem, it is just the slab reinforcement that has me stumped at the moment.
-
Finally got some time to work on the polygon tool in the foundation plugin, starting with the easy one which is the basic slab.
I've got it working for the concrete but the problem is the slab rebar or mesh, see image below:
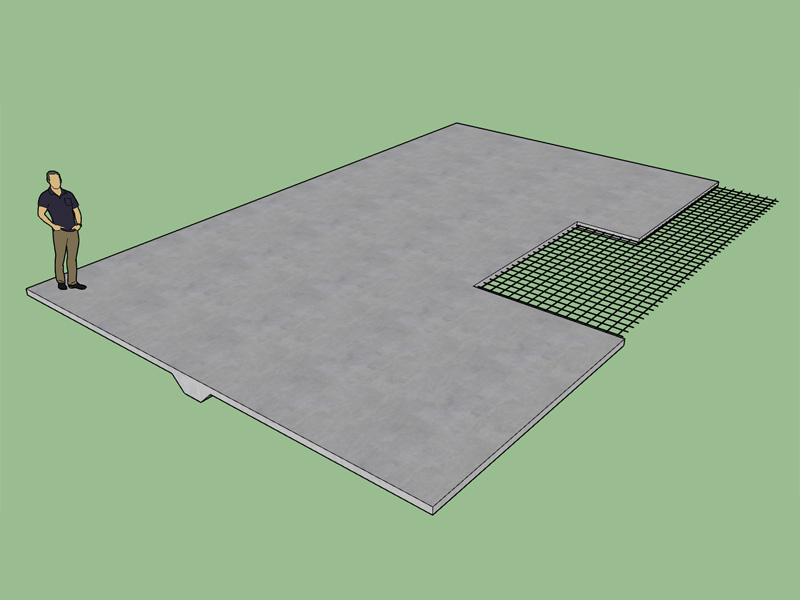
The only way I can see to create the rebar is to use the solid boolean tools (ie. Subtract), however that is only available in the Pro version of SketchUp so the polygon tool would really only be useful or workable in the Pro version of SketchUp. Unfortunately, I don't have enough extra cash at my disposal to even purchase the pro version so I am now at a standstill on this since I can't test or debug it further.
You can literally draw any shape you like but the rebar is configured to always align (parallel) with the edge created by the first and second points.
-
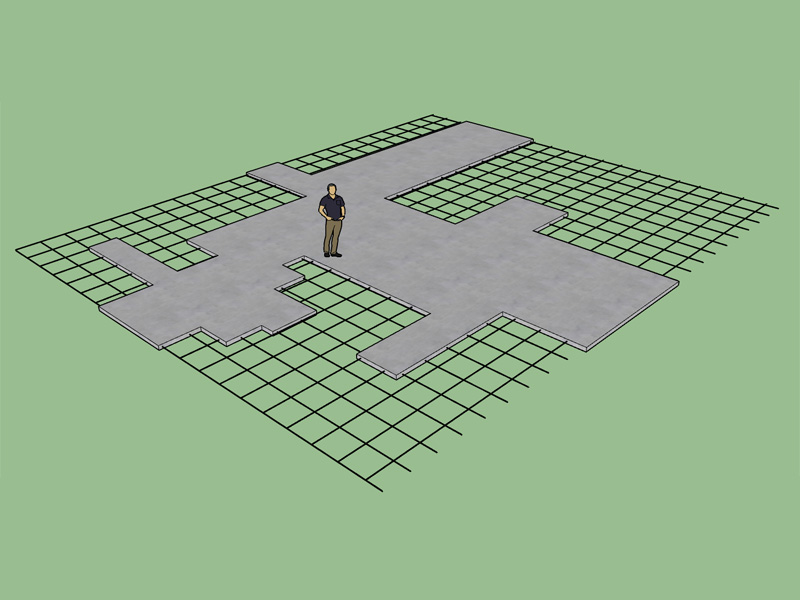
As can be seen in this polygon shape the rebar could be potentially cut in multiple places. The subtraction method makes the most sense but since I don't have that luxury I am working on a different algorithm for putting the rebar only within the concrete and so that it has at least 3" of ground clearance on the sides.
-
Go Medeek!
You are teasing us with these progressive screen shots of
the evolving "polygon" feature.


-
Haven't figured out the best way to deal with the slab reinforcement yet but I've moved on to start putting together the polygon tool for the Slab-on-Grade. Since the offset line tool is not exposed in the API I've decided to try and use TIG's SmartOffset plugin as a starting point. Unlike the rectangle tool I probably won't have a bend radius on the footing bars, at least not initially. At some point I would like to figure out a plugin or some code that will automatically apply a radius or fillet to two lines/edges, I'm surprised that this functionality is not already built into SketchUp.
The way I will create the SOG is extrude the slab and then use the follow me tool for the footing, then union the two solids together, fairly simple. Any shape or size of SOG will be possible. The basic input (Non-Graphical User Interface) will only allow the entry of one internal footing however I am planning on implementing a Webdialog GUI that will allow the user to create as many interior footings as required and also allow them to even cross each other in grid patterns (ie. X-dir and Y-dir). Things are going to get interesting with this plugin.
The GUI will allow the user to better preview the location and start and end points of the interior footing(s) which will make the entire process much more intuitive and easier to use.
Anchor bolts along the perimeter of the SOG will also be implemented. Hoping to have all of this done by the end of the week, and as time allows. I may have to simply disable the slab mesh/rebar until I can figure out a way to trim it without forcing the user to SketchUp Pro.
-
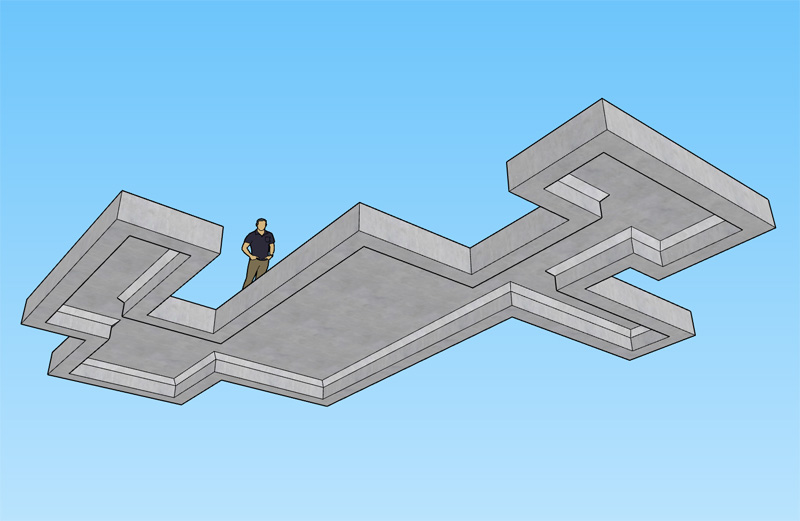
The slab on grade concrete is working great, that was easy. Now I just need to work on the rebar in the perimeter footing and the anchor bolts as well as the optional garage curb.
-
Any shape is possible even a circular shape by selecting points along an arc. Now I really need to get the wall plugin going with the same polygon tool that is smart enough to handle typical 90 deg. corners and non-orthogonal corners.
Curved walls and roofs though are still a bit of stretch, but I can see we need to eventually go that direction as well to make everything complete.
View model here:
3D Warehouse
3D Warehouse is a website of searchable, pre-made 3D models that works seamlessly with SketchUp.
(3dwarehouse.sketchup.com)
-
Looking great Nathaniel! You are doing such great work with all of your plugins.
-
The polygon tool for the slab-on-grade foundations is nearing completion. I've got the concrete, perimeter rebar, internal footings and even anchor bolts all working.
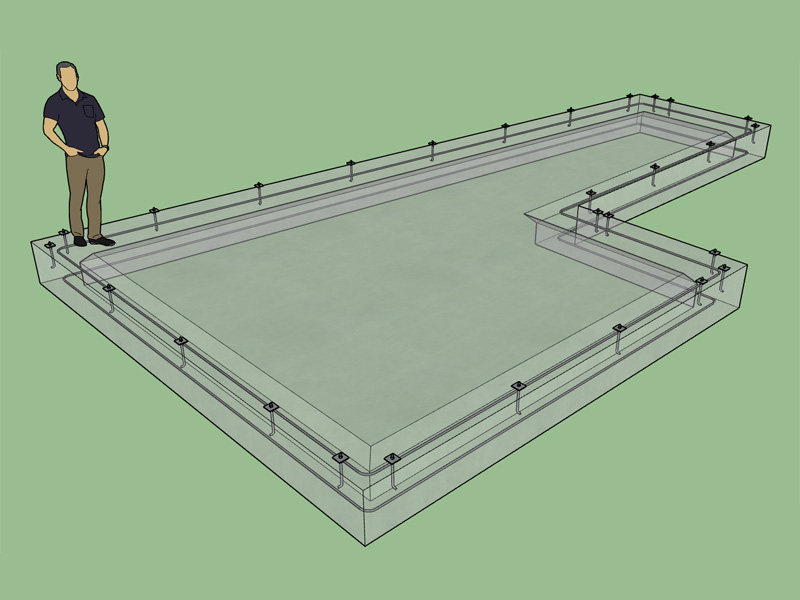
The only item still pending is the slab reinforcement (mesh/bar). I've been contemplating devising my own boolean subtraction tool.
I've even managed to create a fillet tool based on TIG's 2D tools that properly applies the correct bend radius to the perimeter rebar.
-
Please make it so the reinforcing and anchor bolts need to be toggled on/off separately.
-
This is already the case. Anchor bolts, perimeter rebar and slab rebar/mesh are all independent of each other.
The garage curb is also working well.
I still need to do further testing with the metric templates.
-
I think I've got the slab reinforcement working now. I haven't tested it enough to determine if its really robust enough to release another update but I'll keep testing.
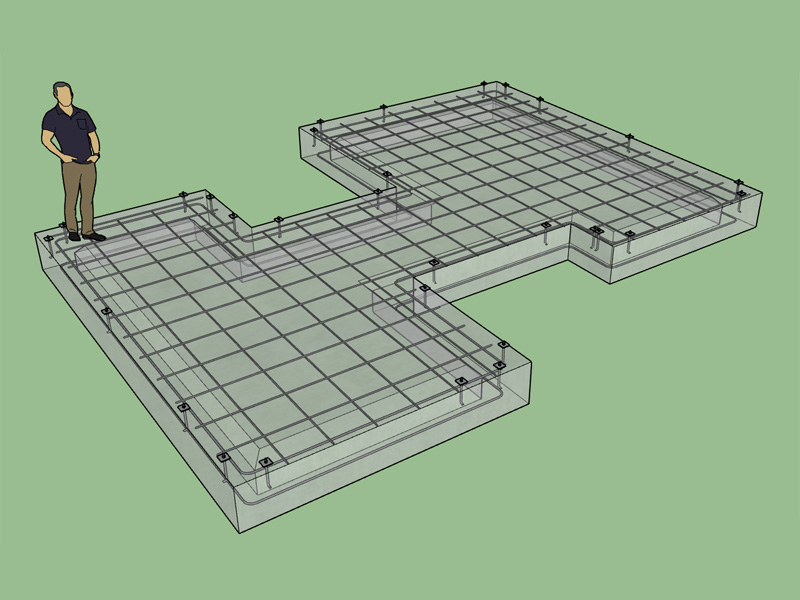
I owe Sdmitch big time for this one. I've integrated his rebar trim function into the plugin to create a new module that trims the slab rebar or mesh. I am still trying to figure out exactly how the magic is done but most of it is over my head.
View model here:
3D Warehouse
3D Warehouse is a website of searchable, pre-made 3D models that works seamlessly with SketchUp.
(3dwarehouse.sketchup.com)
A mesh reinforced slab though can get quite heavy with the polygon count so it may only have limited usefulness.
-
I've tested it some more this morning and so far I have been unable to break it,
 .
.In the next couple of days I will update the slab feature on par with the slab on grade feature so that polygon shaped foundations are 100%.
Then I will turn my attention to the stemwall foundation and fully implement the polygon layout tool in that as well. I now have all the widgets in my toolbelt to make this happen.
Once I get those updates done I will release the updated version.
At that point I may raise the price to $15.00, since I will now have added more functionality.
The ability to trim rebar is a much bigger prize than just rebar. This will now allow me to do the same thing for floor joists (polygon layout) in the truss plugin.
-
Wonderful work! For my current uses, which is not a full house modeling, the foundation tool is probably the best because I do like to model at least the basics of a foundation for my exterior house models, and often find this is often the most helpful part to study in 3d.
-
I haven't fully compiled a TODO List for this plugin yet but there are still a number of items that need to be addressed.
- A hole cutting tool that removes the concrete and the rebar and any anchor bolts in the way.
- Square and Rectangular Footings for point loads
- Strip Footings
- A line tool for the stemwall module
- Retaining Walls with Engineering
- Ability to step foundation walls
- Webdialog input for SOG and Stemwall so that interior footings can be configured with ease.
Let me know if there is anything you would like to add to this list.
-
Version 1.1.0 - 04.14.2017
- Added polygon outline tool for slab-on-grade and slab.
- Enabled perimeter rebar, anchor bolts, and slab reinforcement for (polygon) slab-on-grade foundations.
- Enabled slab reinforcement for (polygon) slabs.
-
Medeek,
Thank you for the Foundation Plugin update "Easter Egg", enjoy your Easter break

-
Using the rectangular floor primitives I was able to manually create the floor on the previous foundation in about 30 minutes:
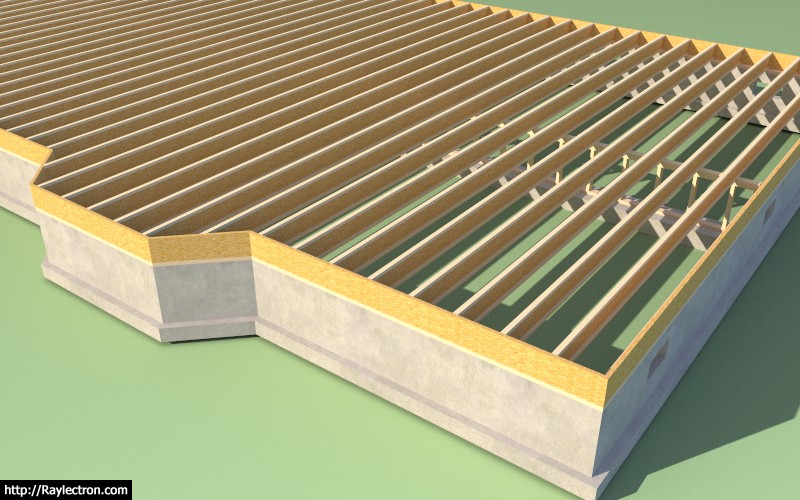
If I create the polygon floor tool I will be able to accomplish the same thing in under 10 seconds. The polygon floor tool in the truss plugin is next...
-
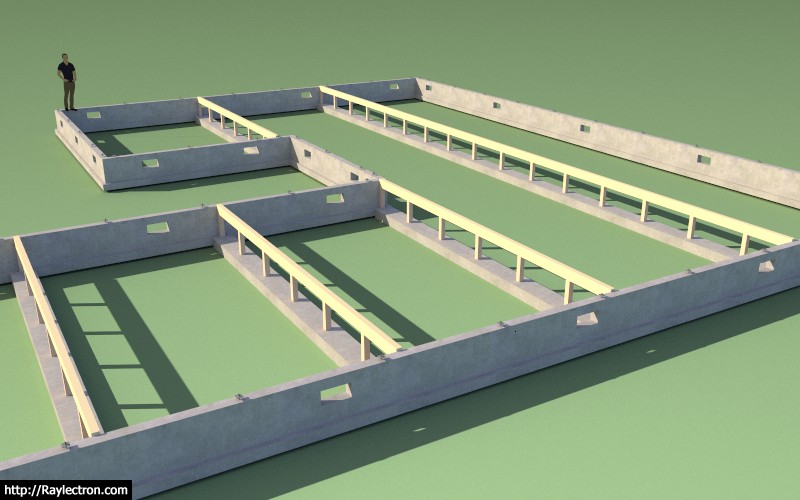
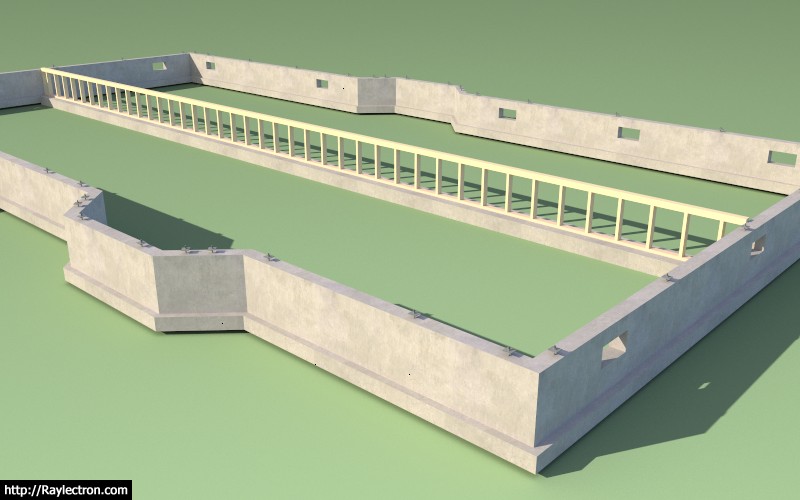
Polygon stemwall foundation with post and beam interior supports.
Note that the smaller segments of the interior footing assemblies were created by copying the larger assembly and then trimming it to size with the Trim tool in the truss plugin.
-
Version 1.1.1 - 04.23.2017
- Added polygon outline tool for stemwall foundation.
- Enabled perimeter rebar, anchor bolts, vents, and internal footings for (polygon) stemwall foundations.
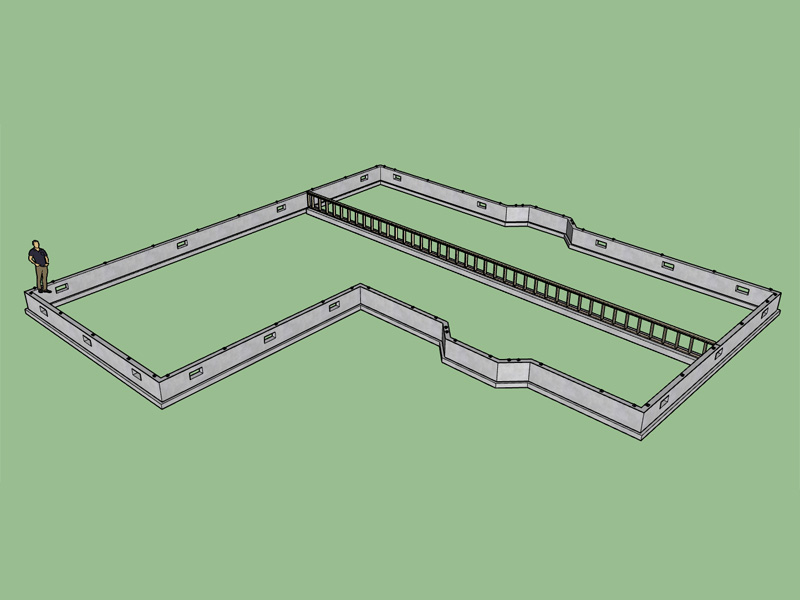
View model here:
3D Warehouse
3D Warehouse is a website of searchable, pre-made 3D models that works seamlessly with SketchUp.
(3dwarehouse.sketchup.com)
The next improvement would be a web_dialog input so that more than one internal footing can be specified at a time.
Advertisement


