[Plugin][EVAL] TIG-CutNfill
-
An updated v1.1 is now available in the PluginStore. http://sketchucation.com/resources/pluginstore?pln=TIG-CutNfill It is also be available as a pre-licensed version in the SketchUcation Shop...
http://sketchucation.com/shop/plugins/767-cutnfill-v1-1It is now faster and less likely to failure - it tries to mend non-Solid Cut/Fill results that can occasionally occur when two Solids are intersected.
Note that if you have previously purchased a license you do not need to buy a new one.
Just download/install the latest EVAL version and it will find and use the license-file already in the Tool's subfolder... -
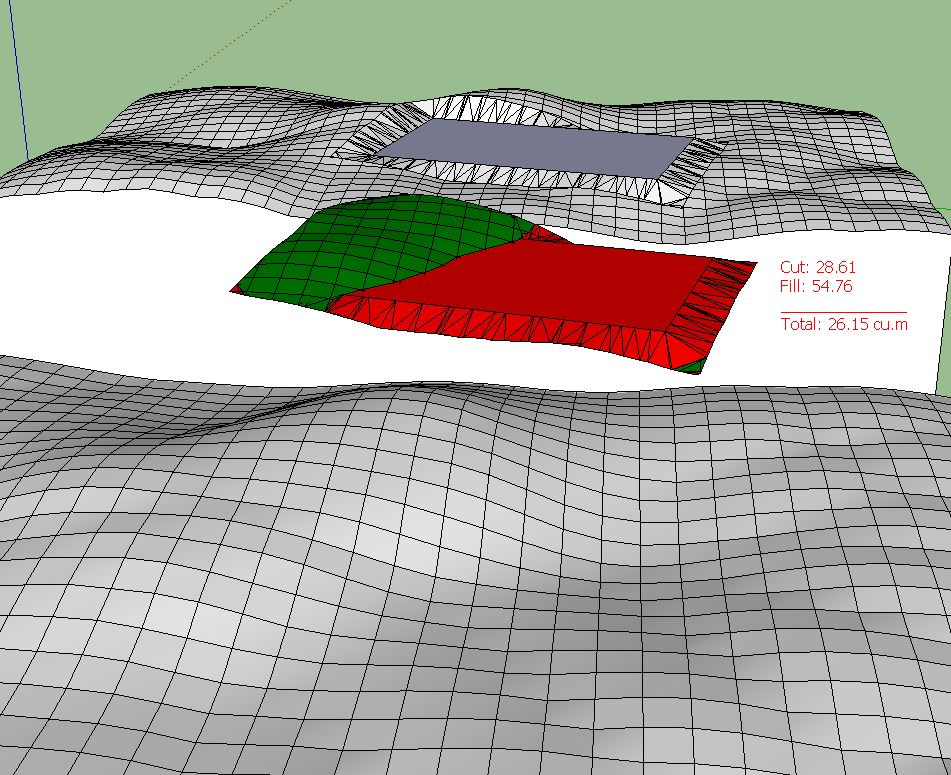
Thank you TIG, that's one amazing plugin, even gives me a nice little solid cut/fill object, SU just became a whole lot more useful.
-
I had done this in a project manualy... and surprisengly using same color code
 . this was done almost 1 year back... good to see that there is a plugin though.
-
Great minds think alike...

Or perhaps the SCF PluginStore collects more data about you than we admit to

-
This is the very useful plugins for me. Unfortunately I can't get it done for me. It keeps showing that I have to align the corner of the two groups although I've done so.
Can someone tells me what I was wrong.
-
Because the two 'solid' groups are subtracted to get the two cut and fill volumes in the Z/blue direction, then the XY/red-green dimensions and outline of the 'skirt' need to be identical and overlaid exactly.
The 'bounding-box' of both groups should appear the same and at the same point at bounds.min...
It see your Red axis but where is the green/blue ?
It's wise to always model near the origin 0,0,0 (0;0;0 if you use ',' as your decimal separator)
To see the 'origin' of the groups switch on Model > Components > Show axes.
You can always explode and regroup each of these groups IN TURN to ensure they coincide.
To Move exactly to the origin, preselect a group and click a bottom minimal corner on the 'skirt' as the start point, then type [0,0,0] ( OR [0;0;0] ) plus <enter> - repeat the Move for the other group, starting with the exact same point on the 'skirt'...
They should now be overlaid exactly. -
An updated v1.2 is now available in the PluginStore. http://sketchucation.com/resources/pluginstore?pln=TIG-CutNfill It is also be available as a pre-licensed version in the SketchUcation Shop... ***
It is now faster and less likely to failure - it tries to mend non-Solid Cut/Fill results that can occasionally occur when two Solids are intersected.
*** Note that if you have previously purchased a license you do not need to buy a new one.
Just download/install the latest EVAL version and it will find and use the license-file already in the Tool's subfolder... -
Thank you sir...
-
@tig said:
Because the two 'solid' groups are subtracted to get the two cut and fill volumes in the Z/blue direction, then the XY/red-green dimensions and outline of the 'skirt' need to be identical and overlaid exactly.
The 'bounding-box' of both groups should appear the same and at the same point at bounds.min...
It see your Red axis but where is the green/blue ?
It's wise to always model near the origin 0,0,0 (0;0;0 if you use ',' as your decimal separator)
To see the 'origin' of the groups switch on Model > Components > Show axes.
You can always explode and regroup each of these groups IN TURN to ensure they coincide.
To Move exactly to the origin, preselect a group and click a bottom minimal corner on the 'skirt' as the start point, then type [0,0,0] ( OR [0;0;0] ) plus <enter> - repeat the Move for the other group, starting with the exact same point on the 'skirt'...
They should now be overlaid exactly.Thank you very much for your comment. I'll try again.
-
@pillarpom said:
@tig said:
Because the two 'solid' groups are subtracted to get the two cut and fill volumes in the Z/blue direction, then the XY/red-green dimensions and outline of the 'skirt' need to be identical and overlaid exactly.
The 'bounding-box' of both groups should appear the same and at the same point at bounds.min...
It see your Red axis but where is the green/blue ?
It's wise to always model near the origin 0,0,0 (0;0;0 if you use ',' as your decimal separator)
To see the 'origin' of the groups switch on Model > Components > Show axes.
You can always explode and regroup each of these groups IN TURN to ensure they coincide.
To Move exactly to the origin, preselect a group and click a bottom minimal corner on the 'skirt' as the start point, then type [0,0,0] ( OR [0;0;0] ) plus <enter> - repeat the Move for the other group, starting with the exact same point on the 'skirt'...
They should now be overlaid exactly.Thank you very much for your comment. I'll try again.
Still can't get it done,used v1.2 . I've also attached the skp. file for you to review. Please check it out, thank you in advance.
-
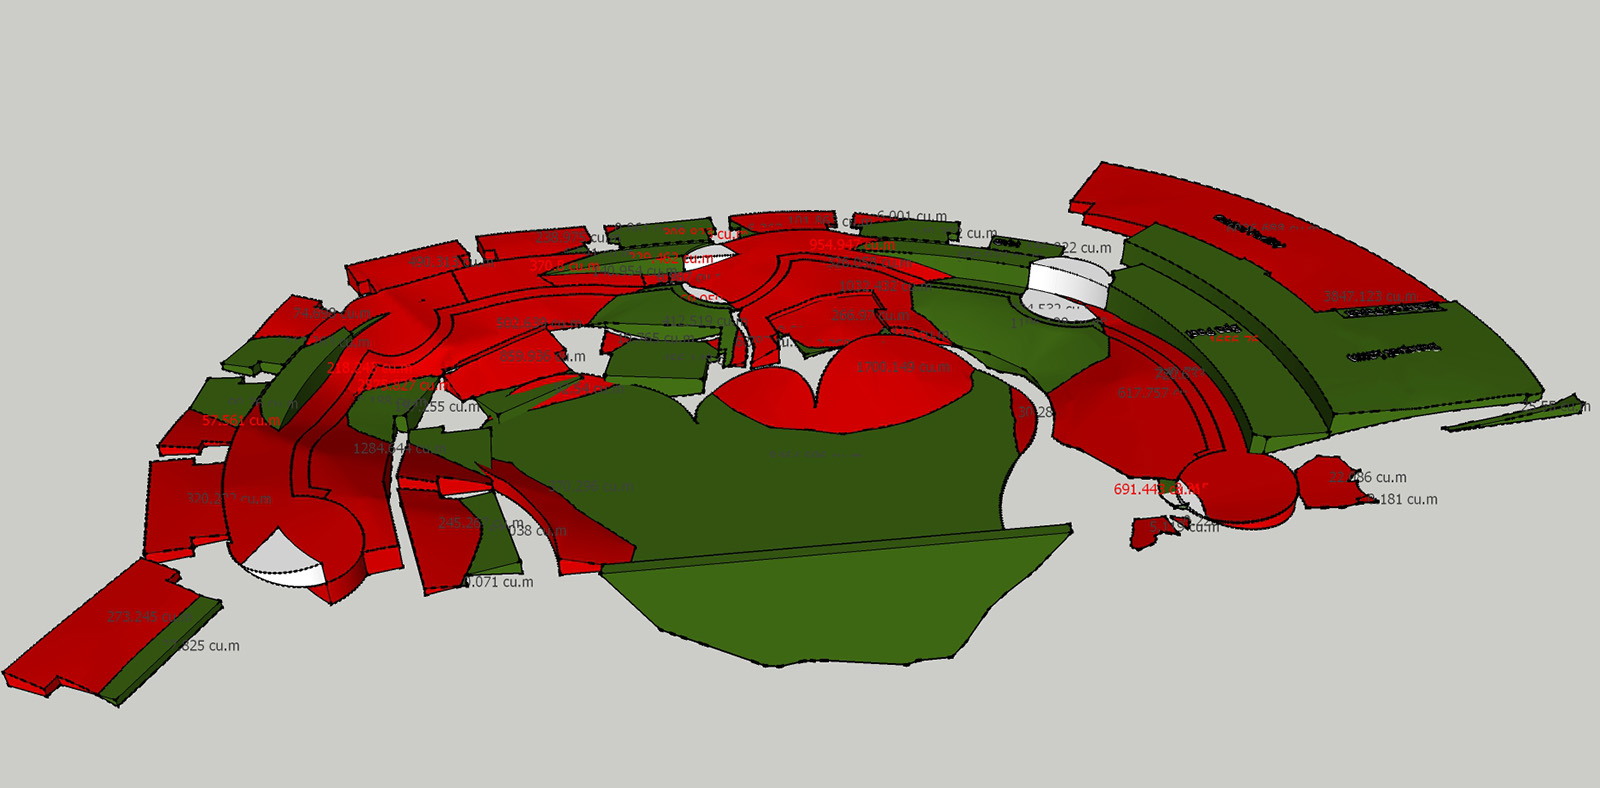
If you look at the EXTG and Proposed groups [with Hidden Gemomtry ON] you can see that they do not have the same 'skirt', so when one is subtracted from the other weird volumes result.
The differences should be in the blue Z direction.
Making the below ground parts with a different outline is a recipe for a failure...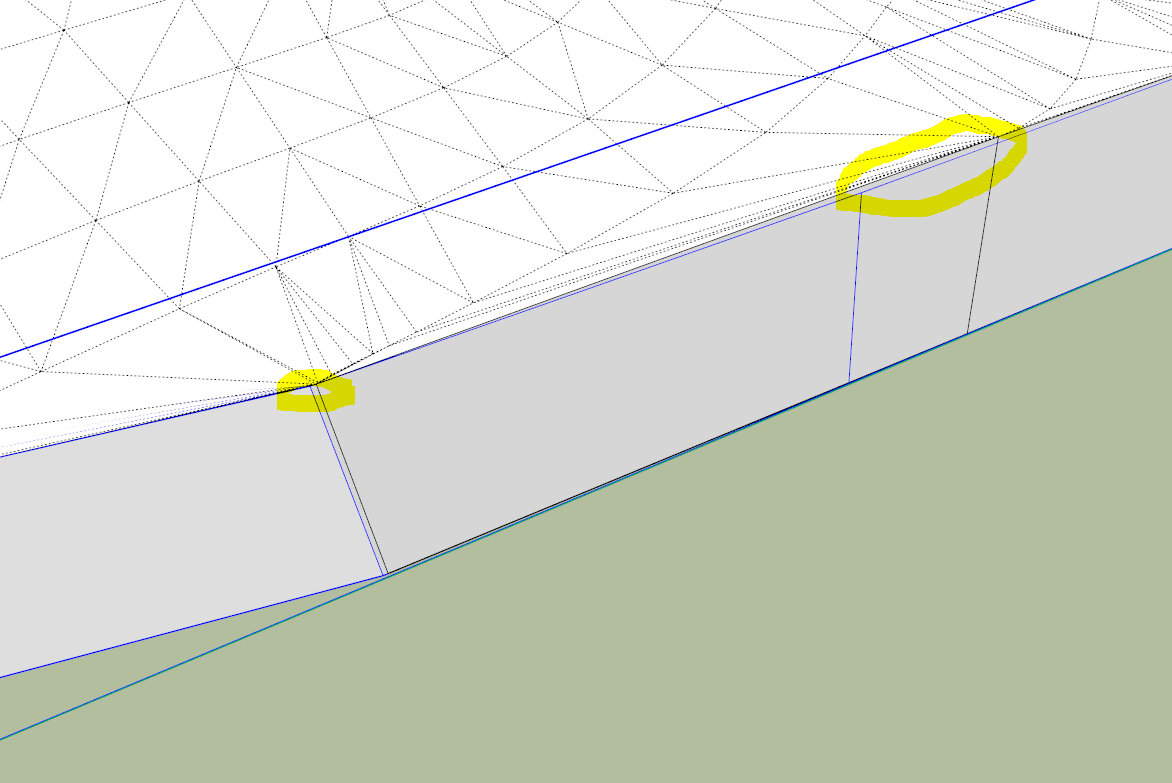
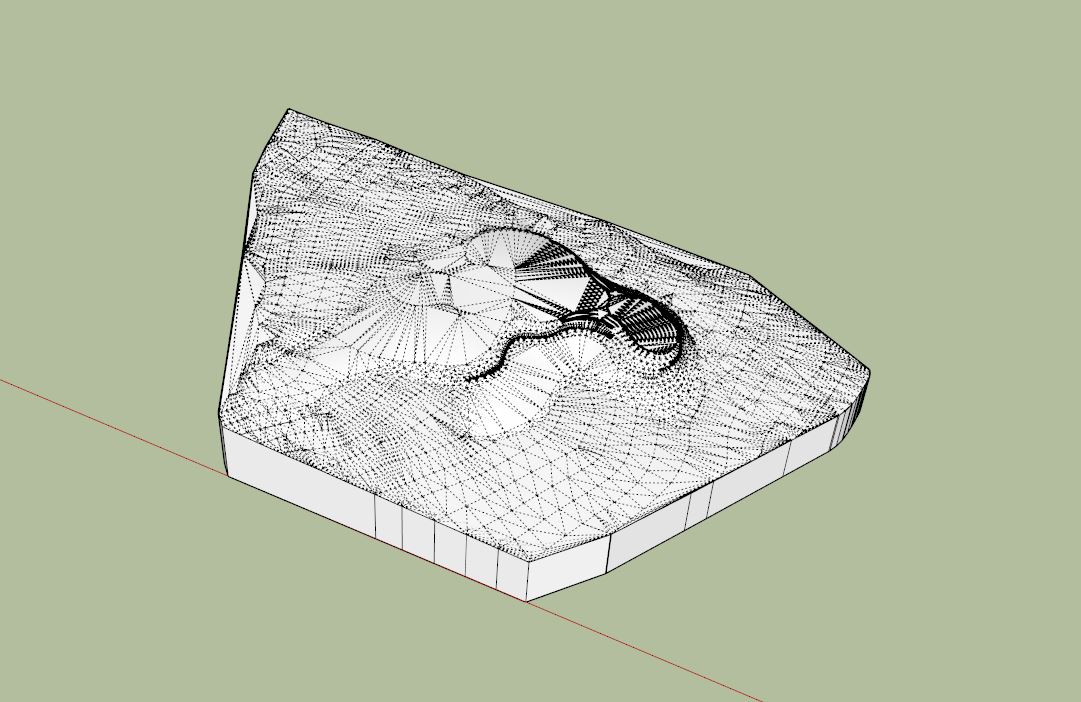
Because the bottom left most vertex [minX, minY, 0] does not align, the the pair are not considered as being properly overlaid - hence the message.
However, relocating the single vertex to be coincident will not resolve the matter.
You need to ensure that the two 'skirts' are wholly coincident, otherwise when they are subtracted there will be left over slivers of volume making the CutNfill result invalid, even if you do manage to make one !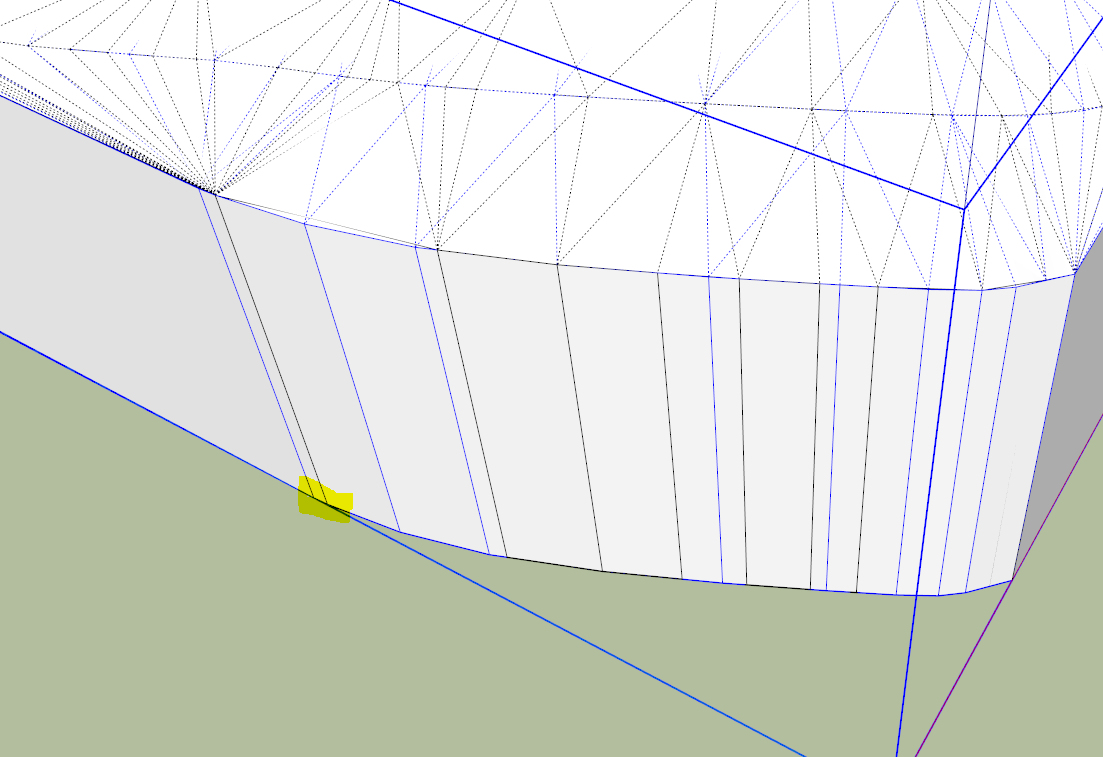
-
@TIG
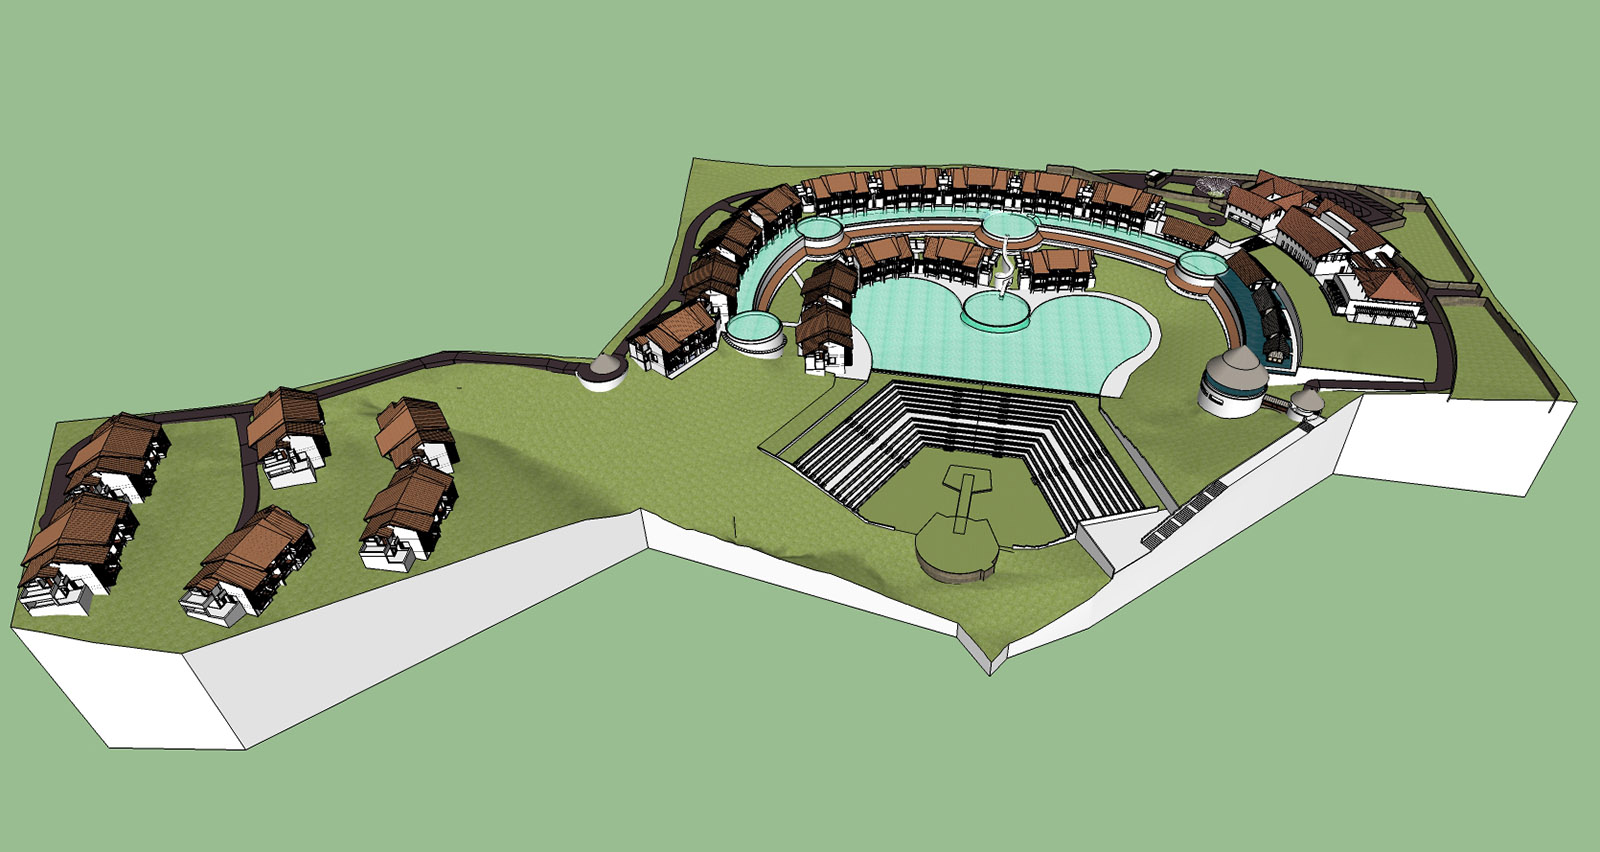
Thank you for your suggestion. The hard part then is how to make the skirt identical. My contour lines were made in Autocad with the same identical property line and then moved to the actual Z value of each contour. The contour lines were imported to Sketchup and transformed to surface by Sandbox. I could not control the boundary afterwards, but they looked almost identical. After the surfaces were made I then used your plugin to make the skirts for each terrain. That was what the result came out. Any suggestion please. Thank you. -
Work on a copy as it might get messy !
View > Hidden Geometry ON so you can see all edges and vertices.
Use a Style [temporarily] that makes end-points very noticeable.
Edit the EXTG group.
Select all of the 'skirt' by fence - i.e. leave out the top surface.
Use Edit > Copy to put it onto the clipboard.
No exit that edit.
Edit the Proposed group.
Select all of the 'skirt' by fence - i.e. leave off the top surface.
Press <delete> to remove it.
The top surface should be unaffected.
Now immediately use Edit > Paste-In-Place to insert the clipboard's 'skirt' copy.
Immediately use the context-menu to Group that - we need to temporarily separate it from the other geometry we will be editing.
The Proposed group will no longer be 'solid', since we know that the two surfaces do not overlay exactly in plan, and of course the temporary skirt-group will also lead to non-solidity in any case...
Now deselect everything inside the edit, and use the Move tool to relocate the misplaced vertices on the top-surface's perimeter to snap them in turn onto the temporarily grouped skirt's equivalent top edge vertices, or in some cases an edge [if there is no vertex at the desired location].
The perimeter of the Proposed top-surface should align exactly in level [Z] with the equivalent edges in the EXTG, since you have no cut/fill beyond the edges ??
Once you are happy that you have 'healed' the Proposed top-surface's vertices onto the grouped-skirt test for solidity...
Explode the skirt-group so it merges with the top geometry.
No exit the edit and Entity Info should report 'solid'...
If so you can try CutNfill again...
If still bot solid Undo until the skirt-group exists again... repeat fixing the vertices until it is a solid ... -
Here's v2.0 http://sketchucation.com/pluginstore?pln=TIG-CutNfill It's now reworked and signed for full v2016 compatibility, and various minor improvements for the newer SUp versions - with Skirt making code refreshed etc.
If you have an earlier licensed version of TIG-CutNfill, then please get this updated EVAL version and when it is installed, the earlier license code is reused.
So you do not need to buy another license [although if you do I won't mind (no refunds!) ] -
Hi,
I have downloaded the latest evaluation version, it looks like this tool is exactly what I require. However I get the following error on loading SketchUp:
Error Loading File TIG-CutNfill.rb
(eval):65:in `require': uninitialized constant SketchupExtension::TIG::CutNfill::FOLDERPlease advise, I am keen to get this working
Thanks
-
Hi again,
Just paid for the licensed version as I am sure this tool will make my life easier. However the same problem persists: Error Loading File TIG-CutNfill.rb
(eval):65:in `require': uninitialized constant SketchupExtension::TIG::CutNfill::FOLDERCheers,
Ollie
-
Following on from the last two posts...
After some not inconsiderable reverse-engineering...
I have now made a v8 compatible version of the v2.0 RBZ - for both the EVAL and LICENSED versions...So, if you need one please contact me by Private Message...
Then I'll PM you an RBZ that will work on your 'olde' version 8...
BUT if you have bought a license, then please give details of your user-name, email etc, so that it can be verified...
I am not as stupid as I look !
-
Earlier today I purchased CutNfill. 2 questions:
- should I have received my license number by now, or does it take a while for the email to be sent? I did get the PayPal receipt.
- using the Skirt Tool on my unlocked Location Terrain group, created using Add Location, doesn't make a solid. Is there something I'm missing?
Here's what I thought I'd be able to do: Add Location, unlock Location Terrain, use Skirt Tool, copy Location Terrain (now a solid), rename one of them EXTG, rename other PROPOSED, move PROPOSED over 1000', modify PROPOSED, move it back 1000', which should put it back in exactly the same spot as EXTG. Obviously I can't do this if I can't make Location Terrain a solid, so I think I'm missing something.
I'm going to go back now and experiment with creating a terrain from scratch and then using the SKIRT TOOL, while I wait for an answer here. Maybe I'll figure out the answer to my own question
Thanks!
-
How did you purchase it ?
Through the SCF Shop ?If you did that you should have got a new RBZ which you then download and install.
And that is fully licensed.There is no license emailed to you.
The downloaded RBZ contains the licensed RBZ...Provided that the 'surface' terrains [EXTG & PROPosed] are inperforate skins then the skirt should make a solid.
If it's not a solid the entity info will report it as not.Tools like SolidSolver and SolidInspector² can help make these solid...
PS:
I have copied this to the SCF Shop to determine that you have indeed paid, and if so we'll get a licensed RBZ sent to you... -
Thanks, TIG.
I did manage to make it solid, but only after a bit of work on it. Tomorrow, I'll download some other Google terrains to see the results. I'll attach a file or two if I still have difficulty with them.
Thanks for forwarding my query re the license, as the plugin I downloaded did not download with a license attached.
And thank you, too, for some of your other plugins. I'm amazed at the work you do!
Hello! It looks like you're interested in this conversation, but you don't have an account yet.
Getting fed up of having to scroll through the same posts each visit? When you register for an account, you'll always come back to exactly where you were before, and choose to be notified of new replies (either via email, or push notification). You'll also be able to save bookmarks and upvote posts to show your appreciation to other community members.
With your input, this post could be even better 💗
Register Login


Advertisement