Bump Map doesn't work with me
-
Hello,
I'm a newbie with renders, in my case - Vray.
I'm folowing now step by step the Vray manual excersises, but I'm stuck now on bumps.
I must say, I was looking in the web for an answer of my question, but I couldn't find it.
I know that the problem is in me and something that I DON'T do properly.I'm making my trials with bricks - it didn't work. It's like the grayscale image is not added at all.
Than I decided that maybe I can not see the difference - edited the greyscale picture, making it sharper, increased the bump multiplier - all the same after endering.
Than I decided to make a test, following this tut:It's very simple, but for me it didn't work....
So I wonder now where am I wrong.
Do you have any idea?
Thanks a lot in advance!!!
-
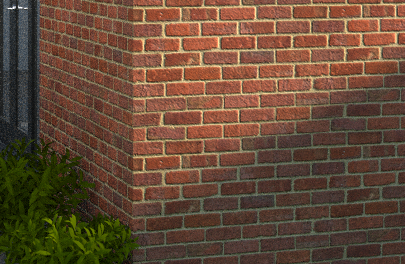
Sometimes, if the surface is not lit by a directional light (e.g. the sun), then the bump will not show as in this example. This brickwork has bump, but it only shows when the sun is on it, and not in the shade.
David

-
Thank you, David! I tried it with a rectangle light above the surface. It didn't work.
Is there any very important setting without which bump doesn't work, that I maybe missed? Something in the environment options or maybe the bump images file format? I tried with jpg or png...I just noticed that I see the bump maped in the preview of the material in the Material Editor.
But when I render it, it's purely flat. -
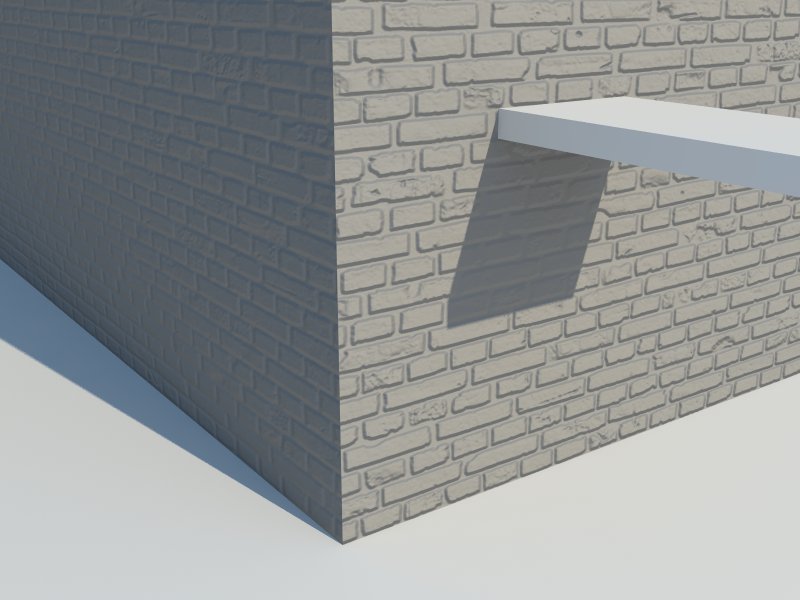
Seems to be fine with me. I swapped out my brick texture for just a diffuse color to really see what is happening. Everything is default settings in this test. Essentially, less light means less bump effect.

-
Hi valerostudio,
You bump seems perfectly well even without difuuse texture.
Please, can somebody look at the very basic model that I fastly made to try out if it wrks this time. But it doesn't. The bump file I'll atach also, as I'm not sure if you'll get it with the skp file. (I don't know how to export the whole file, including all the attached subfiles, like images etc.)
I'll be very thankful if somebody take a look and try it on his machine...Or see my mistake.
Thanks!!!

-
cveti - you said you have used a rectangular light 'above the texture' - this will give a rather general and diffuse level of light, which may not show the bump up very well, whereas the sun is very directional (as per the two examples above)
A few things I've done in the past that messes things up -
a) ensure you have the bump map in the right place in the texture maps
b) ensure it is a 'grayscale' image
c) ensure it is the same scale etc as the 'diffuse' imageIts only by cocking things up that we really learn!!
(I'll have a look at your model)
David
-
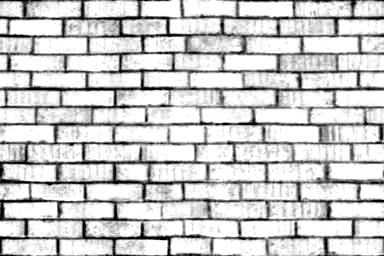
Typically your diffuse and bump map should look something like these
-
hi dcauldwell,
Thank you for your help!
I was thinking about point "a) ensure you have the bump map in the right place in the texture maps"....
It may be a stupid question, but is there a special folder on my pc where the texture maps and bump maps should be stored? And should they also be in the same folder? Maybe this is the main problem (excepting the light)....
And for the light...So far I can apply only rectangular light, as I'm following the manual. I'll read about the other sources of light and try it.Thanks a lot!!!:-)
-
Having looked at your skp 'model', straight away I would say your problem is the rectangular light. It is so big, and entirely covers the area it is lighting that it will give the most even of lighting - so no bump visible!
Try using the sun or a point light to see the difference.
(You don't have to keep the files in any particular place)
David
-
David,
Thank you very much for your help!
I'm noticed that when I enable displacements, I get nice render, where the unevens are visible.
But when I disable it and keep only the bump option - it all render absolutely flat. I'm using the sun light and removed the rectangular light - no difference.Probably there is a scale factor in the vray options or in the materials options, which is low for me...I don't know. The bump multiplier is 20!!! And still flat....
Thankfully the displacements "work", but I just keep wondering what is the problem with bump. I hope soon I'll find out and I'll share here.
Thanx again to all of you!!!
-
What version of V-Ray are you using? 1.6 beta has improved bump mapping. Displacement is very different than bump mapping.
-
There's something up with that bump map file. I get the same results also. I replaced with one of my standard brick bumps and your file works file. Get a new bump map, that thing is really low quality.
-
I don't think there is anything wrong with the bump map. However, when you open the file and, using the SU materials editor you will see that the material is simply a colour (not a texture image). Because it is just a colour it has no dimensions and so Vray has nothing to go on when sizing the bump texture (I think it therefore uses a default size which is small).
I tried substituting the colour with the bump file (as a diffuse texture) and discovered that it measure 8" x 1', and therefore its scale relative to the size of the surface it is applied to is tiny, - so any bump would be imperceptible.So, I agree with Volerostudio, - start again, and this time create a texture in SU using an image, then apply that textures bump map in Vray.
I would still say however that to properly see the bump, you will need a directional light - not a huge rectangular one, as the rectangular one will give you very diffuse lighting.
Cheers
David
-
Thanks to all of you guys for the time you spent on my problem!!!!
I'll start over with a different texture.
I tried with a color, because I watched a tutorial like this and it seemed fast and easy to check how bump works.
Well, David,I was also thinking that the scale of the bump map itself is too small and therefore invisible.
Again, thanks a lot.I'll tell here when I get a good bump map!

Greetings
-
Because of the limitations of UVW mapping, you will either need to have a copy of the bump in your diffuse as a reference (just set the opacity to AColor and then set that to white and add your color layer as a 2nd diffuse under that). Or you can play with the UVW scaling in the texture itself.
Hello! It looks like you're interested in this conversation, but you don't have an account yet.
Getting fed up of having to scroll through the same posts each visit? When you register for an account, you'll always come back to exactly where you were before, and choose to be notified of new replies (either via email, or push notification). You'll also be able to save bookmarks and upvote posts to show your appreciation to other community members.
With your input, this post could be even better 💗
Register LoginAdvertisement


