Solids
-
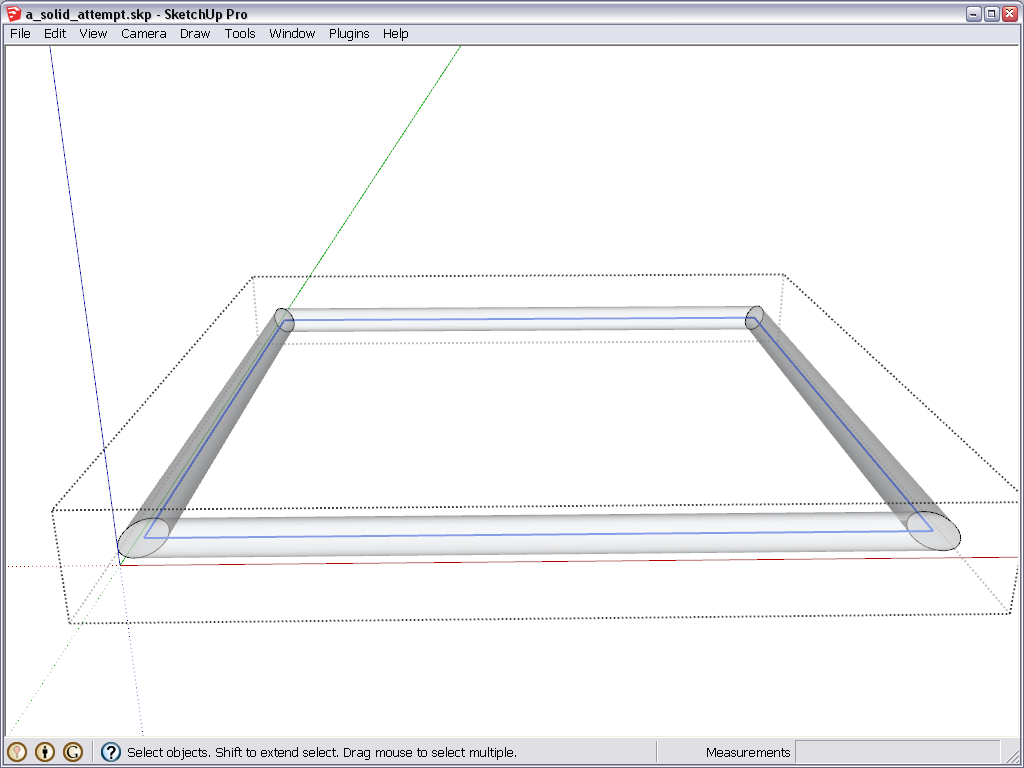
Hello. I'm embarrassed to be writing this because the 'solid' concept seems straight forward and somewhat intuitive yet even the simplest examples I construct are not solids or so SU tells me. The only thing I've been able to make a solid is to extrude a circle into a cylinder. But as soon as I get more complicated than that I fail the solid test. The most frustrating is: Make a square. Get rid of the inside so your left with just the perimeter. Make a circle perpendicular to the path at the center (of the circle). Then use follow me to get a picture frame looking tubular square - SU tells me its not a solid. What gives? What am I not understanding here? Thanks for all the help.
-
Hi Keith,
As you probably know, one of the things that make a group "not" solid is stray edges (that do not define faces). Now using the Follow me tool and a path that will later not be "consumed" by the extruded shape (i.e. when you position the profile to be extruded, it's edge does not touch the path), the path will remain in the shape.
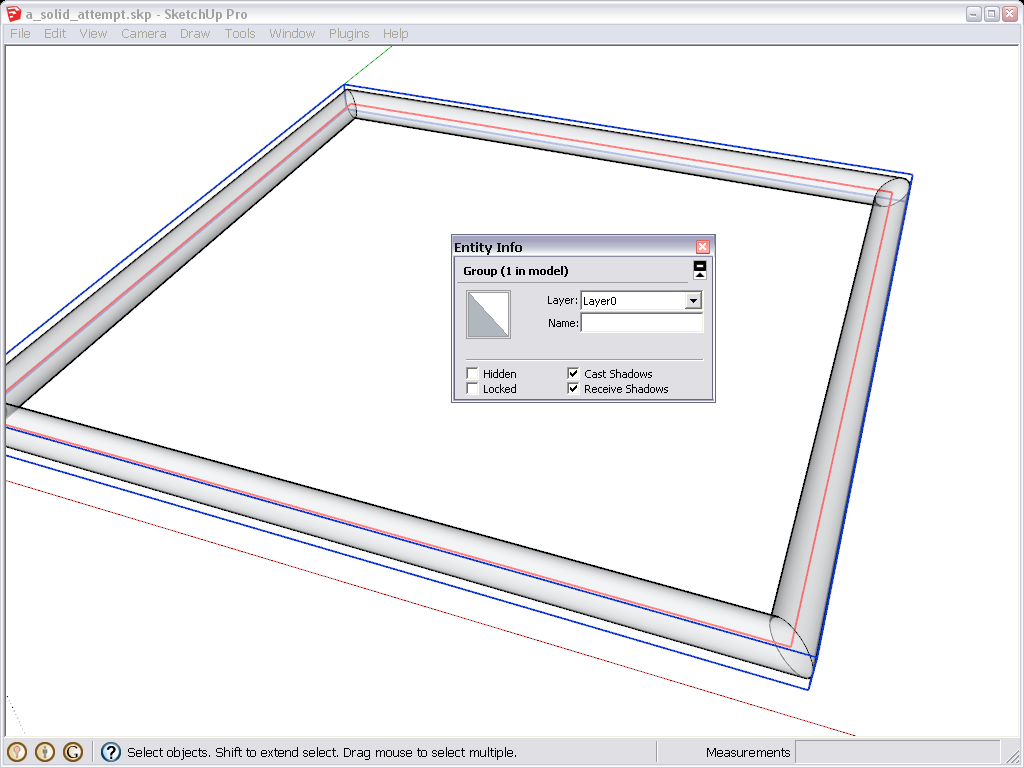
Here is your group (X-ray mode, with the path selected/highlighted):

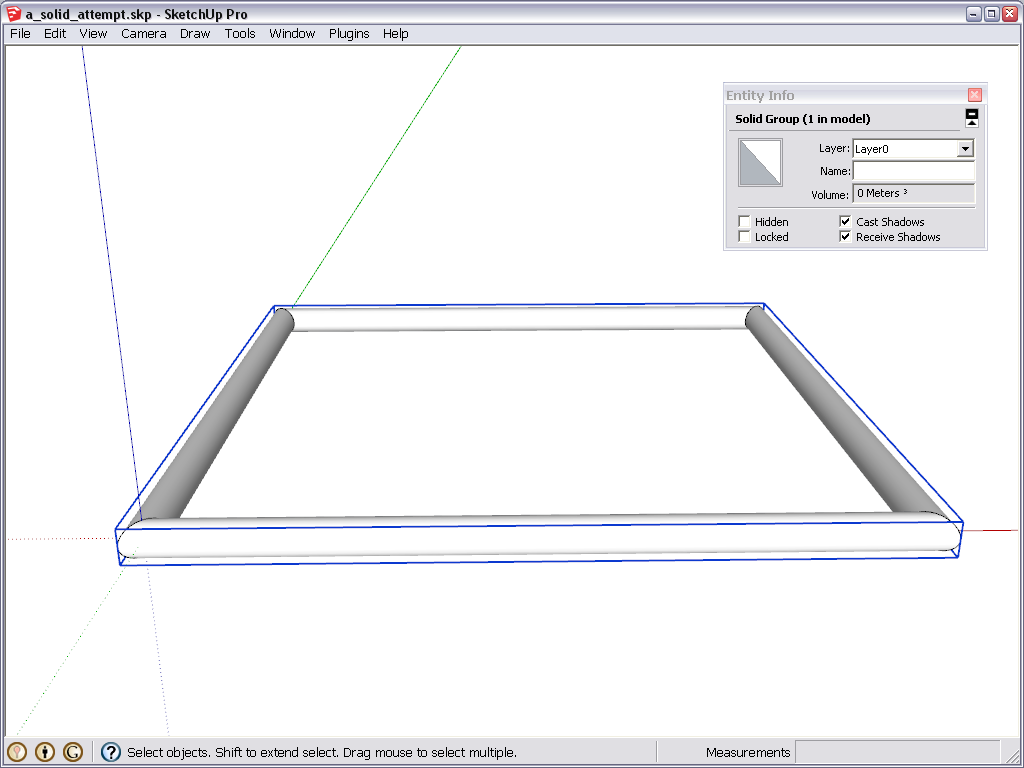
and here it is after I deleted that path - already a solid:
Next time, when you make such a shape, do the extrusion, triple click on the tube (the path not touching it will not be selected) and make the group then only. The path won't be part of the group then. You can now select all (Ctrl+A) > deselect the group (Shift+Select or Ctrl+Shift+Select) and press the delete key to get rid of any stray geometry not part of the group remaining in the model... -
I am not understanding your not understanding. I opened your file. It looks like a solid to me and I get no message about it being not solid.
-
Roger, the original group (with the stray path highlighted in red) is not a solid according to SU.

-
A 'solid' contains only faces and edges, AND ALL of those edges must have TWO faces [no more, no fewer].
The 'path' hidden inside this form has four faceless edges, therefore it's not considered to be a 'solid'.
However, erasing those four unneeded edges quickly makes it into a solid.
The 'Entity Info' window says if a selected group/component-instance is a 'solid' in the top-bar info...Things that prevent 'solid'ness [apart from the obvious things like nested groups!] are if it has unfaced edges, edges with one face [forming a 'flap', or the perimeter to a 'hole'], 'holes' no matter how tiny, coincident edges of two forms [e.g. two touching cubes where the one shared edge then has four faces], internal 'partitions' that will then inevitably have some edges with three or more faces, overlaid coplanar faces that then share edges [resulting from some explode/intersect operations] etc.
Thomthom's "SolidInspector" will highlight issues for you, you will need to do manual editing to fix them.
My "SolidSolver" would have fixed this particular problem, but it can often fall over if there are complex holes, partitions etc... so it's best at 'solid'ifying simpler forms that show such issues...
-
Thanks everyone! Sometime between 1 and 2 am I found out about the follow-me path. In the last 24 hours I've made a lot of progress with solids and I can create them almost (dare I say) a will. But a new problem has arisen and I'm not sure you can help me with this one. I purchased Pro a couple weeks ago (v
 but every time I do a solid subtract the program crashes. Have any of you experienced this? Three times I have started from scratch and the path I take seems not to matter - the crash always happens at the moment I select the second solid. Any suggestions would be helpful. Thanks mucho, Keith
Two solids, when I extract the tubes from the plate, sketchup crashes and burns.
-
Hey Guys, Thanks for all the help but never mind on the crashing event. I redid my drawing yet again (yeah, a whole day shot) and tried it one last time and the subtract worked. Anyway, seems a little buggy but nothing you guys should spend your time on. Just out of curiosity, have any of you used imaterialize (the 3D firm that will take your drawing and produce the whatever thing-a-ma-jig in plastic or metal?)? Just wondering what that process is like and if the parts are 'perfect' - whatever that means (I guess good enough that machining isn't needed at the end). Thanks again, Cheers, Keith
-
Ok, just one more question. I got past the solid thing. Got past SU crashing every time I did a solid subtract. Then finally, I got every thing right, 2 water tight groups etc. But the result is not what I expected. In playing around with subtract using crude shapes I felt I understood the end result but this subtract transformation on my groups is completely different. I tried reversing the "1" and "2" but there results are still perplexing. Any insight? Group 1 is a representation of four bolt holes complete with ledges for the heads of the bolts. Group 2 is just a shaped hunk of metal. The result should be holes in the hunk of metal correct?
Thanks again!
-
Hi Kallen,
The problem with your file seems to be that the "holes" template has some reversed faces, such that SU is having trouble working out 'inside' from 'outside'.Fistly, a little tip - to make the orientation of faces easier to see, pop into the 'Styles' window, then choose the 'Edit' tab - now choose the most hideous colour you can imagine for the 'Back' colour. Now when you use the 'Monochrome' view (or your model has no materials), the problem show up much more clearly.
Because SU's 'solids' are not truly solid (as you can see if you delete a face), it has to make a distinction between 'front' faces and 'back' faces. Making sure that the 'front' faces are all on the outside is important in order to get some of the boolean operations to work reliably; and also for the application of materials and textures (especially if you ever want to render anything).
You can sort this out very quickly by selecting any 'back to front' faces, and choosing 'reverse faces' from the right-click context menu. By using the "hideous back colour" style, they'll easily show up when modelling so that you can get into the habit of sorting them out as you go along - they're not always easy to find in a large model with nested components etc.! -
Wow! Great tips Togluddite (and also Gully etc who also contributed)! 10 seconds of reversing the faces and the subtract worked perfectly! I never noticed the color difference - figured it was just SU coloring. 10 seconds later the subtract worked perfectly!
Now let me ask a philosophical question. I find that at times I need to create something off to the side. Problem is, I always have a heck of a time putting whatever it was I created back in the right place. It seems things never line up - even with inferences. Is there a way to say, "remember this location" so I can snap back to it? How do you professionals attack such problems?
-
Start developing your "part" inside the model, "in situ". At en early stage however, turn it into a component and go on developing it by editing that component (i.e. I usually make legs for chairs/tables by creating a rectangle where I need to then make this into a component).
Now when you have reached a certain complexity and the model is in your way, just make a copy of the component (Ctrl+ ) and keep working on that. The "original" will reflect all the changes.
OR: if it is really complex in an even more complex model, right click on the component and "Save as...". It will save as a full skp file (which it is actually) that you can open, work on it etc. then save. Back in your master model, now right click on the component again and now "Reload...".
There you go with a full part.
-
As well as Gai's excellent tips on breaking your model into bite sized chunks and editing separately and then reloading, there are times you need to refer to adjacent objects...
If you make the new part in place and immediately separate it off by putting its geometry inside a new component or group, then you can use the View > Component Edit > View Rest of Model toggle etc to hide everything else except what you are working on during an Edit session. Toggling it 'off' let's you see parts that would be otherwise hidden by other objects, but toggling it 'on' can also be useful as it lets you snap to objects outside of the edit context. You can also make 'combo hides' of 'rest of model' and 'similar objects' - e.g. snapping to another tread-instance in a spiral stair [while everything else is hidden] can be useful because you'll then know that they join together perfectly when they are all assembled.If you feel you really have to work away from the main assembled parts, then still start by making a small part 'in place' as a group/component then Select it and Move it along an axis [color-locked - to say 'red'], type in an easily remembered distance e.g. 9999 [+<enter>] when working in mm moves it almost 10m to the right - assuming this is far enough away for your needs...
When you are done editing the contents, select the 'container' and start to Move it along the same axis, in the opposite direct... back towards where it belongs... and again type in 9999 [+<enter>] - this will put it back exactly where it was to start with. -
@TIG, Gai The last tip (moving an easy to remember distance along an axis) is what I've been doing but I think I probably need to start thinking more in 'components'. I've shied away from them until now. I 'm not sure what you meant by 'combo hides'? Did you mean 'component hides'? Thanks again guys for all the help. When I get this thing done I'm having a party - you're all invited if you're anywhere near Palmer Lake Colorado. Cheers, K..
-
Well, in fact, both TIG and I will be in Colorado in some two weeks...
(Do not make too rash promises!)
-
I never make rash promises. It may be done in two weeks but it'll be close. What r u coming to CO for? Don't tell me mountain biking (cause I'm an avid biker). Chin-chin, K..
-
-
@beginner said:
@unknownuser said:
What r u coming to CO for?

I know that you're going too !
BUT we'll be ~85 miles away... -
Hmmm...
Palmer Lake Colorado. -
@beginner said:
Hmmm...
Palmer Lake Colorado.[off:3gxof8kr]We ARE going somewhat off topic here...
And 'Beginner' is now starting to sound like a stalker...
Hmmmm...[/off:3gxof8kr] -
@beginner said:
Hi TIG,
It was just a comment...
Your map location is close to Palmer Lake mentioned by Kallen - nothing else.
But 'A' IS 'Boulder' and 'B' IS 'Palmer Lake'
It's too small to show up on a map that scale - BUT the nearest 'big' place 'Monument' does show up...

Advertisement


