What A Prima Donna
-
This was supposed to be a quick exercise but I don't mind admitting that I underestimated the amount of work involved. It was honestly a real pain at times, but good experience for future organic modelling. The main plug-ins used were Artisan and Curviloft.

I've also put together a short tutorial/guide for the modelling process, including images of the proxies.
The model is based on Alessi's Diva watering can by Eero Aarnio.
-
Nice design, nice images and nice tutorial.

-
I can only see a person being stabbed through the back by their own hair and screaming in agony...
Nice rendering, though.
-
Thanks
I was so engrossed in the modelling that I didn't notice the anthropomorphic qualities and reason for the product name until I started to stage the render scene.
-
Please explain from 2 to 4 for those that do not understand how that happened or what you used please.
-
Should I just go into more detail about using Curviloft and combining the spout and body models, or do you think it would be a good idea to also expand on the way I tidied up the geometry?
-
That's rather lovely.
-
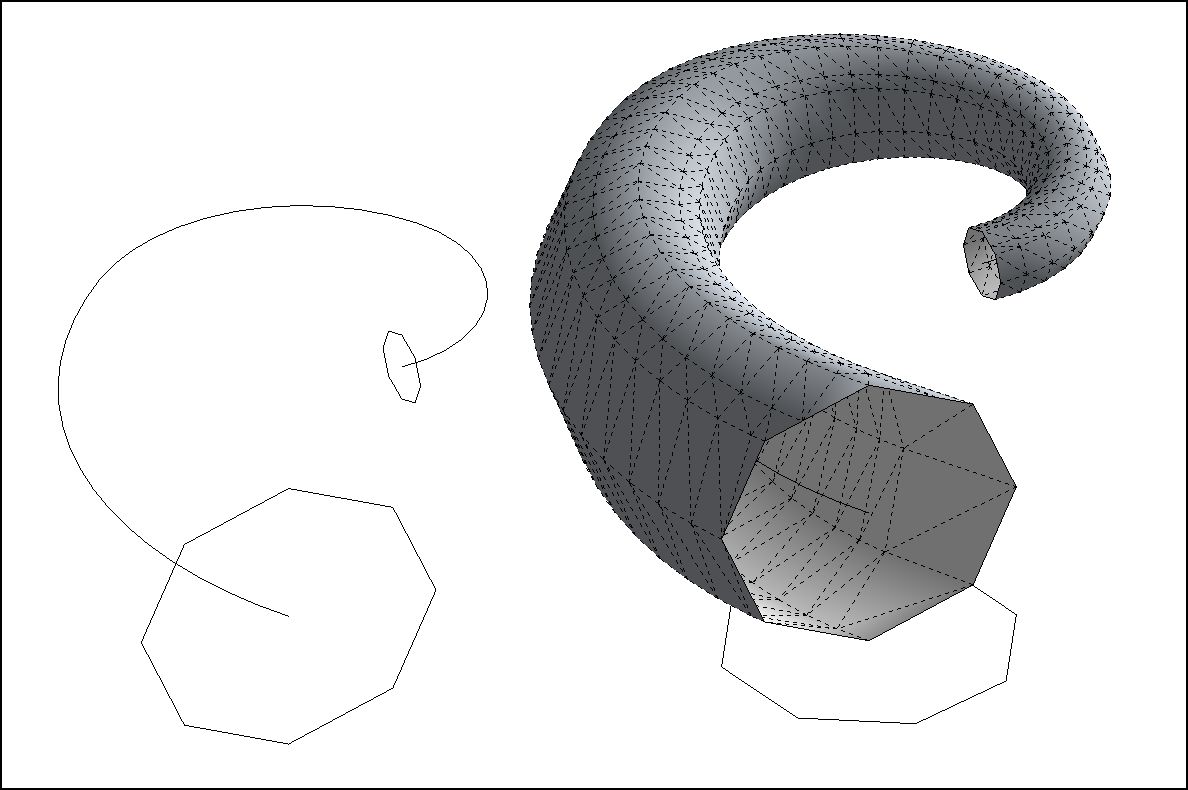
OK here's a more detailed explanation of my use of Curviloft and creating the main proxy for the model.
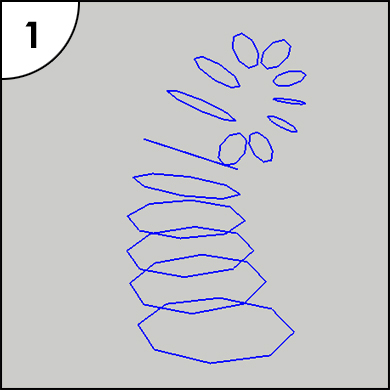
- Select just the edges of the profile segments.
- Launch the Curviloft plug-in using the Loft By Spline option. To see how accurate the result is I made the source image visible and selected a side view with the camera set to parallel projection.
The result is a little too detailed and the overall shape isn't quite right (there is distortion and the symmetry of the handle is off). You need something simpler and more geometric to work well as a proxy for Artisan.
- Here is the result after making the necessary adjustments - note the Curviloft settings for the profile and segments.
-
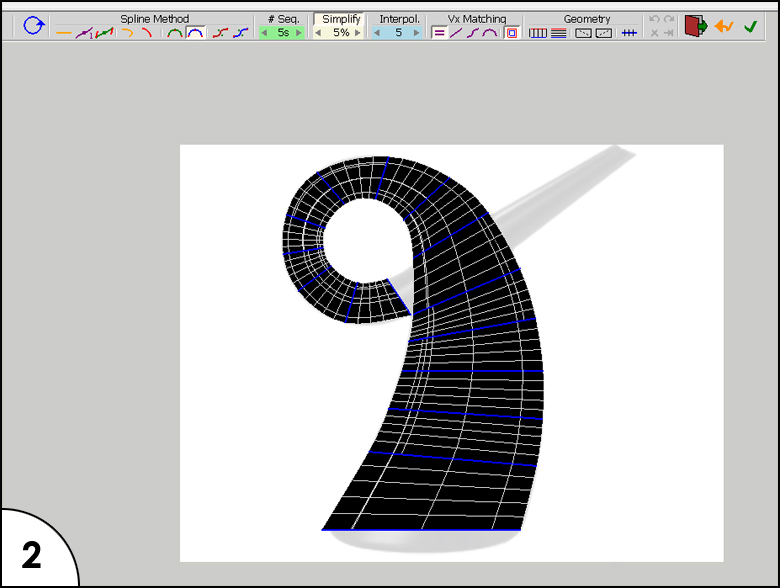
Here is the result after applying the Curviloft plug-in.
-
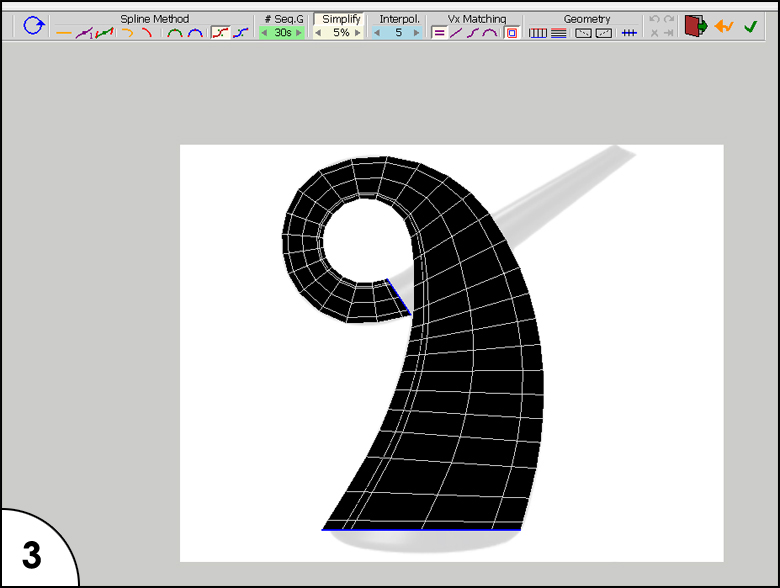
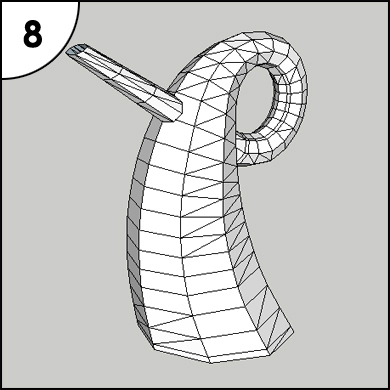
To work on the mesh it's best to unsmooth the geometry.
-
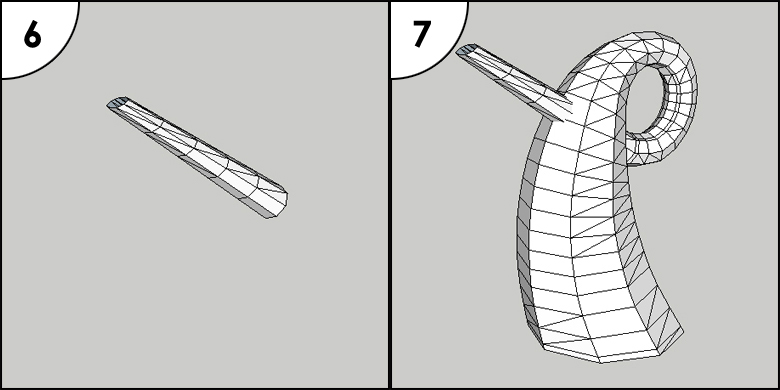
Repeat the above process for the spout.
-
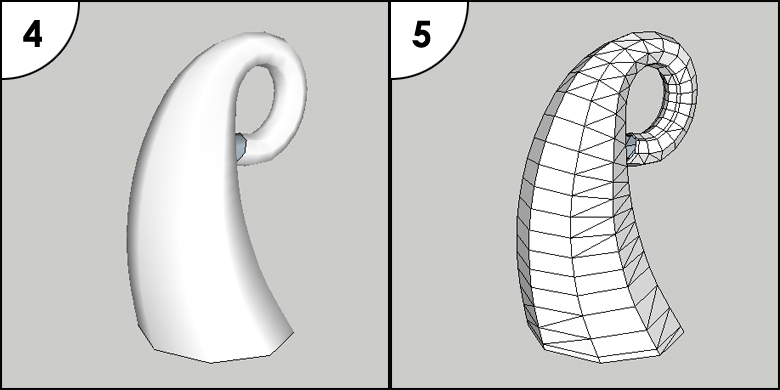
Explode the groups created for the spout and body.
- Select all of the geometry and select Intersect Faces>With Selection.
- Remove the internal geometry where the spout passes through the body of the watering can.

-
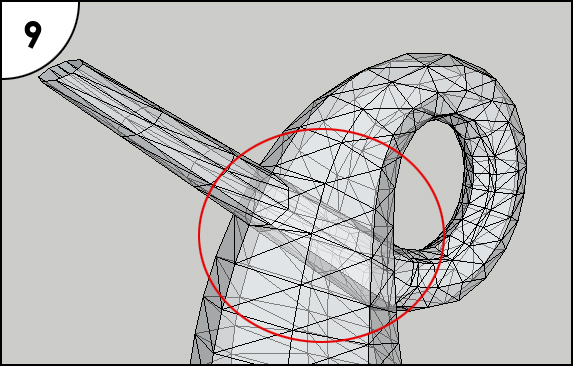
Split the geometry down the middle (to half your work). Start tidying up the geometry - notice the sloppy way that the spout meets the main body. In this image I've also already begun to correct the incorrect triangulation seen in fig. 8.
-
The results after correcting the mesh. All the triangulation is now consistent and the spout flows into the body of the watering can (it's better connected).
Throughout this process I usually apply subdivision with Artisan to test the changes I make,
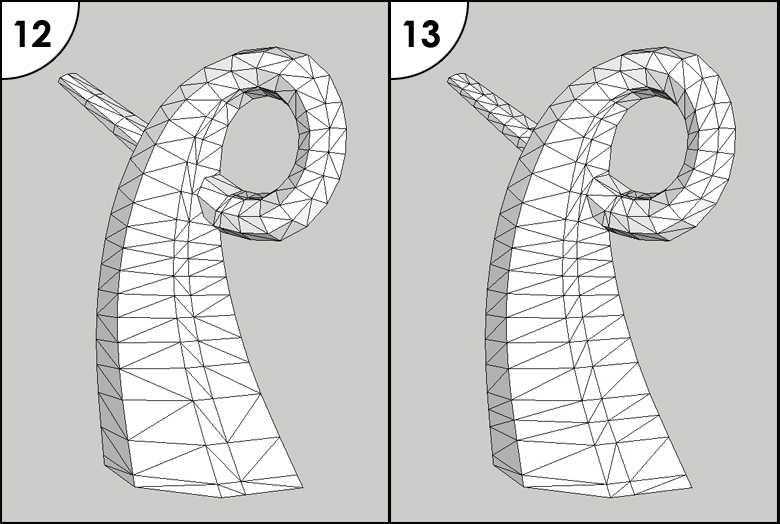
12 & 13. Before and after images of the back of the model. As with the spout, pay particular attention to the way the handle joins the body of the watering can.
I think that should cover everything not explained on my Website. If anyone wants a more detailed explanation of the rest of the modelling, just let me know.
-
Thanks Tom
-
@dsarchs said:
I can only see a person being stabbed through the back by their own hair and screaming in agony...

Really nice design, David
-
I can't take credit for the design. It's based on Alessi's Diva watering can by Eero Aarnio.
It's an instant classic that I just had to model.
-
@David
Nice model
-
Very luscious. Seems I remember an awesome plugin that scales a shape profile, in this case your octagons, along a path, or perhaps it is the one where the ends are defined, large and small here, and the routine skins (terminology?) the shape betwixt... That is the curviloft plugin you mention? Why do you provide intermediate profiles as opposed to one at the beginning and one at the end (of the two)? I hope my laziness isn't too glaring.
-
Thanks Rich
.@brookefox said:
Why do you provide intermediate profiles as opposed to one at the beginning and one at the end (of the two)? I hope my laziness isn't too glaring.
When I first saw the design I thought that all I needed to do was draw a loop and use the Taper Maker plug-in. Unfortunately this resulted in the mesh twisting and folding back on itself through the loop of the handle. Attempts with other plug-ins resulted in similar results.
-
Of course it would be interesting to see alternative modelling solutions (hint, hint
 ).
). -
This is a really nice thread (and model), thanks for posting.
-
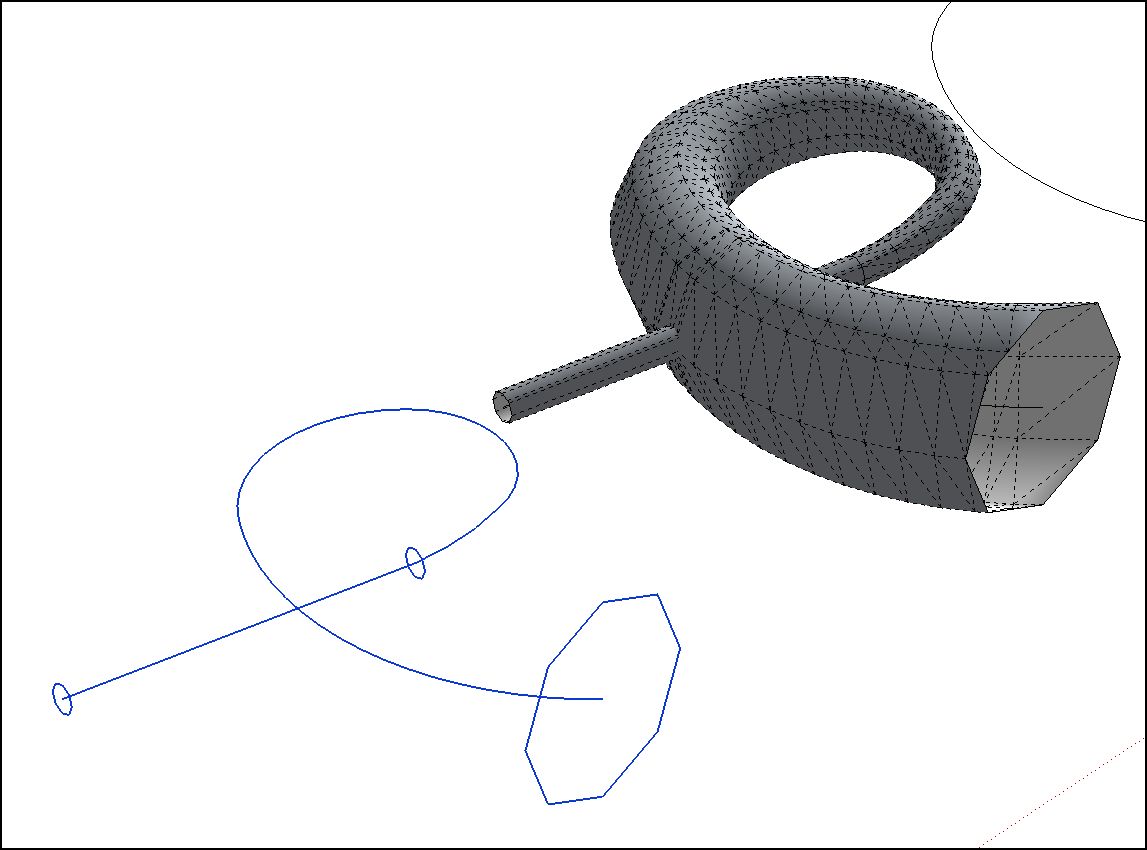
Here's just the most basic move via Fredo's curviloft, loft along spline. No attention paid here to getting the proportions or details right. The plugin is so configurable and potent... And then I ran into SU bug: a refusal to rotate a curve or circle along Z axis. How did you scale and distribute your octagons along the path?
A beginning and an ending profile, and a path.
Spout added.
-
I think my poorly drawn arcs cause problems with TIGs routines: it wants to flip the end faces as it skins, as it were, and curviloft did as well but could be tweaked out of it. I must work on making smoother multi-arcs. TIGs seem to require a 3d arcs as it wants the path at the edge of the face and these faces are of different sizes, while curviloft takes a center path so it can be 2d. At least this is how is seems to me at this point. If you post your generative path/s we could work with them?
-
-
You're right, no help, but no matter. You did the job with what you had and it came out beautifully. It looks like it would have been made easier by having smoother, more consistent arcs, but that is something looking at your model made me focus on: the plugin workhorses seem to like it that way and that is something I need to learn, esp. good 3d arcs. The easiest, simplest path was for me 3 tangent arcs, welded, with a tangent line for the spout.
Hello! It looks like you're interested in this conversation, but you don't have an account yet.
Getting fed up of having to scroll through the same posts each visit? When you register for an account, you'll always come back to exactly where you were before, and choose to be notified of new replies (either via email, or push notification). You'll also be able to save bookmarks and upvote posts to show your appreciation to other community members.
With your input, this post could be even better 💗
Register Login


Advertisement