Tiger II Tank Interior
-
Alright a small update, I have been out of town for a week, so the project was on hold. However I managed to do some work on the engine the last few evenings.
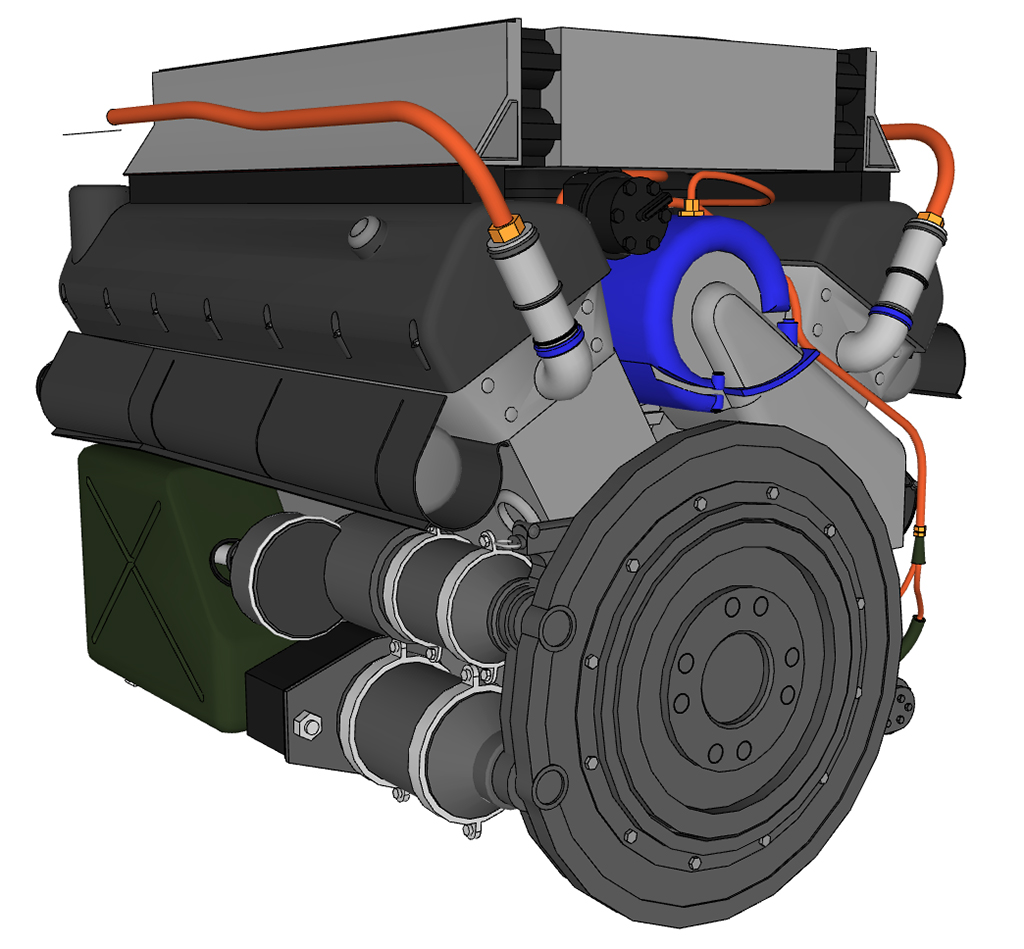
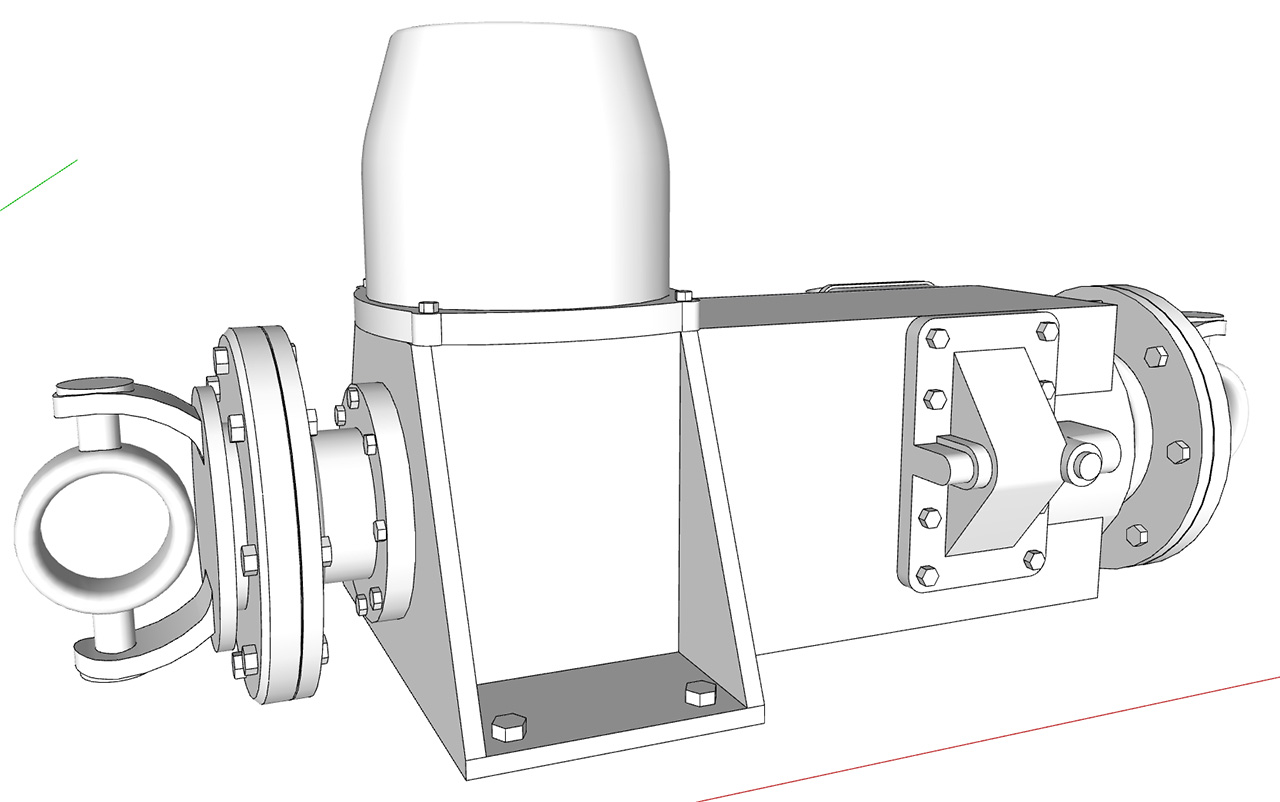
The Tiger II was using the Maybach HL230 engine, a 1200 kg, 690 horsepower beast. The dimensions of the engine are 1000 x 1190 x 1310 mm.
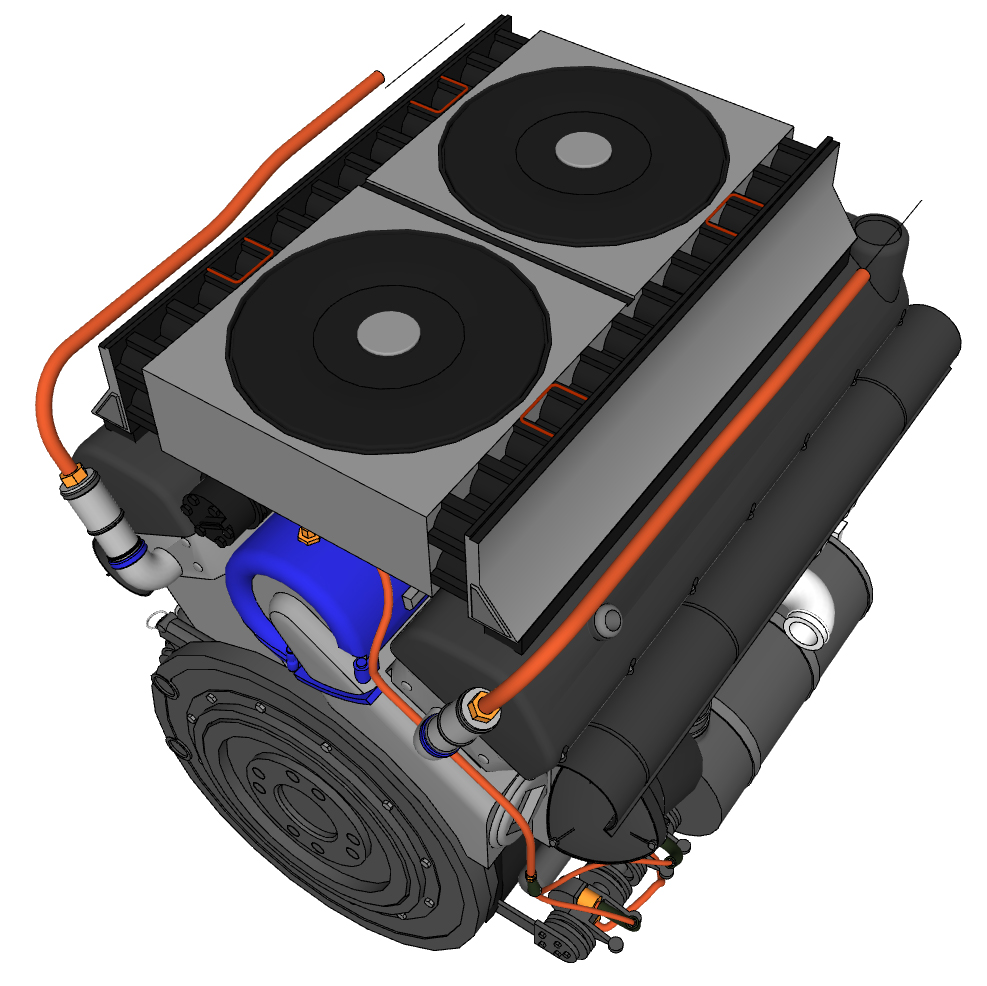
The model aint finished yet, I could spend years on getting all the the details, but as it will be hidden far inside the hull, i need to stop somewhere. Right now it counts well over 70.000 faces.
-
Very nice work on the engine
 Certainly looks detailed enuf to me, especially since it's going to be buried deep within the tank.
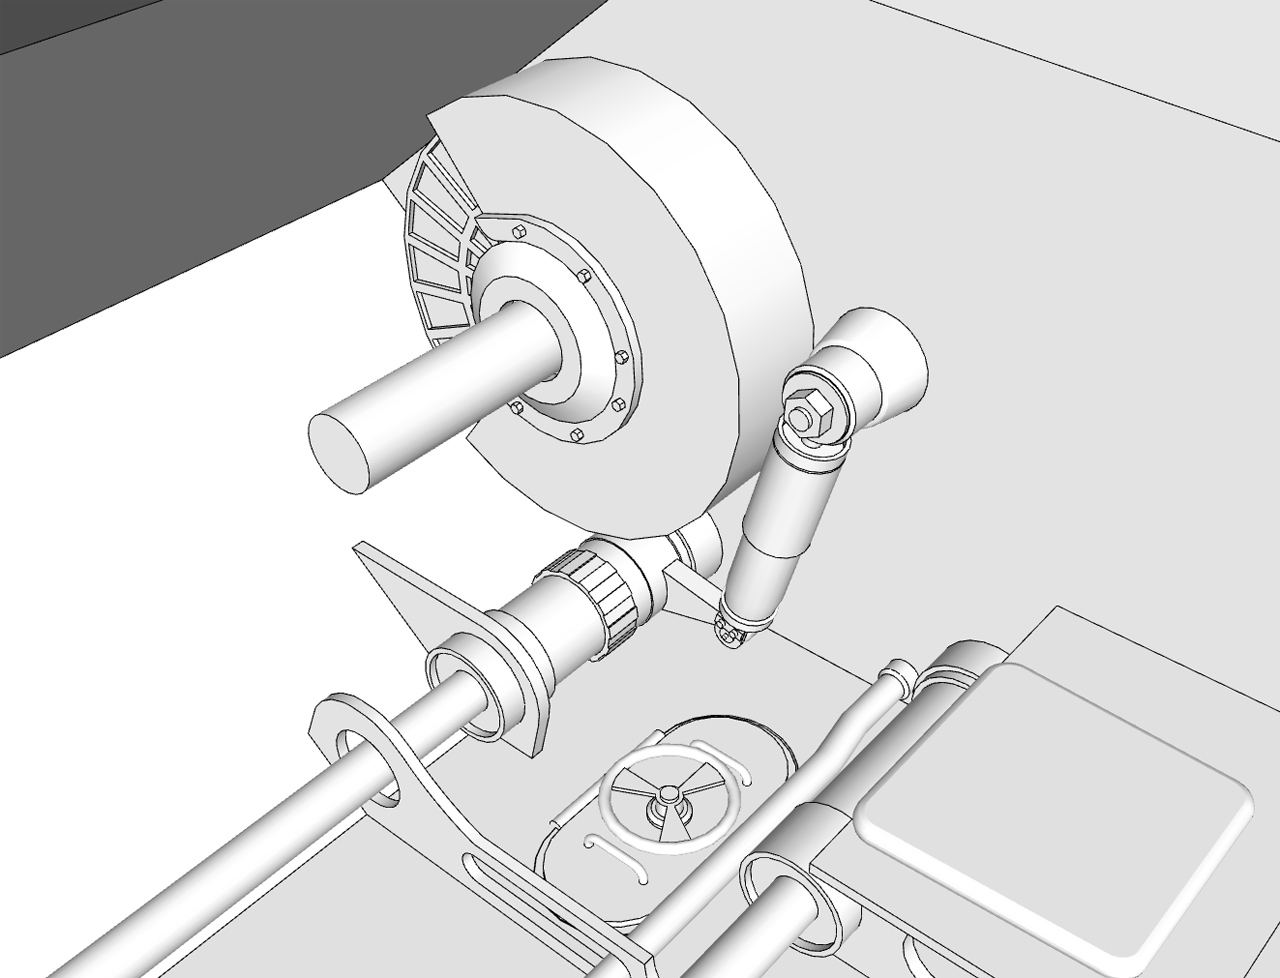
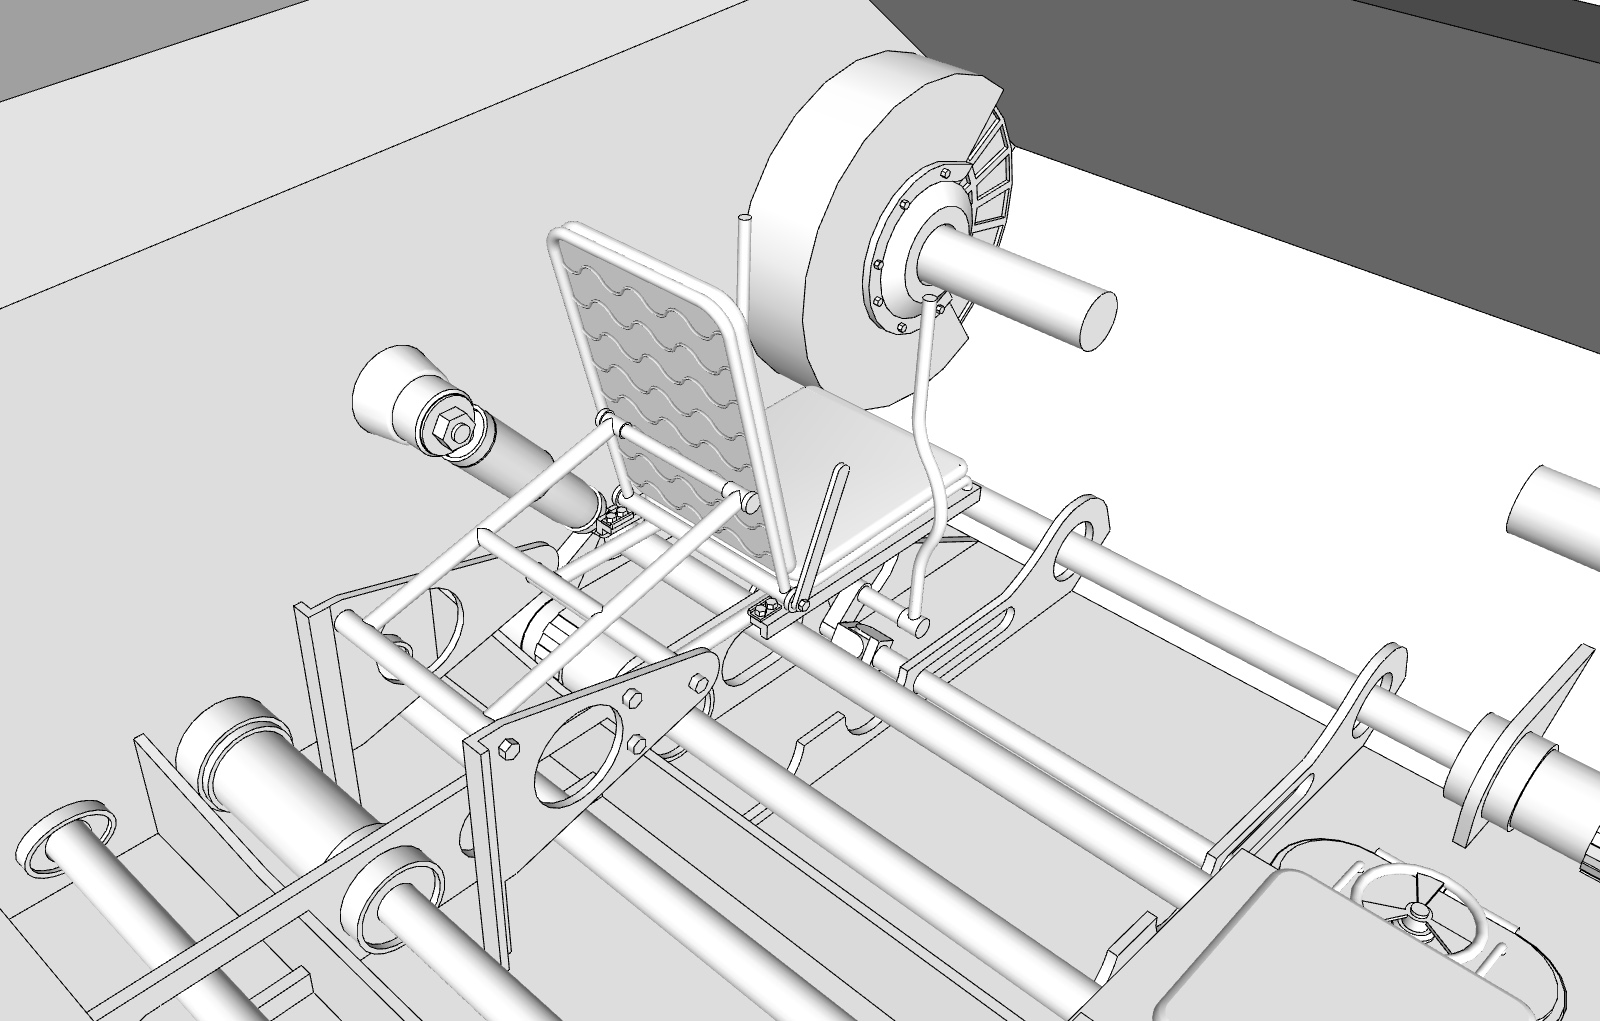
One question - What's with these two areas of the flywheel? I'm assuming those are starter motors, right?

-
Thank you Hellnbak. About those two areas then yes, you are right, those are starter motors as far as I know. The lower one i electric, the upper is handdriven, manufactured bu Bosch

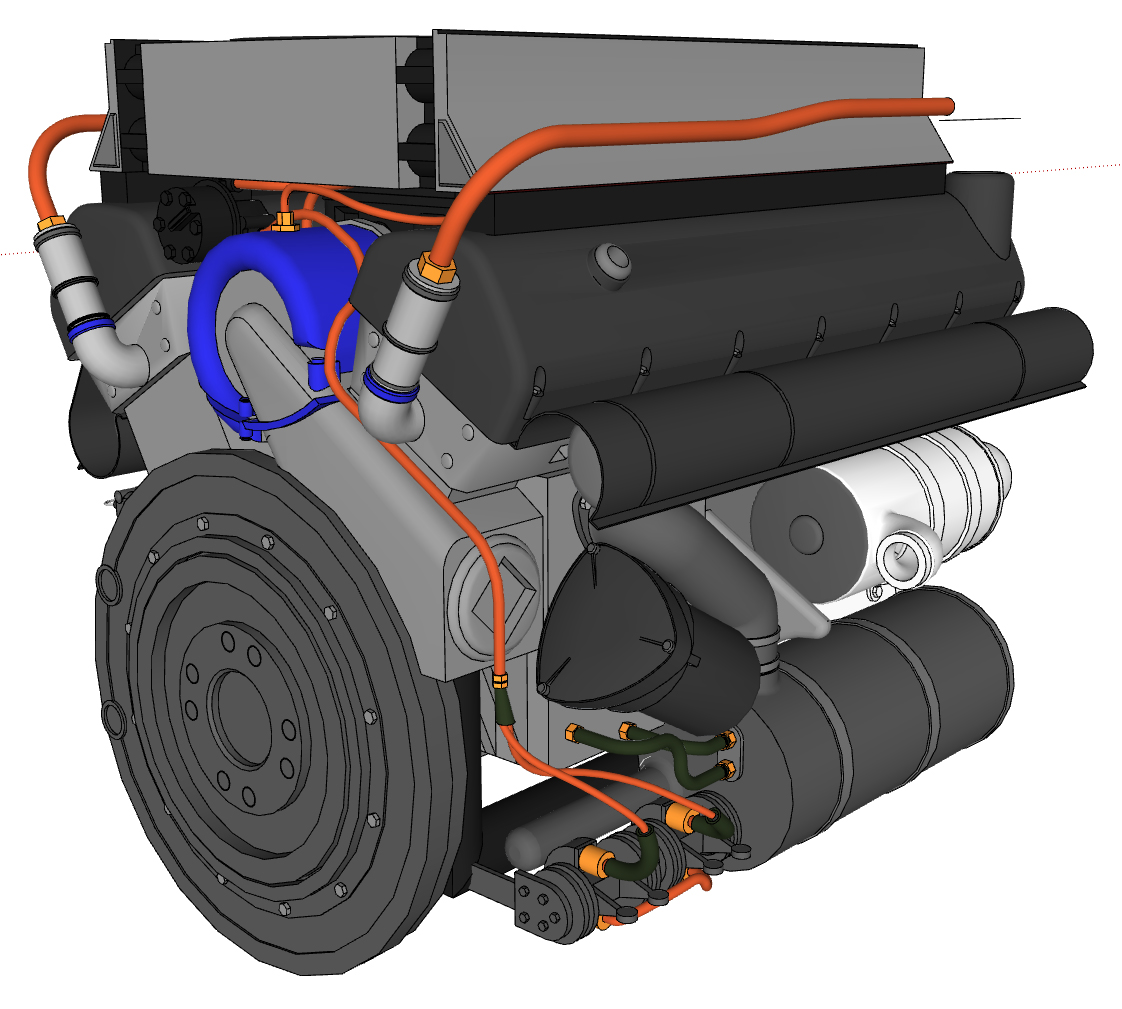
I still need to do some work on the back of the engine, but im afraid I wont get much time for it, for the ret of the week, but we'll see.
-
Thanks, but my question is why are they protruding thru the flywheel? Shouldn't they be on the edge of the flywheel?
-
Well they should be placed correctly, but infact you just pointed out one of the places that isnt entirely done yet,in fact most of what seems to be the flywheel on my pictures, is the frame surroinding it.
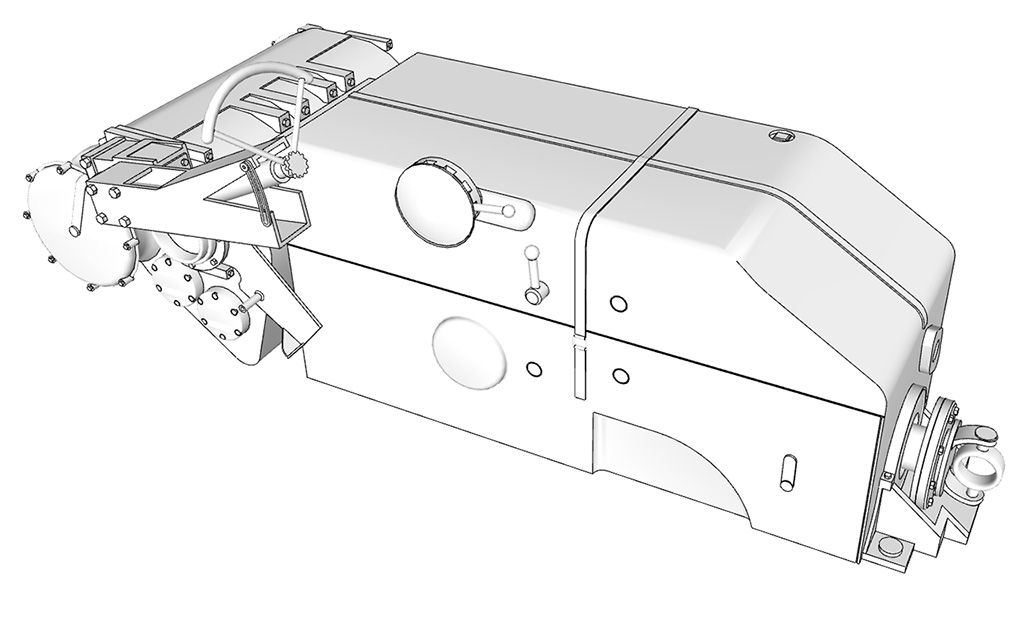
You can see a good picture here, also notice all the details that I still need to have made
Google Images
Google Images. The most comprehensive image search on the web.
(www.google.dk)
-
Ah, I see now. Except for the center portion, it's all a protective shroud covering the flywheel. Wow, I've learned something today (and I'm sure it will come in handy somewhere down the road
 )
)Again, very nice work
-
Yeah, its nice to learn something
 If you feel for it, check out that guys gallery, he got over a 1000 pics of him building a fantastic model King Tiger. I dont think I have ever seen a model kit assembled and finished as nice and beautifully as those he does. Amaizing.
 -
Alright new update, this time its the transmission; Maybach OLVAR EG 40 12 16 B.
The transmission is placed in the front of the tank, right between the driver (left side) and the radio operator (right side).

The drive shaft from the engine will be connected to this universal joint.
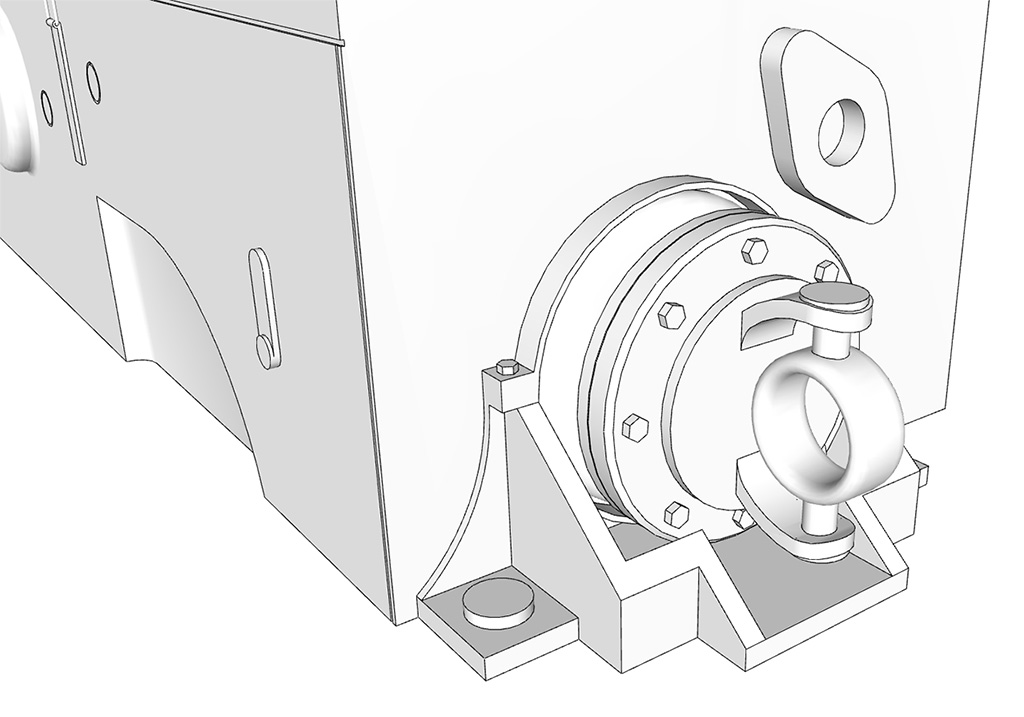
The drivers steering wheel.
Feedback please!
-
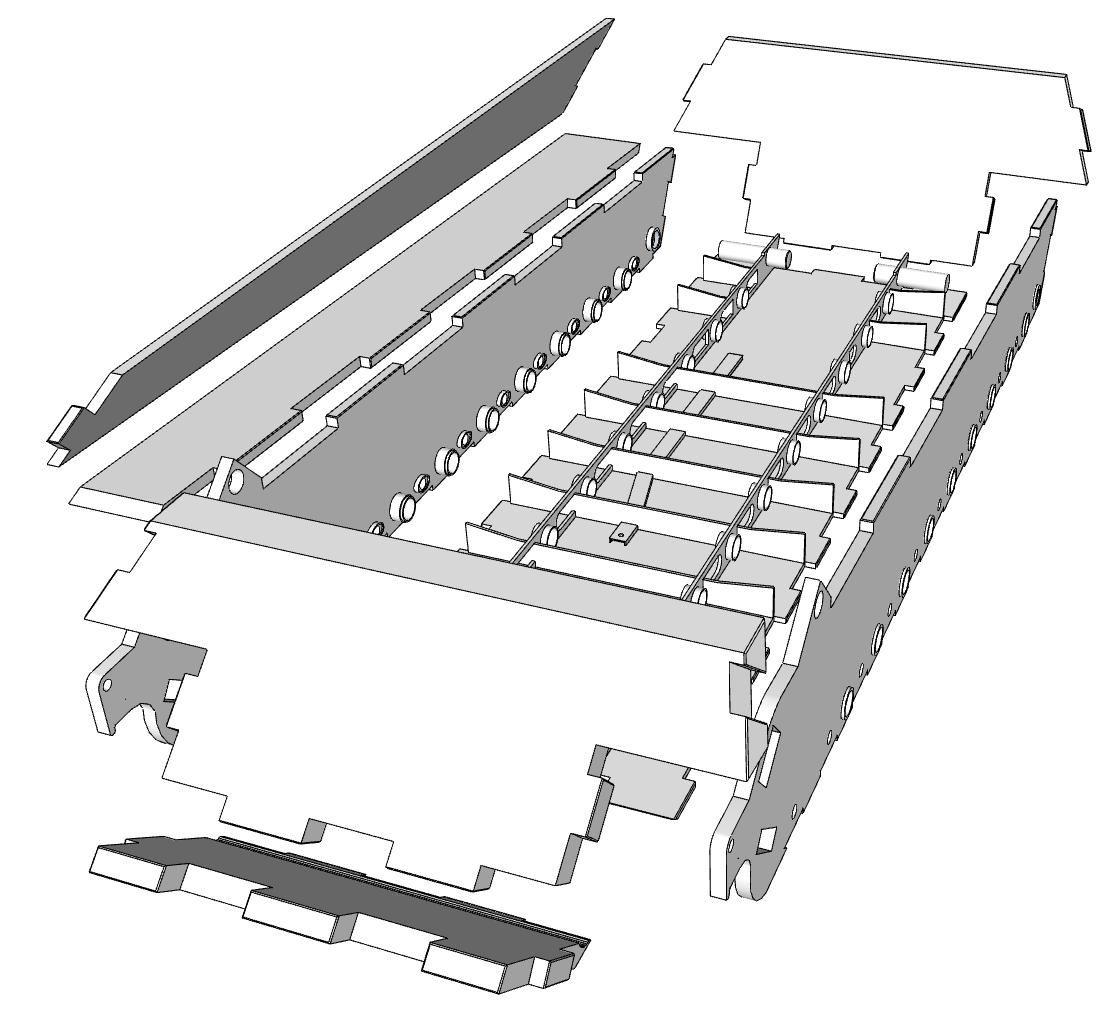
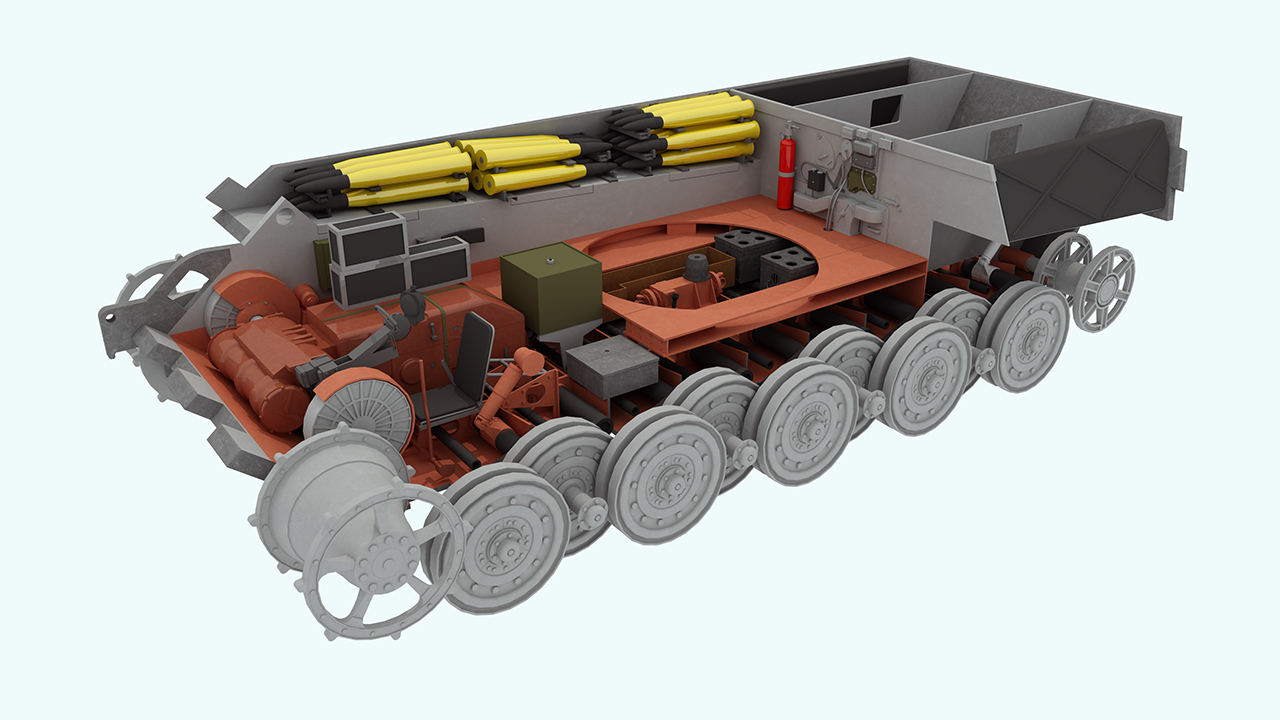
So, this thread has been standing still for quite some time now, however the project itself haven't. This is quite a major update, I have modelled many new things, and startet to fit them into the hull.
First of all, the oil tank. This simple piece is rather large and will be fitted behind the transmission:

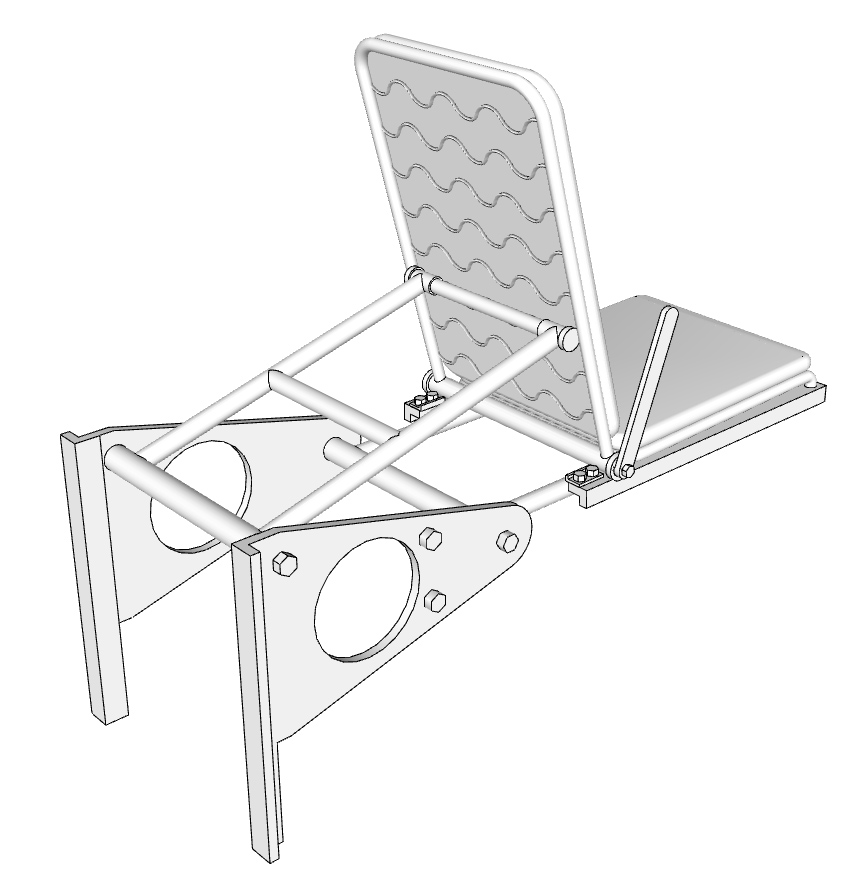
The drivers seat (needs a bit more detailing), I bet this was a mechanical and comfortably wonder back in its time:
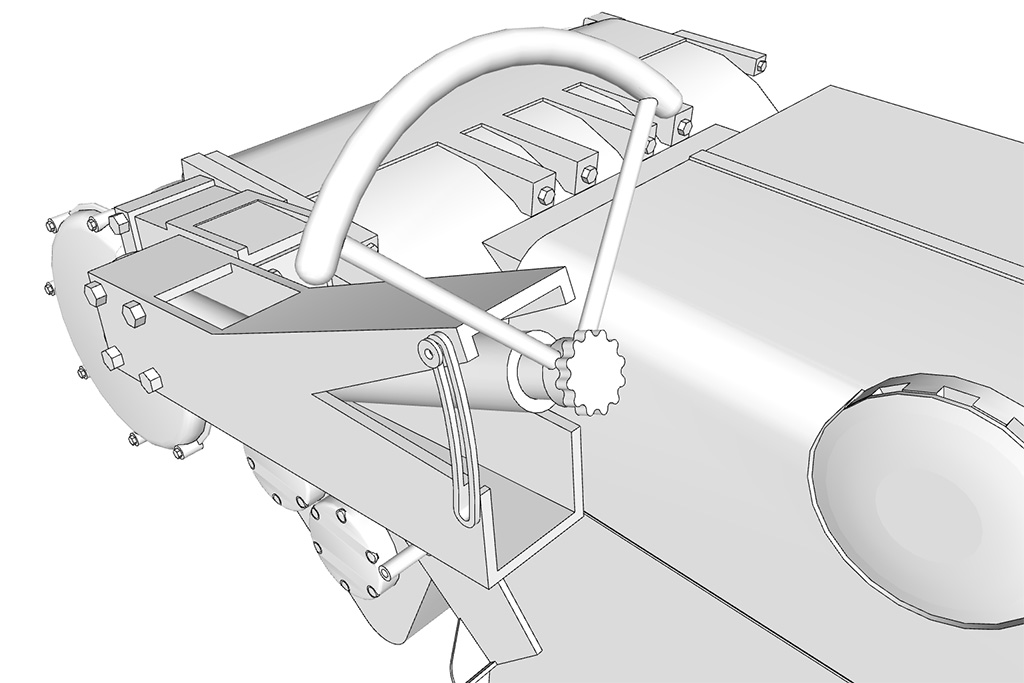
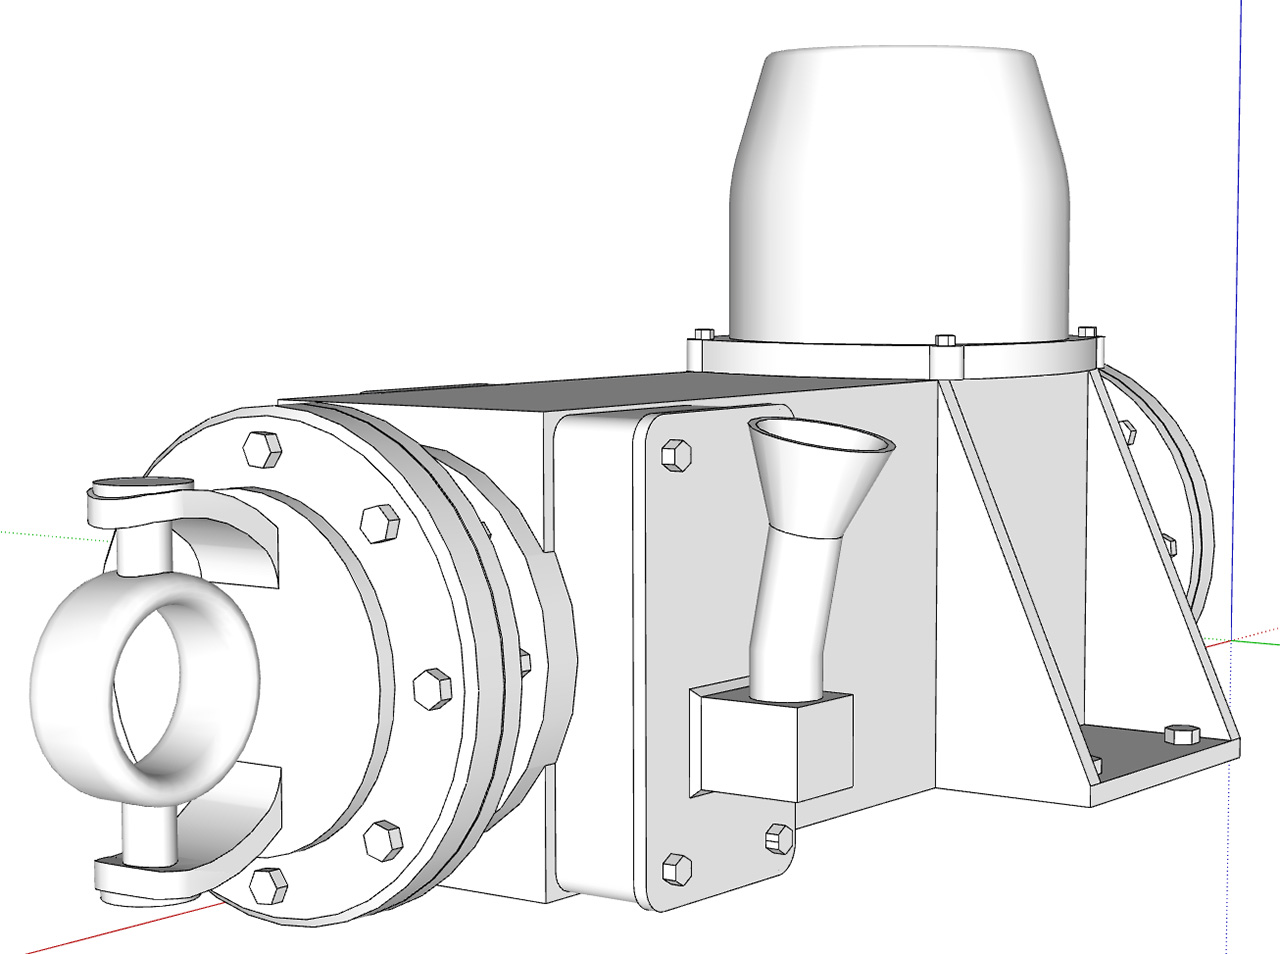
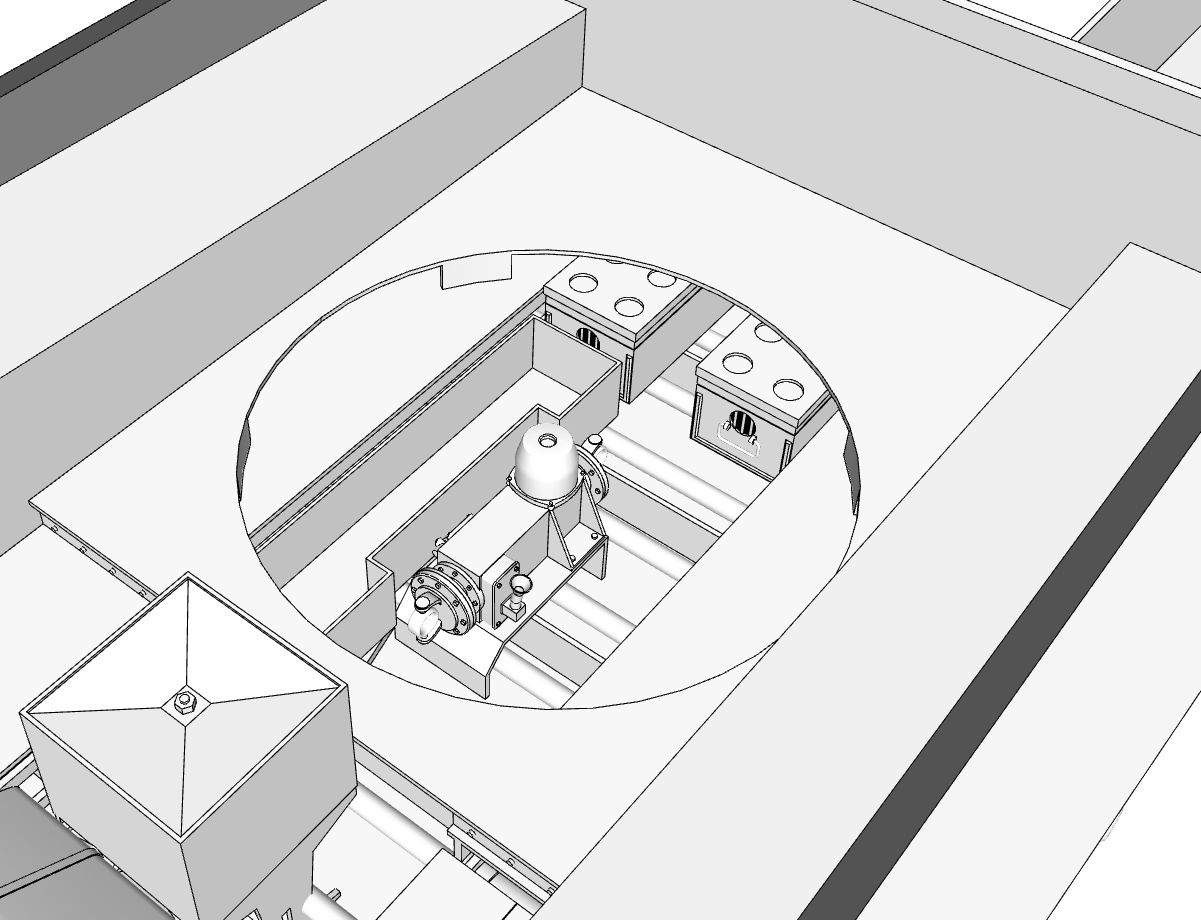
The turret Power Take Off (PTO) This unit is placed directly under the turret, it link the drive shaft from the Engine, with the drive shaft from the transmission:
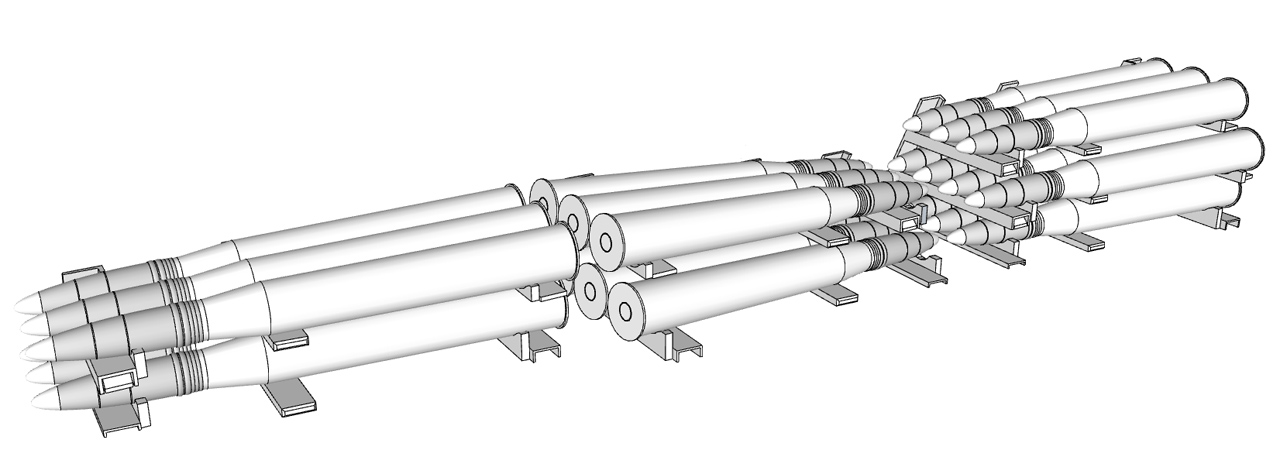
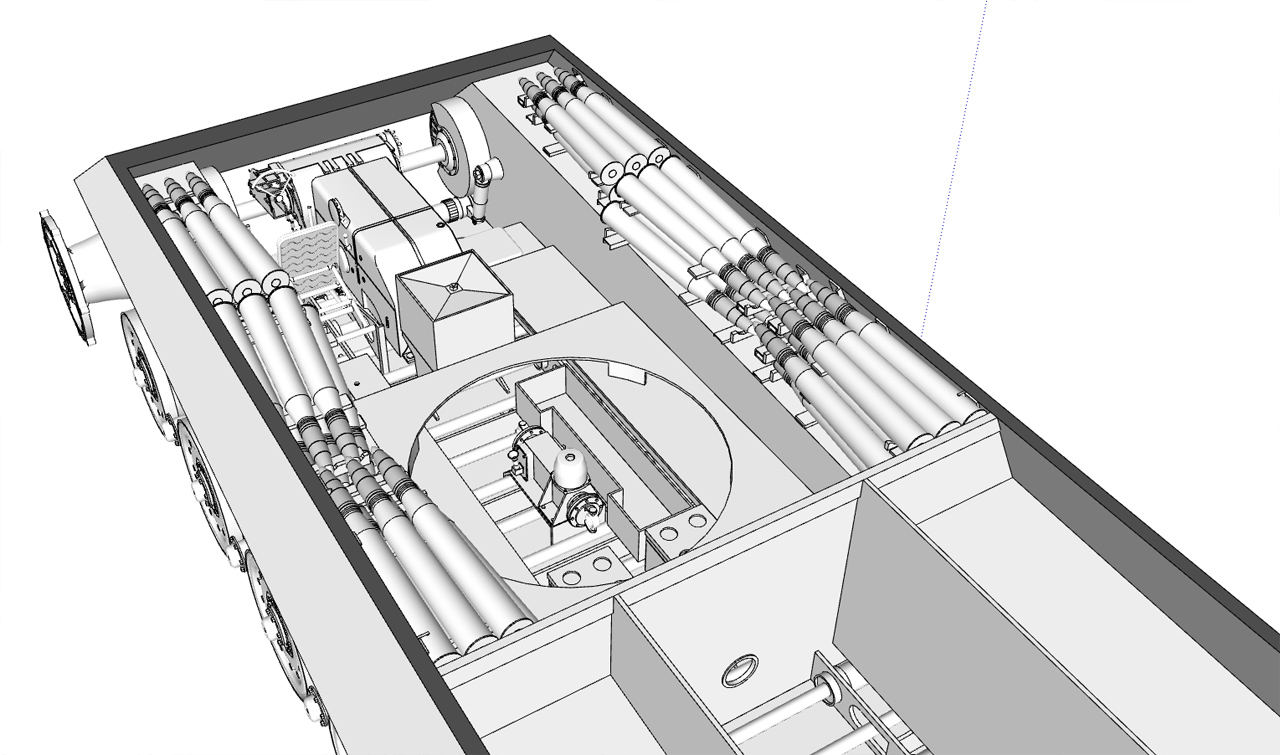
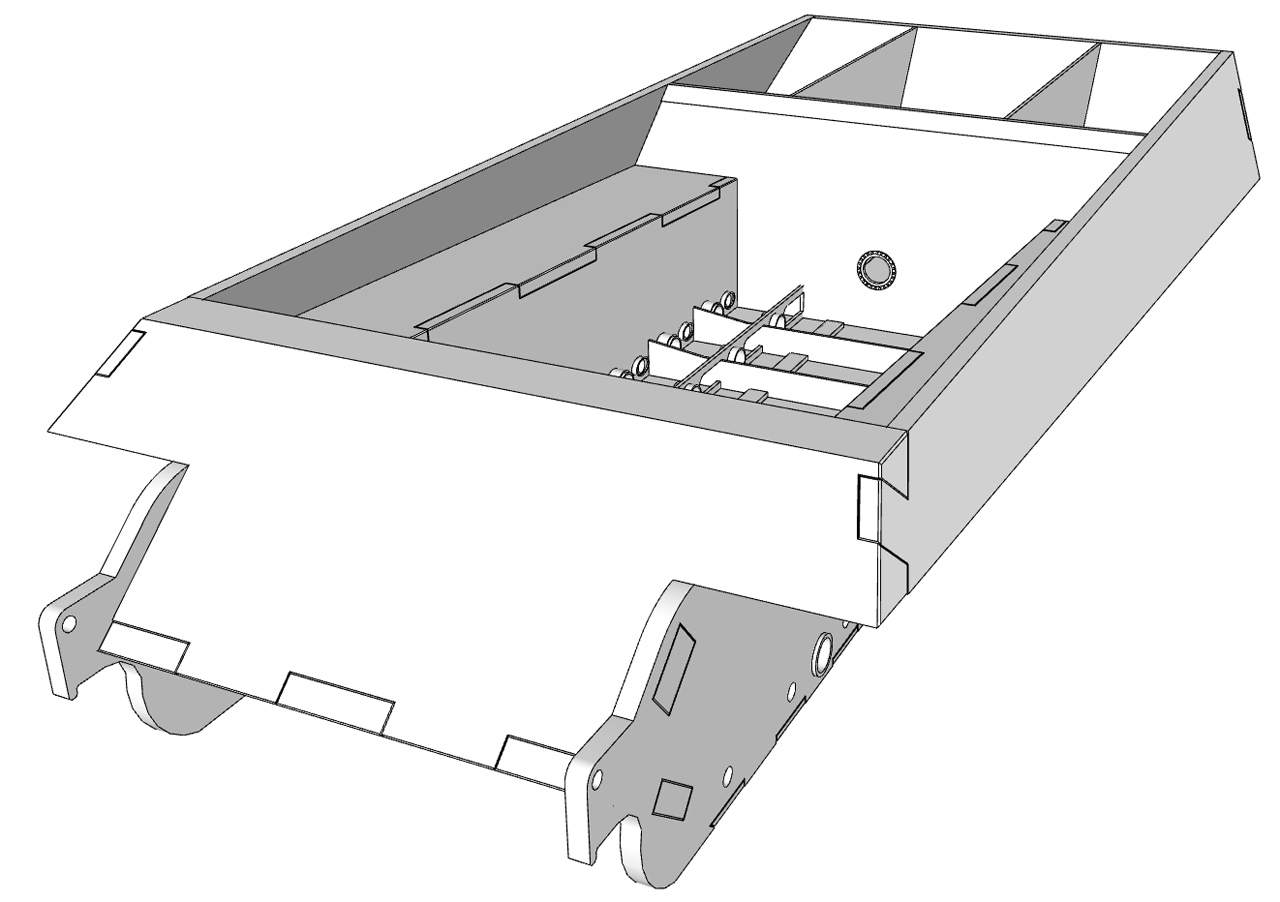
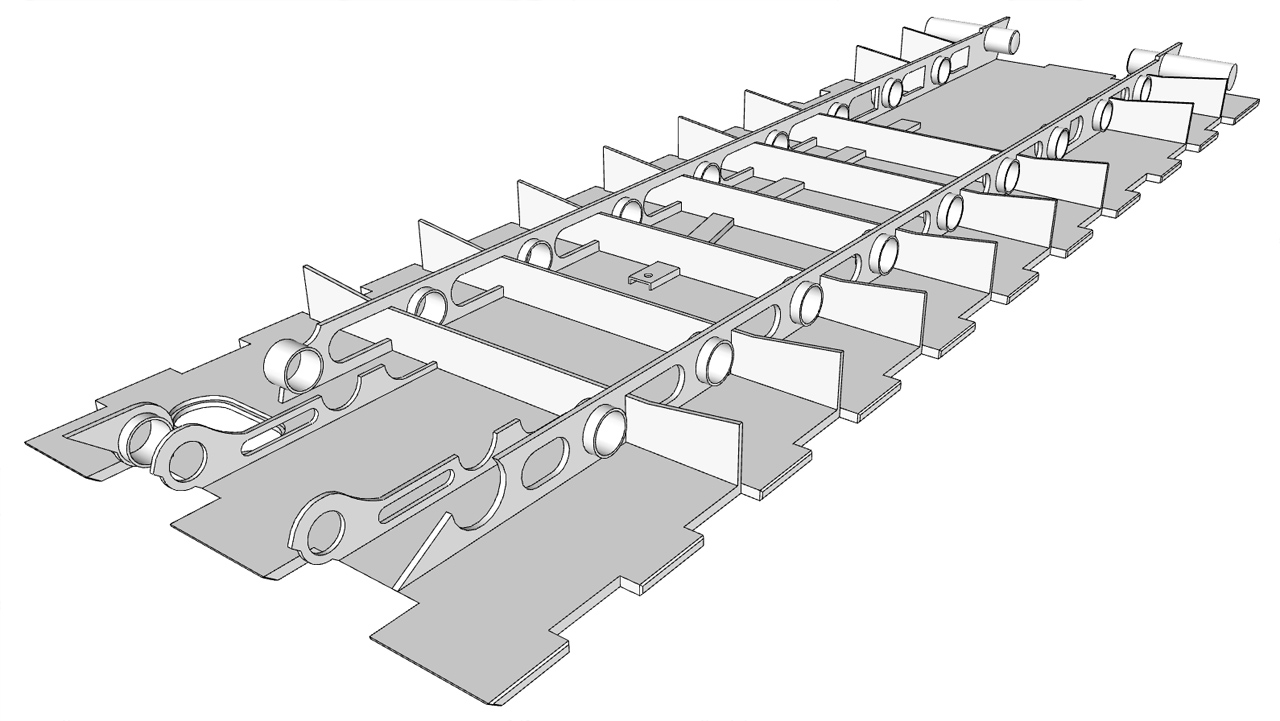
The ammunition racks are placed just above the tracks. Inside the hull obviously. Note that they have been angeled to make room for the turret:
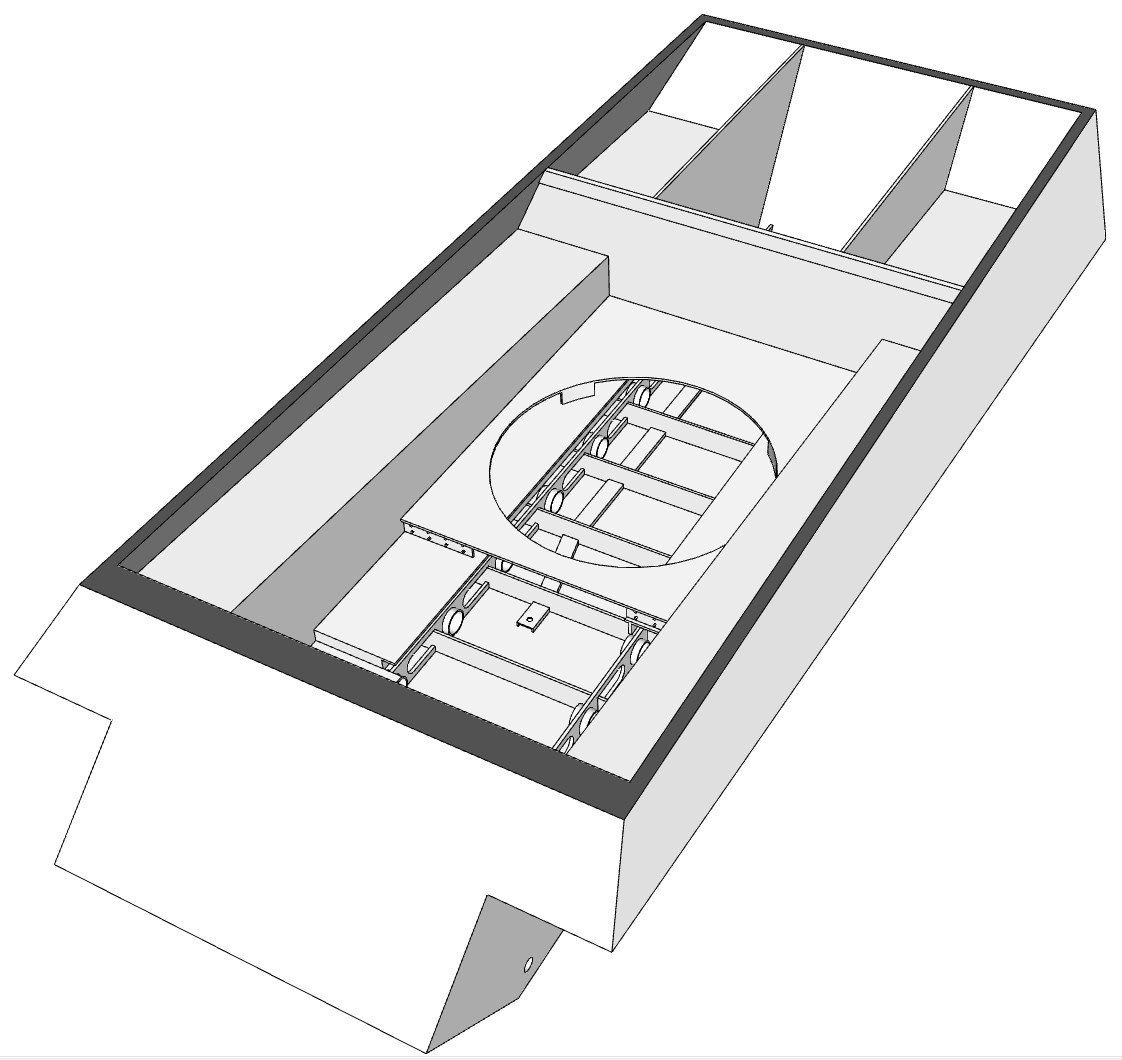
Alright for the hull itself and its assembly:
Hull floors, the upper one marks where the turret will be placed:
Other minor additions are the Radio operators escape hatch, the left right side brakes and the internal spur wheel:
Fitting the drivers seat:
Fitting in the transmission and oil tank:
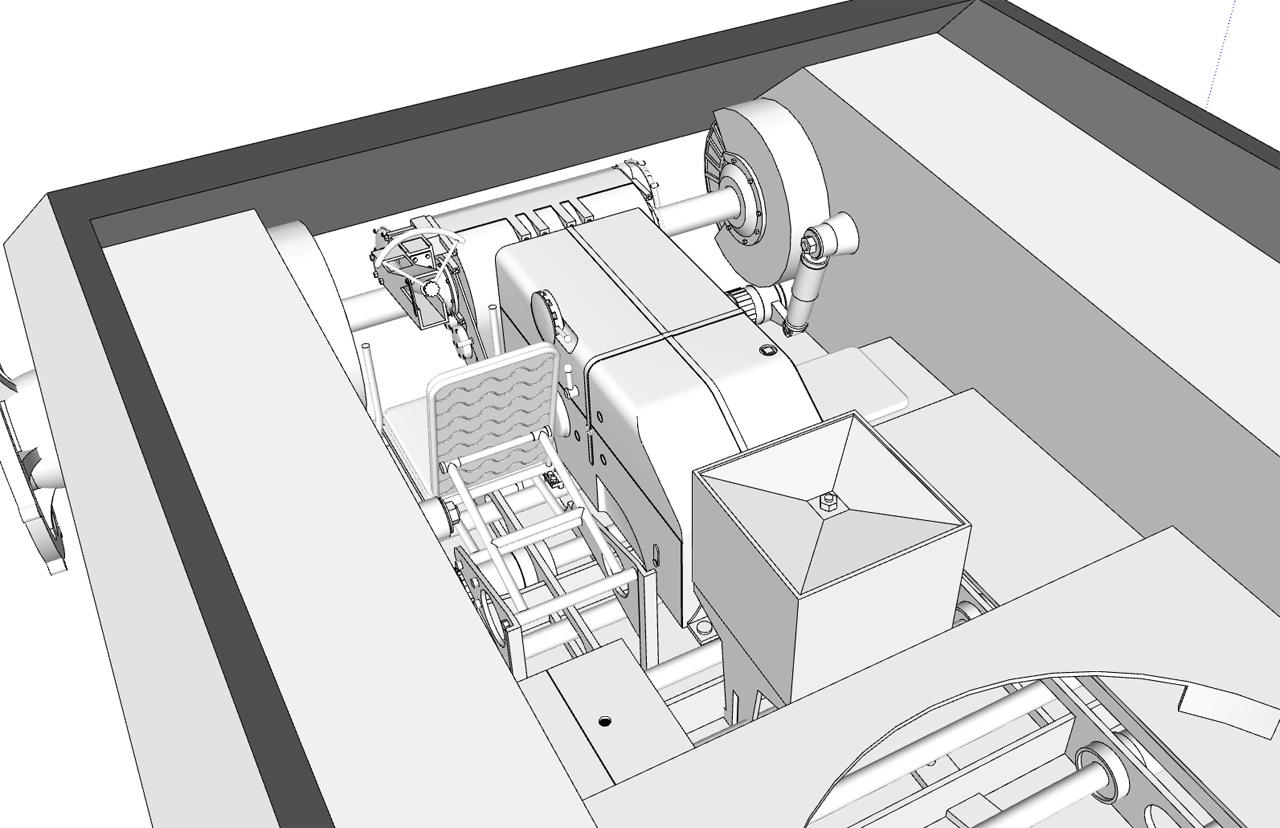
Minor additions; Batteries, open toolbox and fitting the Turret PTO:
Fitting in the ammunition racks:
The engine will be fitted when it is entirely done, including the exhaust pipes.
Untill then, here's a picture of all the things fitted, without the hull itself:

Please, feedback!
-
Awesome work......
-
You must have good blueprints!
-
You are crazy, this is the best i have seen!
-
patience+talent= reaaaalllyyy good work !!
-
Looks ace!
-
Marvelous and I do marvel at the detail and patience.
-
Alright another update. Something about the model has been bothering me alot. I modelled the hull in one single piece, meaning that it couldn't be disassemblied, and thus didn't represent the real deal. So today I decided to redo it, I knew it would be a rather difficult decision, but that it would take me 10 hours to correct, was a surprise. It propably has something to do with the fact that I had to remodel most of it, add new details and reassemble, while still keeping the mm perfect precision and compatibility with the other components that I had before. Anyways, I got it done and now im more than satisfied with the new result.
One of the main reasons for redoing the hull was to show the great interleaved welds. This is one of the examples of germans over-engineering their weapons, but it proved to be very effective.
As said the new hull allows me to disassembly the plates, this will make it easier for me to showcase the enterior in my renderings, once the model is finished.
This is one of my favorite parts of the entire tank, those engineers really nailed it.

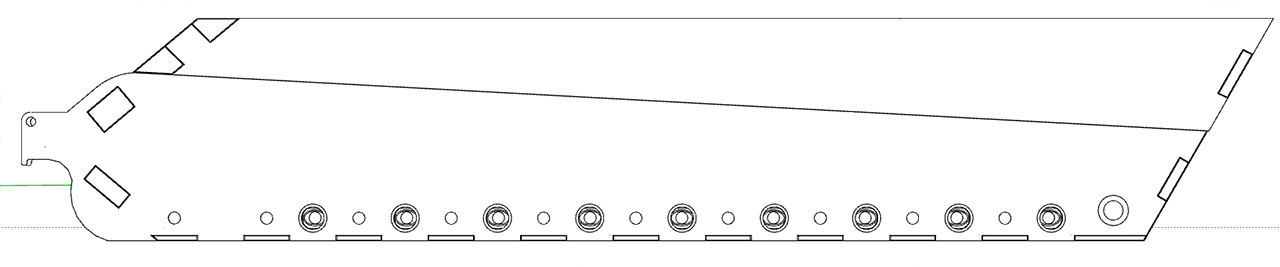
Here is the bottom hull plate. You see the supports for the hull, and torsion suspension. Alright, I admit that the interleaved welds on this plate aint accurate (there was only used normal welds) but I quite like this, see it as my personal mark on this model.
A side view of the tank and welds. Ofcourse the floor plate welds are made so that they make sense compared to the rest of the tank.
The upper front plate, notice the sheer volume of the thing, where other natoins made square amour plates, the germans made overly complicated ones.
The tank with the front plate removed, revealing much of the interior.

And thank you for the nice comments everyone, they are really motivating me to keep going, even when things dont play out as expected.
-
You are a crazy man!
Incredible work. Just incredible.
-
Another update.
I'm starting to get a bit bored of just modelling pure geometri, so I've started to texturize and render the model. First of all, I've tweaked Podium into giving me some decent results, actually this render engine is more powerfull than I first thought, as long as you want to edit the preset files in a text editor.
I modelled the firewall which separates the fighting compartment from the engine compartment.
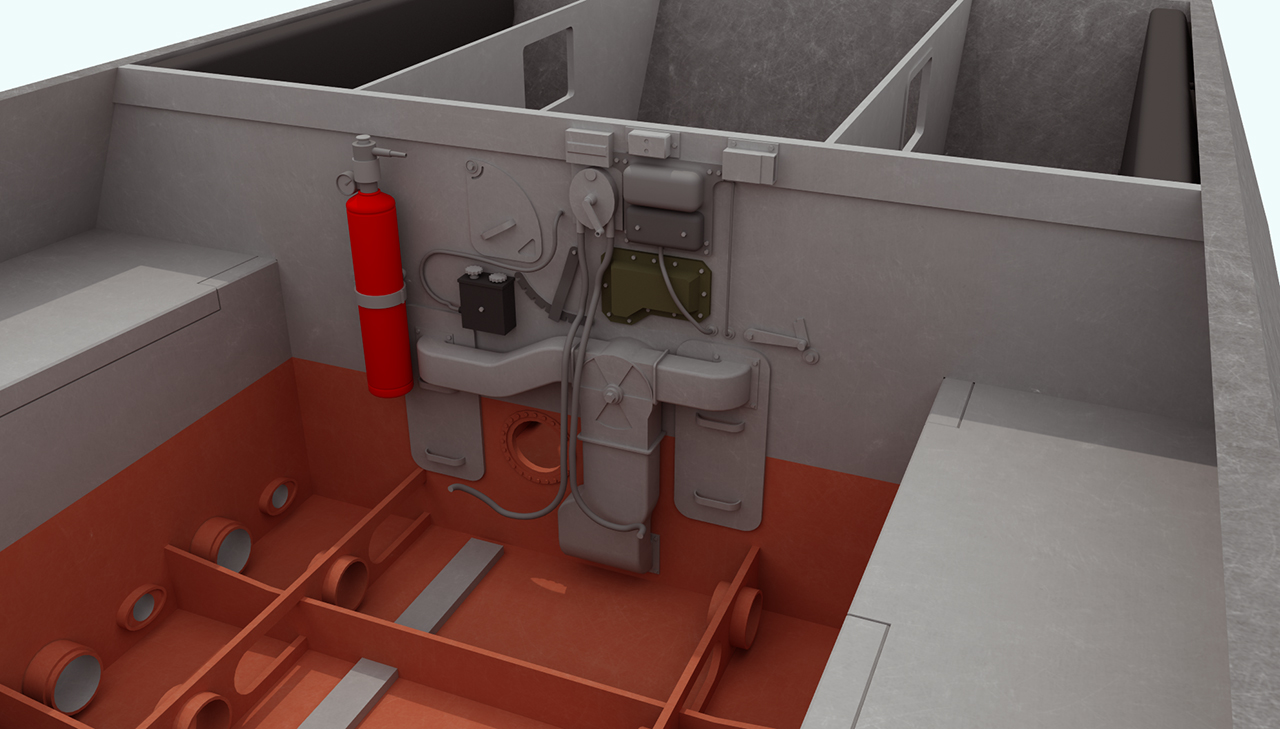
Also I've done a few renders of the fighting compartment, which is probably around 80% finished by now, in terms of pure geometri. The texture work still needs ALOT of attention tho.
From above:
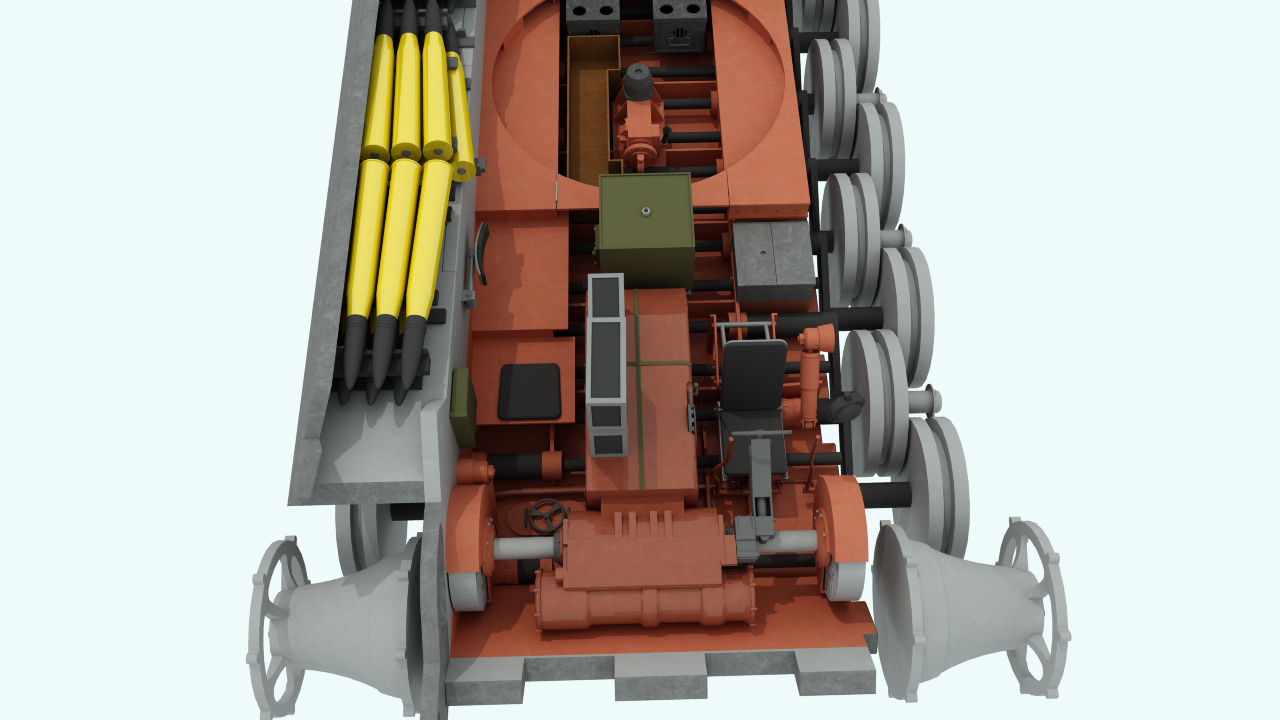
From the side:
Very large (3840 x 2160) version here:
http://i118.photobucket.com/albums/o88/stoferr/TigerIIHull.jpgI have a question regarding textures that I hope someone can answer. Is there a way to place something like sprites on an already textured surface? My images seem a little too clean, so I would like to add some textures on those already placed there. Can this be done in Sketchup?
-
In SketchUp, you can try this: http://www.sketchupartists.org/tutorials/sketchup-and-photoshop/use-image-editing-software-inside-sketchup/
-
Looks great, have been watching this since you started and cant wait to see it done!
I am going to try and take a similar approach with my avatar model http://media.cmcdn.net/12429650/940x515.jpeg one day!Is this just a personal project or are you selling the model, if you sold it you could probably get a tidy sum for your work although the market for this is limited I guess!
Hello! It looks like you're interested in this conversation, but you don't have an account yet.
Getting fed up of having to scroll through the same posts each visit? When you register for an account, you'll always come back to exactly where you were before, and choose to be notified of new replies (either via email, or push notification). You'll also be able to save bookmarks and upvote posts to show your appreciation to other community members.
With your input, this post could be even better 💗
Register Login


Advertisement