Tiger II Tank Interior
-
You must have good blueprints!
-
You are crazy, this is the best i have seen!
-
patience+talent= reaaaalllyyy good work !!

-
Looks ace!
-
Marvelous and I do marvel at the detail and patience.
-
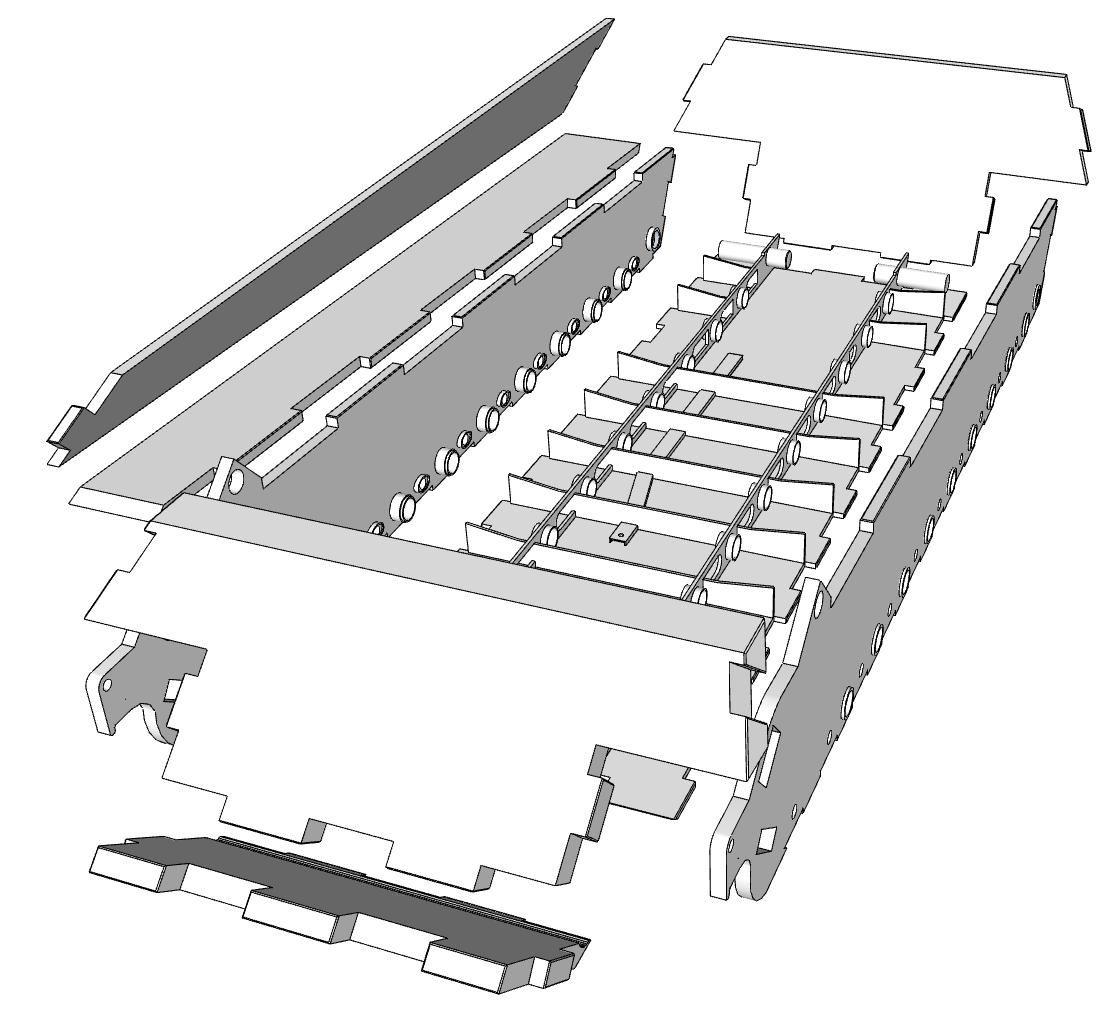
Alright another update. Something about the model has been bothering me alot. I modelled the hull in one single piece, meaning that it couldn't be disassemblied, and thus didn't represent the real deal. So today I decided to redo it, I knew it would be a rather difficult decision, but that it would take me 10 hours to correct, was a surprise. It propably has something to do with the fact that I had to remodel most of it, add new details and reassemble, while still keeping the mm perfect precision and compatibility with the other components that I had before. Anyways, I got it done and now im more than satisfied with the new result.
One of the main reasons for redoing the hull was to show the great interleaved welds. This is one of the examples of germans over-engineering their weapons, but it proved to be very effective.
As said the new hull allows me to disassembly the plates, this will make it easier for me to showcase the enterior in my renderings, once the model is finished.
This is one of my favorite parts of the entire tank, those engineers really nailed it.

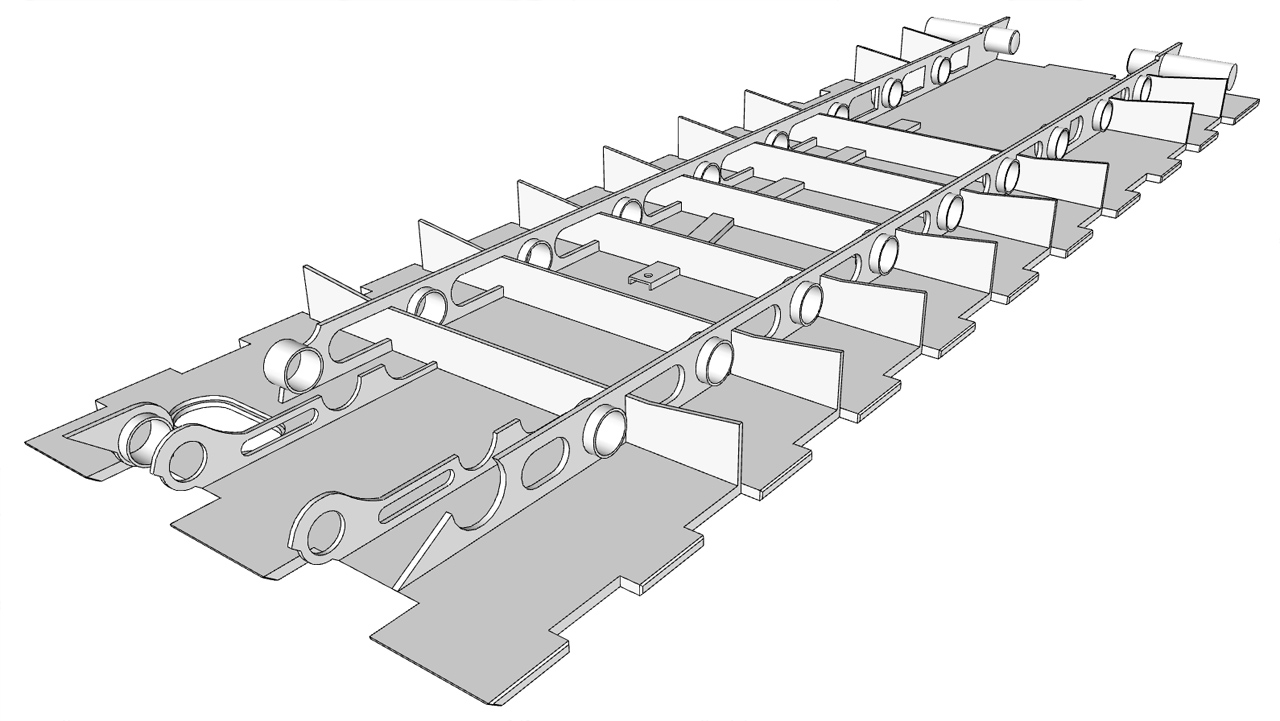
Here is the bottom hull plate. You see the supports for the hull, and torsion suspension. Alright, I admit that the interleaved welds on this plate aint accurate (there was only used normal welds) but I quite like this, see it as my personal mark on this model.
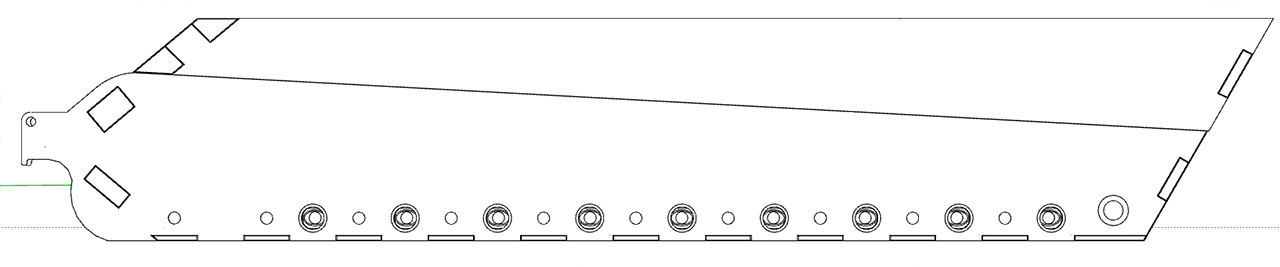
A side view of the tank and welds. Ofcourse the floor plate welds are made so that they make sense compared to the rest of the tank.
The upper front plate, notice the sheer volume of the thing, where other natoins made square amour plates, the germans made overly complicated ones.
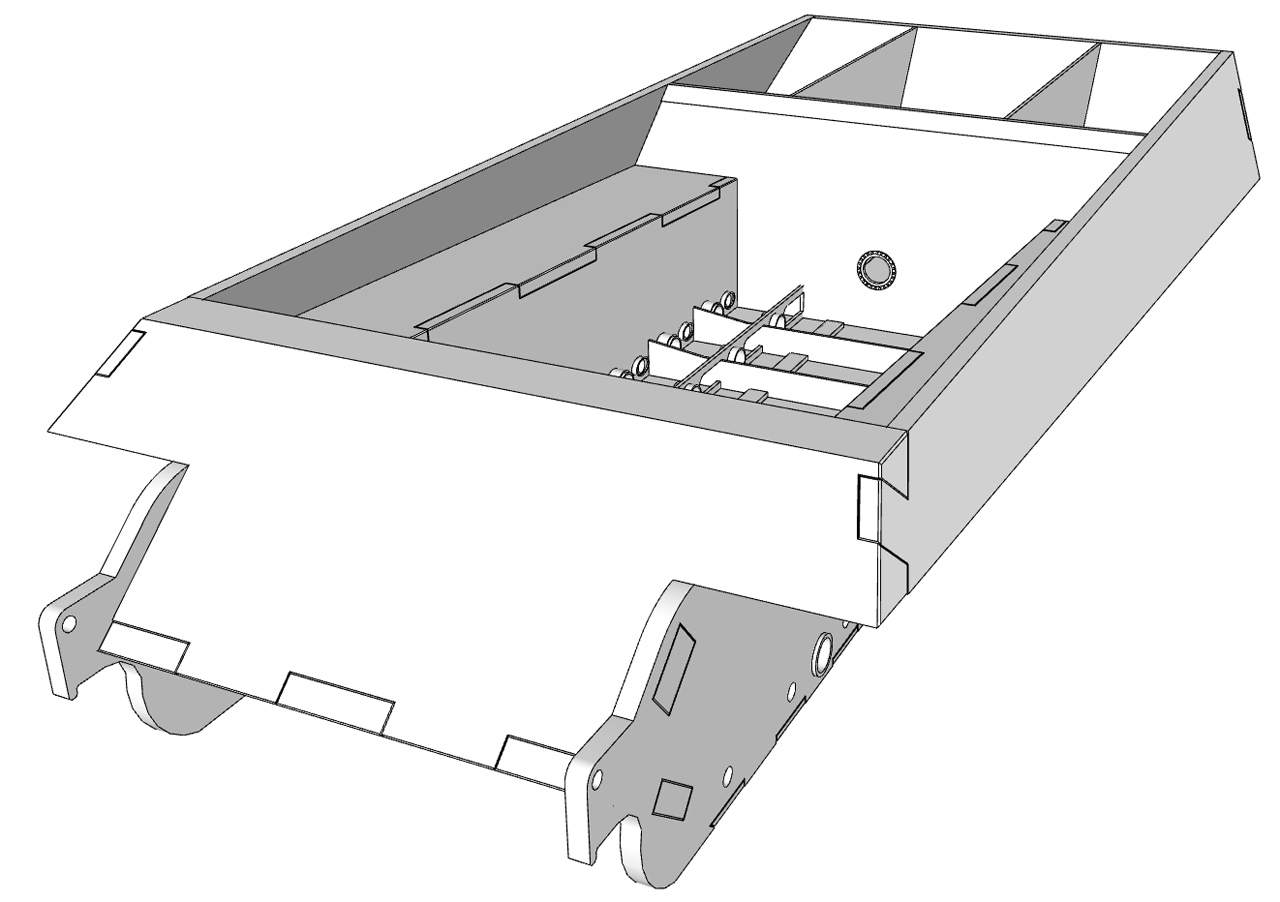
The tank with the front plate removed, revealing much of the interior.

And thank you for the nice comments everyone, they are really motivating me to keep going, even when things dont play out as expected.
-
You are a crazy man!

Incredible work. Just incredible.
-
Another update.
I'm starting to get a bit bored of just modelling pure geometri, so I've started to texturize and render the model. First of all, I've tweaked Podium into giving me some decent results, actually this render engine is more powerfull than I first thought, as long as you want to edit the preset files in a text editor.
I modelled the firewall which separates the fighting compartment from the engine compartment.
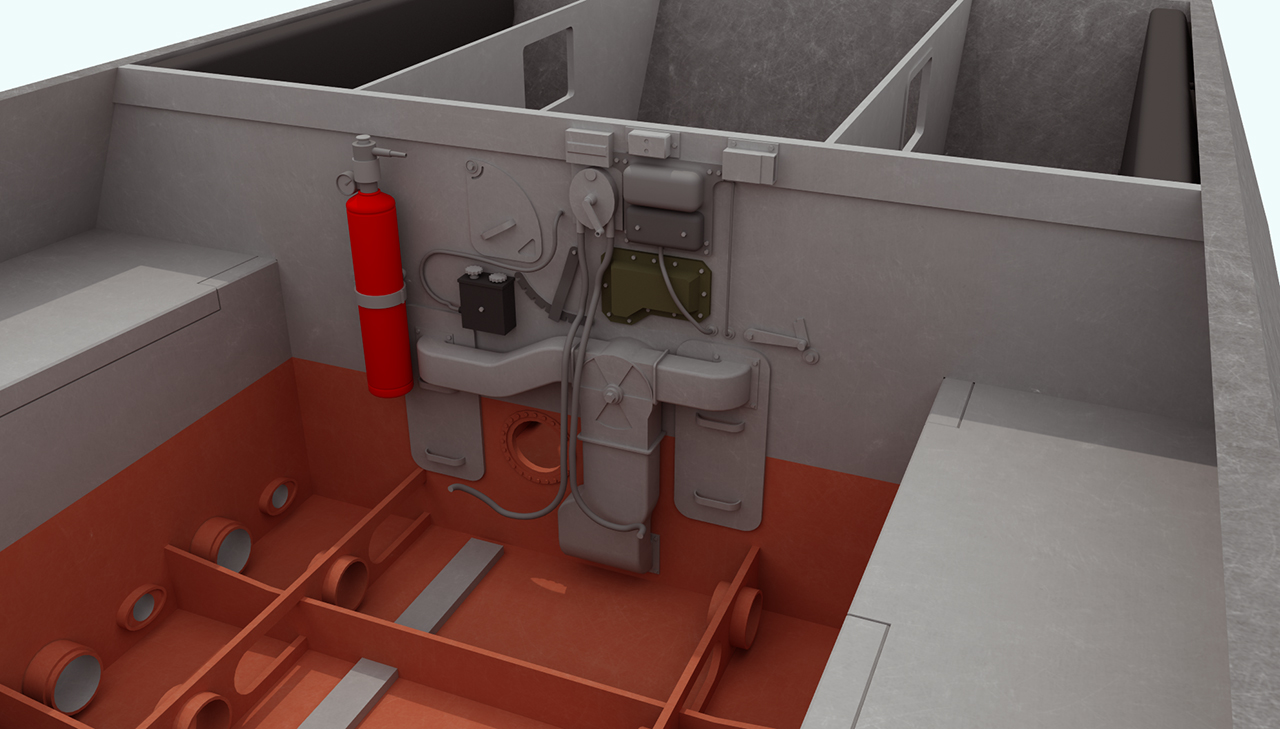
Also I've done a few renders of the fighting compartment, which is probably around 80% finished by now, in terms of pure geometri. The texture work still needs ALOT of attention tho.
From above:
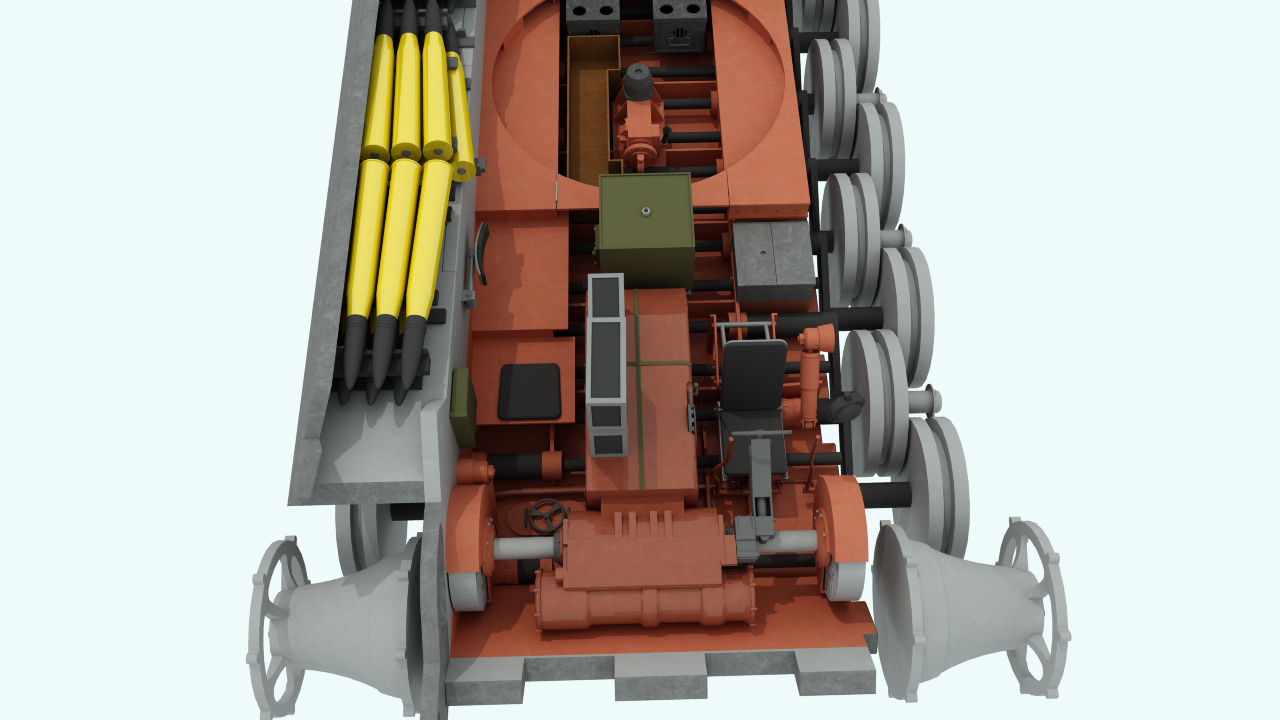
From the side:
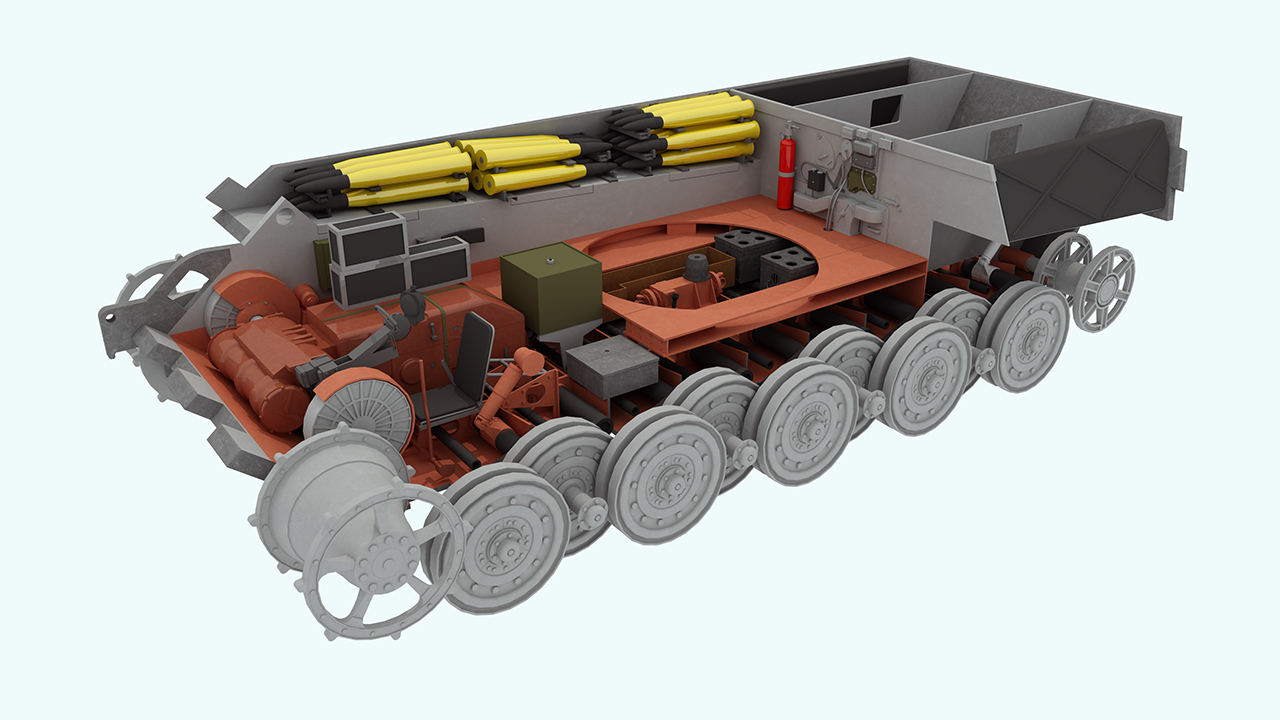
Very large (3840 x 2160) version here:
http://i118.photobucket.com/albums/o88/stoferr/TigerIIHull.jpgI have a question regarding textures that I hope someone can answer. Is there a way to place something like sprites on an already textured surface? My images seem a little too clean, so I would like to add some textures on those already placed there. Can this be done in Sketchup?
-
In SketchUp, you can try this: http://www.sketchupartists.org/tutorials/sketchup-and-photoshop/use-image-editing-software-inside-sketchup/
-
Looks great, have been watching this since you started and cant wait to see it done!
I am going to try and take a similar approach with my avatar model http://media.cmcdn.net/12429650/940x515.jpeg one day!Is this just a personal project or are you selling the model, if you sold it you could probably get a tidy sum for your work although the market for this is limited I guess!
-
Wow very nice job
Your work has inspired me to continue work on my King Tiger model. Exterior is almost finished(615 704 faces, 1 606 489 edges, 32mb)
Also I noticed your work on World of Tanks forum. So I thought you must have a topic in here so I came to check.
-
Well, well, look who´s back
You´re not intending to show your progress here? -
Yeah
I'm too busy with school and stuff so I havent had time to work with my hobbies.- I havent done much. Remodeled and fixed King Tiger tracks about 3 times. Thats all.
Dunno how long I manage to stay. Final exams coming.
- I havent done much. Remodeled and fixed King Tiger tracks about 3 times. Thats all.
-
Aaah, remodeling and fixing things up? Been there

Anyway, what was wrong with the tracks? In case you need it, some guy posted these blueprints here: http://forums.sketchucation.com/viewtopic.php?f=81&t=43428 -
Just wanted to make them more detailed and accurate. Also those blueprints make me want to remake tracks 4th time.

-
Great modeling skills and attention to detail.
Can't wait to see the finish product
cheers -
Hi Coremster, just checked out your pics on the WoT forum, it looks very very good! With that amount of faces, your circle, round shapes etc, must really be smooth! Unfortunately, I'm very busy in school for the time being, any architecht will probably know what I speak of. So I'm not going to post anything for the next month or so.
-
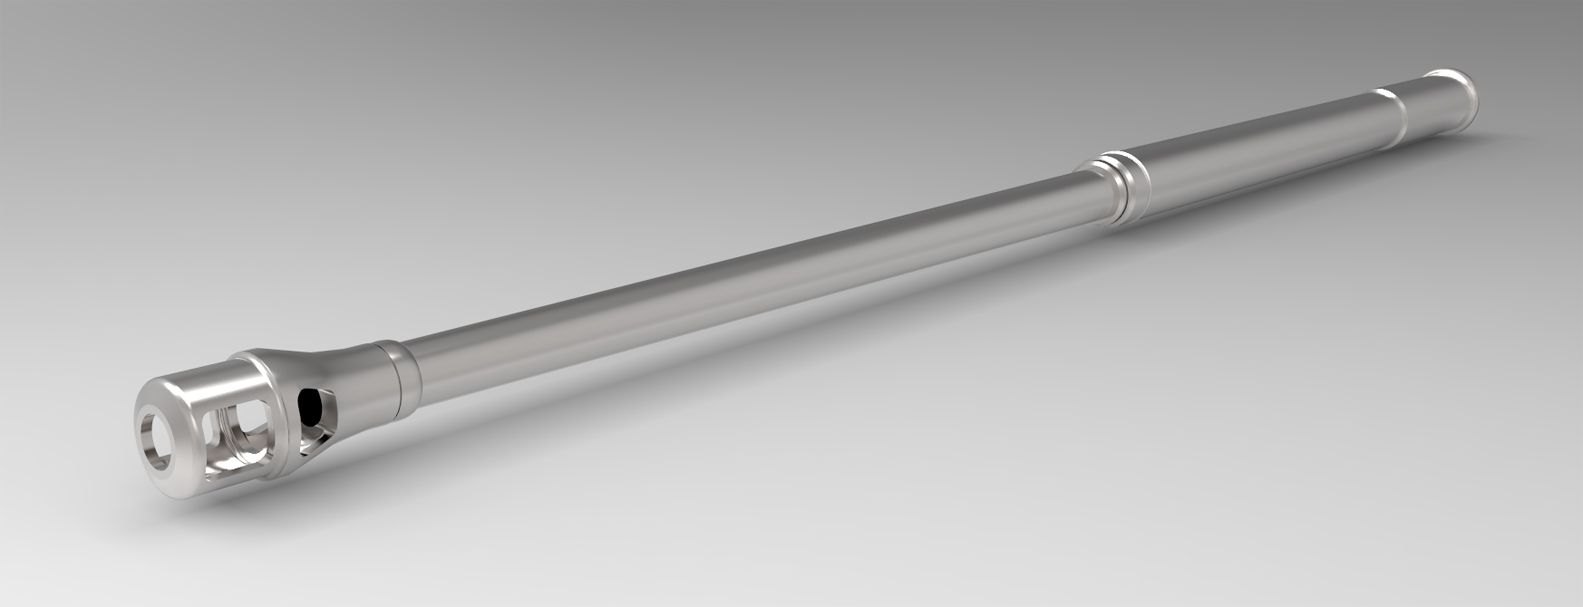
So after a very long time of inactivity im finally back to work, so heres a very small update.
The gun barrel:
A closer look:
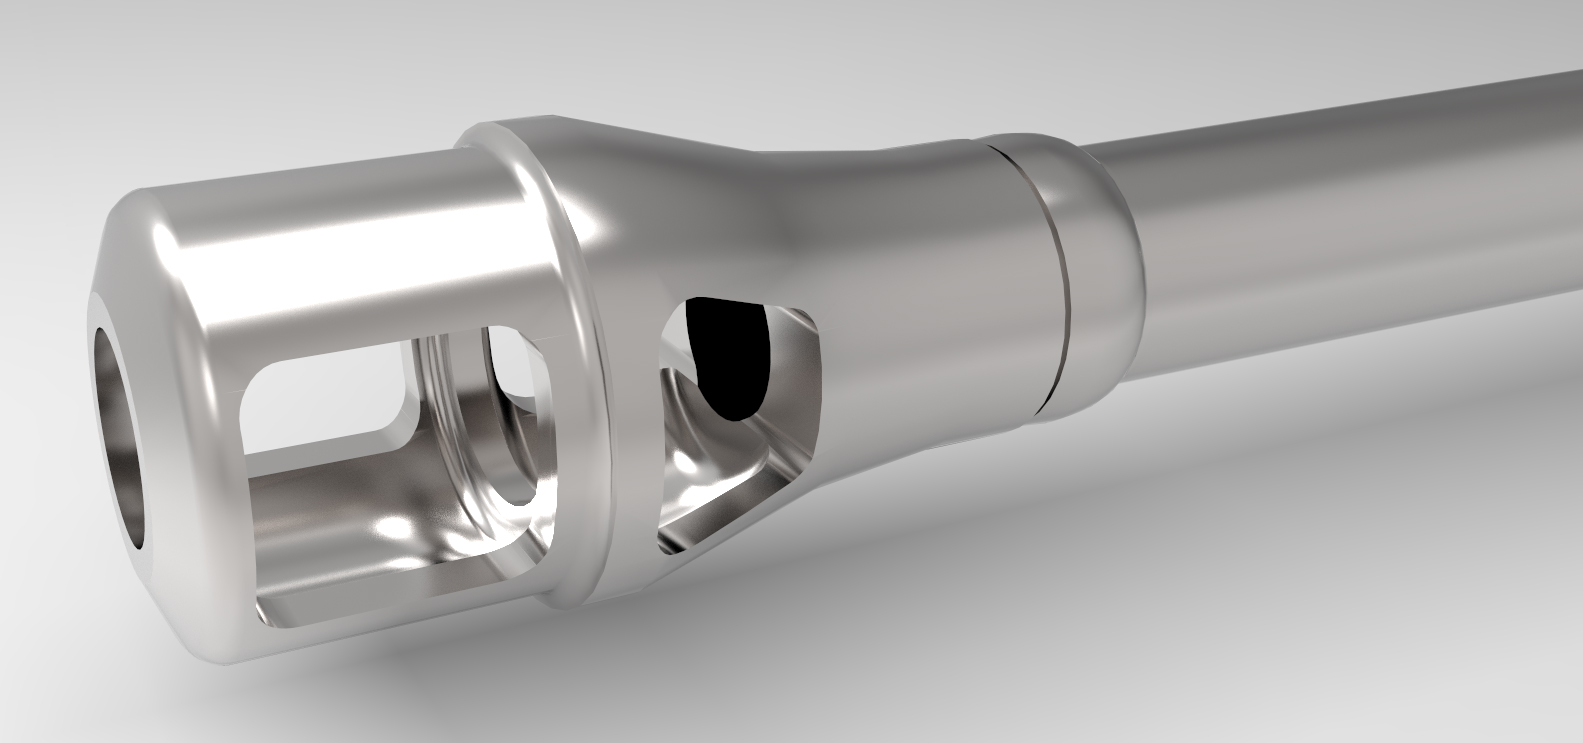
As you might guess, I'm working on the Turret part of the tank now. Have a great weekend everyone!
Hello! It looks like you're interested in this conversation, but you don't have an account yet.
Getting fed up of having to scroll through the same posts each visit? When you register for an account, you'll always come back to exactly where you were before, and choose to be notified of new replies (either via email, or push notification). You'll also be able to save bookmarks and upvote posts to show your appreciation to other community members.
With your input, this post could be even better 💗
Register Login


Advertisement