Slicing thru a component with a plane
-
This issue I have yet to clearly resolve or understand its solution. Duh.
Probably really simple.. but here I go
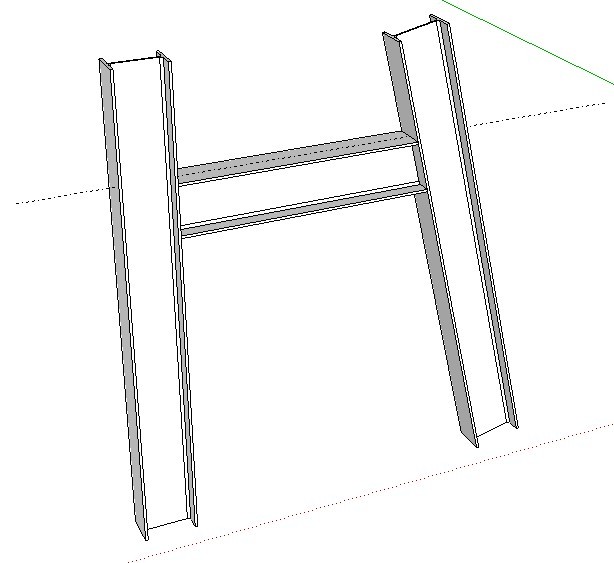
got three steel component parts from the warehouse as I am making a structural frame.
I want to "slice a plane thru one of the components so that I can weld it onto the other two..
seems simple enough.
I have a few plugins, booltools, zorro, and slicer to aid in this process...
not quite getting the results I need..Joining knee to beam and post.pdf
I know this is ELEMENTARY
Yes, but still not got the solution
thanks for any help or insights
aloha
red -
You don't need any scripts or additional tools to make such simple cuts.
Group the object you want to cut [make it a component if there'll ever be more than one of them].
Make a large rectangular face and group that too.
Move/Rotate the object-group and/or the face-group so that the face is on the plane of the cut.
Edit the object-group.
Set View > Component edit > hide rest of model
Select all geometry in the area of the cut.
Right-click context menu > Intersect > with model.
A line appears where the [unseen] face-group intersects the object's geometry.
Erase the parts of the object you want to discard.
If the cut 'end' is always to be hidden leave it 'open' as the extra geometry is never seen - otherwise draw a line over an edge to auto-form a face and erase any unwanted faces that might form in inner loops etc...
Exit the edit and move [or erase] the face-group.
Repeat with any other cuts needed...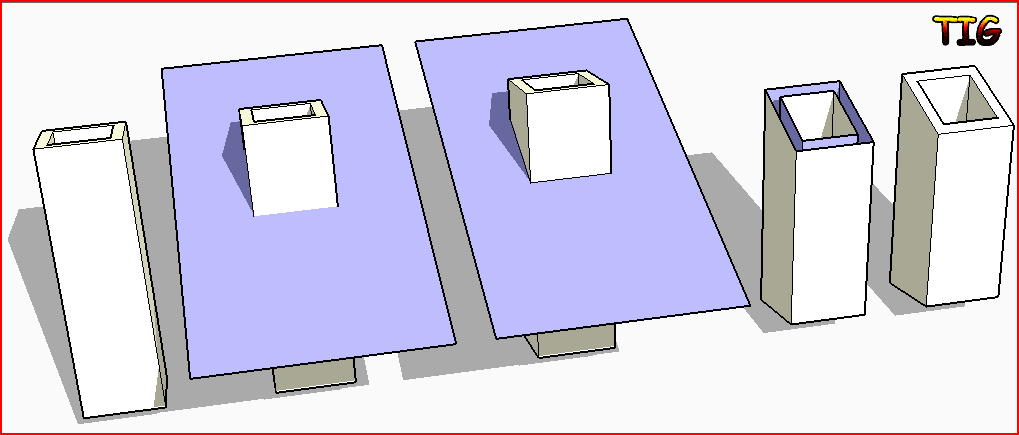
-
I use the following plugin. Just make a face that covers all that you wish to remove and in the direction of the cut, and presto, cut and sealed. Besides making holes, this has turned out to be a great plugin for trimming. You can use the selected face on multiple groups/components.
[Plugin]Hole on Solid tool v1.6.3 update Jan 09, 2012
Ken
-
Thanks for the reply and solution to the basic issue,
now how to do the same with two components of various shapes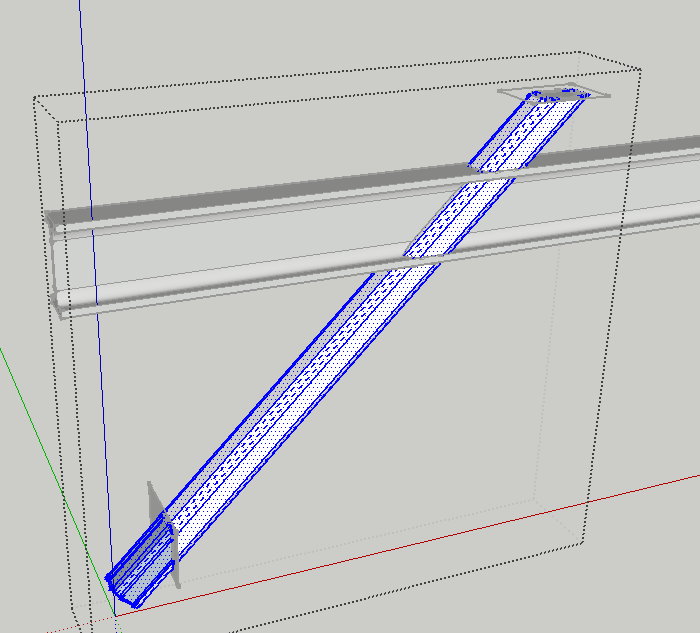
I do the "intersect faces with model" but it does not "cut or slice" the model like a plane does. As seen in the image, the lines of the pipe component remain uncut and cannot be separated / deleted like with a plane cut.
In this case that is okay as the joining surface is flat, typical to most of my needs, but in a multi faced situation it would seem best if the faces of one component could "cut or slice" into the faces of the other component.
I can get an intersection via bool tools, but not seemingly understanding on how to cut with a multi-face component.
thanks again, hopefully this is all not too silly and simple but thanks for the time and insights.
aloha
red -
Just thought I would show how the plugin "hole in solid" make trimming easy.
1st illustration showing three "I beam"
2nd illustration showing two face that I wish to use for trimming
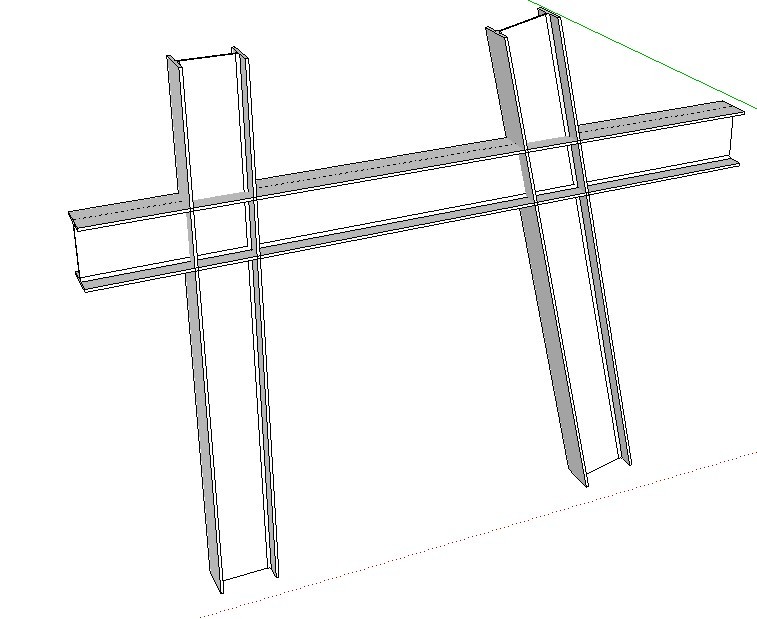
3d illustration shows center "I beam" trimmed
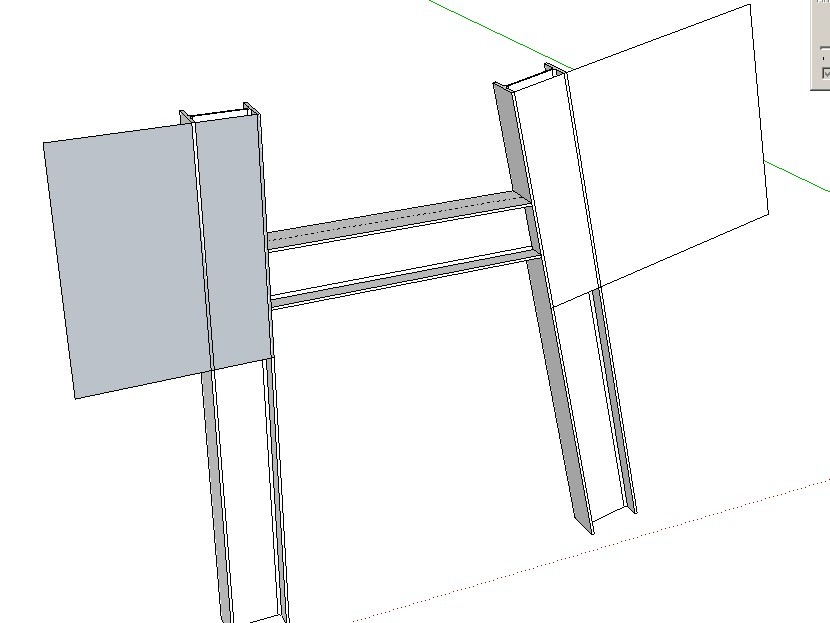
5th illustration shows how the "I beam" ends are trimmed and has a solid look. This process leaves the group a solid after trimming. This is a lot easier to do than intersect with model and having to come back and clean up the cut.Ken


-
Okay, thanks again for the suggestions, I got the "hole in solid" plugin, tried it,
and do not seem to understand how to make it work, have I installed it wrong?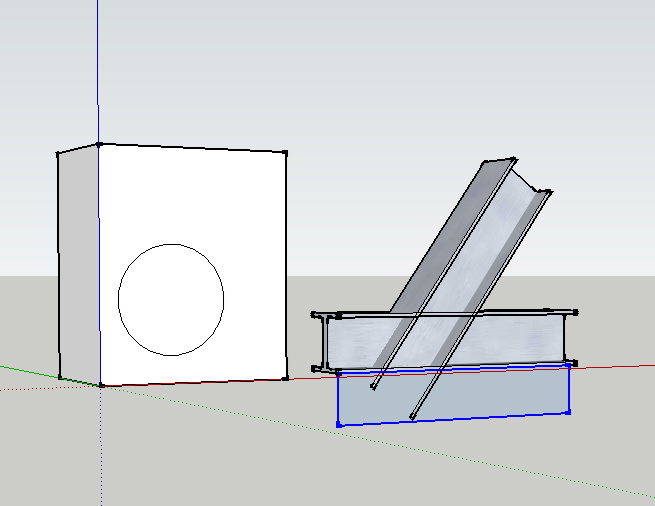
highlight it, click the icon, and get no results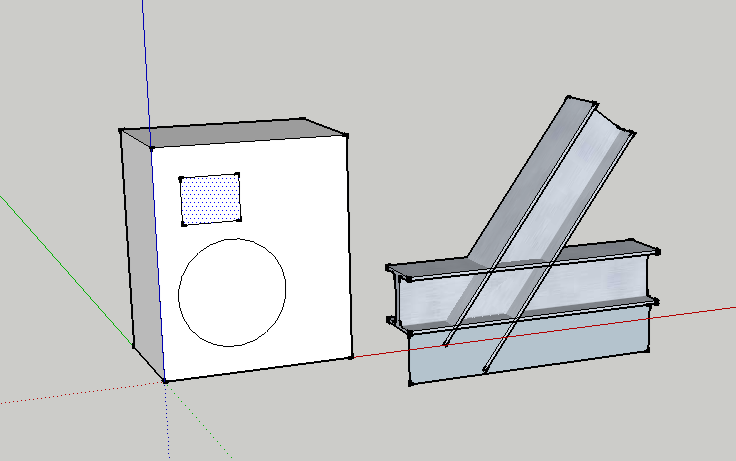
is there something else I need to do?
I know this will work but not got this figured out yet.
thanks
aloha
red -
choose hole in solid in plugin, select a solid, then select a face.
done. -
Redinhawaii
Your example needs NO Plugins at all to punch a simple hole through an object!
Make sure that the 'punching-face' is in the same 'context' as the object that's to be punched, and therefore it is 'on' the 'front' face of the object.
Then just PushPull the 'punching-face' though the block to make the desired hole, stopping the extrusion on the back-face by a pick or by 'sensing' the inference to the back face-plane [z-fighting].If the back-face of the block is NOT parallel with the front-face [although it does look like it is is your example!] then make the extrusion so it stops beyond the back-face, then select the new faces made in the extrusion and use 'intersect' [context-menu] to cut that extrusion at the plane of the back-face; then erase the unwanted parts or the extrusion.
Done.
NO PLUGINS NEEDED AT ALL.
You can do everything you have asked about... manually AND more easily than with a 'tool'...
[This was a heart-felt message from Plugin Developer ! Please learn the basics...]
Hello! It looks like you're interested in this conversation, but you don't have an account yet.
Getting fed up of having to scroll through the same posts each visit? When you register for an account, you'll always come back to exactly where you were before, and choose to be notified of new replies (either via email, or push notification). You'll also be able to save bookmarks and upvote posts to show your appreciation to other community members.
With your input, this post could be even better 💗
Register Login


Advertisement