[Plugin] Follow Me Helix (Updated 06-Jan-2012)
-
Matt, I used Draw helix to draw three different helices. All three have the same pitch. The first was the bottom, straight helix for 5 turns (because that was the default number when the plugin launched) and it got copied up for the top straight section. The second helix tapers from the first helix's radius out to the larger radius. I copied and flipped the copy to make the top taper as well. That one also has 5 turns. Then there's a three-turn straight helix for the center part of the spring.
All these helices are created as groups which I exploded. Then I welded them together to make them easier to select as a path for Follow Me. It's an instant spring but it doesn't take that long to do. I definitely make a component of the spring so I could easily reuse it.
-
Thanks Dave, I think I'll use your method from now on. It's the neatest way to make barrel springs.
Although the intersection method would allow someone to make more interesting profiles if they needed to, if they could tolerate the time it takes for SketchUp to calculate the new path and then follow it

-
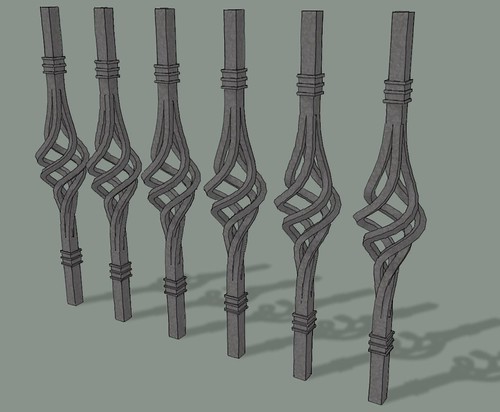
You're welcome. I think it is useful to know both methods. Sometimes one will be more useful than the other. For example I used that method for drawing these ironwork baskets. I couldn't get the proper helix using the Draw Helix plugin. Tools on Surface is ideal for drawing the helix on the extruded shape.
-
Thank You!
Really -
First off, thank you for such a useful plugin - I've been making handrails for spiral staircases so it's been invaluable.
I've had a couple of problems with fractions on making higher resolution helix. My working figures have been for 194mm riser at radius 1150mm with risers at 30 degree increments but when I subdivide my figures to create a smoother helix a bug seems to appear (disclaimer, my maths isn't so hot but I've checked as far as I can). so, doubling resolution to 97 and 15 works as expected but doubling again to 48.5mm and 7.5degrees causes the dialogue to disappear with no geometry result. Has anyone else encountered this, or can maybe suggest a way I can create a smoother helix curve?
ps though I've been a daily reader for quite a while this is my first post to SketchUcation so apologies for the clunkiness of this mail!
-
The problem is with the plugin. It only accepts interger angles in its present form so the 7.5 causes an error. If you divide linear and angular increments by 5 and use 38.8 and 6 that will work. The smaller the angular increment the smoother the helix.
-
Thanks sdmitch! That'll do the trick and might save others a little time too. Great plugin. Not only did it save me time, but I couldn't see another way of resolving my modeling challenge. Cheers BuddyH
-
@sdmitch said:
The problem is with the plugin. It only accepts interger angles in its present form so the 7.5 causes an error. If you divide linear and angular increments by 5 and use 38.8 and 6 that will work. The smaller the angular increment the smoother the helix.
Why not fix it ?
@radius=1.feet if !@radius;@dist_inc=1.inch if !@dist_inc;@ang_inc=30****.0**** if !@ang_inc prompts=["Radius of helix:","linear Increment:","Angle Increment:"] ans=UI.inputbox(prompts,[@radius,@dist_inc,@ang_inc],"Helix Generator") if !ans then;return;end @radius=ans[0].to_l;@dist_inc = ans[1].to_l; @ang_inc=ans[2].to_****f****
If a dialog has a value set as an integer it can thereafter only accept an integer as its input.
So just make the initialized@ang_inca float by using a float value.
[30.0and NOT an integer like30]
And also never change the@ang_incinto an integer with.to_ilater on. -
Hi Jon,
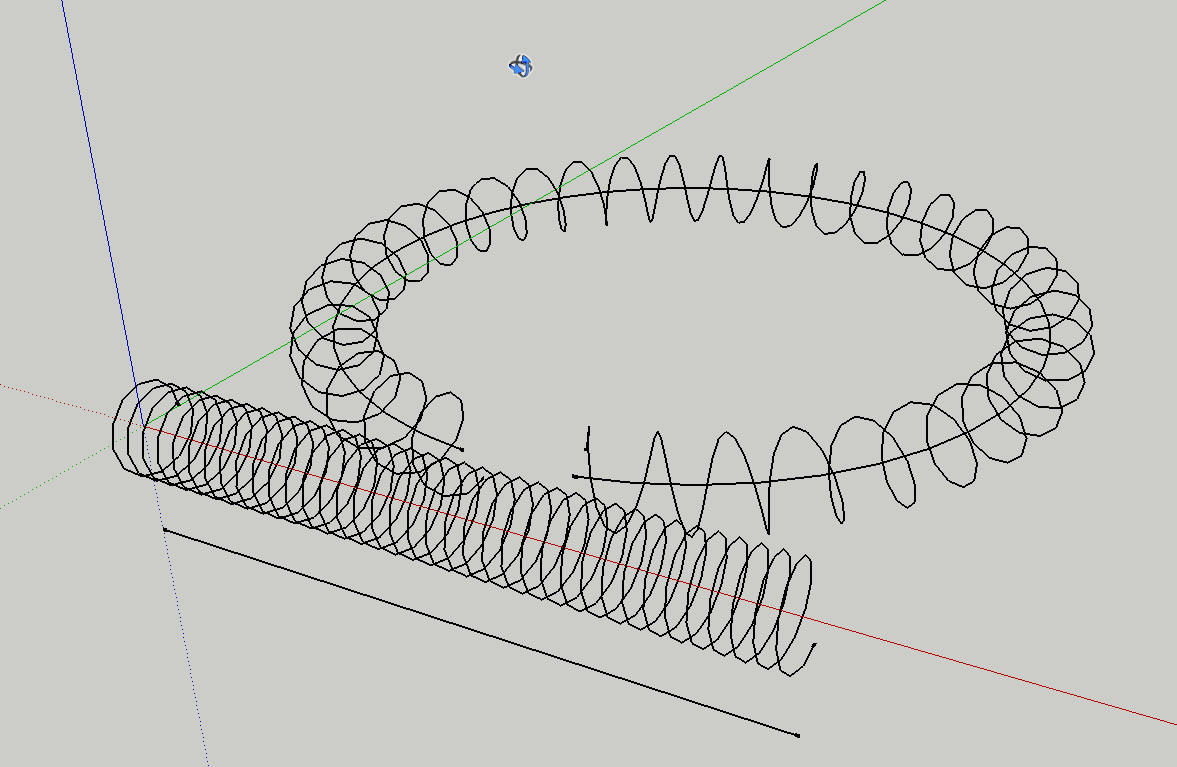
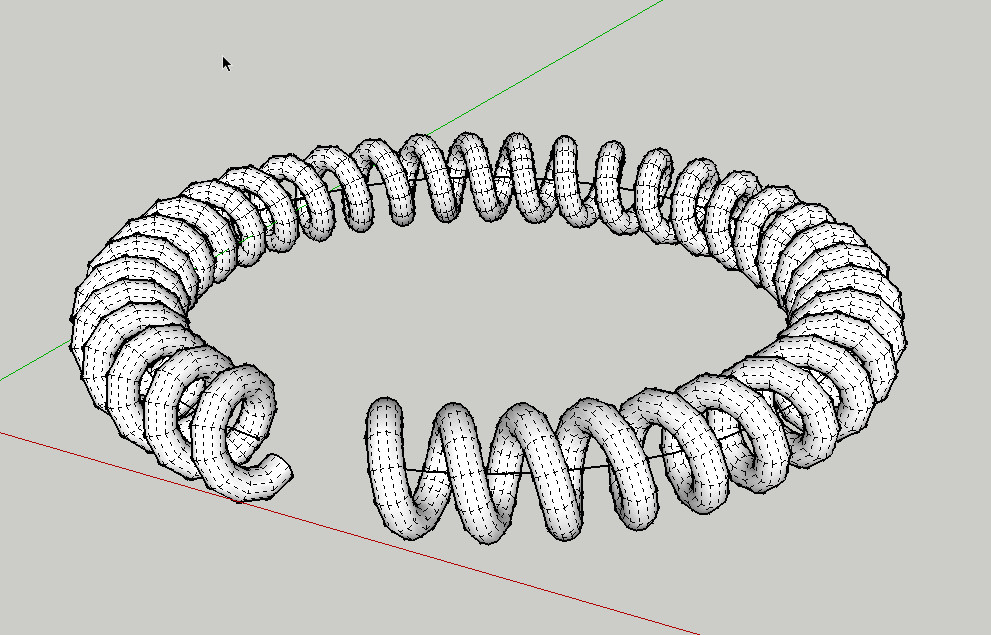
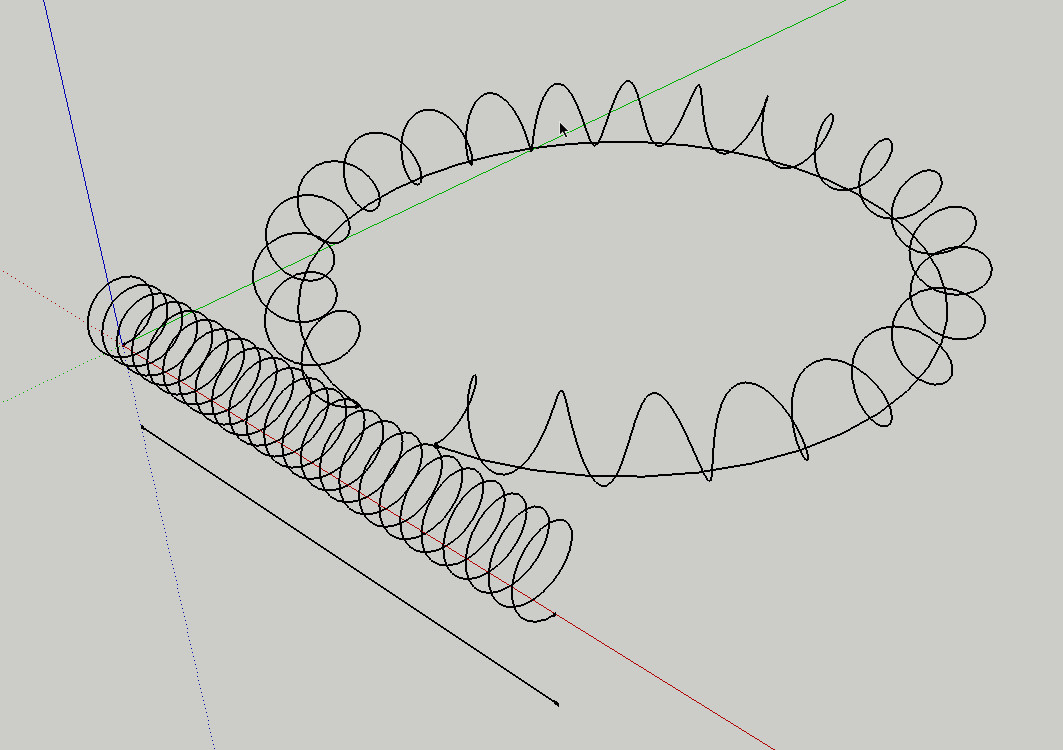
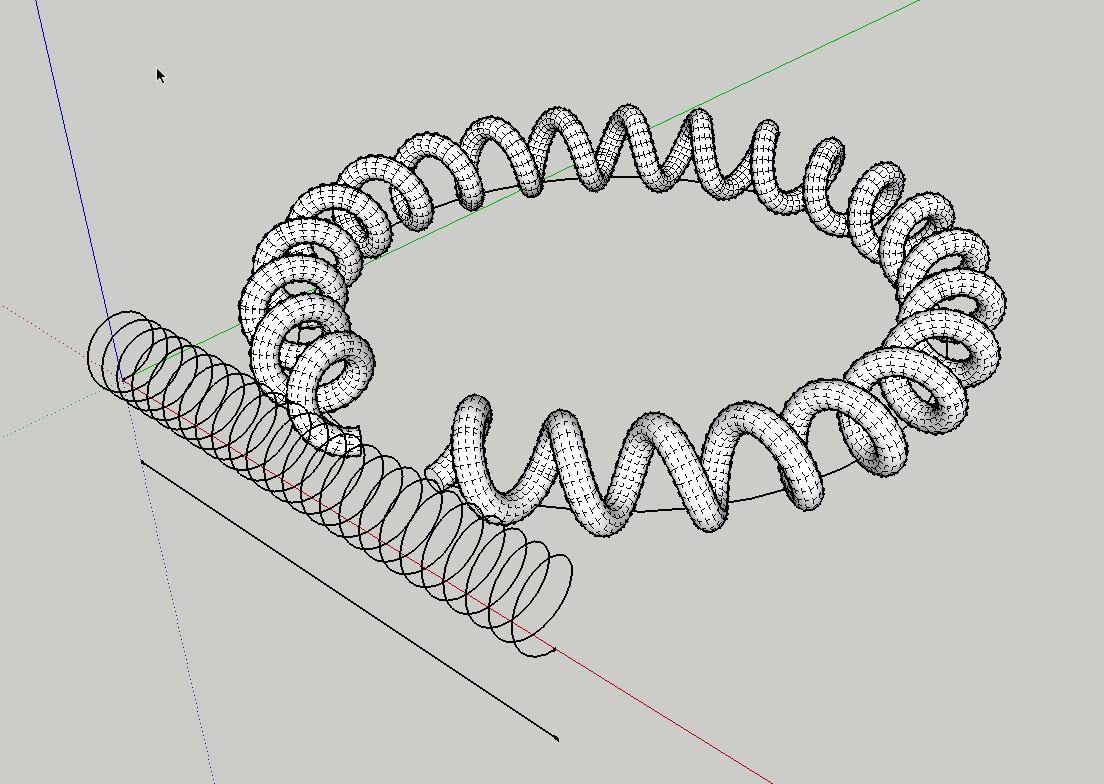
The technique for a curved spiral is "Follow Me Helix" and "Shape bender". The better is the combination "DrawHelix" and "Shape bender". there is a better control about the helix.
Charly
-
TIG, fixing it is as simple as you suggest in making the angle increment a float. My original obviously flawed assumption was that there would never be a need for an increment less than a degree.
-
Hi,
I downloaded this and added it but can't seem to find it in any toolsets. Where does it reside in the menus?
-
@shingabiss said:
Hi,
I downloaded this and added it but can't seem to find it in any toolsets. Where does it reside in the menus?
If you installed it correctly it would be in the Plugins menu.
-
I can confirm that this tool [like many others] is already compatible with all current versions of SketchUp - including the newest ones].
When properly installed t will appear in the Plugins menu as 'Follow Me Helix'.
If it does not then you have not installed it properly
There are many threads about fixing security-permissions for installing files manually - if you have v2014 these permissions are auto-resolved for you [although the folder is harder to find!], but on especially PCs with earlier SketchUp versions you need to do a one-off fix for the Plugins folder's permissions... see this consolidation tutorial http://sketchucation.com/resources/tutorials/36-intermediate/811-setting-security-permissions-in-sketchup
It is much easier to AutoInstall Plugins using the SketchUcation PluginStore dialog in SketchUp, or download the RBZ version from the SCF PluginStore page and then use the Preferences > Extensions > Install... button... -
Any documentation or guidance on how to use this plugin? (It installed just fine under SK8 on my Mac.)
If nothing it selected I get a dialog "Select the entities that will be the size and shape of the helix you want to create." If a line is selected I get the parameters dialog but don't understand their semantics - some values produce interesting results but I don't know how to control it. If a more complicated 2D entity is selected then I get more complicated results - or no result.
-
There's some information in this thread. For the rest, a little bit of experimentation should answer your questions.
-
Steve,
The centerline for the helix should be selected before running the plugin. The radius is of course the distance from the centerline to the points of the helix curve. The linear increment is the distance along the centerline between generated helix points. The angular increment is the angular change between helix points around the centerline. The angles between the segments of the centerline are checked to see if any exceed 30 degrees. This is done because trying to wrap the helix around such corners is problematic. You are given the option of smoothing the centerline curve by doing a spline fit using the end points of the centerline segments as nodes of the spline.
Hello! It looks like you're interested in this conversation, but you don't have an account yet.
Getting fed up of having to scroll through the same posts each visit? When you register for an account, you'll always come back to exactly where you were before, and choose to be notified of new replies (either via email, or push notification). You'll also be able to save bookmarks and upvote posts to show your appreciation to other community members.
With your input, this post could be even better 💗
Register LoginAdvertisement
