300 dpi
-
Hello,
I´ve got a question regarding exporting of 2d graphics.
I need to deliver a file with a dpi of 300 but all I can get Sketchup to export is a dpi of 96.
Is there a way to get 300 dpi exports? small filesize vs better quality does nothing to the dpi I noticed.
Is this only a pro export option?, I am currently running on free sketchup 7Also, this might not be the place to ask, but, I also got twilight renderer installed and I noticed that changing the presets: low, low+, medium , medium + and so on does nothing the the dpi?
I need 300! this is sparta!! aaarghh
Thanks
-
When you export you specify the number of pixels necessary to produce 300dpi in your print size.
print_size_in_inch * dpiSo if you print on a A4 - length of a landscape A4 is 297mm
(297 / 25,4) * 300 = 3507,874015748031 = 3508 pixelsI assume you're seeing in PhotoShop it says 72dpi - that is merely an indication for applications of how large the image should be. It is of no relevance when you use a WYSIWYG interface to size the image on the page. (such as Illustrator or InDesign.) It also does not matter when you print Fit to Page as the image will be scale to fit regardless of what the DPI property in the image file says.
This is a good article on DPI: http://www.rideau-info.com/genealogy/digital/dpi.html
-
Ok thanks, helped to clarify alot
-
[this is on a mac but maybe windows has this option?]
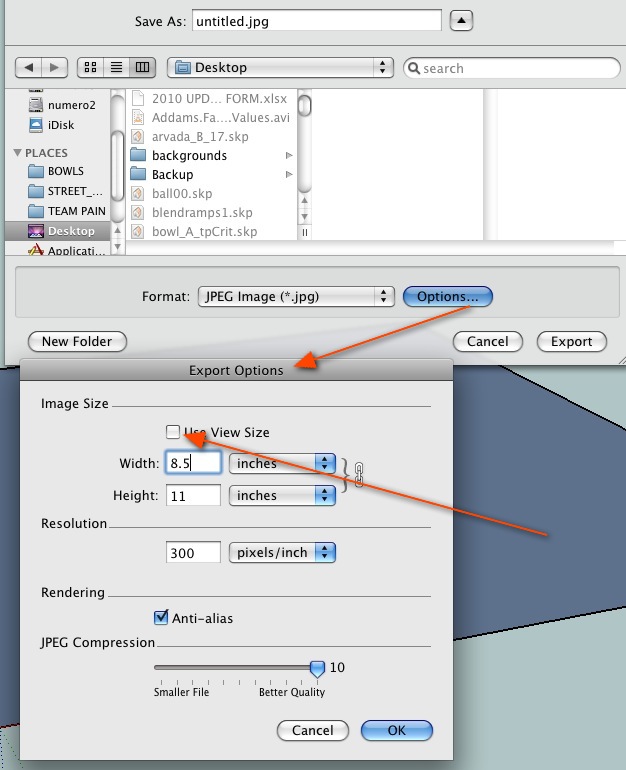
you have to uncheck 'use view size' because if it's checked, the image will be exported with the current SU window size + your monitor's resolution..

uncheck then you're free to change to other dimensions as well as resolutions..
bear in mind however what thomthom is saying up there.. if i have a picture that's 1000px X 1000 at 300dpi, it's no different than 1000px X 1000 at 100dpi..
either way, it's still a 1 megapixel image.. and both will have the same file size and appear identical on a computer.. the only difference is what happens when the image is printed.. the 100 dpi image will print 3x larger but without using any additional info.. in essence, it's the same as the 300dpi print except it's stretched out..
-
@unknownuser said:
the only difference is what happens when the image is printed.. the 100 dpi image will print 3x larger but without using any additional info.. in essence, it's the same as the 300dpi print except it's stretched out..
If the printing program makes use of the DPI property in the image.
-
DPI properly refers to the number of dots per inch that a printer can muster. The more the better as the printer must 'dither' the primary colors (usually 4 but up to 9) to achieve the gamut of 24 bit images. PPI is the number of pixels per inch -- an arbitrary number that tells you how big a pixel will be. PPI and DPI are often confused and used improperly -- they are not the same. Photoshop allows you to set the PPI number when you print (play with the print size dialogue in Pshop and you will see the ppi number change). The default 72 ppi dates way back to original Macintosh 9 inch screen when the size of the pixels was about 72 ppi and dot matrix printers were 72 dpi (whence what you see is what you get). For scanning the proper term would be samples per inch -- the higher the better and bigger image.
-
@pmiller said:
SNIP
The default 72 ppi dates way back to original Macintosh 9 inch screen when the size of the pixels was about 72 ppi and dot matrix printers were 72 dpi (whence what you see is what you get). SNIPActually this refers back to the printing industry, points and picas. PPI is Points Per Inch, not the more modern Pixels Per Inch. There are 72 Points to an inch and 12 Points to a Pica. Points are used for vertical measurement, particularly of type size (24 point etc) and Picas are used for horizontal and vertical measurement of the actual page layout.
The 72 DPI of an original Macintosh screen allowed for WYSIWYG as its vertical and horizontal dot density would allow you to match the printed point sizes and page layout of a printed page. The Imagewriter dot matrix printer head also had a 72ppi matrix allowing you to "proof" a layout before sending a document to be printed, albeit at a much lower resolution, with the proper sizes and relationship of the parts of the document. The Laserwriter offered higher resolution computer printing directly to paper but is/was no where near the resolution of actual printing.
Later monitors have had their PPI (Pixels) rise to 100+ which poses some issues with WYSIWYG but for the most part its an abstraction anyway as you can now see complete pages at "100%" displayed on large monitors.
There have always been a huge number of issues of the relationship of PPI, PPI, LPI and so on across the computer to how something will be reproduced on a printer and its resolution.
Anyway after going through my pedantism, out put your file at a large size with high resolution and then using an image editor resize the image to the desired size and dot density for the printer you will use. I tend to not use the Anti Alias function as creating the image at higher resolution and size and then resizing will give you a sharper image with less dithering of the edges to appear smooth.
-
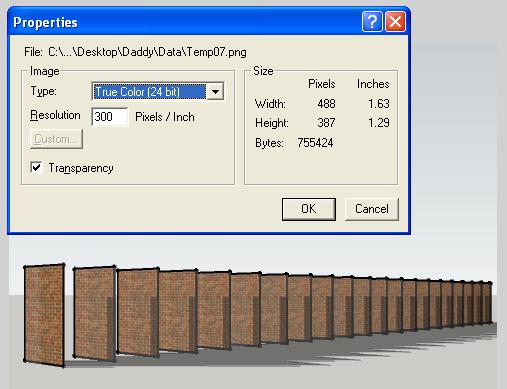
If all you need to do, is to change an image from 96 dpi to 300 dpi, most image editors will do so. Keep in mind that the physical size of the image will shrink accordingly.

Advertisement


