Applying wood textures with the right axis
-
I have been using SU for a while now and haven't found an easy way to do the following. I want to be able to apply wood textures in the correct direction for the wood grain. Obviously on a flat board I can use the position texture tool (although it is quite tedious). The biggest problem is when I have a curved surface. I attached a model of a table leg, hopefully someone will have some magic for me.
-
-
As well as letting you 'move' textures to avoid joins in the surface, the Texture tool also has a right-click options menu - e.g. 'rotate' lets you rotate by 90 etc rather than using the rotate 'pin'. You can also set the texture as 'projected'.
Once you have got a couple of faces as desired use the Materials Browser eyedropper to sample an adjusted texture material and paint it onto other surfaces with a similar orientation.
that way you are copy/pasting the material with the desired orientation and positioning...
Toggle view > hidden geometry on/off to let you select suitable faces but then paint eyedropper-ed projected textures onto whole surfaces.
I had to change some soft/smooth edges to solid to separate two opposing faces of the leg as the surface ran around awkwardly mapping the textures otherwise.
I've also rotated the leg into a vertical position.
I also adjusted the material's proportions to make it longer - that way joins are less likely to appear in surfaces.
Here is the SKP back [purged so there are less things in it than before...].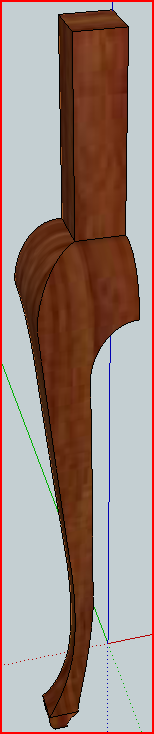 Cabriole Leg.skp
 -
Turn on hidden geometry in View>Hidden Geometry. Then you can position a texture on one of your curved faces as usual (right-click> texture> position). After that sample it by holding down Alt while the paint tool is active and clicking on the face you positioned. You can then paint the rest of the faces that are incorrectly oriented. Still tedious though, and some alignment between adjacent faces is often necessary.
Also a plug-in aimed at this problem, I haven't tried it out though.
Hello! It looks like you're interested in this conversation, but you don't have an account yet.
Getting fed up of having to scroll through the same posts each visit? When you register for an account, you'll always come back to exactly where you were before, and choose to be notified of new replies (either via email, or push notification). You'll also be able to save bookmarks and upvote posts to show your appreciation to other community members.
With your input, this post could be even better 💗
Register Login


Advertisement