sketchucation logo sketchucation
    • Login
    🛣️ Road Profile Builder | Generate roads, curbs and pavements easily Download

    How can I make a letter rounded?

    Scheduled Pinned Locked Moved SketchUp Discussions
    sketchup
    31 Posts 6 Posters 5.9k Views 6 Watching
    Loading More Posts
    • Oldest to Newest
    • Newest to Oldest
    • Most Votes
    Reply
    • Reply as topic
    Log in to reply
    This topic has been deleted. Only users with topic management privileges can see it.
    • simon le bonS Offline
      simon le bon
      last edited by

      Hey Hey Helisei,

      You show too much or you explain not enough 😛
      You are waiting I find by myself I suppose. Not a lot of time again for that these next days..

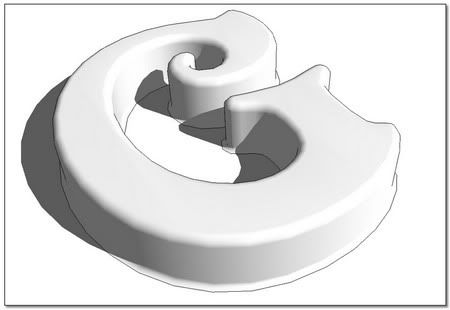
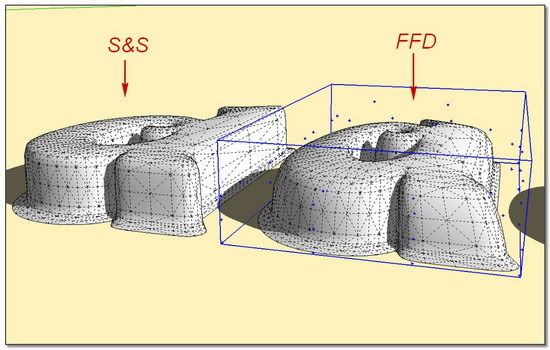
      You are right. S&S works well on the letter shape you have redraw.
      but:
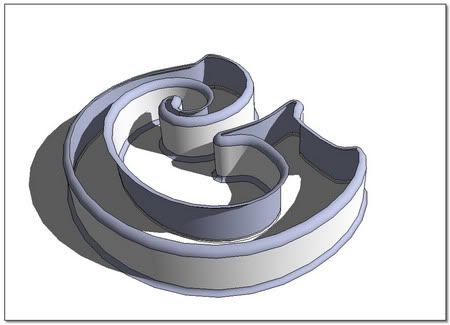
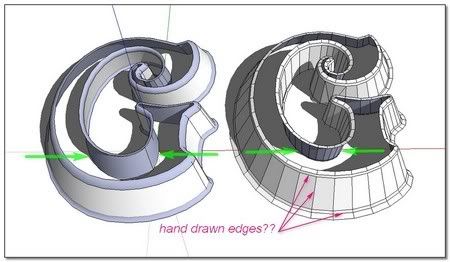
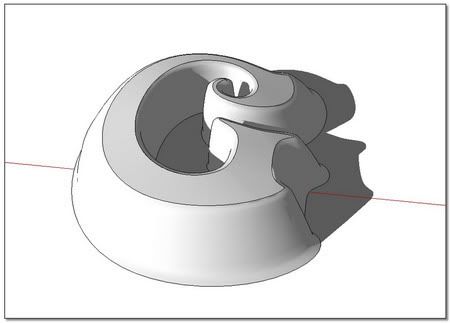
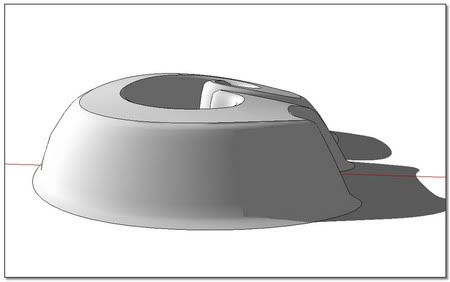
      1_ How did you do to make the base of the letter correctly flared ??
      2_ How did you do to redraw all the lines of the letter shape: by hand??


      http://i274.photobucket.com/albums/jj245/Spendauballet/SketchUp/ThickLabel_W_450.jpg

      I can see I have still a lot to learn on S&S. This another technic for exemple find me with the tong out of my mouth:Contest Winner: Modelling a Panton Chair with Subdivide and Smooth

      Thanks to participate,
      simon . . . . . .and theSlideshow(each link is the same updated one)

      PS: Your cars are crazy beautiful man 👍

      1 Reply Last reply Reply Quote 0
      • simon le bonS Offline
        simon le bon
        last edited by

        Hi ely862me

        @unknownuser said:

        Take the model as in image 3 or 4 and run Subdivide&Smooth on it..u ll get the desired result

        I'm afraid I don't understand the way you think about!
        I've tried this time, not the subdivide+smooth operations like before but the modeler operation as i can think you are talking about, and the result is the following, after what i can't go further.
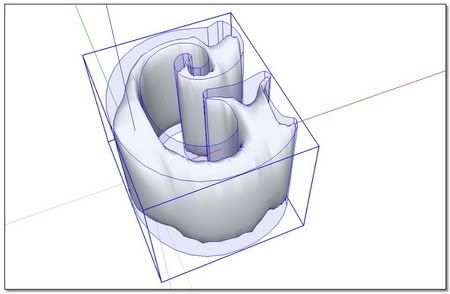
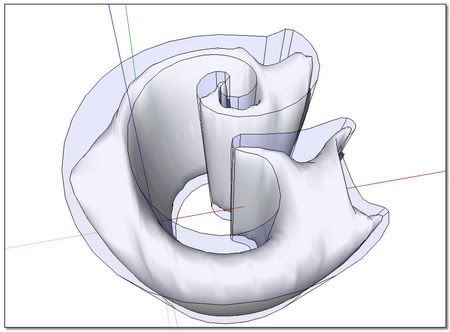
        http://i274.photobucket.com/albums/jj245/Spendauballet/SketchUp/ThickLabel_P_450.jpg


        http://i274.photobucket.com/albums/jj245/Spendauballet/SketchUp/ThickLabel_Q_450.jpg

        /**

        Dear Gaieus,
        One more time you're right! I can't say I didn't know what you're talking, about cleaning unwanted geometry. But i thought in this case that it was not necessary to clean because there was no faces joining. As we can see, I was wrong 😄
        Adendum about this subject:Creating a Hidden Seam in Google SketchUp by Eric Lay(Boofredlay).

        After cleaning:

        http://i274.photobucket.com/albums/jj245/Spendauballet/SketchUp/ThickLabel_R_450.jpg

        This time it looks ok 👍

        http://i274.photobucket.com/albums/jj245/Spendauballet/SketchUp/ThickLabel_S_450.jpg

        and i'm afraid this is my ultimate best
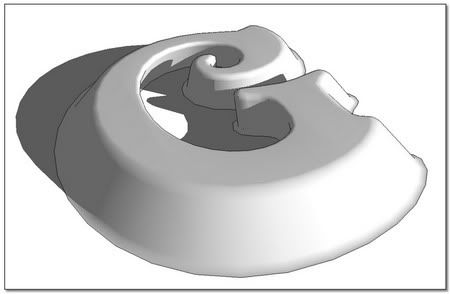
        http://i274.photobucket.com/albums/jj245/Spendauballet/SketchUp/ThickLabel_T_450.jpg

        Updated slideshow

        simon

        1 Reply Last reply Reply Quote 0
        • simon le bonS Offline
          simon le bon
          last edited by

          @ely862me said:

          :lol: actually is very simple..

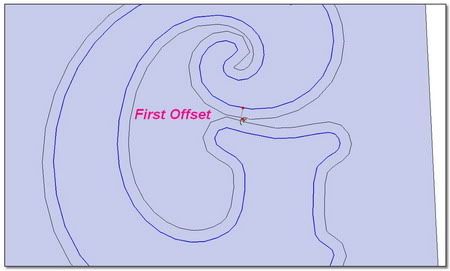
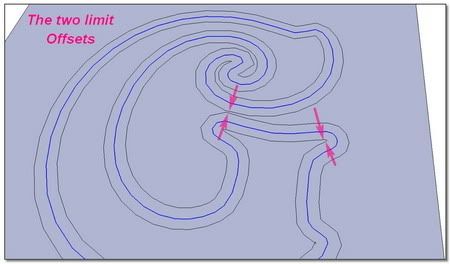
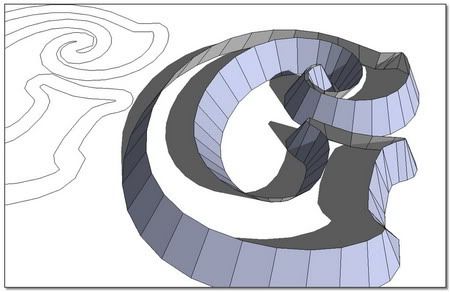
          i ll give u 3 hints: offset tool,skin tool and scale tool

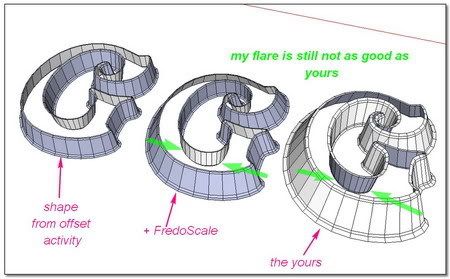
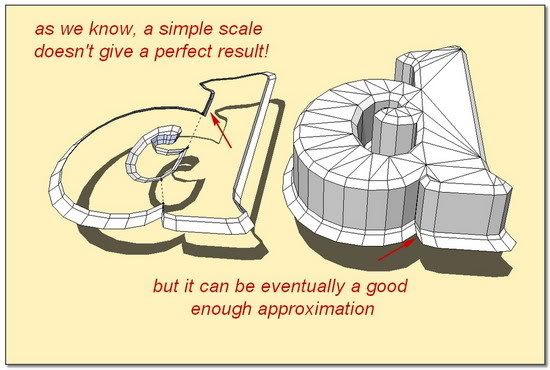
          Very simple? No I wouldn't say that. In fact I haven't found how to make exactly the good flare I wanted (the same as yours). And I would have please (now I have searched 😉 ) more precisions from you on the way you've mastered it.

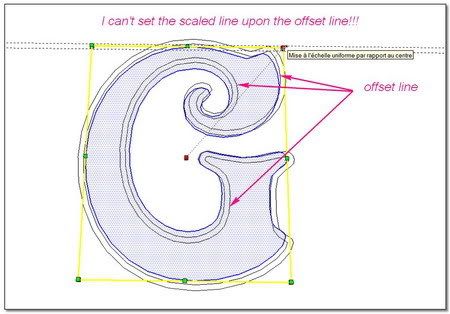
          • A very important thing I have learned here is that: an offset doesn't give the same outer edge than a scale??(really a surprise to me) this is the reason why I was not able to do the right flare using scale tool and FredoScale!!

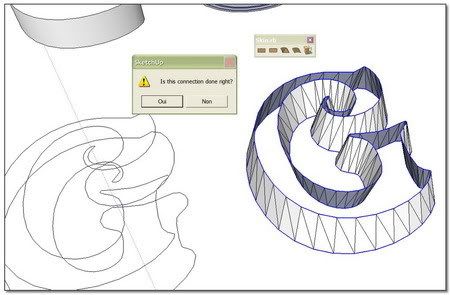
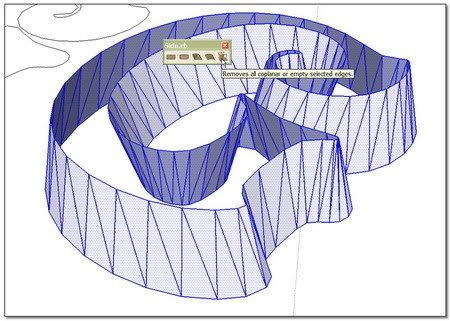
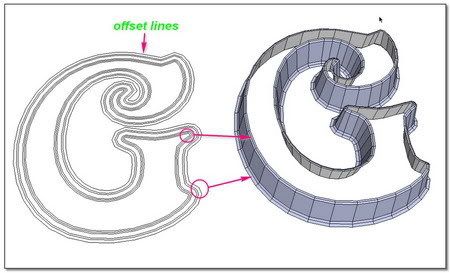
          • No need to redraw all the lines, there is a cleaning module in Skin.rb


          http://i274.photobucket.com/albums/jj245/Spendauballet/SketchUp/ThickLabel_WA_450.jpg


          http://i274.photobucket.com/albums/jj245/Spendauballet/SketchUp/ThickLabel_WB_450.jpg

          A check with S&S

          http://i274.photobucket.com/albums/jj245/Spendauballet/SketchUp/ThickLabel_WC_450.jpg

          "Very important"

          http://i274.photobucket.com/albums/jj245/Spendauballet/SketchUp/ThickLabel_WD_450.jpg


          http://i274.photobucket.com/albums/jj245/Spendauballet/SketchUp/ThickLabel_WE_450.jpg


          http://i274.photobucket.com/albums/jj245/Spendauballet/SketchUp/ThickLabel_WF_450.jpg

          (I have let down momentarily what I had begun whith Gaieus and I will retake it soon.)

          simon

          1 Reply Last reply Reply Quote 0
          • simon le bonS Offline
            simon le bon
            last edited by

            Ok Elisei, you seem to be occupied. I can't wait you to follow my idea. (It would be great and friendly if you would give us a little step by step further explanation)

            I start from your shape.


            http://i274.photobucket.com/albums/jj245/Spendauballet/SketchUp/ThickLabel_WFB_450.jpg

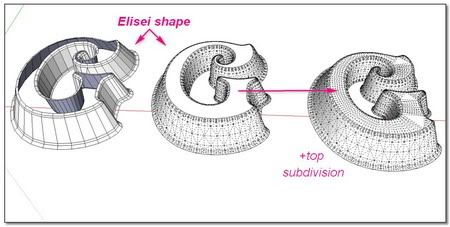
            I need to subdivide the top of the letter. I'm using SandBox tool: from contour.
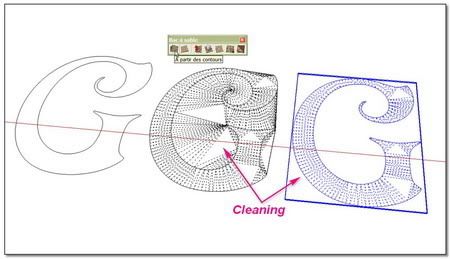
            http://i274.photobucket.com/albums/jj245/Spendauballet/SketchUp/ThickLabel_WG_450.jpg

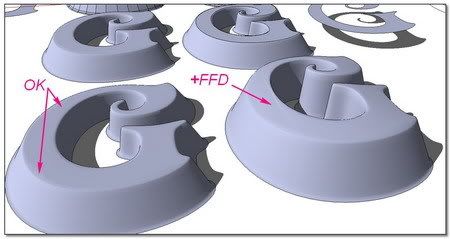
            Now using SkechyFFD to put some irregularity to the letter (I glue the bottom points)
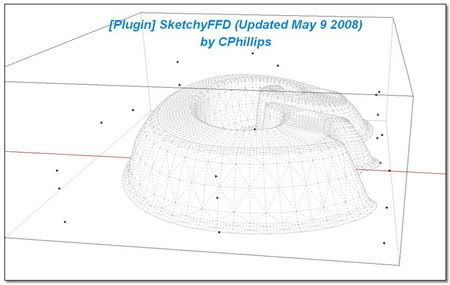
            http://i274.photobucket.com/albums/jj245/Spendauballet/SketchUp/ThickLabel_WH_450.jpg


            http://i274.photobucket.com/albums/jj245/Spendauballet/SketchUp/ThickLabel_WI_450.jpg


            http://i274.photobucket.com/albums/jj245/Spendauballet/SketchUp/ThickLabel_WJ_450.jpg

            (Note this other try with modeler from SandBox Tools.)
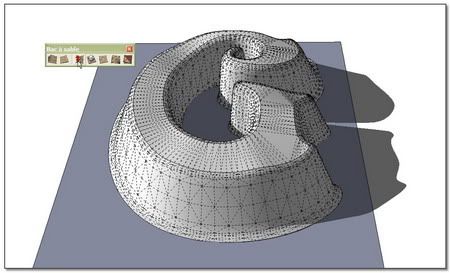
            http://i274.photobucket.com/albums/jj245/Spendauballet/SketchUp/ThickLabel_WK_450.jpg

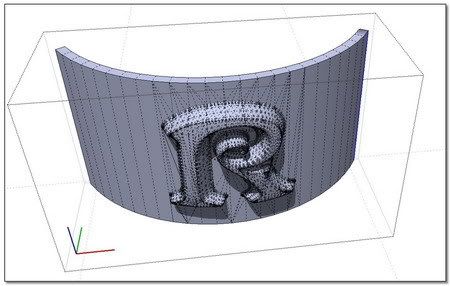
            Finally, with a ShapeBender treatment:
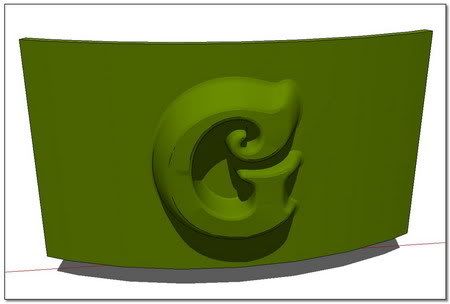
            http://i274.photobucket.com/albums/jj245/Spendauballet/SketchUp/ThickLabel_WL_450.jpg


            http://i274.photobucket.com/albums/jj245/Spendauballet/SketchUp/ThickLabel_WM_450.jpg


            http://i274.photobucket.com/albums/jj245/Spendauballet/SketchUp/ThickLabel_WN_450.jpg

            not to bad for me 😉

            Slideshow
            ___
            [Plugin] SketchyFFD by CPhillips
            [Plugin] Shape Bender by Chris Fullmer

            simon.

            1 Reply Last reply Reply Quote 0
            • ely862meE Offline
              ely862me
              last edited by

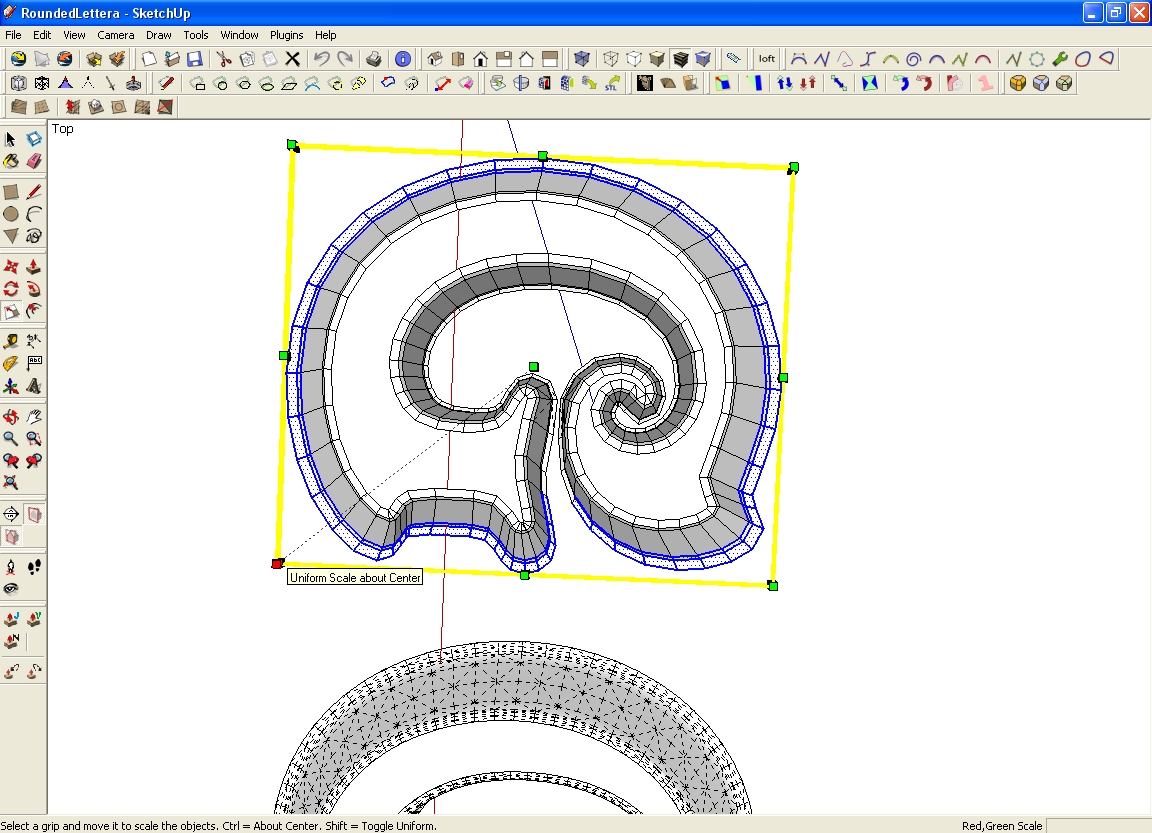
              after making the shape with offset and skin i scale it but not all, just the outer lower profile . When u scale all lower profile the inside part of the letter is scaled too, so ,u want it to be smaller but u get it bigger(so it becomes bigger than the up part of the letter), what u need is to scale just the outer lower part of the letter

              Elisei (sketchupper)


              Before no life was done on Earth it was THE LIFE ITSELF...GOD
              Come and See EliseiDesign

              1 Reply Last reply Reply Quote 0
              • simon le bonS Offline
                simon le bon
                last edited by

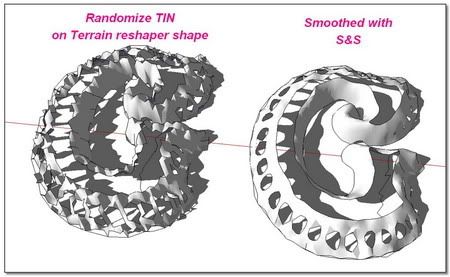
                A last try for another method using Terrain Reshape and afterward Randomize TIN

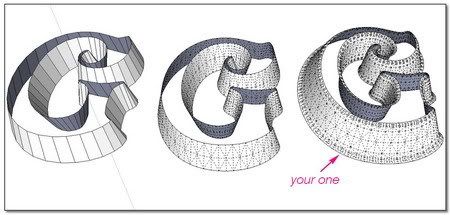
                The idea: apply the process on a very low shape and scale it after. I'm starting from the offseted and skined shape from Elisei. The result is not bad but S&S do very better. Its job isn't really for that kind of thing.
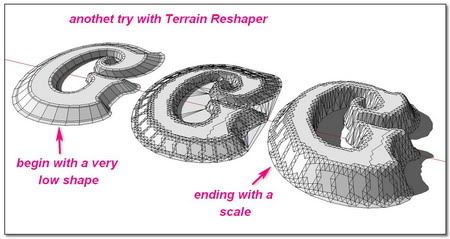
                http://i274.photobucket.com/albums/jj245/Spendauballet/SketchUp/ThickLabel_XG_450.jpg

                I still follow what was Planned:

                http://i274.photobucket.com/albums/jj245/Spendauballet/SketchUp/ThickLabel_XH_450.jpg

                The result is beautiful but far from what I expect. I keep it in mind... 😉

                Slideshow

                Re I shall update with a link as soon as I shall have made a tutorial with this 😉

                I think: End of the topic!!! Thanks to all

                😎 Simon

                1 Reply Last reply Reply Quote 0
                • ely862meE Offline
                  ely862me
                  last edited by

                  yet, u didn t get all the point..u need to make scale from center and select more geometry from the letter
                  Btw..i didn t subdivide the top and letter together because as u can see when u subdivide them together the top becomes messy ,if u look at it with hidden geometry off

                  Elisei


                  rl.jpg

                  Elisei (sketchupper)


                  Before no life was done on Earth it was THE LIFE ITSELF...GOD
                  Come and See EliseiDesign

                  1 Reply Last reply Reply Quote 0
                  • simon le bonS Offline
                    simon le bon
                    last edited by

                    Hi Elisei,

                    hey hey!! You don't give up so easily 👍
                    -) Allright I was a bit modest with the lines I was scaling. What you do certainly works well.
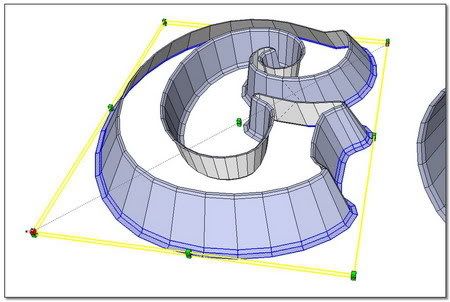
                    http://i274.photobucket.com/albums/jj245/Spendauballet/SketchUp/ThickLabel_XJ_450.jpg

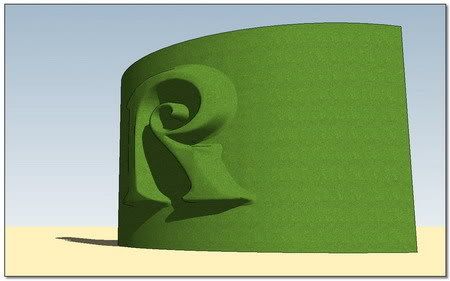
                    I put at the end My last "R" (in french "l'air de la plage": a pretty bad wordgame hi!) in which I have hardly scale, redraw, modify the outlines.

                    -) I prefer rather than you, doing all this job on the same plane before elevate and skin process.

                    @unknownuser said:

                    .i didn t subdivide the top and letter together because as u can see when u subdivide them together the top becomes messy

                    -)Messy, yes it is , but I don't understand you because:
                    1-with hidden geometry off, the look is perfect without any seam line remaining.
                    2-when I subdivide independantly the top, this one doesn't fit exactly well.
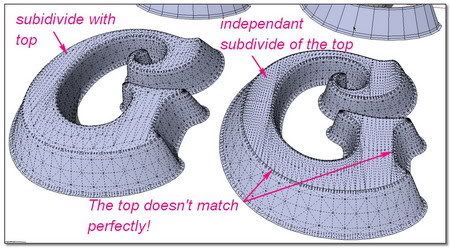
                    http://i274.photobucket.com/albums/jj245/Spendauballet/SketchUp/ThickLabel_XL_450.jpg

                    3-I haven't found one method which give not a "messy result".
                    4-the subivision is enough to use SketchyFFD pretty well.
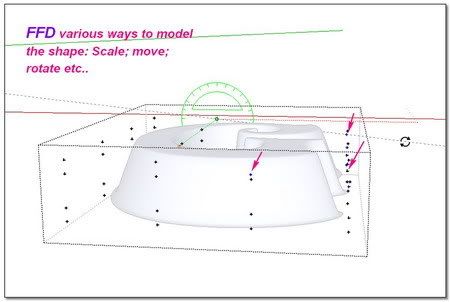
                    http://i274.photobucket.com/albums/jj245/Spendauballet/SketchUp/ThickLabel_XK_450.jpg


                    http://i274.photobucket.com/albums/jj245/Spendauballet/SketchUp/ThickLabel_XM_450.jpg

                    Enough of the "G" Here is the "R"

                    http://i274.photobucket.com/albums/jj245/Spendauballet/SketchUp/ThickLabel_XN_450.jpg


                    http://i274.photobucket.com/albums/jj245/Spendauballet/SketchUp/ThickLabel_XO_450.jpg

                    .

                    ++simon

                    1 Reply Last reply Reply Quote 0
                    • simon le bonS Offline
                      simon le bon
                      last edited by

                      Hi Elisei,
                      I was not fool: Very simple but your hidden trick 😆
                      At the end the entire solution is from you!! Thanks and bravo: I have learned. I'm going to make a tutorial to simplify the process; shared with your name.


                      http://i274.photobucket.com/albums/jj245/Spendauballet/SketchUp/ThickLabel_XA_450.jpg


                      http://i274.photobucket.com/albums/jj245/Spendauballet/SketchUp/ThickLabel_XB_450.jpg

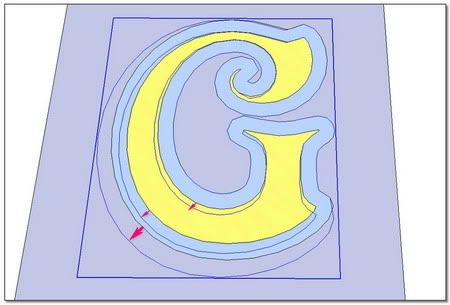
                      Partial Scale. Re: to simplify, I have removed the original letter's line
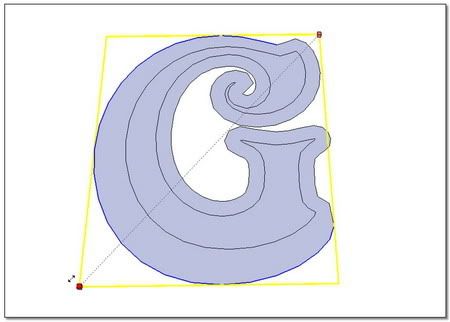
                      http://i274.photobucket.com/albums/jj245/Spendauballet/SketchUp/ThickLabel_XC_450.jpg

                      three scales. The yellow and blue figure is the basic one. I put it just to consider the scales ❗

                      http://i274.photobucket.com/albums/jj245/Spendauballet/SketchUp/ThickLabel_XD_450.jpg

                      And now I get it Myself

                      http://i274.photobucket.com/albums/jj245/Spendauballet/SketchUp/ThickLabel_XE_450.jpg

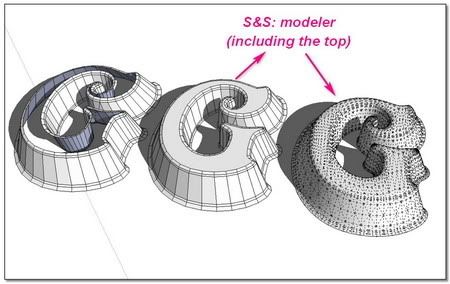
                      I come back on my previous post. No need to subdivide independantly the top of the letter. Just integer it in S&S modeler's process 💭

                      http://i274.photobucket.com/albums/jj245/Spendauballet/SketchUp/ThickLabel_XF_450.jpg

                      simon

                      1 Reply Last reply Reply Quote 0
                      • simon le bonS Offline
                        simon le bon
                        last edited by

                        @alan fraser said:

                        I know that SU now has its own 3D text tool, but that tool is fairly basic. Don't forget the solution of choice before the built-in option (or the Smustard Ruby)
                        Elefont will automatically add a variety of bevels and chamfers that can be exported in dxf and brought into SU.
                        http://www.armanisoft.ch/webdesign/elefont/Elefont.html

                        Dear Alan,

                        I have found time to test this "Elefont" from "Ingenieurbüro" Armin Müller you were talking about.
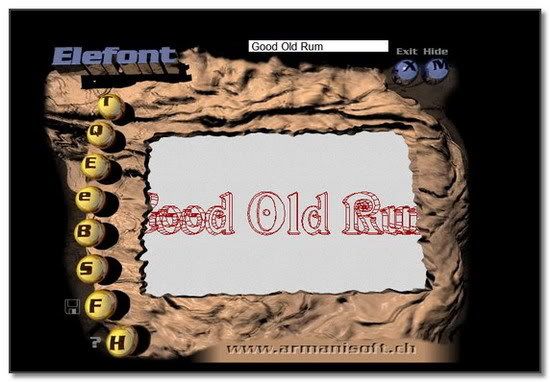
                        http://i274.photobucket.com/albums/jj245/Spendauballet/SketchUp/Elephantroselunette.jpg

                        http://i274.photobucket.com/albums/jj245/Spendauballet/SketchUp/Elefont_001_550.jpg

                        This last 1.4 version dated from 7July 1998 begin to be may be a little outdated 😕 . It is not too much handy because its display is very small and the previsu doesn't give a great control.
                        But in making small tries, we can do number of interesting variations. At the end the saving format in DXF is perfect to import in SketchUp. 👍
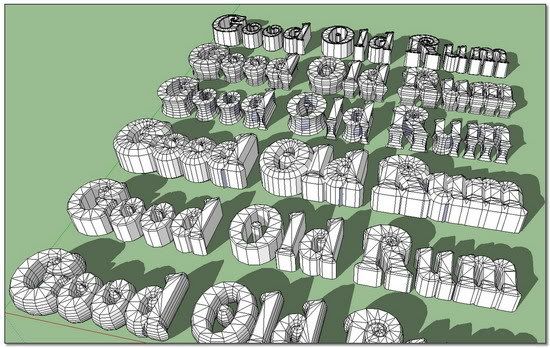
                        http://i274.photobucket.com/albums/jj245/Spendauballet/SketchUp/Elefont_002_550.jpg


                        These subdivided letter shapes are perfect to use directly with S&S , avoiding the previous Offset, Scale and Skin stages 👍
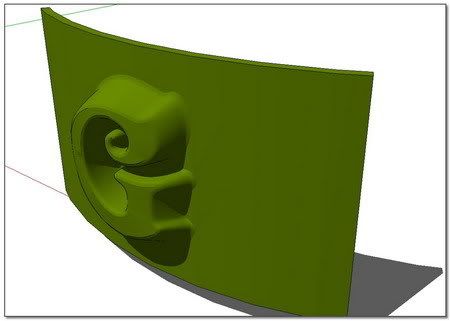
                        I have tried to reach my goal: the molted letter.
                        In taking the letter at this stage, making a real flare isn't possible (?) anymore. So if we satisfied with the approximative Scaled flare, it is OK.
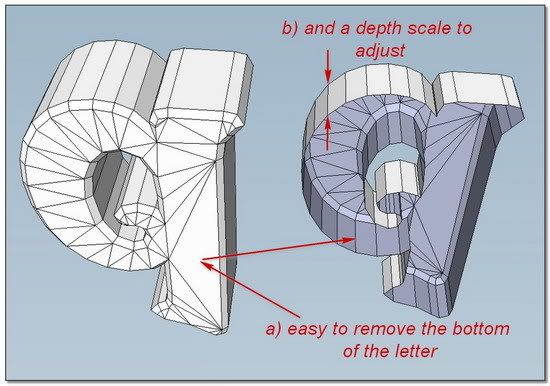
                        http://i274.photobucket.com/albums/jj245/Spendauballet/SketchUp/Elefont_003_550.jpg


                        http://i274.photobucket.com/albums/jj245/Spendauballet/SketchUp/Elefont_004_550.jpg


                        http://i274.photobucket.com/albums/jj245/Spendauballet/SketchUp/Elefont_005_550.jpg

                        😉simon

                        1 Reply Last reply Reply Quote 0
                        • 1
                        • 2
                        • 2 / 2
                        • First post
                          Last post
                        Buy SketchPlus
                        Buy SUbD
                        Buy WrapR
                        Buy eBook
                        Buy Modelur
                        Buy Vertex Tools
                        Buy SketchCuisine
                        Buy FormFonts

                        Advertisement