NprTools
-
I had time to play around with it. Here's the current results along with some comments and questions;
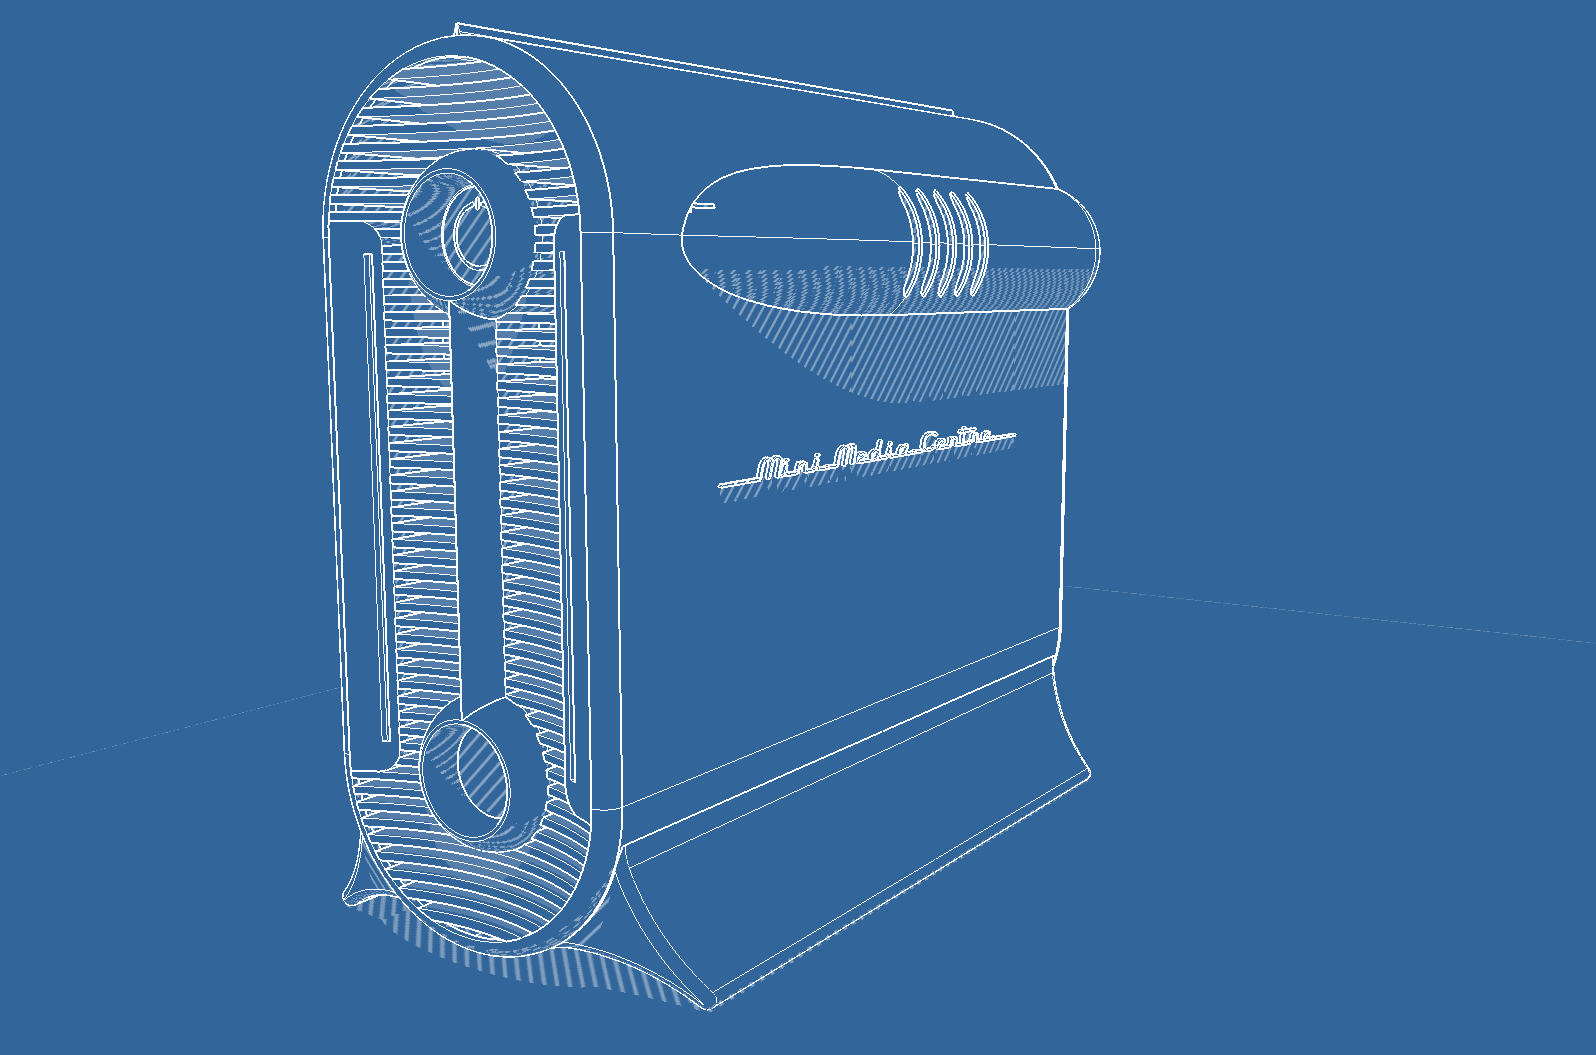
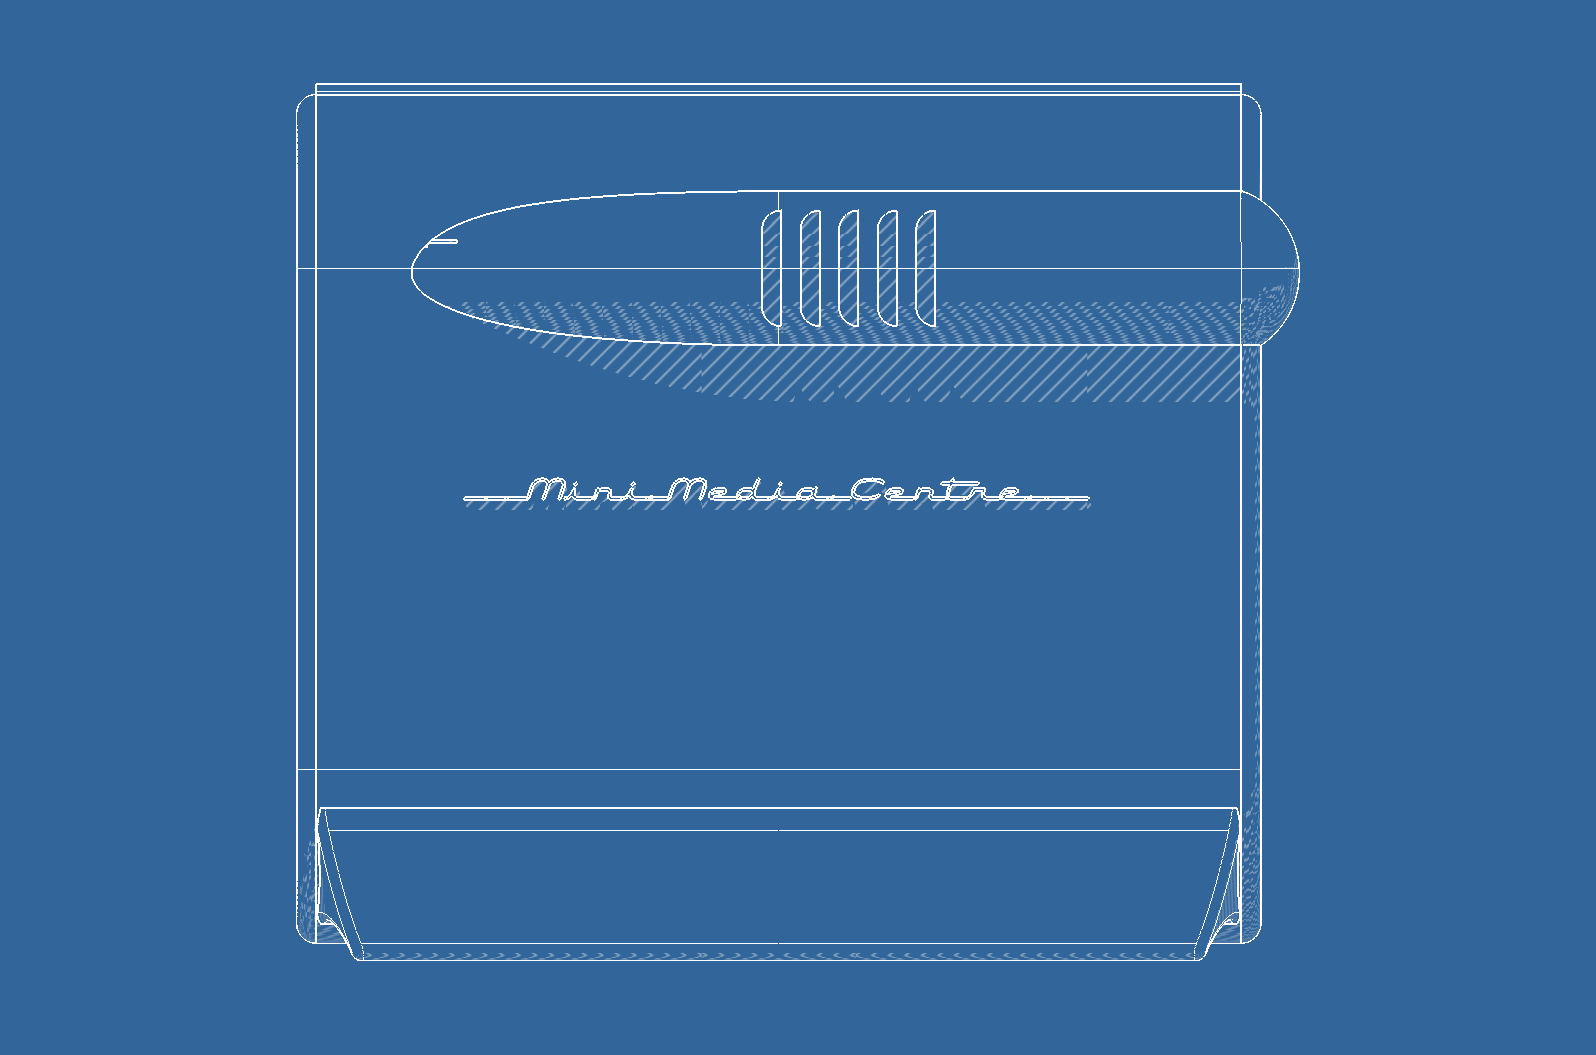

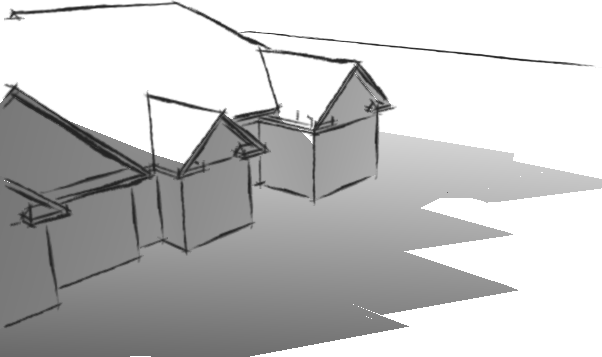
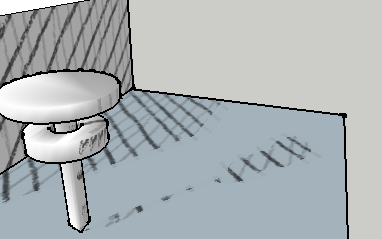
Curves surfaces seem be make shadows that doesn't fit seamlessly together. I understand that could be difficult, but is there possible to improve it? What I find odd is when shadow cast from a curved surface onto a flat surface isn't seamless, as you can see in the side view for instance.
I've set the shadow to 100% opacity, and my custom shadow texture (very nice feature btw) is 100% black. Yet, it looks a bit washed out.
Is there a way to set the output resolution?
How do you save the shadow images? When I click Ok, Picasa opens up and display the image. But I don't know how to save it. (So face I've right-clicked and chosen copy from Picasa preview.
What control the size of the shadow pattern when you use a custom material? I doesn't seem to change when I set the Pattern Scale factor, nor when I set the texture's width/height. (That is, unless I though both properties, then something changes. But I don't know which one is the determining factor.)

-
@unknownuser said:
At 07:33 AM 5/15/2009
Hi Al,
Really neat stuff, wish I had more hours to try these. Question - in a bit of reverse logic, do you have anything to make Revit images "Sketchy"?
Thanks.We have ported our SketchUp rendering engine - IRender nXt - to Revit. But we have not added any Sketchy Stuff to it yet.
We plan to add some of he Sketchy Shadow stuff to the nXt engine, and when we do it will work for Revit.
SketchUp has 3 "Sketchy" things
- Sketchy Edges
- Sketchy Patterns, and
- Sketchy Watermarks.
We added Sketchy Shadows because SketchUp did not do it.
However, adding Sketchy stuff to the nXt renderer will let us apply similar shadow techniques to interior lighting.
We plan to add Sketchy Watermarks to the nXt renderer. (This makes images Sketchy by applying a watermark to the entire image)
And the Sketchy Patterns can already be used with the nXt renderer already.
It is more of a challenge for us to figure out how to do Sketchy Edges in the rendering engine. But we do plan to take a look at it, and then might be able to add it to Revit.
Al
Al Hart

IRender nXt from Render Plus -
Al, Congratulations on the release of NPR Tools. This is a wonderful and useful addtion to the SketchUp Modeling arsenal. I can't wait to see all the great looking output that I am expecting, using this great tool.
-
@thomthom said:
I had time to play around with it. Here's the current results along with some comments and questions;
@unknownuser said:
Curves surfaces seem be make shadows that doesn't fit seamlessly together. I understand that could be difficult, but is there possible to improve it? What I find odd is when shadow cast from a curved surface onto a flat surface isn't seamless, as you can see in the side view for instance.
Take a look at the folder: My Documents\NprTools\TemporaryImages - that is where we store the temporary images which are later combined for the final image. We make the shadow pattern by placing the shadow texture on every surface in your model. This causes the pattern itself look strange on some surfaces.
We did this because some people want the shadow pattern to alter based on the plane of the surface where the shadow appears.
We plan to offer another option where the shadow mask is applied as a watermark. In this case the patter will be the same wherever it is cast, and will not get smaller in the distance. But it will make more regular shadows for some applications.
@unknownuser said:
I've set the shadow to 100% opacity, and my custom shadow texture (very nice feature btw) is 100% black. Yet, it looks a bit washed out.
The angle patterns which we provide are already a bit grey. So the shadow can't get much darker than the pattern used to create it.
I do run the patterns through a "histogram filter" to darken them, but if you want even darker shadows, you may need to create darker patterns.
@unknownuser said:
Is there a way to set the output resolution?
Currently we use the resolution of the SketchUp screen.
We could add a multiplication factor (1.5X, 2X, etc.), or specify a resolution like SketchUp does when saving 2D images. (We use the SketchUp 2D image saving routine for saving the images which we later process.)
@unknownuser said:
How do you save the shadow images? When I click Ok, Picasa opens up and display the image. But I don't know how to save it. (So face I've right-clicked and chosen copy from Picasa preview.
The images are all saved in My Documents/NprTools before your image editing software loads them.
There are several sub folders: SkethyShadows, SoftShadows, SoftEdges, etc.
@unknownuser said:
What control the size of the shadow pattern when you use a custom material? I doesn't seem to change when I set the Pattern Scale factor, nor when I set the texture's width/height. (That is, unless I though both properties, then something changes. But I don't know which one is the determining factor.)
When you use an existing SketchUp material for the pattern, we use the size defined in the SketchUp material editor.
I will try to override this with the scale factor. Bot for now you need to change the SketchUp Material size yourself.
Al Hart
IRender nXt from Render Plus -
@sorgesu said:
Al, Congratulations on the release of NPR Tools. This is a wonderful and useful addtion to the SketchUp Modeling arsenal. I can't wait to see all the great looking output that I am expecting, using this great tool.
Thanks Susan,
I will be very interested in your ideas when you get a chance to play with it.
One thing I want to add is the ability to make shadows darker when they are further from the eye.
Something like this: (Image NOT created with Sketchy Shadows)
The shadows are not really darker further from the eye, but I could alter the cross hatch based on the distance from the eye.
I am thinking that Piranesi EPX format saves the Z-depth of the pixels into the image. Are you aware of any software which would let me access or read the EPX file without using Piranesi itself?
Al Hart
IRender nXt from Render Plus -
No Al, I can't think of anything like that. But there is a neat demonstration somewhere where you can use the "fog" setting within SketchUp to accomplish the same sort of thing. Something in "black" that conveys the depth by degrees of gray in the alpha channel
That is essentially how it works in Piranesi. If you were to look at the "depth channel" ,which you can indeed do, for any image imported from SketchUp, it is displayed as degrees of Grey ( Gray?) and I believe that is how it is recognized in Piranesi as having differing depth.
-
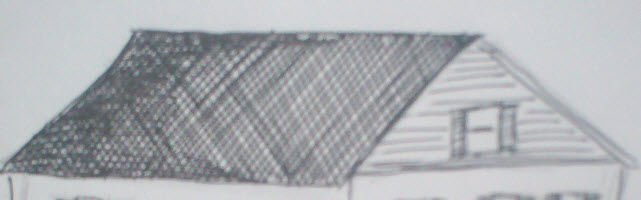
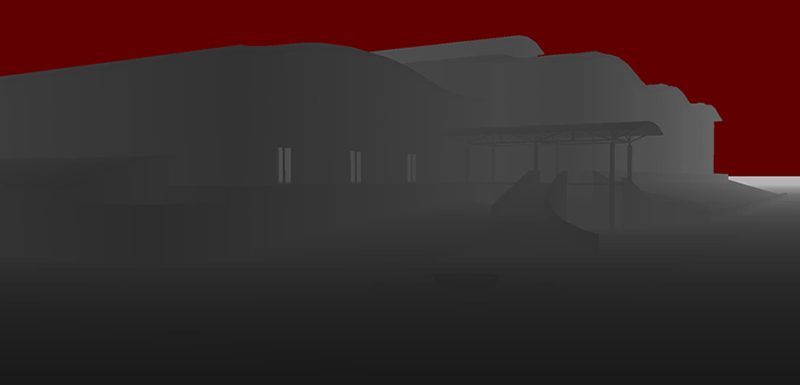
Al, below are 2 images. the first is using a black "Fog" in SketchUp on a Hidden line drawing. I should probably have used Monochrome mode with no edges showing instead. But you get the idea. the next one is the same view within Piranesi's Depth Chanel. The background red is the "infinity" of the Sky.[attachment=1]gapFOG.jpg[/attachment

-
@sorgesu said:
No Al, I can't think of anything like that. But there is a neat demonstration somewhere where you can use the "fog" setting within SketchUp to accomplish the same sort of thing. Something in "black" that conveys the depth by degrees of gray in the alpha channel.
Great idea - Fog - This is a shadow image with fog turned on:
I can treat the "lighter" shadows as being further away and make them darker or use more hatching.
Also, the fog makes the roof darker as it is further away.
(This is difficult for me to see - but a paint program verifies it)
I can do two things:
-
Apply "fog" darkening to only a specific material (so you can apply a dummy material to the roof and darken only the roof)
-
Use this "fog" darkening to apply cross hatch to the roof, going from single lines, to cross hatch lines as the roof gets further away.
Stay tuned...
Al Hart
IRender nXt from Render Plus -
-
One more thing, in the thread where I posted the pictures; the view from the top - there's shadows missing on the ground.
-
@thomthom said:
One more thing, in the thread where I posted the pictures; the view from the top - there's shadows missing on the ground.
(Excuse all these long answers - but I want to give complete answers to questions so I can use this as a basis for how to improve the documentation)
For the Pattern Sketchy Shadows (as opposed to the watermark shadows which will come later), I cannot put them on the ground. I make the patters by applying the pattern material to the entire SketchUp model and then saving an image, and these is no easy way to place the materials on the ground.
So you will have to draw a face on the ground large enough to hold all the shadows.
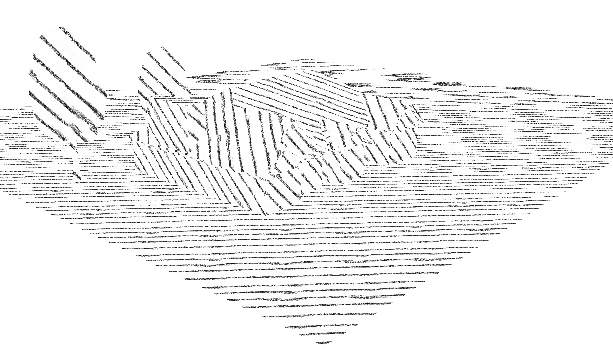
(Also in this histogram filtered version of the shadow patterns you can see that the texture is not fully dark. So the shadows wil not be any darker than this pattern.)
Al Hart
IRender nXt from Render Plus -
@al hart said:
So you will have to draw a face on the ground large enough to hold all the shadows.
That's the thing; there is a ground plane face there. You can see in the other examples there's shadows there. Just not in the top view.
-
@thomthom said:
@al hart said:
So you will have to draw a face on the ground large enough to hold all the shadows.
That's the thing; there is a ground plane face there. You can see in the other examples there's shadows there. Just not in the top view.
I see some very slight things on ground on the right of the top view. (It is very difficult to look at images of other people models and know what is missing)
Reprocess the top view image, and look in the TemporaryImages folder.
Compare the shadow_histogram.png file and the histogram_pattern.png file (or upload them here) to see if there is a clue to what might be missing. (These are the images which are merged with the Base.ong image to get the final image.
Al Hart
IRender nXt from Render Plus -
@sorgesu said:
No Al, I can't think of anything like that. But there is a neat demonstration somewhere where you can use the "fog" setting within SketchUp to accomplish the same sort of thing. Something in "black" that conveys the depth by degrees of gray in the alpha channel
That is essentially how it works in Piranesi. If you were to look at the "depth channel" ,which you can indeed do, for any image imported from SketchUp, it is displayed as degrees of Grey ( Gray?) and I believe that is how it is recognized in Piranesi as having differing depth.
It turns out that Piranesi uses a TIFF format format with extra channels added for Z-depth and material ID. I may be able to use it directly, or I may be able to export the same information from SketchUp. I would be easier to have the actual Z-data, rather than having to reverse-engineer it from fog colors.
Al Hart
IRender nXt from Render Plus -
Yes, that's right. I didn't realize that that would have been helpful info, sorry.
-
@sorgesu said:
Yes, that's right. I didn't realize that that would have been helpful info, sorry.
Not really very helpful, because I can't find any software anywhere that already reads it. Still, it would be nice to get the "exact" z-depths rather than having to guess them from fog.
Al Hart
IRender nXt from Render Plus -
What about the .eps format? I thought that Piranesi was using that format? But I know very little about it really.
EDIT Hmm, I see that have their own epx. I must have got the last letter confused in my head.
Chris
-
Ya did, Chris. It is epx which is just a Tiff with 2 extra channels. I can't think how to unravel that info because epix is proprietary and I somehow doubt they would want to share the data therein
-
I added a couple of handy things today (But you won't get them until Monday)
Mask Soft Shadows
I added a "Mask soft shadows to the shape of the original shadow" option.
This lets you you very broad soft shadows, but not let them overwhelm the size if the shadow itself.
Original shadows from ShetchUp

Soft Shadows over a wide area.
(I used just a few iterations so you could see the effect better.
Soft Shadows masked to original shadow shape.
Image Resolution

This options lets you set the resolution to be larger than the SketchUp screen.
(We still are limited to 3,000 pixels or so whatever the SketchUp Wxport 2D limit is)
(Also, be aware, it can take a long time to save hundreds of shadows images for high resolution soft shadows)Al Hart
IRender nXt from Render Plus -
In playing around with NprTools, I ran into an interesting philosophical question.
In this image, is the wall on the left in a shadow?
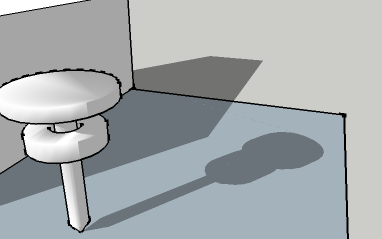
One obvious answer is YES - since the sun is not shining on it.
The other answer might me NO - since SketchUp does not show it in the same intensity as the shadows on the ground.
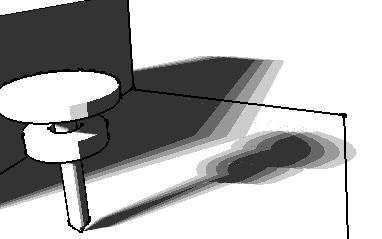
If it is in shadow, then this Sketchy Shadow image (the way it works now), is correct:
However, you might prefer to draw the Sketchy Shadows only where the shadows appear on the ground.
One other complication is that if you turn shadows off in SketchUp, the wall on the left does not change.
So you could argue that the shadows don't really effect it. (This might be the way for me to solve the problem - if we don't like the Sketchy Lines on the wall - by comparing the image with the sun on and with the sun off to find the shadows. Currently, I use a SketchUp hidden-line image to determine where the shadows are.
Any thoughts?
Al Hart
IRender nXt from Render Plus -
There have been places in some of the images that I've seen with the sketchy shadows on them and I've thought - that should not have a shadow like that on it. And then I realize it is lightly shaded in SU, so it gets the shadow effect. I think that often I would prefer that the wall, in this case, did not recieve such intense sketchy shadows.
Thats my thoughts,
Chris
Hello! It looks like you're interested in this conversation, but you don't have an account yet.
Getting fed up of having to scroll through the same posts each visit? When you register for an account, you'll always come back to exactly where you were before, and choose to be notified of new replies (either via email, or push notification). You'll also be able to save bookmarks and upvote posts to show your appreciation to other community members.
With your input, this post could be even better 💗
Register Login


Advertisement