You could be right. I tried scaling down your working version and it quit working.
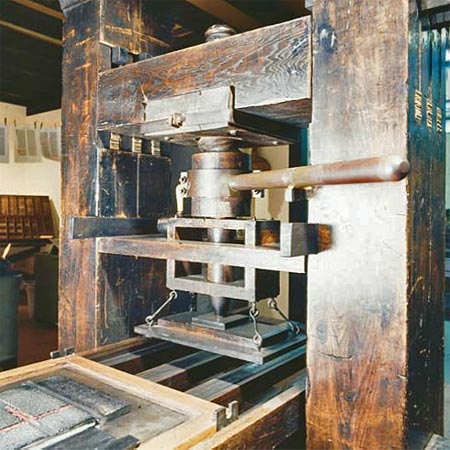
There's another problem as well: as you can see in the photo above, the "nut" part is stationary in space while the "bolt" part must both turn and slide up and down.
You could be right. I tried scaling down your working version and it quit working.
There's another problem as well: as you can see in the photo above, the "nut" part is stationary in space while the "bolt" part must both turn and slide up and down.
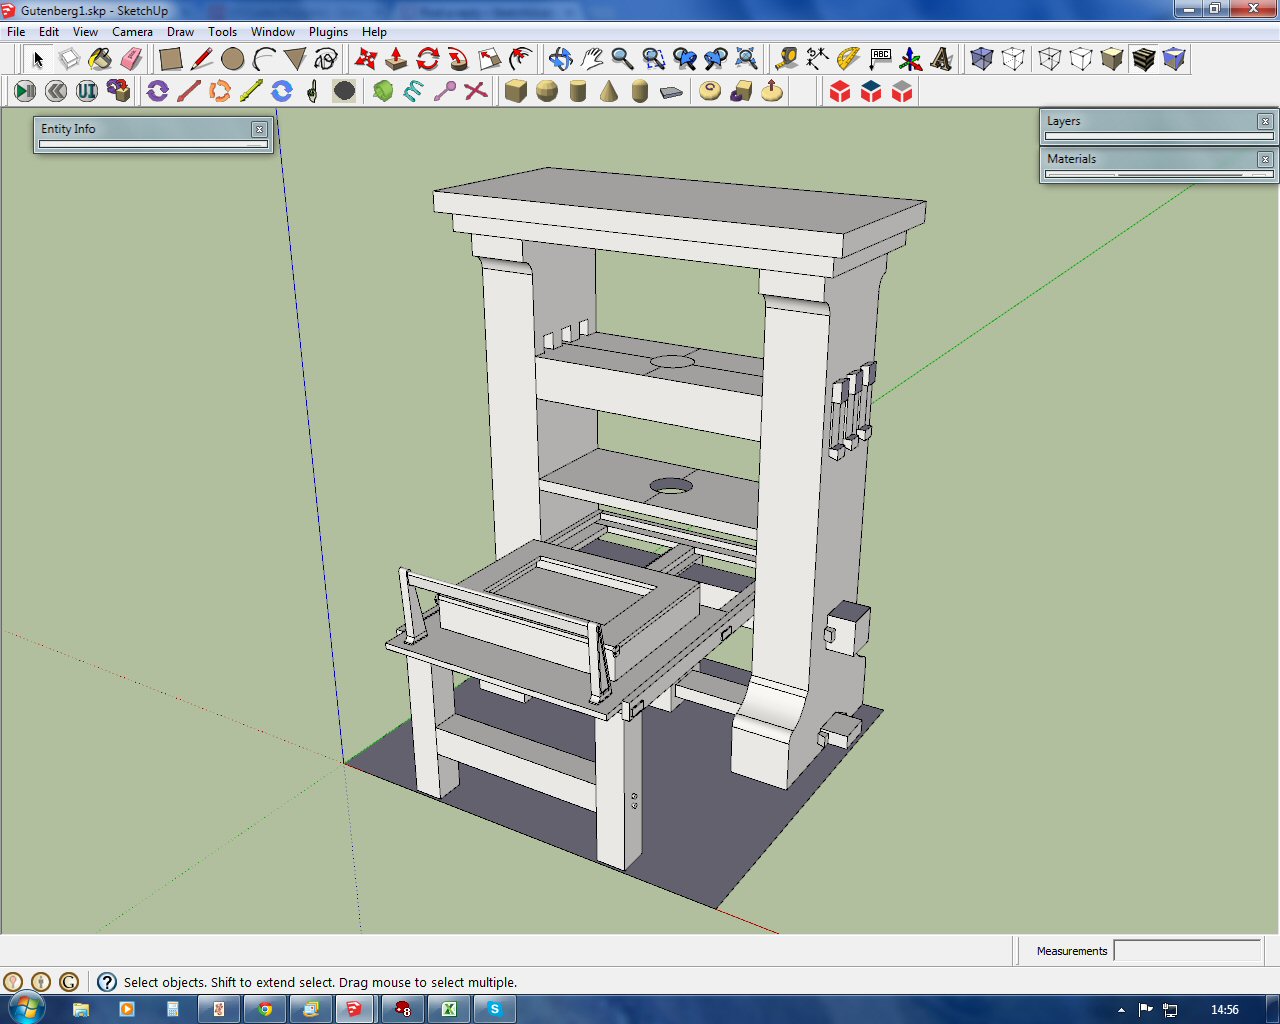
The printing press is still a work-in-progress, but here's what it looks like right now:
Thanks, MPTAK. That's fantastic. I downloaded your model and can easily see how it works. I'll take you Mechanism and build the structure around it. When the whole printing press is finished, I'll be sure to give you a credit for your help.
Thanks again,
Tom
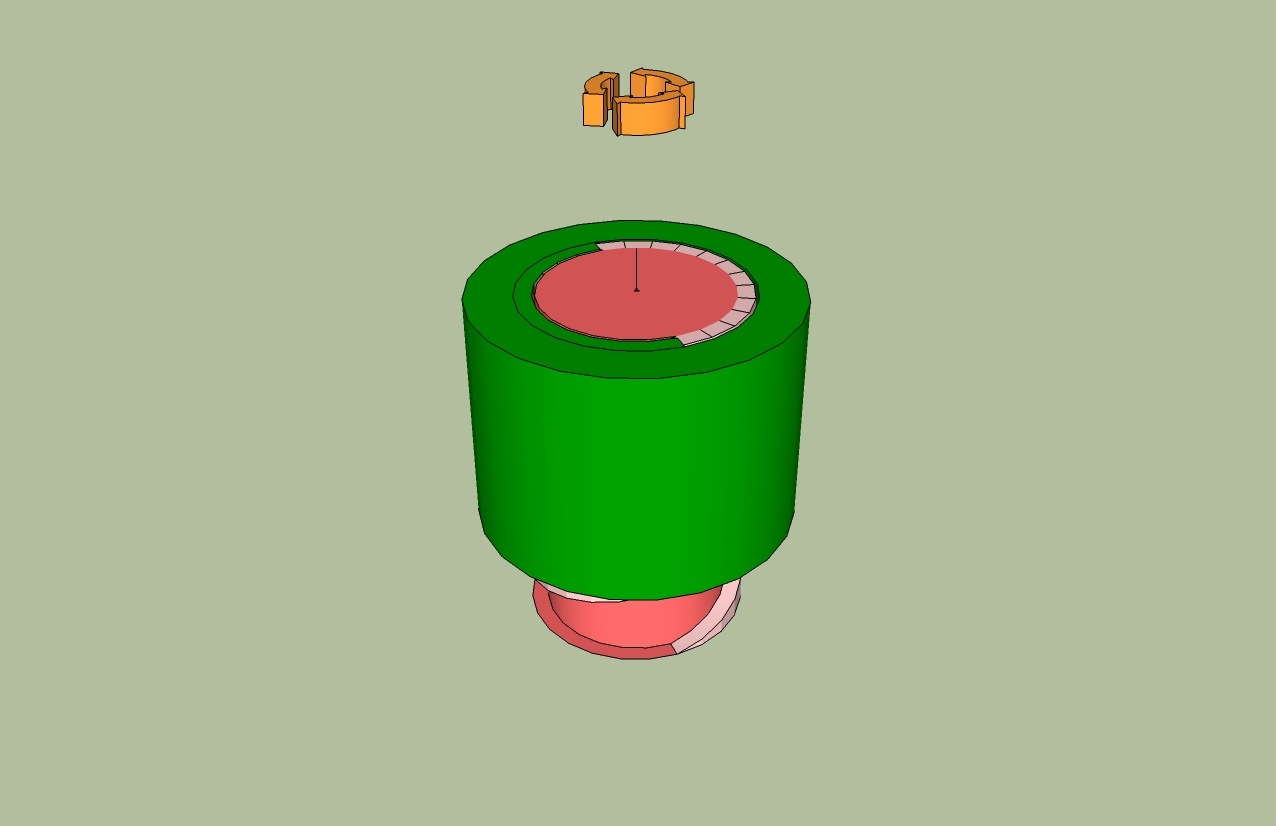
I'm going a little crazy with my screw mechanism. The model as it stands now is attached. The green barrel should screw down the red screw, but, while the two can spin around each other, the screw surfaces don't interact/collide.
Any ideas would be greatly appreciated.
Thanks,
Tom
Does anybody know if someone has made a working model of a nut and bolt using SP?
I'm working on a model of replica Gutenberg printing press and the dynamic part is the large wooden screw assembly that puts pressure on the paper against the inked type. So the screw mechanism is critical. Nobody knows exactly what the press looked like, but it was based on a wine/cider press that was already in existence. It probably looked something like this:

Thanks for any help,
Tom
@mptak said:
Cool beans! I'm glad to see that others are struggling with all this and sticking with Sketchy Physics.
I'm by far not an expert but have picked up a thing or two. Your model looks great but I fear that the base cylinder around which your screw is attached may not be being read as a cylinder. It tends to cease a bit on me and I would guess that the large wheel is correctly modeled. Once I get it spinning I'll try to do some of the movie capture I have been playing with and share it back to you. Mr. K provides a great script to enable good capture.
I'll look forward to it!!
WoodGear1c.skpOK, I've made both the worm and gear into collections of individual components each of which is configured as "convexhull". When I run the simulation, they now seem to interact but not as gears. The worm shaft turns as expected, but the gear just nudges down a fraction and doesn't turn on its axis.
By the way, here's a picture of the original and the model:
And here's the model as it stands now:WoodGear1c.skp
Thanks, MPTAK,
I'll give that a try this afternoon. I've already done this with the gear after reading this: http://support.ponoko.com/entries/21249896-Gears-and-Joints-with-SketchUp-Sketchy-Physics.
I can't take credit for the design, I'm afraid. I saw this photo on Wikipedia:
http://en.wikipedia.org/wiki/File:CNAM-IMG_0602.jpg
Tom
[/img]WoodGear1dtemp.skp
Hi,
I think I've missed something fundamental. I've built a model of wooden worm gear assembly. The worm has an attached motor and the worm gear has a hinge. Both of them turn on the correct axes and the worm works with the motor correctly. However, when I run the simulation, the worm passes through the gear teeth as if they weren't there. The two joints are connected gear-to-gear.
I'd appreciate any help I can get.
Tom
Nick,
Why do you want to "draw" the windows?
If you build the wall with the appropriate curvature, You can "paint" a texture of the windows onto your curved surface. This will save a lot of faces and would be pretty fast to do if you've already got a photo of the wall.
Tom
I'm glad it all worked out. I've deleted the model in my section of 3DW.
I like the models together.
Tom
Hi,
OK, here's what I did: I downloaded you latest model from 3DW. Then I went into the Model Info window and chose the Location page. I checked the box "Use Georeferencing". Then I uploaded the model to 3DW at http://sketchup.google.com/3dwarehouse/details?mid=7c2cdad3f08176b63b1f82950a151c08
It looks like it worked because it shows correctly on the Map option in 3DW.
I called it Temp and I'll leave it up for a couple of days then I'll delete it from 3DW
tom
Ace,
I downloaded the model from 3DW.
First, there is no Terrain or Snapshot layer in the model. So, it won't be geo-located when you upload it to 3DW. You have to keep the Terrain layer in the model even though it doesn't show in 3DW.
Second, uncheck the edges. You only need them when you're building the model. They look strange when viewing the finished model. Click View>Edge Style and remove the check mark next to Display Edges.
Third,Use the Soften/Smoothe Edges tool on the new terrain group. Right click the group, the chose Soften/Smooth Edges from the context menu. Check the box for Soften Coplaner and set the slider at something over 130 Degrees.
Fourth, go to 3DW and delete the model. Now with the terrain layer in the model, export it again to 3DW.
That should do it. Nice building, by the way. Porto Alegre looks like a niice town.
Tom
Ace,
In step 16. in my answer, to sample an image, hold the Alt key with the Paint tool and click on the image to be sampled.
Tom
Ace,
When you upload your model to 3DW, include your new bit of Sandbox terrain. When you look at it in GE, you'll see that it all matches up and that the colors are correct.
Here's what I would do with you model:
Hope this helps,
Tom
Here's one with the Sandbox terrain under it. The only thing needed is the color photo of the ground from GE instead of the B&W that I used.
Tom
OK, I found the model and I've downloaded it. I'll see what I can do.
tom
Why not use the Sandbox tools in SU to build up the terrain to fit the bottom of the model. From the screen shot you sent, it looks like this wouldn't be too hard to do.
If you downloaded the color version of the scene from GE, you can use this to paint the new terrain to exactly match the GE image.
I find that I often have to do this to get the models to look right. The downside is that Sandbox creates a lot of faces. So, make it pretty simple to begin with. You can also delete parts of the Sandbox terrain that are covered by the bulding itself to save faces. You do this by editing the Sandbox group.
If you post the .skp file, I'd be happy to have a look at it.
Tom