Changing the g.entities.to_a at the end of the code statement to just g worked for me without a bug splat
g.entities.intersect_with(false,g.transformation,g.entities,g.transformation,false,g)
Changing the g.entities.to_a at the end of the code statement to just g worked for me without a bug splat
g.entities.intersect_with(false,g.transformation,g.entities,g.transformation,false,g)
if !file_loaded?(File.basename(__FILE__))
 sub=UI.menu("Plugins").add_submenu("My Tools")
 sub.add_item('My First Tool')   {Sketchup.active_model.select_tool MyFirstTool.new } #for class
 sub.add_item('My Second Tool')   {MyTools.MySecondTool} #for module
 file_loaded(File.basename(__FILE__))
end
You appear to be trying to intersect a group with itself.
Having written a rather primitive gear plugin of my own, I was very interested in seeing how you did yours. Very nice I must say. I had no problem loading and running the plugin. My only question/request is, given the examples in the screenshot, what parameter values did you enter to achieve the various gears?
@jorge2011 said:
hola. A question.
There is a plugin, simple and easy, allowing save componenes or groups in different positions and different scenes?
Something like this?
[flash=800,600:30l6ffb1]http://www.youtube.com/v/MfVDs_zvhfA[/flash:30l6ffb1]
U, it is a little more than just changing the labels in the inputbox. Allowing a variable number of steps to/from the landing of U-shape stairs would require extensive re-write.
@unknownuser said:
Please explain each input element, for who has no specialized terms knowledge
For example, what is Risers2Landing? or Gap Run2Run, Step Depth, Riser Height,Tread Depth and so on...
Thank you very much.
Risers2Landing is the number of steps or risers going up to the landing of a U-shape stair.
Gap Run2Run is the space between the sets of stairs in a U-shape stair.
Step Depth is the front to back dimension of each step.
Riser Height is the vertical distance between each step.
Tread Depth is the thickness of the individual steps.
To prevent the face copy from sticking to existing geometry, I have made it a group and added code to rotate the copy to align with x and y axes.
mod = Sketchup.active_model
ent = mod.entities
sel = mod.selection
grp = ent.add_group
face=sel.first
norm=face.normal
axis=norm.axes[0];rp=nil
ang=norm.angle_between Z_AXIS
pts=face.vertices.collect{|v| v.position}
mp=face.bounds.min;md=1e6;
last=pts.length-1
0.upto(last) do |i|
 dis=mp.distance(pts[i])
 (md=dis;rp=pts[i]) if dis<md
end
tr=Geom;;Transformation.rotation(rp,axis,-ang)
pts.each{|p| p.transform! tr}
tr=Geom;;Transformation.translation([0,0,-rp.z])
pts.each{|p| p.transform! tr}
face=grp.entities.add_face(pts)
face.reverse! if face.normal.z < 0.0
#d1=pts[0].distance(pts[1]);d2=pts[1].distance(pts[2])
#d1>=d2 ? (w=d1;h=d2) ; (w=d2;h=d1)
#UI.messagebox "Face dimensions are #{w} X #{h}"
ang=norm.angle_between Y_AXIS
ang = -ang if norm.x < 0.0
ang = ang + 180.degrees if norm.y > 0.0
tr=Geom;;Transformation.rotation(rp,Z_AXIS,ang)
grp.transform! tr
Yes the plugin would have to be run for each rib. There is no way to tell which rib an individual guide point belongs to without selecting them in groups.
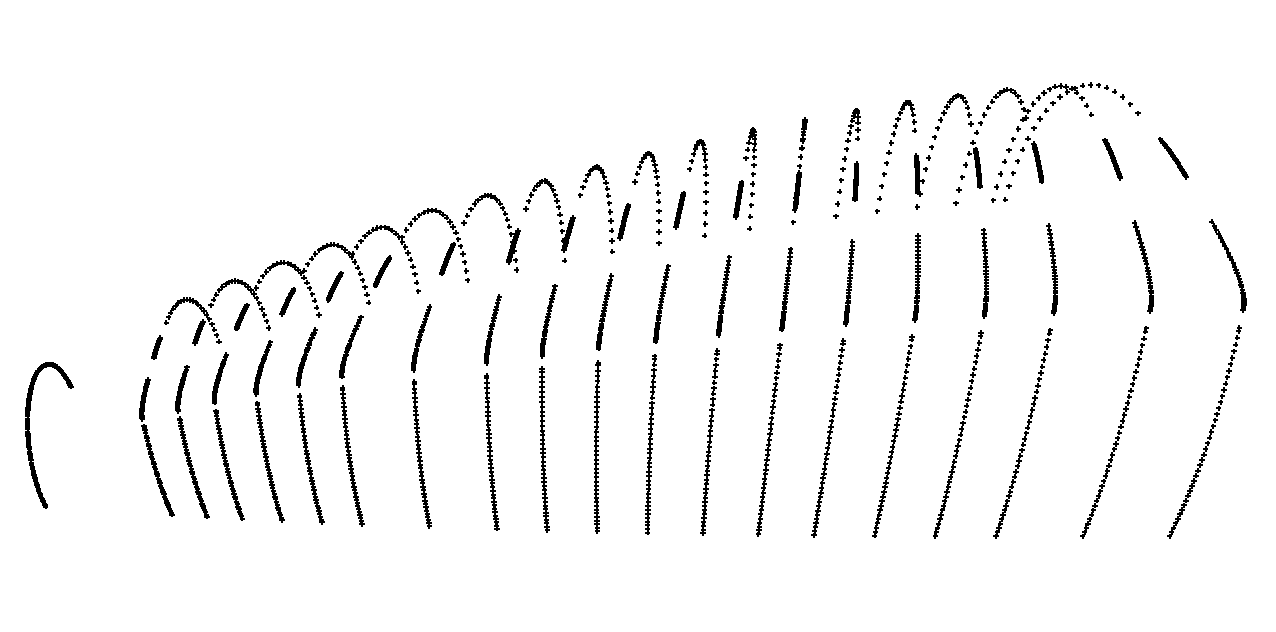 This is a screen shot of the Bob's Ribs model that I used to test the plugin.
Bob's request was
@unknownuser said:
I have a series of guide points that form the contour of an object. I want to connect the guide points to form "ribs" so that I can use Connect Edges by Loft.
If I may assume that we are dealing strictly with rectangles, then the dimensions can be obtain by getting the distances between adjacent corners. Just add this to the previous code.
d1=pts[0].distance(pts[1]);d2=pts[1].distance(pts[2])
d1>=d2 ? (w=d1;h=d2) ; (w=d2;h=d1)
UI.messagebox "Face dimensions are #{w} X #{h}"
As promised, a new and improved version of Bobs_Ribs.rb. As before, pre-select the guide points defining the "rib". The rib is created as a group and placed on layer "Ribs".
6/26/2012 Plugin removed and posted in its own thread.
Connect Guide Points it is. The plugin has been formally posted.
In response to a request "Connect Guide Points"
http://forums.sketchucation.com/viewtopic.php?f=323&t=46163
Pre-select the guide points that represent a single profile or cross-section of an object, execute the plugin and choose to "Close the loop" if desired. The plugin sorts the points based on proximity to each other and un-evenly spaced and/or convoluted shape may not process properly.
Bob, I used the attached plugin to connect the guide points to create the "ribs" one at a time. Pre-select the guide points that define the rib and then run the plugin. The rib is grouped and placed on layer "Ribs".
The plugin has been removed due to flawed logic which severely limited its usefullness.
@unknownuser said:
Is there a utility to replace the sharp angular bends on lines
You are welcome to try my fillet3d plugin which you can find at my blog. You specify the radius and then pick the two intersecting edges.
@unknownuser said:
Is there a utility to draw lines based on geocoordinates (latitude and longitude, or lat, long and elevation)?
Not that I can find but would not be that difficult to create a plugin to either read from a file or interactive input. It seems that the latlong_to_point function returns a point that is an offset from the model's geo-location which by default is the lat,long of Denver, CO.
@unknownuser said:
if a 300mm plastic pipe is the specified material, then I would like to have a 300mm radius 90 degree elbow show where the line takes a 90 degree bend.
Again this would require a special plugin. In Sketchup, you can assign attributes so this should be possible.
Bob, After further testing, I see that there is a problem with the smallest or left most rib. My point sort fails but I think I can fix that so stand by for the update.
Any problem with the grouping or layer? Keep the individual line segments or make it a curve?
Your thoughts.
Maybe after the triangulation you chould use slicer?
Are the guide points in order or randomly placed?
Could you post a sample model?