Thanks sdmitch
This indeed produces a centroid on a face.
I also need to transform the face to ground level. The reason is I will need to do some panel optimization. So I need the shapes on ground level.
Thanks sdmitch
This indeed produces a centroid on a face.
I also need to transform the face to ground level. The reason is I will need to do some panel optimization. So I need the shapes on ground level.
The face can be rotated on both x and y axis.
The key part is that rourke has centroid code but it only works on a face that is parallel to the ground.
What I want to do is transform the points of the face to ground plane, calculate the centroid and then transform the centroid back so it lays on the original face.
I have a face that can be on any plane. I need to transform it so that it is on a specific plane. Does anyone know how to do this.
In most cases the specific plane will be flat on the ground.
Here is a cross section of the 6 different cabinet construction styles. Of course there are variations within each of the styles.
The configuration is as follows:
Cabinet constructions:
I also want to mention that I've been having issues with El Capitan and cabmaker after version 1.0.16
I now have a version 1.0.21 that hopefully corrects this. If someone is interested please contact me and I will send you a share link so you can down load it from google drive.
I've completed the face frames for Sink and Standard units.
Angled, Return, Blind and Tall cabinets with face frames coming soon.
Sorry - but my microphone isn't working with my video capture software (this is after I upgraded to Windows 10).
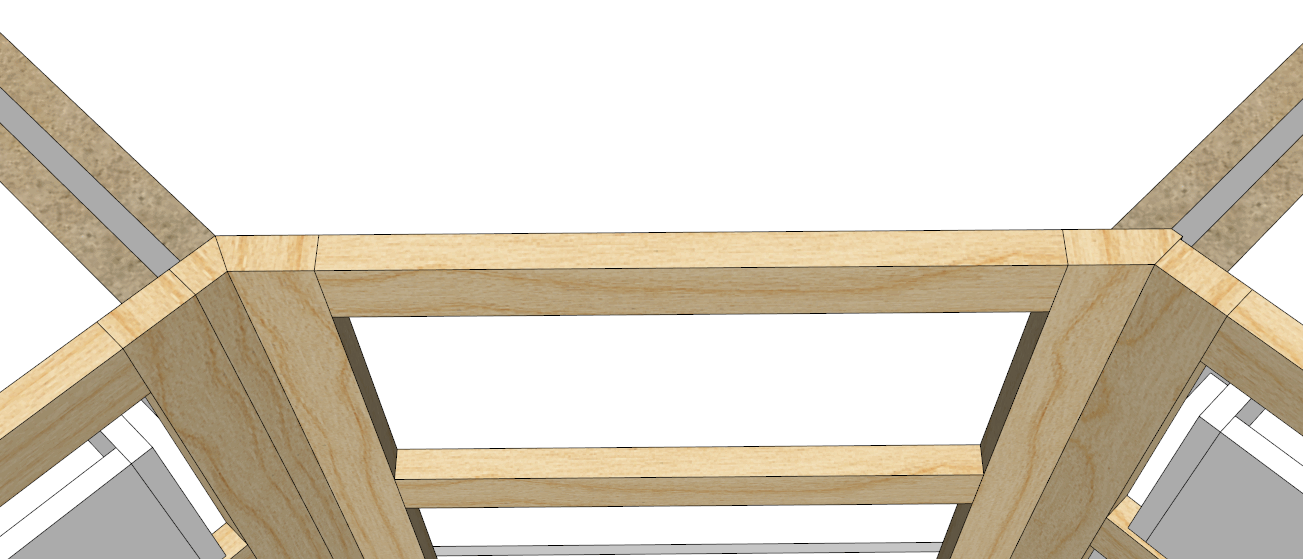
The other challenge is how to handle field joints. Here are the 2 most popular choices.
Option 1 just butt the 2 cabinets together. Have the option to reduce the size of the 2 stiles that meet so their combined width is similar to all the other stiles.
Option 2 is where the stile is skipped on 1 of the cabinets and the rails from the cabinet butt up to the stile of the other cabinet.
Here are the 2 strategies. I did not reduce the width of the stiles for option 1 (right side of corner cabinet)
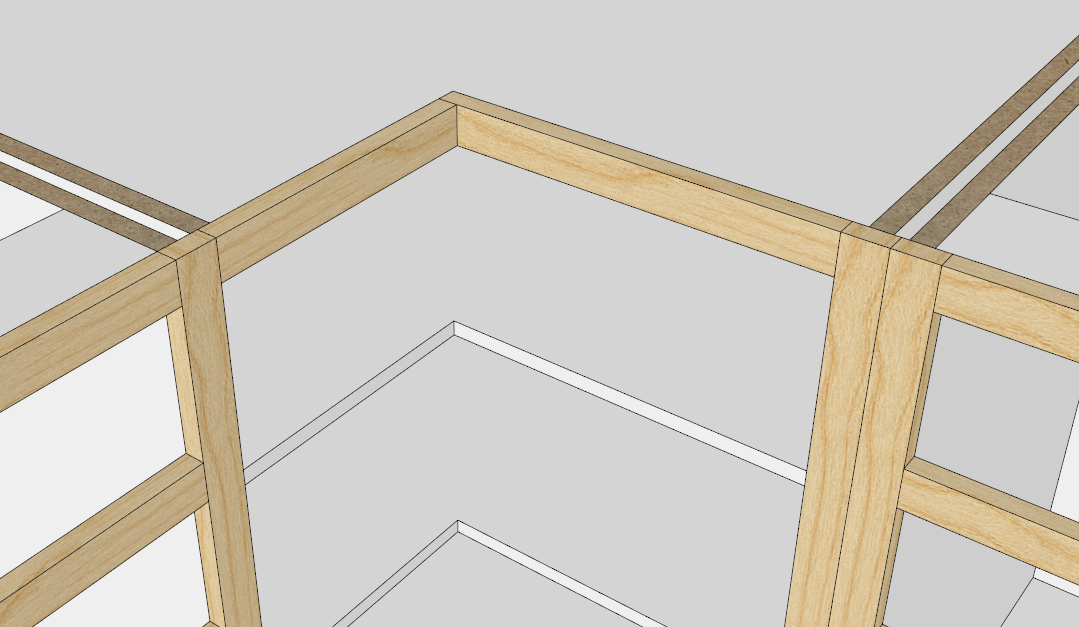
Angled cabinets are always a challenge. Here are 2 of the most popular ways to handle corner cabinets. I`d like to know from cabinet guys which method they prefer. Or if they do it yet again differently what do they suggest.
I`ve used 1 1/2" wide stiles and rails and told cabmaker to overhang stiles by 1/4". I've set up case material as 3/4" thick.
In both cases the cabinets that butt up against the corner are standard. Nothing special.
Notice the angled cabinet sides.
The left hand side panel is standard - exact same as for standard square cabinets. There are 2 mitered stiles making up the left hand side
The right hand side panel has a 45 degree miter. There is 1 mitered stile for the right hand stile. The back of the stile is also mitered to eliminate a very sharp corner.
In both strategies the stile overhangs the same amount and with a finished side could end the run of cabinets.
Another thing to consider is that some plugin authors are going to add new features for SU 2016 and forward. This has to do with the change in security.
Some unscrupulous individuals have been opening RBS files and taking code that doesn't belong to them. Trimble added a new encryption strategy to protect plugin authors IP. I'm pretty sure they realized their own sales potential over this.
At least old versions of SU will still work with old versions of the plugins (minus enhancements and bug fixes).
If you want to keep your settings then you shouldn't remove the old files.
All files that are in gkware_cabmaker\config folder are preserved between updates.
Any new files (templates) that you create are also preserved.
Versions 1.0.20 is ready for download
During trial phase you connect to the internet each time Sketchup starts and you run cab maker. Once licensed you connect to the internet once every few weeks.
If know you will be out of wifi range for a few days then run Check license before you leave. That guarantees you at least 1 week before an internet connection will be attempted.
Sliding doors are on my radar. They will come after face frames.
I found a bug. Split tops and inset doors has the stretcher (split top) rendering at the floor instead of the top.
I will fix for next version.
Either Windows has the file open (even if it is highlighted in file explorer), or Sketchup has it open in another instance.
You can always reboot Windows and then open the file in 2015 (as long as it wasn't saved in 2016 as a 2016 file)
I should mention that the labels and data entry items that are in Blue are parameters that aren't completed. Most of these will disappear with face frames.
CabMaker versions 1.0.19 is now available from my web site.
Doug,
Yes, I would appreciate the help. So you skipped Yosemite. I am going to try to get El Capitan installed on VMWare. Unfortunately I'm pretty much a newbie when it comes to Mac.
Version 1.0.19 will be available shortly
Just putting in some graphics.
I will have the tall cabinets completed today. I am finishing up with inset doors for tall cabinets.
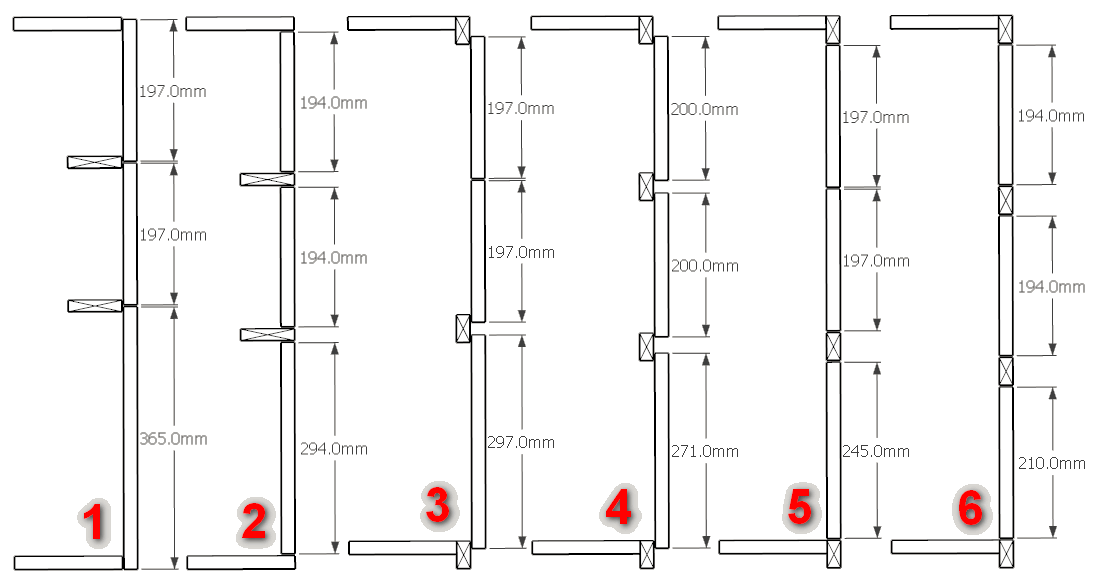
I have noticed a logical error for inset doors. With overlay doors, a drawer height of 200 mm and a door gap of 3 mm you make the actual drawer 197. With Inset doors the actual drawer should be 194 but I kept it at 197 and made the opening 203.
I think it is more intuitive if the drawer opening is 200.
I also found the drawer stretchers on overlay cabinets to be out by 1/2 door gap. I know it's a small thing but I changed it anyways.
Error Code 22 is Unknown User. Have you created a user account on my web site?
If so - then please email me from my web site and we'll take this off line as there are passwords involved.