Subdived test panel
-
Thanks to Ben for the help, I've managed to make my first panel using his technique.
This is just a test panel and not for any particular model.
- I created the shape as all angles starting with a rectangle and then creating an outline
- I then created a spine of straight line angle slightly above the flat shape
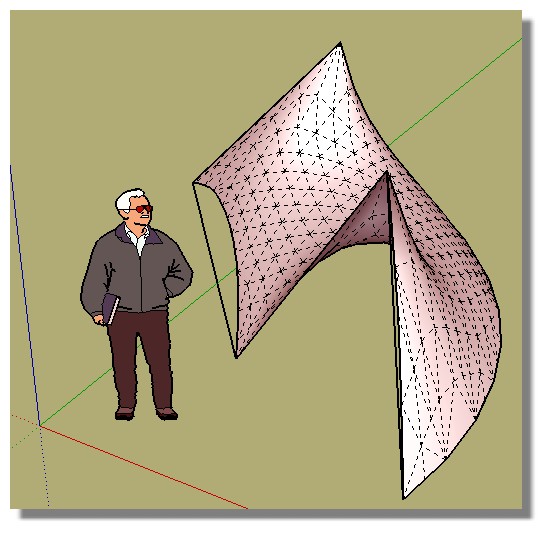
- I then connected the corner angles of the shape to the corner angles of the "spine" I had created (see 3rd pic)
- I then selected all the surfaces and DESELECTED the OUTER perimeter edges.
- I then ran Artisan subdivide once.
- I DID NOT USE ARTISAN SMOOTH, only Sub-divide
- I then selected everything again, this time also selecting the edges
- I then went to SketchUp's "Soften Edges" selecting both Smooth normals and Soften coplaner and selected a random setting on the slider until it looked good
It took me about 2 hours to figure this out but it works great! I've been trying to figure this out for years.
Thanks again Ben!
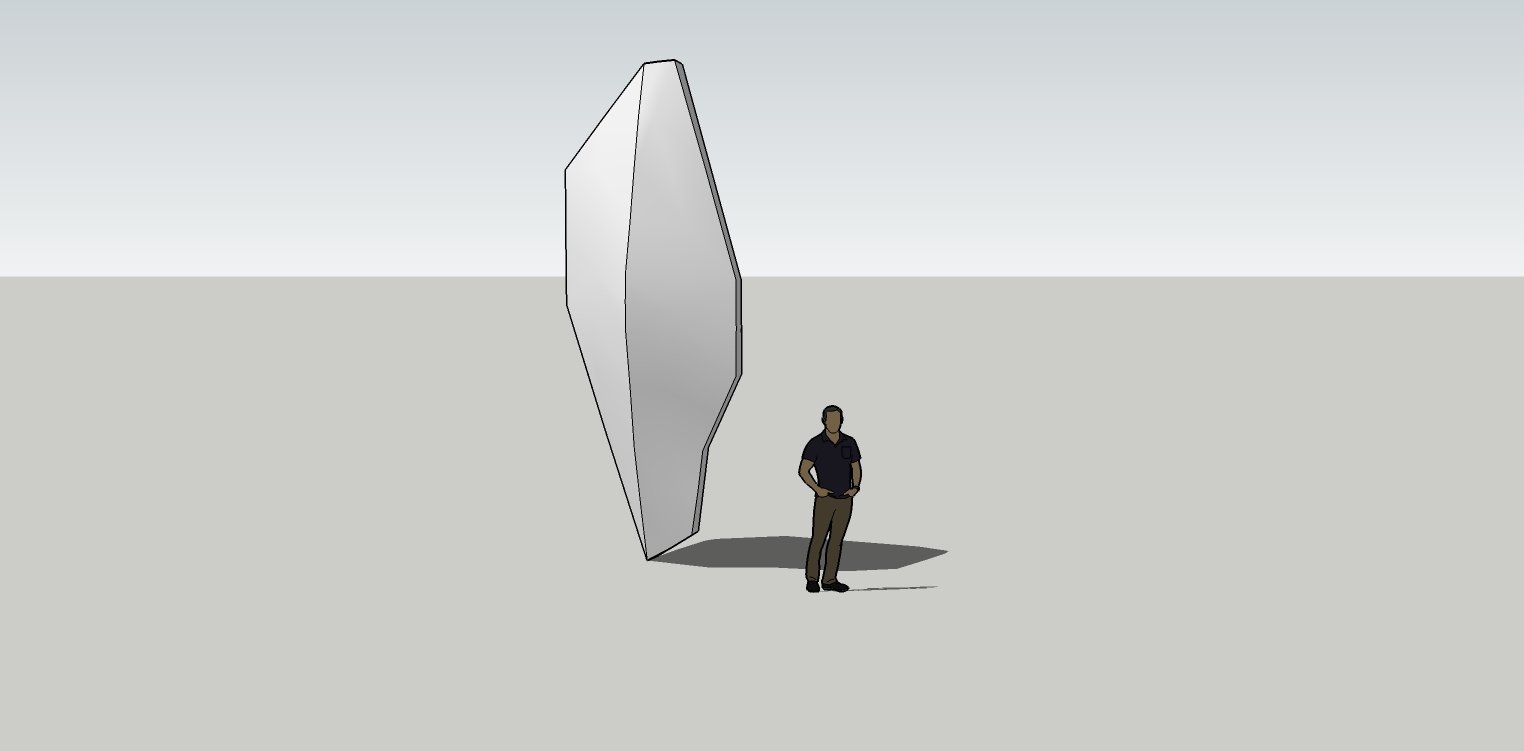
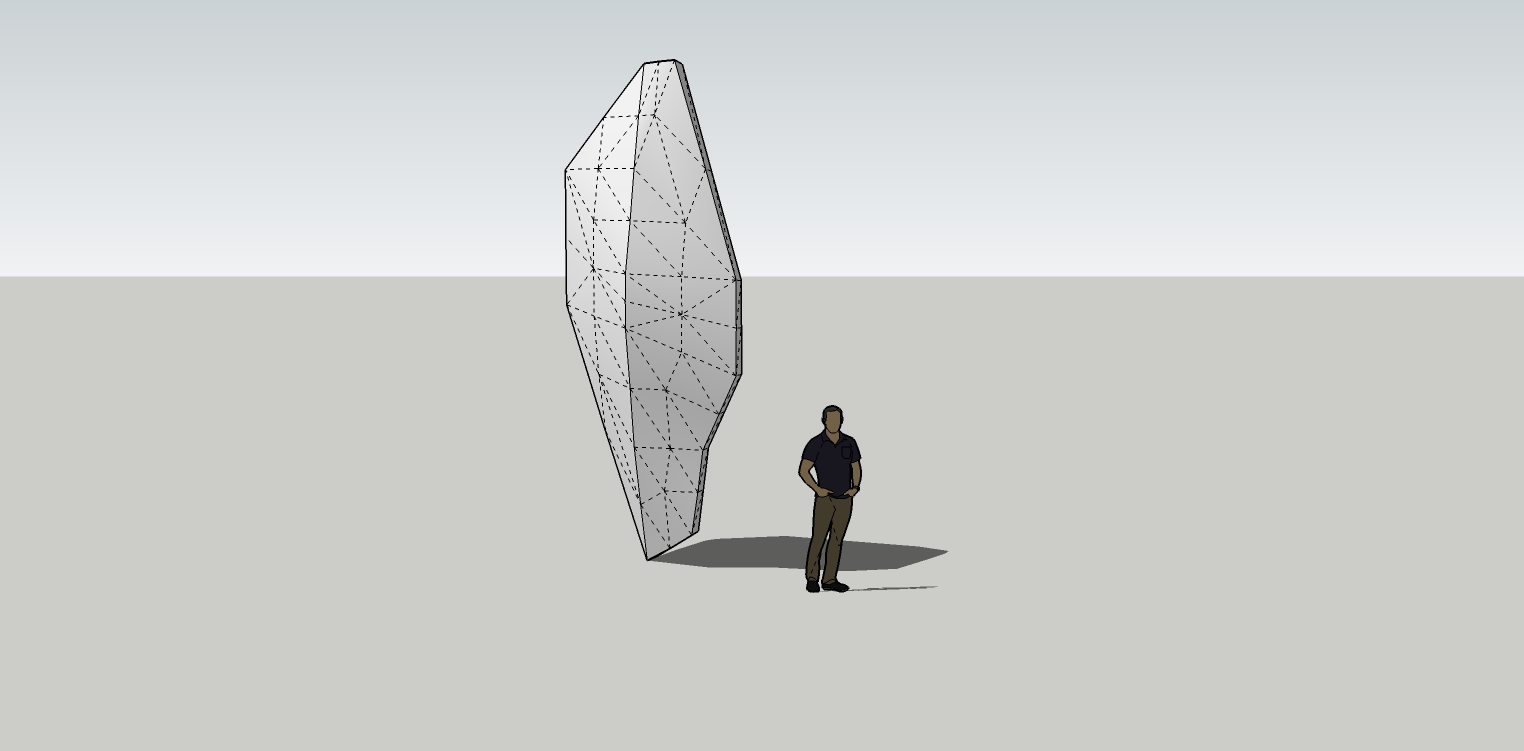
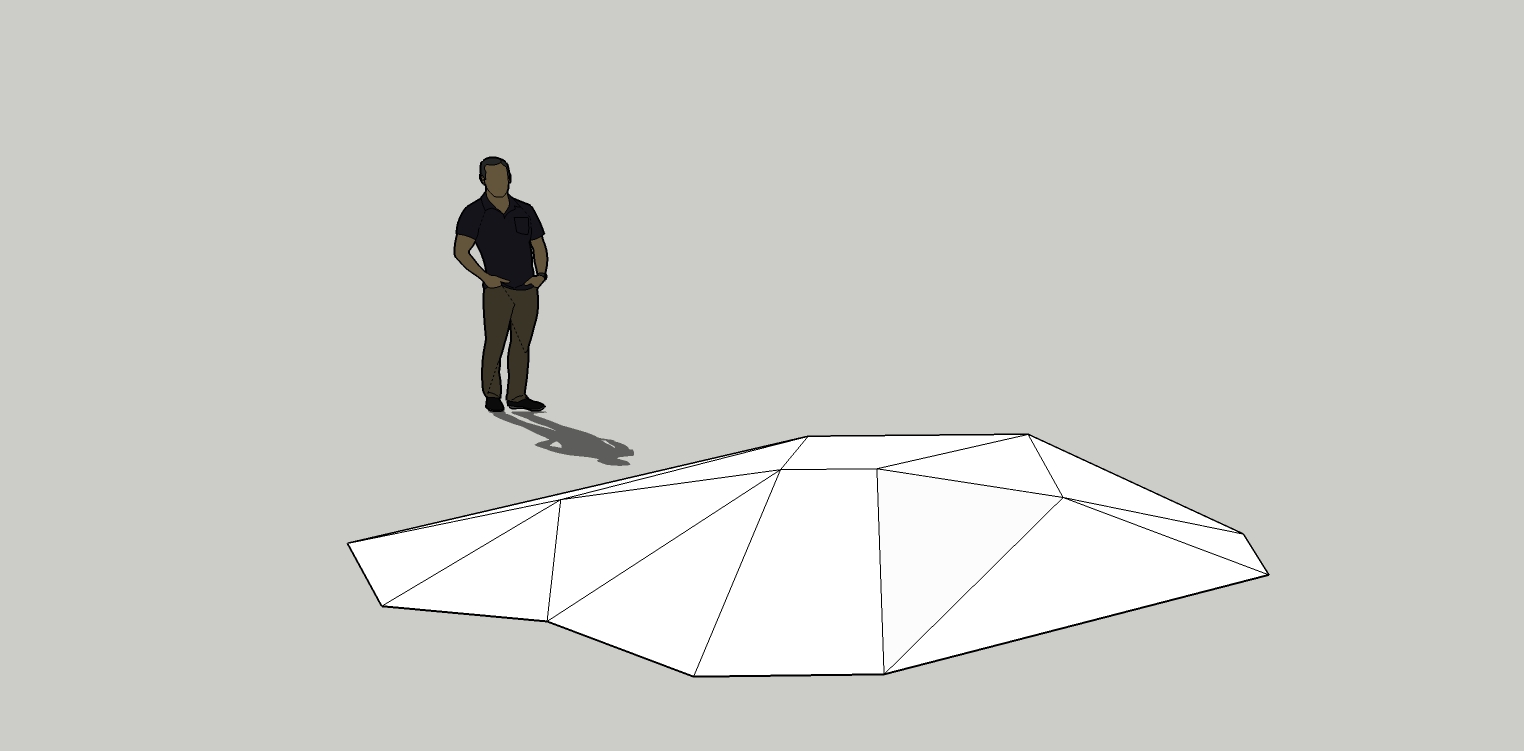
-
Is the last picture the first step?
-
You have also this free Loop subdivision more rustic but maybe give another drawing of faces subdivided...
If problem : just * 100 or more scale before subdivision! -
@pbacot said:
Is the last picture the first step?
Yes. Sorry about that. It was late when I posted.
Thanks for asking. I should have clarified that better.
-
@pilou said:
You have also this free Loop subdivision more rustic but maybe give another drawing of faces subdivided...
If problem : just * 100 or more scale before subdivision!Thanks.
After reading the comments there, it looks like it may have issues. Can you confirm if it works properly?
-
Did you try this with just native tools? Add Detail in the Sandbox tools will sub-divide the faces and Flip Edge (same tools) can be used to get a smoother division if needed.
-
@shawb said:
Did you try this with just native tools? Add Detail in the Sandbox tools will sub-divide the faces and Flip Edge (same tools) can be used to get a smoother division if needed.
Interesting suggestion. I had not thought of that.
So I tried it. It seems to also work well.
Thanks!

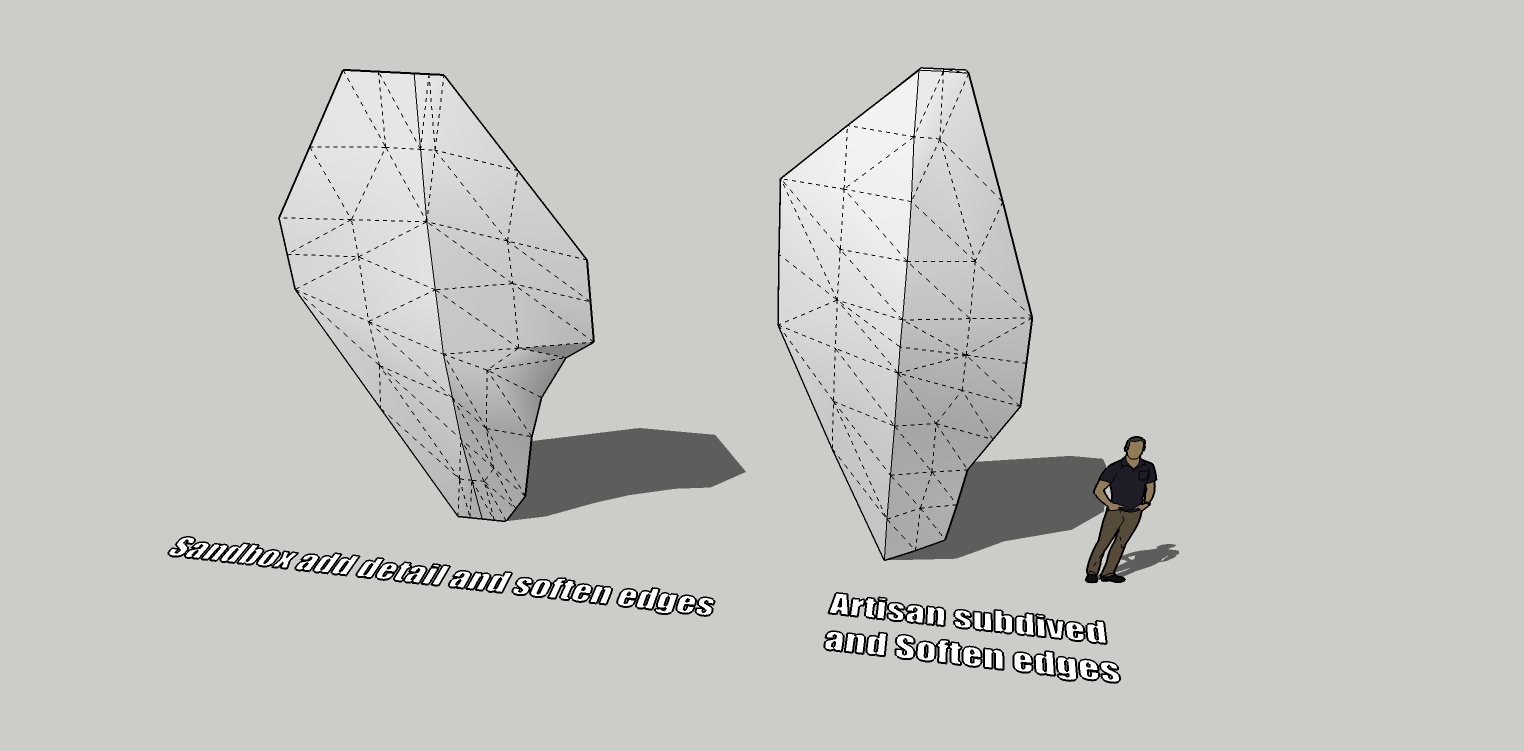
-
Yes perfectly!

And you can of course subdivide many time if wanted...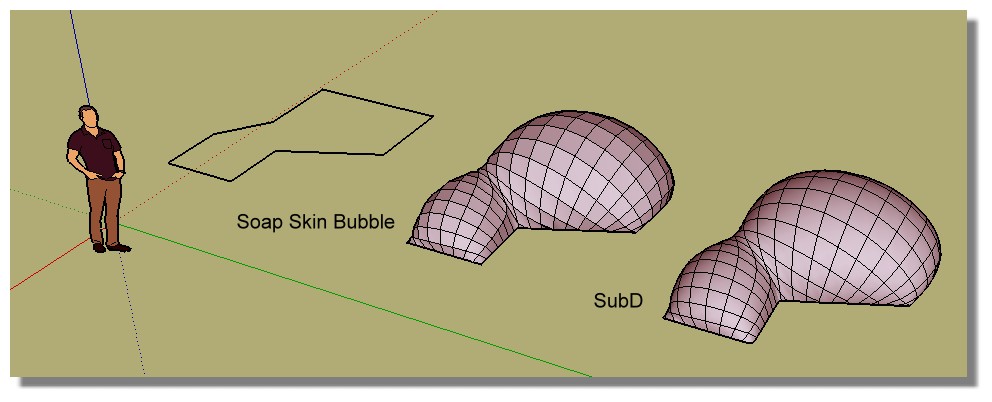
Here with Loop subdivision (*1000)
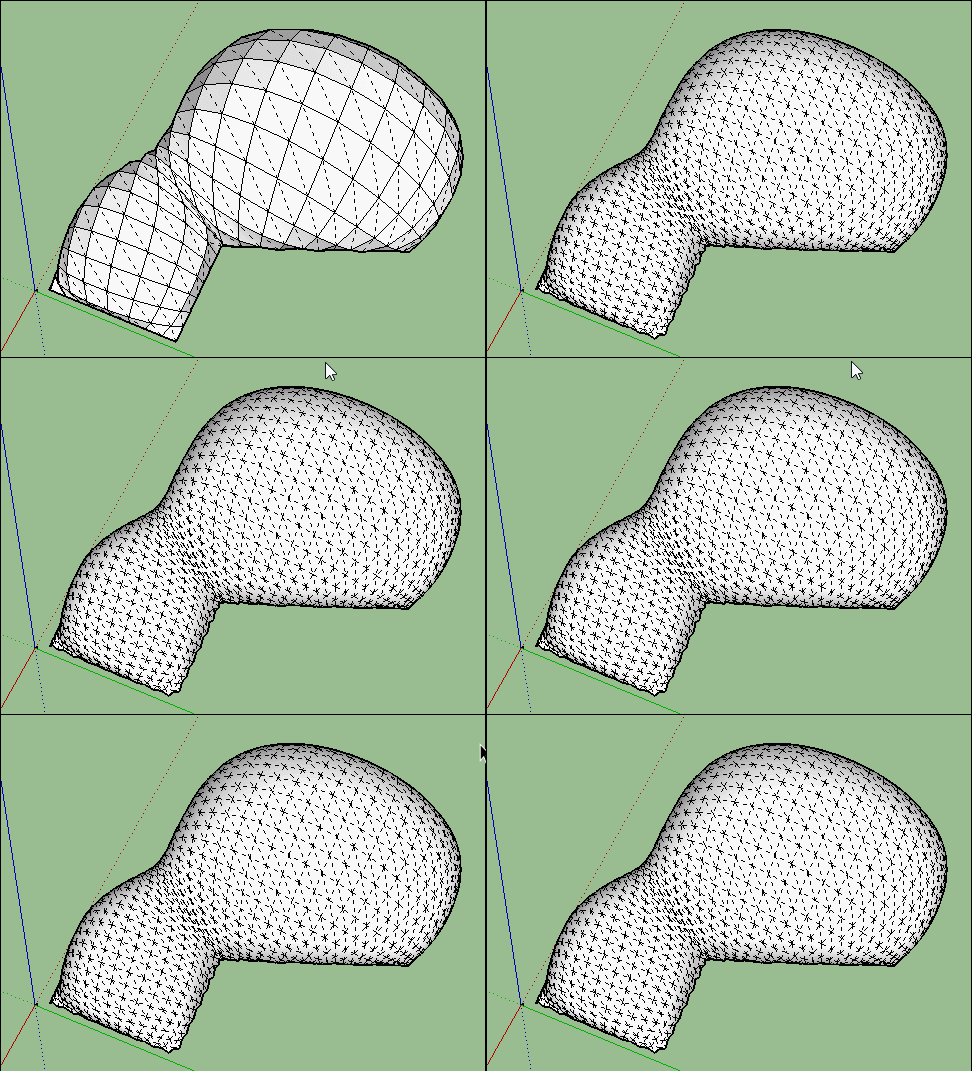
-
Thanks pilou!
Speaking of soap skin, my plug in stopped working. Any suggestions?
-
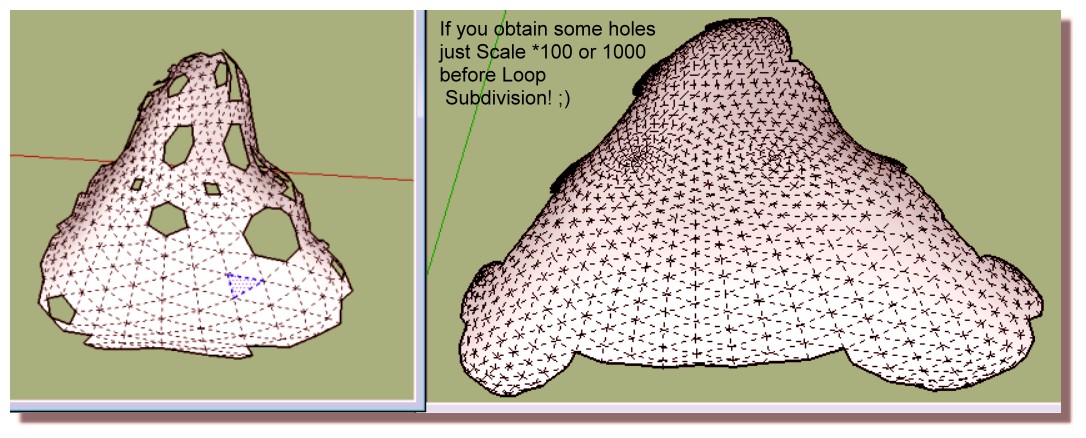
-
About Soap : i have yet downloaded directly from SKetchup for have the last version few month ago...
Normally that is now a version without renew...and that works perfectly fine like a charm!
You have also Ferrari who give better results following start perimeters...
-
Thanks. Ferrari downloaded it but it would not install.
No problem! The tools I have will work for me.

I was able to reinstall Soap Bubble successfully.
-
I'm going to assume you guys are speaking in some foreign, possibly alien, language

-
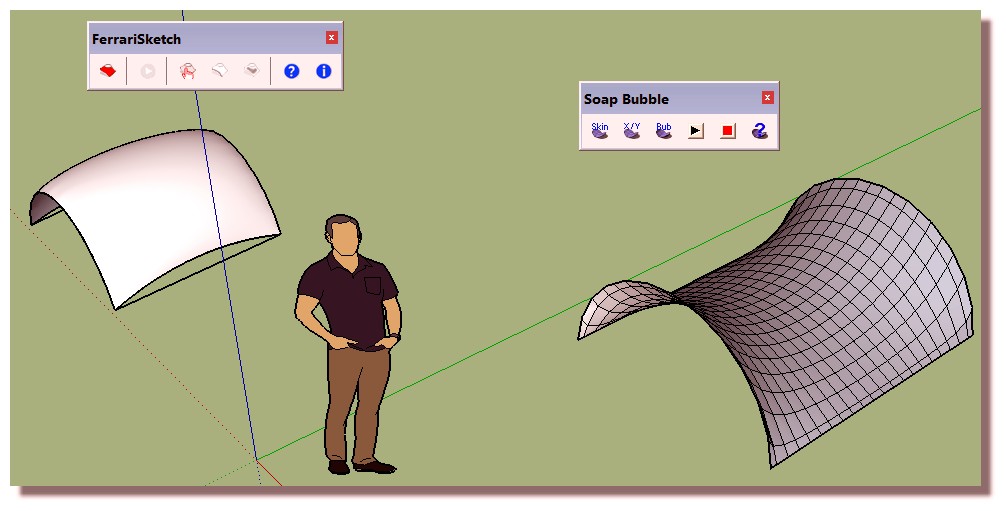
I am sure it is working for me for 2015, 2016, 2017 make

I don't remember if there was a special install...
As you see slighty different...
It's a plugin of 2010 ! But works very fine!
But maybe Ruby language has changed for new versions of SU......
-
@pilou said:
I am sure it is working for me for 2015, 2016, 2017 make

I don't remember if there was a special install...
As you see slighty different...
It's a plugin of 2010 ! But works very fine!
But maybe Ruby language has changed for new versions of SU......
[attachment=0:1a45chm9]<!-- ia0 -->i_am_sure.jpg<!-- ia0 -->[/attachment:1a45chm9]Any tips for installing Ferrari?
-
Not more than that

@unknownuser said:
Version 1.1 (July 2010).
-
First verify that Google SketchUp is installed on the computer. If not, go to “http://sketchup.google.com”.
-
Once this archive is extrated:
- copy the file “FerrariSketch.rb” and the folder “FerrariSketch” in the directory “C:\Program Files\Google\Google SketchUp 7\Plugins” *;
- copy the folder “FerrariColors” in the directory “C:\Program Files\Google\Google SketchUp 7\Materials” *.
- Launch Google SketchUp and open the FerrariSketch tool box by selecting the option “FerrariSketch” in the menu “View -> Tollbars”.
Other information are available in the program website using the tool box button “Help (?)”.
- These pathnames depend on the Google SketchUp version (7 or superior) and/or the operating system (XP/Vista/7).
You must have administrative rights on these folders.
-
-
For the doc under the help button "?" and you will know how to use this terrific plugin!

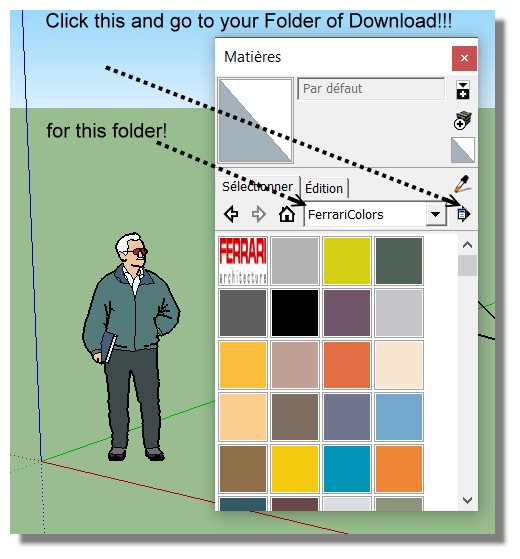
And before i Refound in the Mess of window's folders the SU Ferrari Material folder (not sure i put it somewhere)

you can yet access to the Ferrari Sketch colors by the folder Material itself inside the SU Material panel from your Donwloads' folder!!! (where you have downloaded the Ferrari plugin)
But it's just a library of colors! so not indispensable but you can have all the cake...
Edit : After intense research no i never copied the Ferrari colors folder on a SU folder!
-
@pilou said:
Not more than that

@unknownuser said:
Version 1.1 (July 2010).
-
First verify that Google SketchUp is installed on the computer. If not, go to “http://sketchup.google.com”.
-
Once this archive is extrated:
- copy the file “FerrariSketch.rb” and the folder “FerrariSketch” in the directory “C:\Program Files\Google\Google SketchUp 7\Plugins” *;
- copy the folder “FerrariColors” in the directory “C:\Program Files\Google\Google SketchUp 7\Materials” *.
- Launch Google SketchUp and open the FerrariSketch tool box by selecting the option “FerrariSketch” in the menu “View -> Tollbars”.
Other information are available in the program website using the tool box button “Help (?)”.
- These pathnames depend on the Google SketchUp version (7 or superior) and/or the operating system (XP/Vista/7).
You must have administrative rights on these folders.
These folders no longer exist for 2017. I have ifcplugins folder and no materiel folder. Which is weird. I wonder if it's using my 2015 folders.
-
-
I see that you have Windows system so...for windows 10
copy the file “FerrariSketch.rb” and the folder “FerrariSketch” in the directories
(Change of course the name user if existing or erase it if not existing...)"C:\Users\your name user\AppData\Roaming\SketchUp\SketchUp 2017\SketchUp\Plugins\FerrariSketch"
"C:\Users\your name user\AppData\Roaming\SketchUp\SketchUp 2016\SketchUp\Plugins\FerrariSketch"
"C:\Users\your name user\AppData\Roaming\SketchUp\SketchUp 2015\SketchUp\Plugins\FerrariSketch"
I have not copied the folder "FerrariColors" so use the trick shown above!

-
Thanks. I'll try that.

Advertisement


