Medeek Wall Plugin
-
Version 1.1.3 - 09.23.2019
- Fixed a bug with the placement of Simpson's DTT2Z holdown and replaced included component with a low poly version.
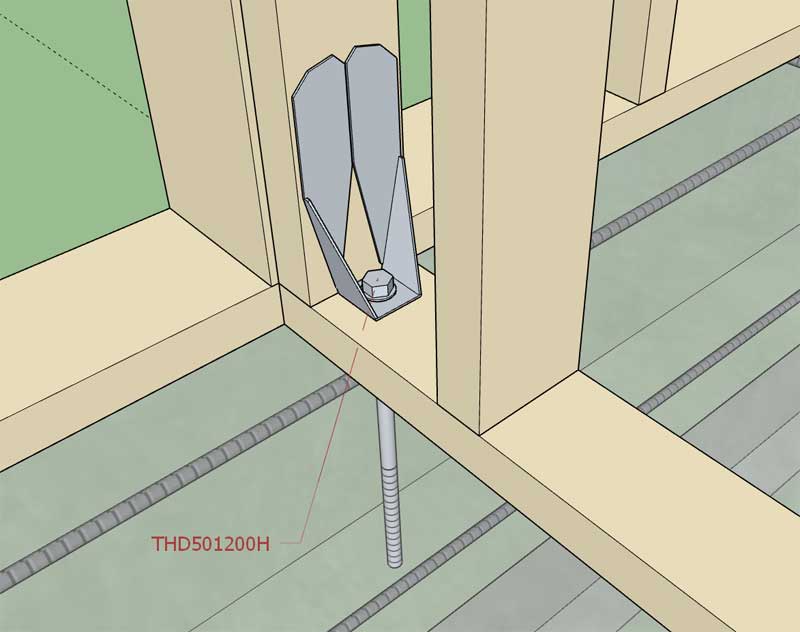
- Added the option for Titen HD holdown anchor bolts: THD50500H, THD50600H, THD50800H, THD501200H, THD501400H, THD501500H.
-
Version 1.1.4 - 09.28.2019
- Fixed a critical performance bug that affects all the modules within the extension.
*** CRITICAL PERFORMANCE UPDATE ***
If you are noticing a slowdown of the plugin performance after multiple edits to a wall assembly, this fix will resolve that issue. This issue affects all previous versions of the plugin.
-
The question "Can I manually edit my wall assemblies?", seems to come up quite often.
***** Important Information *****
The parametrics (editing) with regards to the plugin(s) require that when you edit any wall assembly, roof assembly, foundation assembly etc... it regenerates the geometry from the parameters stored for that assembly.
If you are going to manually edit an assembly just be sure not to regen it, by editing it or adding windows, doors etc... after you have done any manual edits. When you edit an assembly it essentially removes the existing geometry created by the plugin and redraws it. If you have altered the geometry created by the plugin it will also remove any of those manual edits.
You can effectively lock an assembly by removing the instance name (or replace it with something else). When you remove the key words in the assembly instance name the plugin(s) no longer recognizes the assemblies as something they can edit and hence they become "locked" for editing.
You can also unlock a valid assembly (provided it still has its attribute library) by putting the keywords back into an instance name. You will notice that each type of assembly has specific keywords utilized in its instance name.
The problem with manual editing is that, yes you can do it, but the plugins have no way of knowing what changes you have done to the assembly and when it goes to rebuild/regen the only information it has is the parameters stored in its attribute library (database) for that assembly. If you explode the group that contains the assembly the attribute library for that group (assembly) is deleted and even if you were to group the assembly back together the attribute library will no longer be present and hence the assembly is no longer a parametric Medeek assembly.
If you want to include custom components or groups within your assemblies (wall, truss etc...) and you want those "additional" geometric objects retained after a rebuild then you can accomplish this by including the keyword "CUSTOM" or "custom" within the sub-group or components instance name.
Also note that any non-grouped geometry (ie. edges and faces) will also be retained within the assembly by default.
In fact, this is exactly how the electrical plugin works in concert with the Wall and Truss plugins. All of the electrical groups within your wall panels, utilize a special key word in their instance names. This allows them to be retained within the larger assemblies.
There is a method to my madness.
-
Gable Wall Workaround:
A quick tutorial on how to manually edit a wall with the Trim tool to create a balloon framed gable wall.
-
Version 1.1.5 - 11.27.2019
- Added a rotation parameter for in-wall columns.
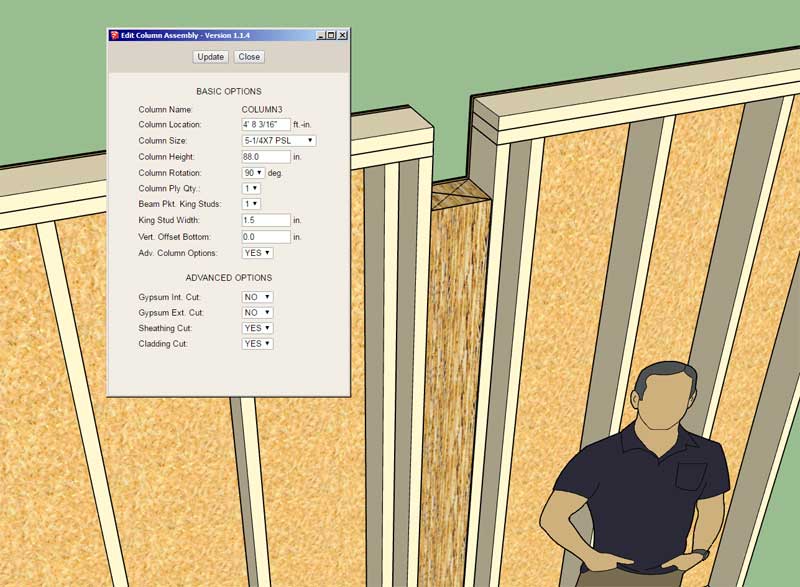
Previously I was listing two sizes in order to get the rotated version (ie. 2x6 and 6x2) of a column size, however this proved to be a clunky and a non-scalable solution. This update rectifies this limitation.
-
Version 1.1.6 - 12.08.2019
- Improved the stability and execution speed of the wall edit menu and the window edit menu.
This improvement is courtesy of my recent work on the complex roof module of the truss plugin. I've improved the speed and stability of my algorithms for transferring data between the ruby code and the javascript. I will now need to update every other HTML menu found with the wall plugin and eventually within all of the plugins.
The wall edit menu contains the most parameters and hence its stability will be improved significantly by this code change, that is why I addressed it first. Other edit menus include: doors, garage doors, stairs, beams, etc...
-
Version 1.1.6c - 12.11.2019
- Updated the garage door edit menu and the door edit menu.
- Added standard sizes of LVL headers (1-3/4") to the built-in header library: 7-1/4, 9-1/4, 11-1/4, 11-7/8, 14, 16.
Within the global settings under the custom header settings the user can easily setup additional LVL headers. I setup these standard sizes for convenience, however any size (width and depth) may be defined.
-
Version 1.1.7 - 12.21.2019
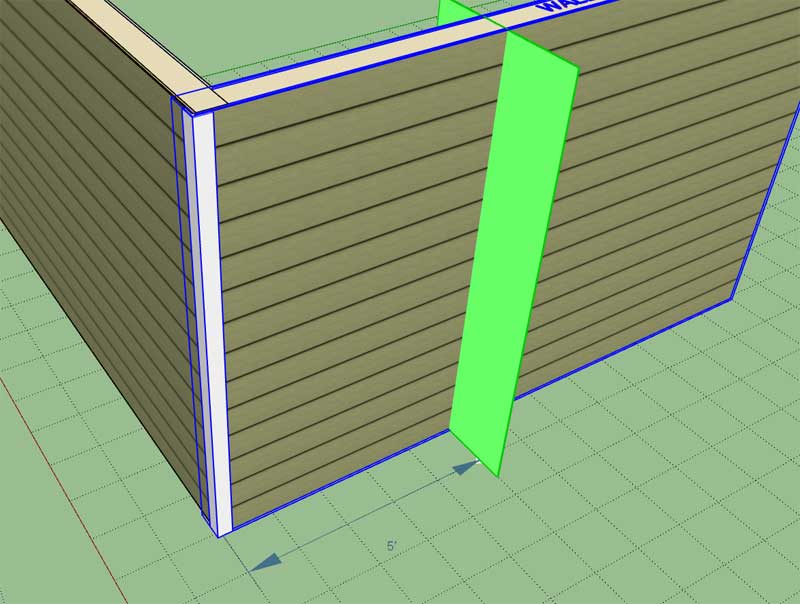
- Enabled the "Wall Split" tool within the Medeek Wall Tools toolbar.
I will release a tutorial video explaining the use of this new tool and what circumstances would typically require its use.
(Click GIF to view animation)
-
Tutorial 9 - Split Wall Tool (6:36 min.)
-
You mean like this? (click to view animation)

View model here:

3D Warehouse
3D Warehouse is a website of searchable, pre-made 3D models that works seamlessly with SketchUp.
(3dwarehouse.sketchup.com)
-
Version 1.1.7b - 12.25.2019
- Enabled temporary (construction) dimensions for the wall split tool.
- Added a vertical offset to the holdown symbol(s) to eliminate Z-fighting with the wall panel top plate.
-
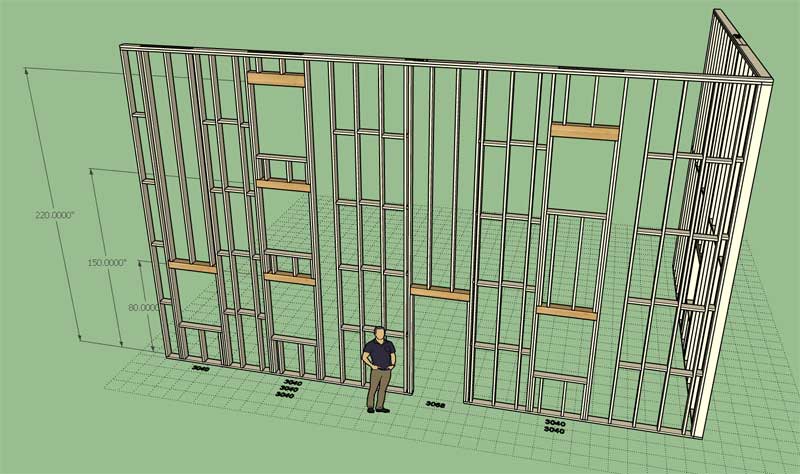
Something that I have had on the to-do list for quite a while but have avoided it due to the many permutations and pitfalls: Stacked Windows

I have some additional testing to do, but so long as the windows line up (same x-position along wall) and they are the same width (as shown) then the algorithm seems to be successful.
The real problems arise when the windows partially overlap, or even if they are aligned but the windows widths are different. Those type of scenarios create all kinds of framing permutations which then becomes a real can of worms for the logic. I may eventually tackle it but for now I’m going to make some simple assumptions, so that I don’t become too bogged down with this problem.
-
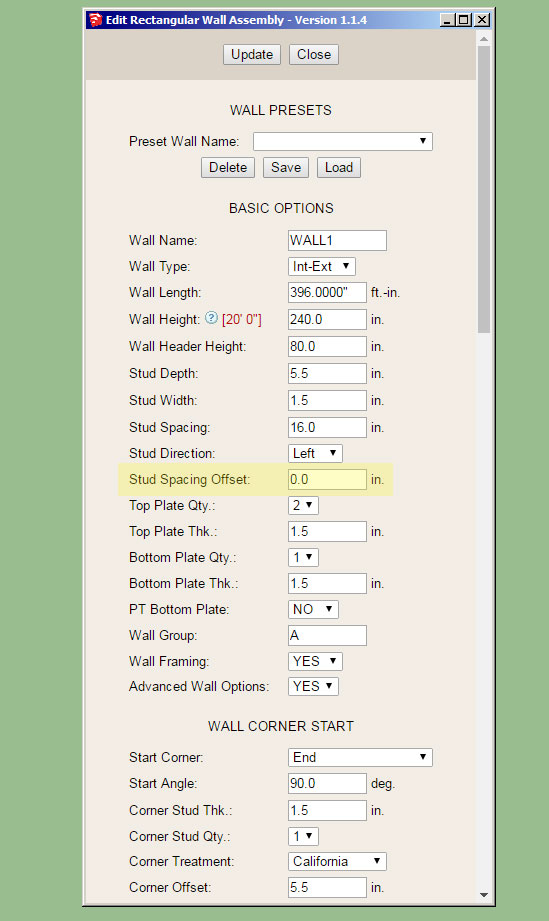
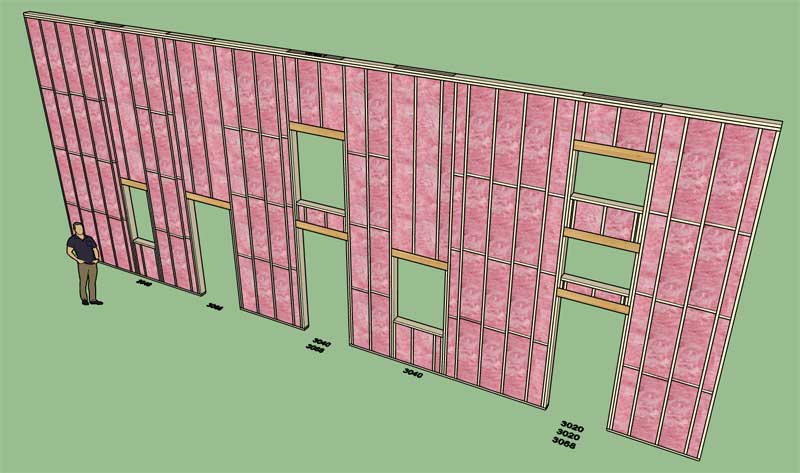
My original algorithm was too simplistic, it did not account for multiple window stacks within a wall panel, now I have that resolved:
The final step is to make sure that the blocking and insulation modules are compatible with stacked windows. As can be seen in this screen capture there is still an issue with stacked windows and blocking (right side).
-
Version 1.1.8 - 01.06.2019
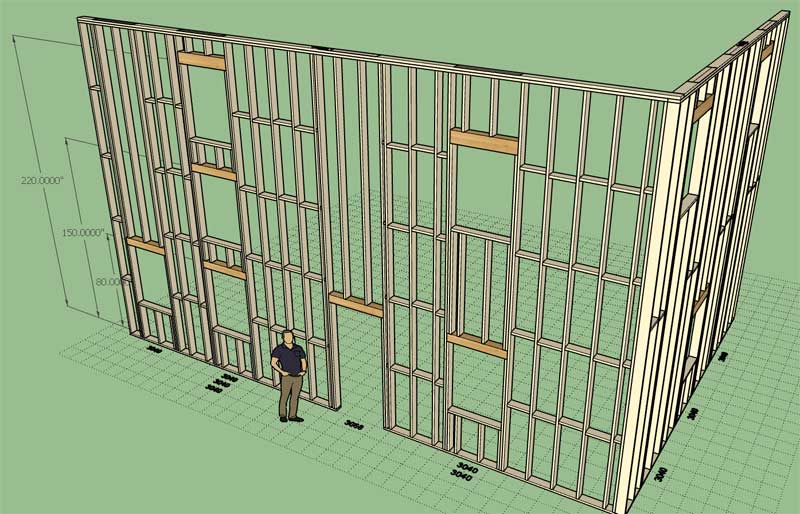
- Added a "Stud Spacing Offset" parameter which allows for custom stud spacing/placement.
- Enabled stacked windows within a wall panel.
View model here:
3D Warehouse
3D Warehouse is a website of searchable, pre-made 3D models that works seamlessly with SketchUp.
(3dwarehouse.sketchup.com)
Both of these items have been on the to-do list for quite some time and together constitute a fairly substantial upgrade to the functionality of the plugin. The offset parameter has been requested numerous times over the last few weeks.
This update does not yet allow for stacking of windows/doors or doors/doors. However, now that the logic path has been established I should be able to enable these additional possibilities much more quickly. I will see if I can knock this one out this coming week.
-
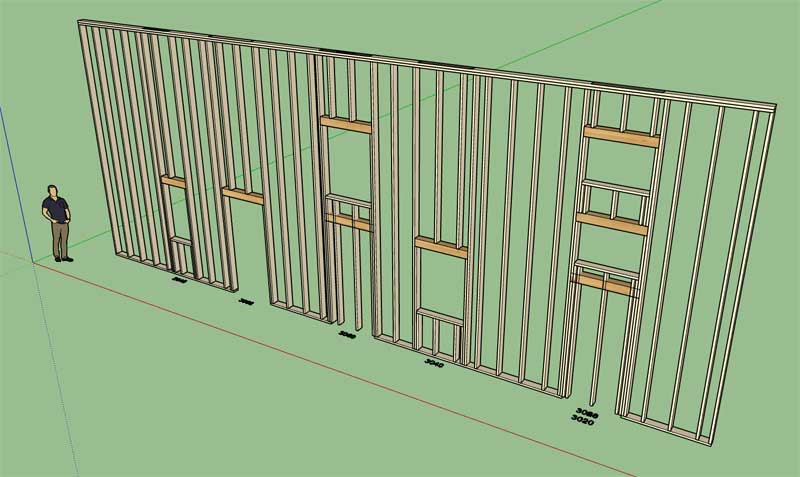
The same stacked windows as below but with the insulation included:

I haven't finished the window/door stacking algorithm yet but it occurred to me that window over door is the most common configuration and not the other way around. In fact, I really see no reason to have a door over door algorithm either. Correct me if I'm wrong.
-
@unknownuser said:
I really see no reason to have a door over door algorithm either. Correct me if I'm wrong.
No doors' emergency exit on the upper levels possible ?
-
Now looking at stacked windows over doors:
It's also possible that you might have multiple stacked windows over top of a door as shown to the right. A few things to consider here.
-
@pilou said:
@unknownuser said:
I really see no reason to have a door over door algorithm either. Correct me if I'm wrong.
No doors' emergency exit on the upper levels possible ?
Yes, but in that case it will probably be a separate wall panel and not balloon framed to the second level.
-
Version 1.1.9 - 01.09.2019
- Enabled stacked windows over doors within a wall panel.
Note that for this to work correctly the king studs of the window(s) and door must align and the windows and doors must be centered on the same location within the wall.
The framing, blocking and insulation modules are now updated for stacked windows and stacked windows over doors.
-
As I was comparing the window and door modules this evening a number of things jumped out at me. I've made some updates over the last few months to the window module that did not get propagated to the door module. Here is a short list of items I will work on in the next couple of days to bring the door module up to par:
1.) Arched, gothic arch and half round door openings and doors.
2.) Variable king stud width for doors
3.) Variable trimmer stud width for doors
4.) Built up headers for doors
5.) Trimmer extend option for doors (for built up headers that have a bottom plate, common construction method in Alberta CANADA).Note that these updates are specifically for man doors and do not apply to garage doors or garage door openings. That will be work for another day.
*** IMPORTANT***
I'm also considering making the wall plugin able to insert windows, doors and garage doors into generic walls (non-Medeek Walls), similar to what one is able to do with the electrical plugin. I actually don't think this will be too difficult and will make the Window/Door tools more universal and flexible for the user who may or may not always use Medeek walls in a given project.
Hello! It looks like you're interested in this conversation, but you don't have an account yet.
Getting fed up of having to scroll through the same posts each visit? When you register for an account, you'll always come back to exactly where you were before, and choose to be notified of new replies (either via email, or push notification). You'll also be able to save bookmarks and upvote posts to show your appreciation to other community members.
With your input, this post could be even better 💗
Register Login


Advertisement