How to make good textures
-
Hi guys,
What is the best way to make good textures to render.
This is my workflow mostly.1.i go to http://www.textures.com/ and search for my textures.
2.Then i import them into sketch up and re-size them whit the pins on the plane where i need them.Is this good?
On cgt textures you have mostly 4-5 choices to pick the resolution of the texture will this give many difference on the texture itself? The bigger you go the better?
Because now i have this problem see attachments the texture looks good from far be not from close,
how can you fix this, by downloading the same texture but on a higher resolution ore...Is my workflow for making textures right ore are there better ones?
Thanks,
Sam

-
Well, you're not actually making textures. You're applying ready made textures into a sketchup model.
Your workflow is correct and allows you to place textures on simple faces with enough control. More complex shapes and faster workflows imply plugins:
- Sketch UV by Whaat;
- FredoTools Thrupaint by Fredo6;
- WrapR (upcoming).
Now for the resolution, that is a fundamental issue to be concerned about. I use always the maximum texture size I can so I can have fine details wich low res textures will miss.
However this is heavy on a sketchup model. I use Thea though and it allows us to use low res textures in Sketchup while rendering with High res versions of those textures: perfect render details, low requirements on sketchup model.
If you want to actually create textures you should google for seamless texture creation. You will probably start with something like photoshop and once you need to advance, you might use something like Awesome Bump, Bitmap2Material, Pixplant or others.
If you dwelve even further you can start investigating procedural textures. I use Substance Designer for those (and convert them to regular bitmaps with Thea Render, so I can use them in Sketchup.)
-
Hi,
Thanks for the fast and clear reply, i'm already using pixplant.
I render whit su podium, there are also material settings avaiable the most commen
bump,reflection,transparency,....But i'm still not getting the solution if you mentioned one
 .
.I want to achieve the result like in the attachment.
Is this simply by downloading the highest resolution from the material and importing it into sketch up ore is this (probably) a bit more difficult.
If yes on a bit more difficult: what is the best workflow to achieve a result like in attachment.Thanks in advance,
Sam

-
Texel density, or the pixel resolution, is what you need.
The larger the image the better the appearance. Most render engines allow you to use lower resolution in SketchUp and higher in the render engine. This helps to keep the file size of the SketchUp file down while making the render engine work to chew through resolving the image using the hi-res textures.
Podium I'm unfamiliar with though...
The bumps, spec and normal maps need to pick carefully crafted too. Relying solely on PixPlant will not get optimum result. You need to tweak the maps precisely to get the most physically accurate result.
Massimo, a member here, is a legend in using PixPlant. He features heavily on the PixPlant gallery.
-
thanks for the fast reply again!
So the resolution is the key.
So if i'm right and download this at a resolution 5000x2093, the problem should be solved?But how about importing the texture, i think this is also a very important thing.
I just import it as texture.
I click two times and the texture multiplies him along the plane.
Then i play whit the fixed pins and set them correctly against the end points of the plane.It would be lovely to hear something from the pixplant master massimo himself.

Sam
-
@poot said:
But i'm still not getting the solution if you mentioned one
 .
.I want to achieve the result like in the attachment.
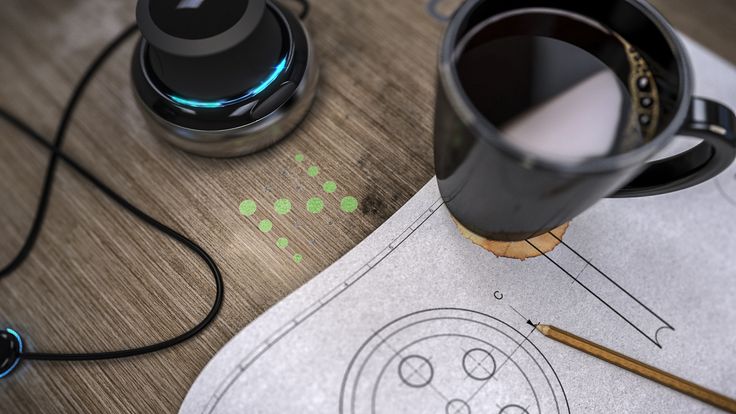
What Rich says there is absolutelly true, high resolution is key for any render. Specially if you're seeing the material both at a distance and at closeups. This is only a closeup, wich could be rendered even without seamless textures as the surfaces aren't that big.
Also textures here might be disguised by the blurring effect of Depth of Field (DoF) wich is a camera effect that helps desguise poor textures at close or far away by making them out of focus.
But the most important part here is that if you want to render something like this you have to pay attention to details and modelling is key!
Rich has a nice cup of coffee modelled in the Subdiv forum that you can pay attention to.
Renders don't do miracles, they just calculate light, you have to model most things to simulate they're real shapes.
With a texture alone, it will be almost impossible to reproduce the bubbles and the rounding effect that happens where the coffee meets the cup. You have to model those...
Perfect subject, perfect modelling setup, perfect texturing setup, perfect lighting setup, perfect camera setup.
I must tell you that I never pulled off any perfect render so far. Massimo did!
-
Initially after reading the title, I thought you were looking to make textures, but it appears you were looking for advice in a different area... But just in case you are not aware of it, here are three good options for making your own textures...
• Filter Forge- https://www.filterforge.com/filters/
Filter Forge is a node based texture generating program that will allow you to render out images of over 11627 available user made filters, modify existing ones, or make your own (depending on the version)... The site also has many lower resolution (516 x 516 pixel) seamless images used as examples of what the individual filter look like that could probably be used in many projects if you are not interested in the actual product.
Filter Forge comes in four versions...
-Basic: Around $149 USD, This version will render up to 3000 x 3000 pixel images of any of the user made filter collection of filters up to the current version you purchase (for example the current version is 5, but when 6 comes out and people start making filters in 6, you will be limited to ones for version 6, unless you upgrade... This applies to all versions except the subscription version). Basic does not render bump, normal or occlusion maps and you can not alter or make your your own filters with it.
-Standard: Around $249 USD, this version too renders up 3000 x 3000 pixel images of the user library collection, but you can make your own or alter other user's available filters from the library. It does not do bump, normal or occlusion maps. Probably the best bargain if you are not in need of the Pro features.
-Professional: Around $399 USD, this version will render images up to 65,000 x 65,000 pixels (I have no idea how they tested that, but most computers would just melt doing that). You can render bump, normal, ambient occlusion, metallic, and other specialty maps, make your own filters, or alter existing ones.- Professional Subscription: $29 USD quarterly. Same features as above, but in subscription format, not affected by version changes if you stay subscribed.
Note that with the above prices I have said "Around $____ USD", this is because if you are patient, you can probably catch a really great sale... Often I have purchased upgrades for 70%-80% off... Also from what I understand all versions (except subscription) have the ability to purchase a permanent license key for more money and that option also will reflect any sales percentage offered.
There is a free 30 trial demo available, it is fully functional, including the ability to render out any filters you create or download.
Lastly, Filter Forge has a unique gimmick... Users who download very popular filters can earn points to apply to discounts, upgrades, or even a free upgrade... BUT... This is fairly hard because it is subject to usage statistics, not downloads and some users may not wish to share their usage stats.... But in the event someone is great at filter making, it's nice have the option, plus it encourages new filter additions to the library.
Filter Forge is available for Macintosh and Windows.•Genetica- http://spiralgraphics.biz/index.htm
A node based texture generator similar to Filter Forge but with many unique differences (depending on the version), such as drawing tools, visual styles (similar to Photoshop's "styles") and the ability to create animations. It is available in three versions. I do not own Genetica and the website is pretty flat in what their features mean, so in this instance I can not provide as much info other than what I see and understand.
-Basic: $149 USD. Renders up to 3000 x 3000 pixel images of filters... It appears though, that you can make and alter filters with this version... But I can not confirm that. You can render bump, specular, luminance and "other" effects maps. Has drawing tools and visual styles.- Pro: $399 USD. Renders up to 6000 x 6000 pixel images. All of the above features, but also gives you the ability to import UV mapped models for texture work (don't understand to what extent), create and edit HDRI maps (sounds kinda cool),render and export HDRI maps, has a hair and fiber lab, batch processing, and renders normal maps.
- Studio: $899 USD. Renders up to 46,000 x 46,000 pixel images all of the above features, but also includes pixel script, animation ability and animation presets.
I've been told they have occasional 40% off or more sales around holidays, unfortunately I've missed all of them, I'd like to get the pro version which appears to be the best bargain. But only if it's around $180-$200, as the ability to create and export HDRI maps would great, hopefully I'll eventually catch a sale.
Genetica is only available for Windows... No Mac versions.But that's not all from Spiral Graphics (makers of Genetica)....
They have two free programs available that are very, very useful...
-Genetica Viewer: http://spiralgraphics.biz/viewer/index.htm
Viewer will render out any of the couple hundred free presets from the Genetica Texture Pack in up to 2048 x 2048 resolution, as well as effects maps like bump and specular.
It's free and extremely useful, so why not just pick it up and try it out.- Wood Workshop: http://spiralgraphics.biz/ww_overview.htm
Renders out any of around 100 procedurally generated wood texture presets in up to 3000 x 3000 pixels... And it's free.
As with Genetica, Viewer and Wood Workshop are Windows only.
And Lastly, not a program, but a great texture resource...
Textures.com (formerly CG Textures): http://www.textures.com
A collection of thousands of photo textures in seamless and non-seamless varieties... There is a free membership which allows for good, but small- medium resolution images and a premium version you pay for... It is "credits" based downloading and with the free version you get 15 credits per day... Depending on the credit value of the image (based on resolution) that could be four or five images per day... For professionals who need access to dozens of images, the premium plan would make more sense.Hopefully this information was useful to someone.
Advertisement


