Twilight Render - Challenge
-
Dave , don't get discouraged. You are making progress. Heck I never need to do this sort of stuff for my job but learning new stuff is a good thing. You never know when it might come in handy. Just keep swinging at the pitches. chuck.
-
In the world of western art paintings, the glass object was a form of showing off your skills. Nice job Tuna! I have the problem of the glass disappearing even when there seems to be nice reflections. Your stem and base show up nicely in these renders.
-
Thanks pbacot , it's kind of fun trying new stuff even if your not getting the result you want. Totally understand your comment about artists painting glass objects. Have an art background. I have to tip my hat to the guys that write the render software. When I think about the way light bounces and bends going through bottles and such. I'm guessing calculating the light paths through curved glass is one of the toughest on the software. Makes my head hurt thinking about it.
-
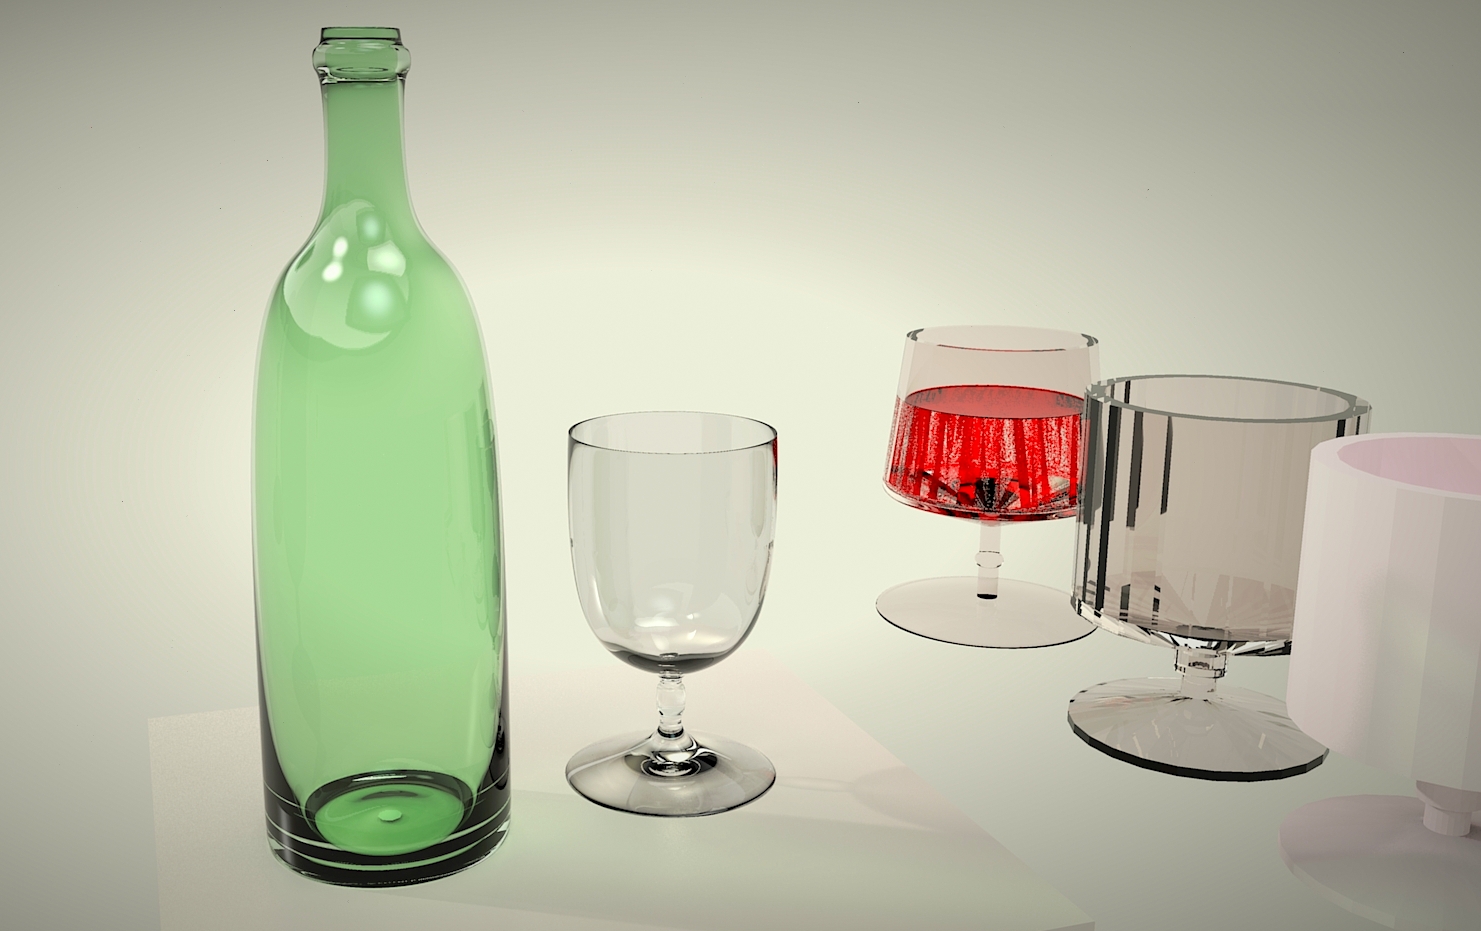
Here's a very quick one, I thinned down your profile and SUbD'd it and very quick blobby bottle, also SUbd. Honeydew uneditted for the bottle, whitesmoke uneditted for the glass, both just the default settings for Glass common. Sun turned down to 1, Hemispherical sky, hdr 001 from the studio pack set at 4 for the rest of the light. No background just your glasses and a box to sit mine on.

-
Very convincing!
That is magic beverage!
-
OK - Much closer to what I want to be able to accomplish.

For me, I think this is a big step forward. Still lots to learn but I think I am headed in the right direction. Very little tweaking to the settings for the various materials.
Now I need to add details to the walls, add a ceiling and then begin learning how to use the lighting tools. At some point I would also like to have a window with stuff showing in the background.
As always, suggestions on how to move forward and learn to use the tools greatly appreciated.
BTW: @Box, I really liked your posts too

-
, Each one of your shots gets better than the last. Keep it up -
@tuna1957 said:
:thumb: , Each one of your shots gets better than the last. Keep it up
Thanks - one thing I was just noticing thoug - is there a conflict in the reflection of the glasses on the table versus the shadow of the chairs?
-
Dave, What was your light set up ? You can get conflicting, multiple shadow effect if there is multiple light sources. Depends on light placement and power. Curious , what setting did you render at ? chuck.
-
@tuna1957 said:
Dave, What was your light set up ? You can get conflicting, multiple shadow effect if there is multiple light sources. Depends on light placement and power. Curious , what setting did you render at ? chuck.
I did not have shadows turned on in SketchUp. Here is the environment setting in Twilight

-
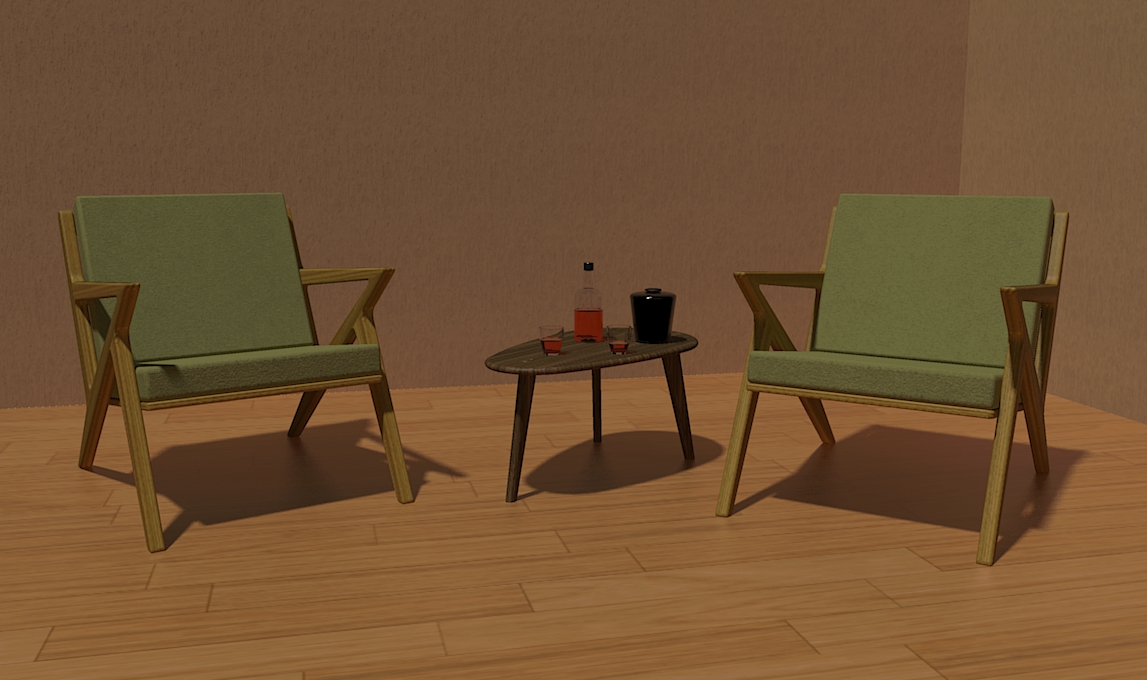
Dave, Not sure how you set up your room, guess I should have asked. Being as you use a Hemispherical Sky setting I guessed you used some kind of open box for your "room". Posting a pic of a quick shot to try an emulate what you were trying. Doing an interior this way is totally different than what I'm used to. 98% of the renders I'm doing for job are interior shots. The spaces are fully modeled and lit with light emitting panels. Works well for the crazy stuff I'm doing.
That said I through together 2 walls and a floor , slammed chairs , table and booze in the corner. Used Hemispherical Sky setting. What I did do was turn on shadows in SU and adjust the settings until shadows had very little rake. Did test renders on low and played with sun TW sun settings until I got something reasonable.
The posted pic had Brightness - 0.6 , Haze - 30 , Sun Strength - 2.0 . Also gave the sun the RGB value of a tungsten light bulb.
For me I'd rather set up an enclosed room and use point lights , spot lights, emitters or a combo of the same for doing interiors. F.Y.I. setting up and running the test took maybe 15 - 20 minutes tops.
-
Agree with all of your points.......I just threw the render together because I finally got the glass thickness correct. Yes, it was a "room" with 3 walls and no ceiling.
I do want do one with a full room, windows and some wall decorations. Then use interior lighting. I also want an HDRI background that you can see through the windows. Slowly I am learning this. When I thought I was creating the glass at .1" it was actually 1". Once I got past that stupidity, things started improving.
BTW: I really like your wood floor. Wish I had a material like that one. And yes, the rest of the model was good too. Maybe a little dark but I liked it.
-
Dave, You are going to get so sick of me
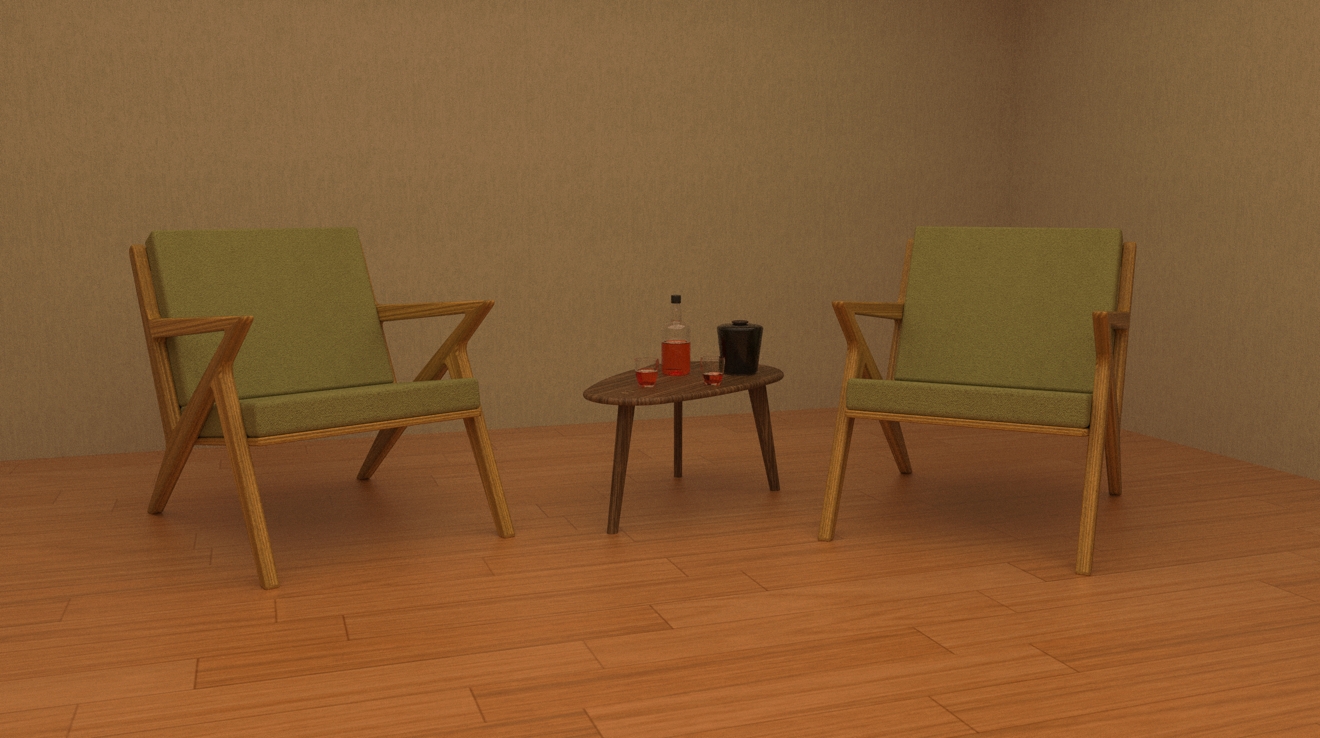
 ! The last pic I posted I new was pretty dark. It was on purpose. I was hoping you would pick up on how stark the shadows were. Shadows from sun settings are a lot stronger than shadows in most interior spaces. Posted two more quick tests, scene the same as the last.
room test 09 - Fully enclosed room. Light emitter at ceiling, 2' smaller on all sides. Lowered 8" below actual ceiling. RGB of emitter 255/214/170. Rendered on 09 interior progressive. 10 passes, 14:20 minutes . Exposure set to 1200 in post pro before saving.
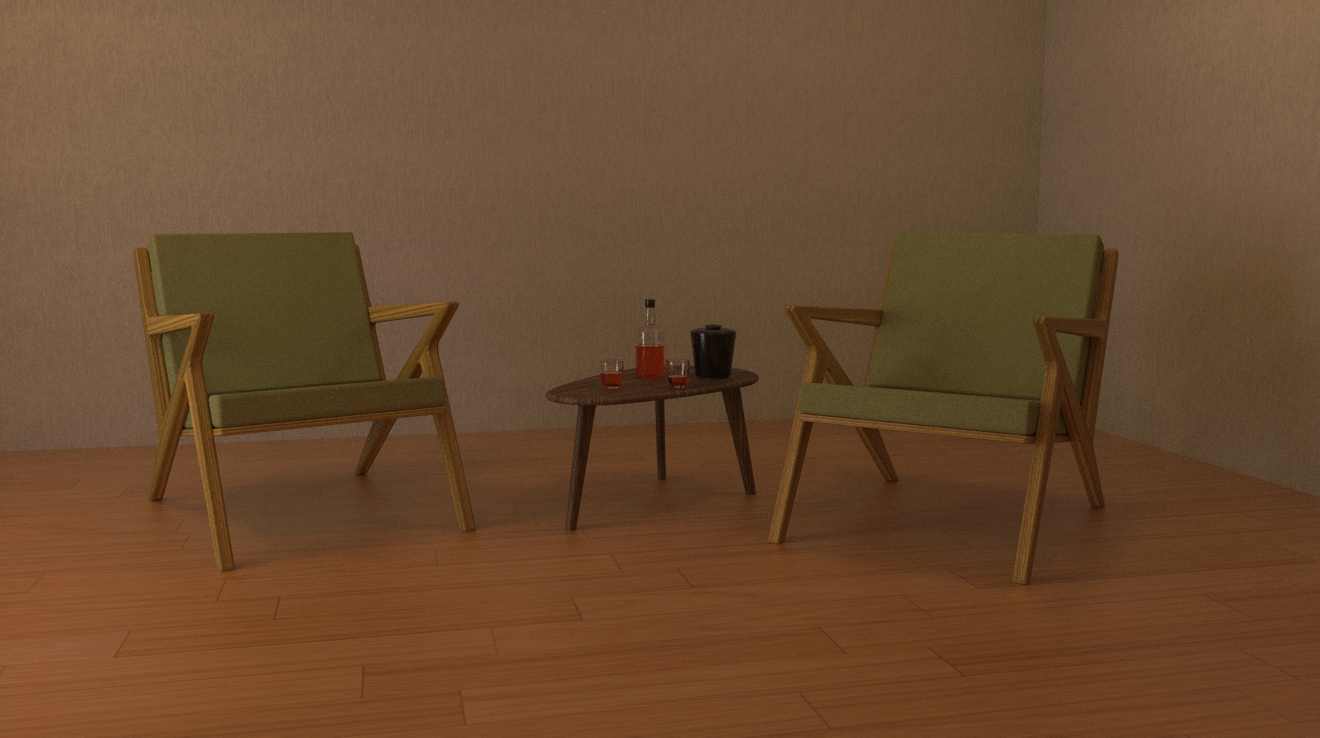
room test 09 2 - Same room but added 6' sliding door in wall to left of scene. Set a light emitter outside of door. Left RGB at default 255/255/255. Power 200,000 . 4 point lights in room, two spaced out over chairs. Two at other end of room, behind camera view. Lights over chairs radius 4 , strength 0.6 . Lights behind camera radius 3 , strength 0.8 . All point lights RGB 255/214/170 . Rendered 09 interior progressive, 15 passes , 27:46 minutes. Saved at 1400 exposure.
The first render could have run another 10 passes. My experience has been after 25 passes you really don't see improvement when your using low resolution textures.
Second render would definitely benefit from some more passes . Image would sharpen up. Added the the door to pick up natural side light that would highlight stuff on table.
You can have those wood textures ,floor and furniture. They are available as texture packs in the sketchUcation store. The fabric on the chair cushion is another texture pack same place . They are low res. NPR textures , but still look real good for the work I do.
-
Never get sick Chuck.........as I said before, I appreciate you taking the time with me. One of these days I might be able to help someone else. I am trying to learn from all of this and really appreciate you sharing your knowledge of Twilight with me.
Hope you have a Happy Easter.
-
i did a quick test with a glass i made myself and a studio hdr. The only thing was the wine wich is not very good.

-
also a test because i saw that de glass was not overal the same thickness and clear. Also made a better wine.

I think this is much better, improving
-
hvanessen , yes you are improving. what will help a lot is make your glass thinner. the base and "bowl" of the glass is still very thick. to look like real life the glass has to be as thin as a real glass. keep practicing you will keep getting better.
-
Hvan - Believe me, I understand your frustration. I finally got the glass better by scaling up 10 times, drawing a bunch of guidelines, drawing the outline, doing the Follow Me stuff and then scaling the drawn glass back down to the correct size. I started with a rectangle that was 100" tall and 50" wide (of course you will want to use the metric system). I then used guidelines to set the size of the various parts. In my case, I wanted to the glass to be only .1" think when I scaled back down. My biggest problem was that I had set my guidelines so that when I originally scaled down at the end the glass was 1" thick (10 times what I wanted).
Believe me, once I got the glass to a more proper thickness, the rest started to fall into place. It was then much easier to look at things like the IOR settings and it all to come together and the things that other people had posted in the thread became much clearer.
I too was VERY frustrated and thought I would never learn how to use the tool. Just be patient and do not give up and you will get it. That is a promise.

I have not had time to do anything for a couple of days but I now want to start learning how to do interior and exterior lighting to build some more sophisticated renders. I look forward to seeing some additional renders from you as well.
-
Dave, Posted a couple more shots that might be helpful. chuck.
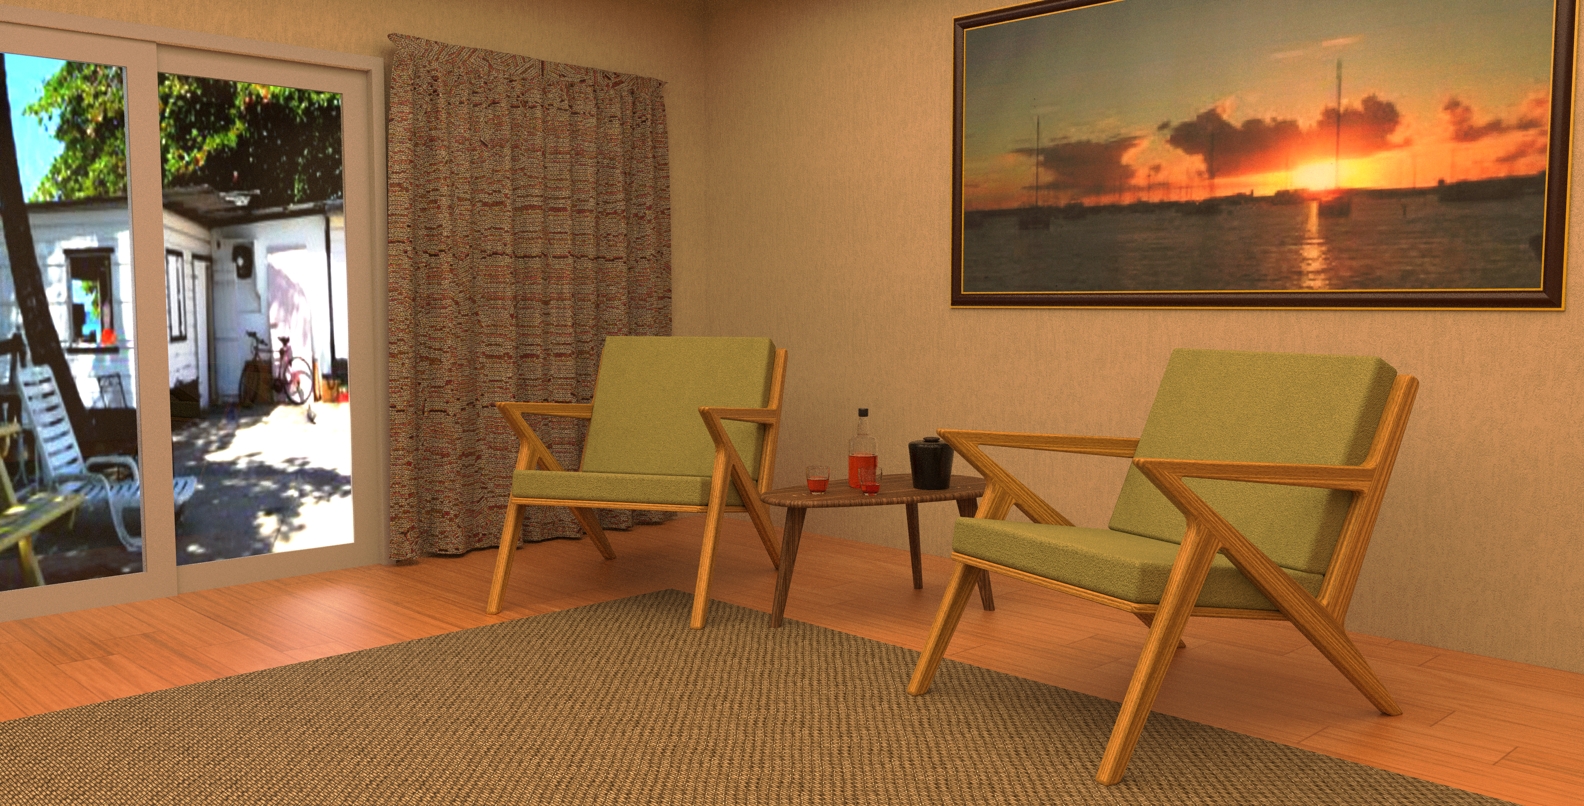
Room Test 3B - This is the same "room" from the earlier post. Added a sliding door , tacky picture on wall , carpet and drape. Light in the room is an invisible emitter, power set to 80.000 . The out side view is a pic applied to a rectangle the size of the sliding door applied as a texture. I gave it the property of an emitter , power of 100.000 . I think the balance of light in the room versus the brightness of the outside image is pretty good. You have to be careful if you set the image pasted against a door or window you can "blow" it out if you run the power to high. Saved the image at 2.4 exposure and 0.900 gamma.
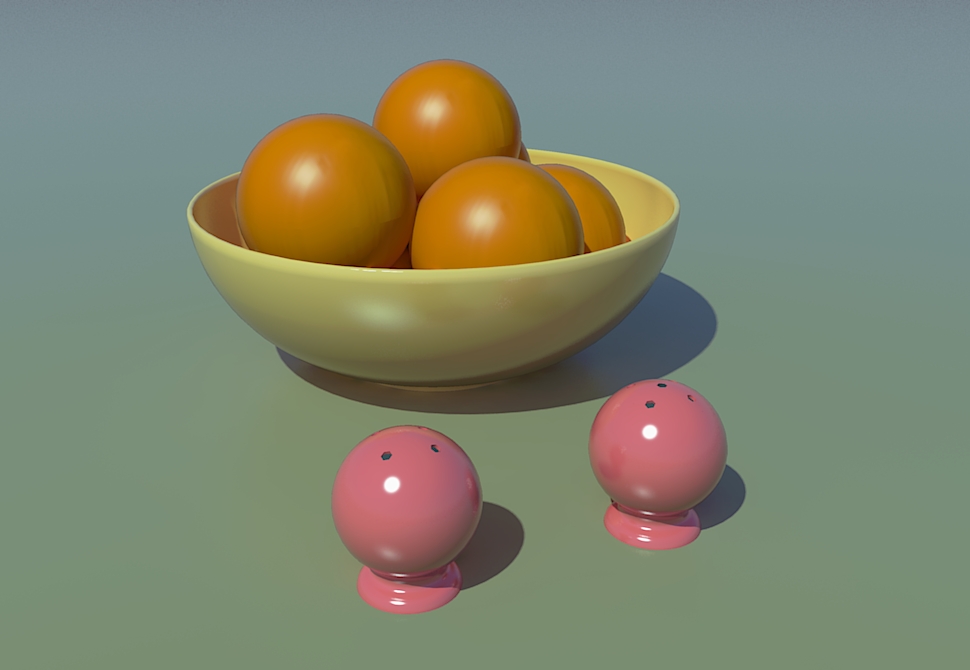
Fruit stuff - This was a quick render I did after modeling the objects in the scene. I've gotten in the habit of doing quick test shots of models just to check out how the model is going to look. Are round objects really smooth, did I choose good colors, that sort of thing. It's good practice for getting comfortable with using the various tools in TW.
-
Like these 2 images a lot. In particular, I like the texture of the oranges and the bowl in the 2nd image.
I also like the way you created the background outside the sliding door and the drapes. All good stuff to try to learn.
This stuff (anything related to rendering and creating the type of scenes you have been doing) is a long way from what I normally do.
Hello! It looks like you're interested in this conversation, but you don't have an account yet.
Getting fed up of having to scroll through the same posts each visit? When you register for an account, you'll always come back to exactly where you were before, and choose to be notified of new replies (either via email, or push notification). You'll also be able to save bookmarks and upvote posts to show your appreciation to other community members.
With your input, this post could be even better 💗
Register Login


Advertisement