3D Truss Models
-
Actually let me rephrase that, any roof can get very complicated with intersecting roof lines whether it is framed out with trusses or more traditional rafters and beams.
If I incorporate traditional framing I would like for the user to be able to indicate the perimeter of the ext. walls and for the logic to be smart enough to handle any possible configuration. Consider the custom home with guest house below:
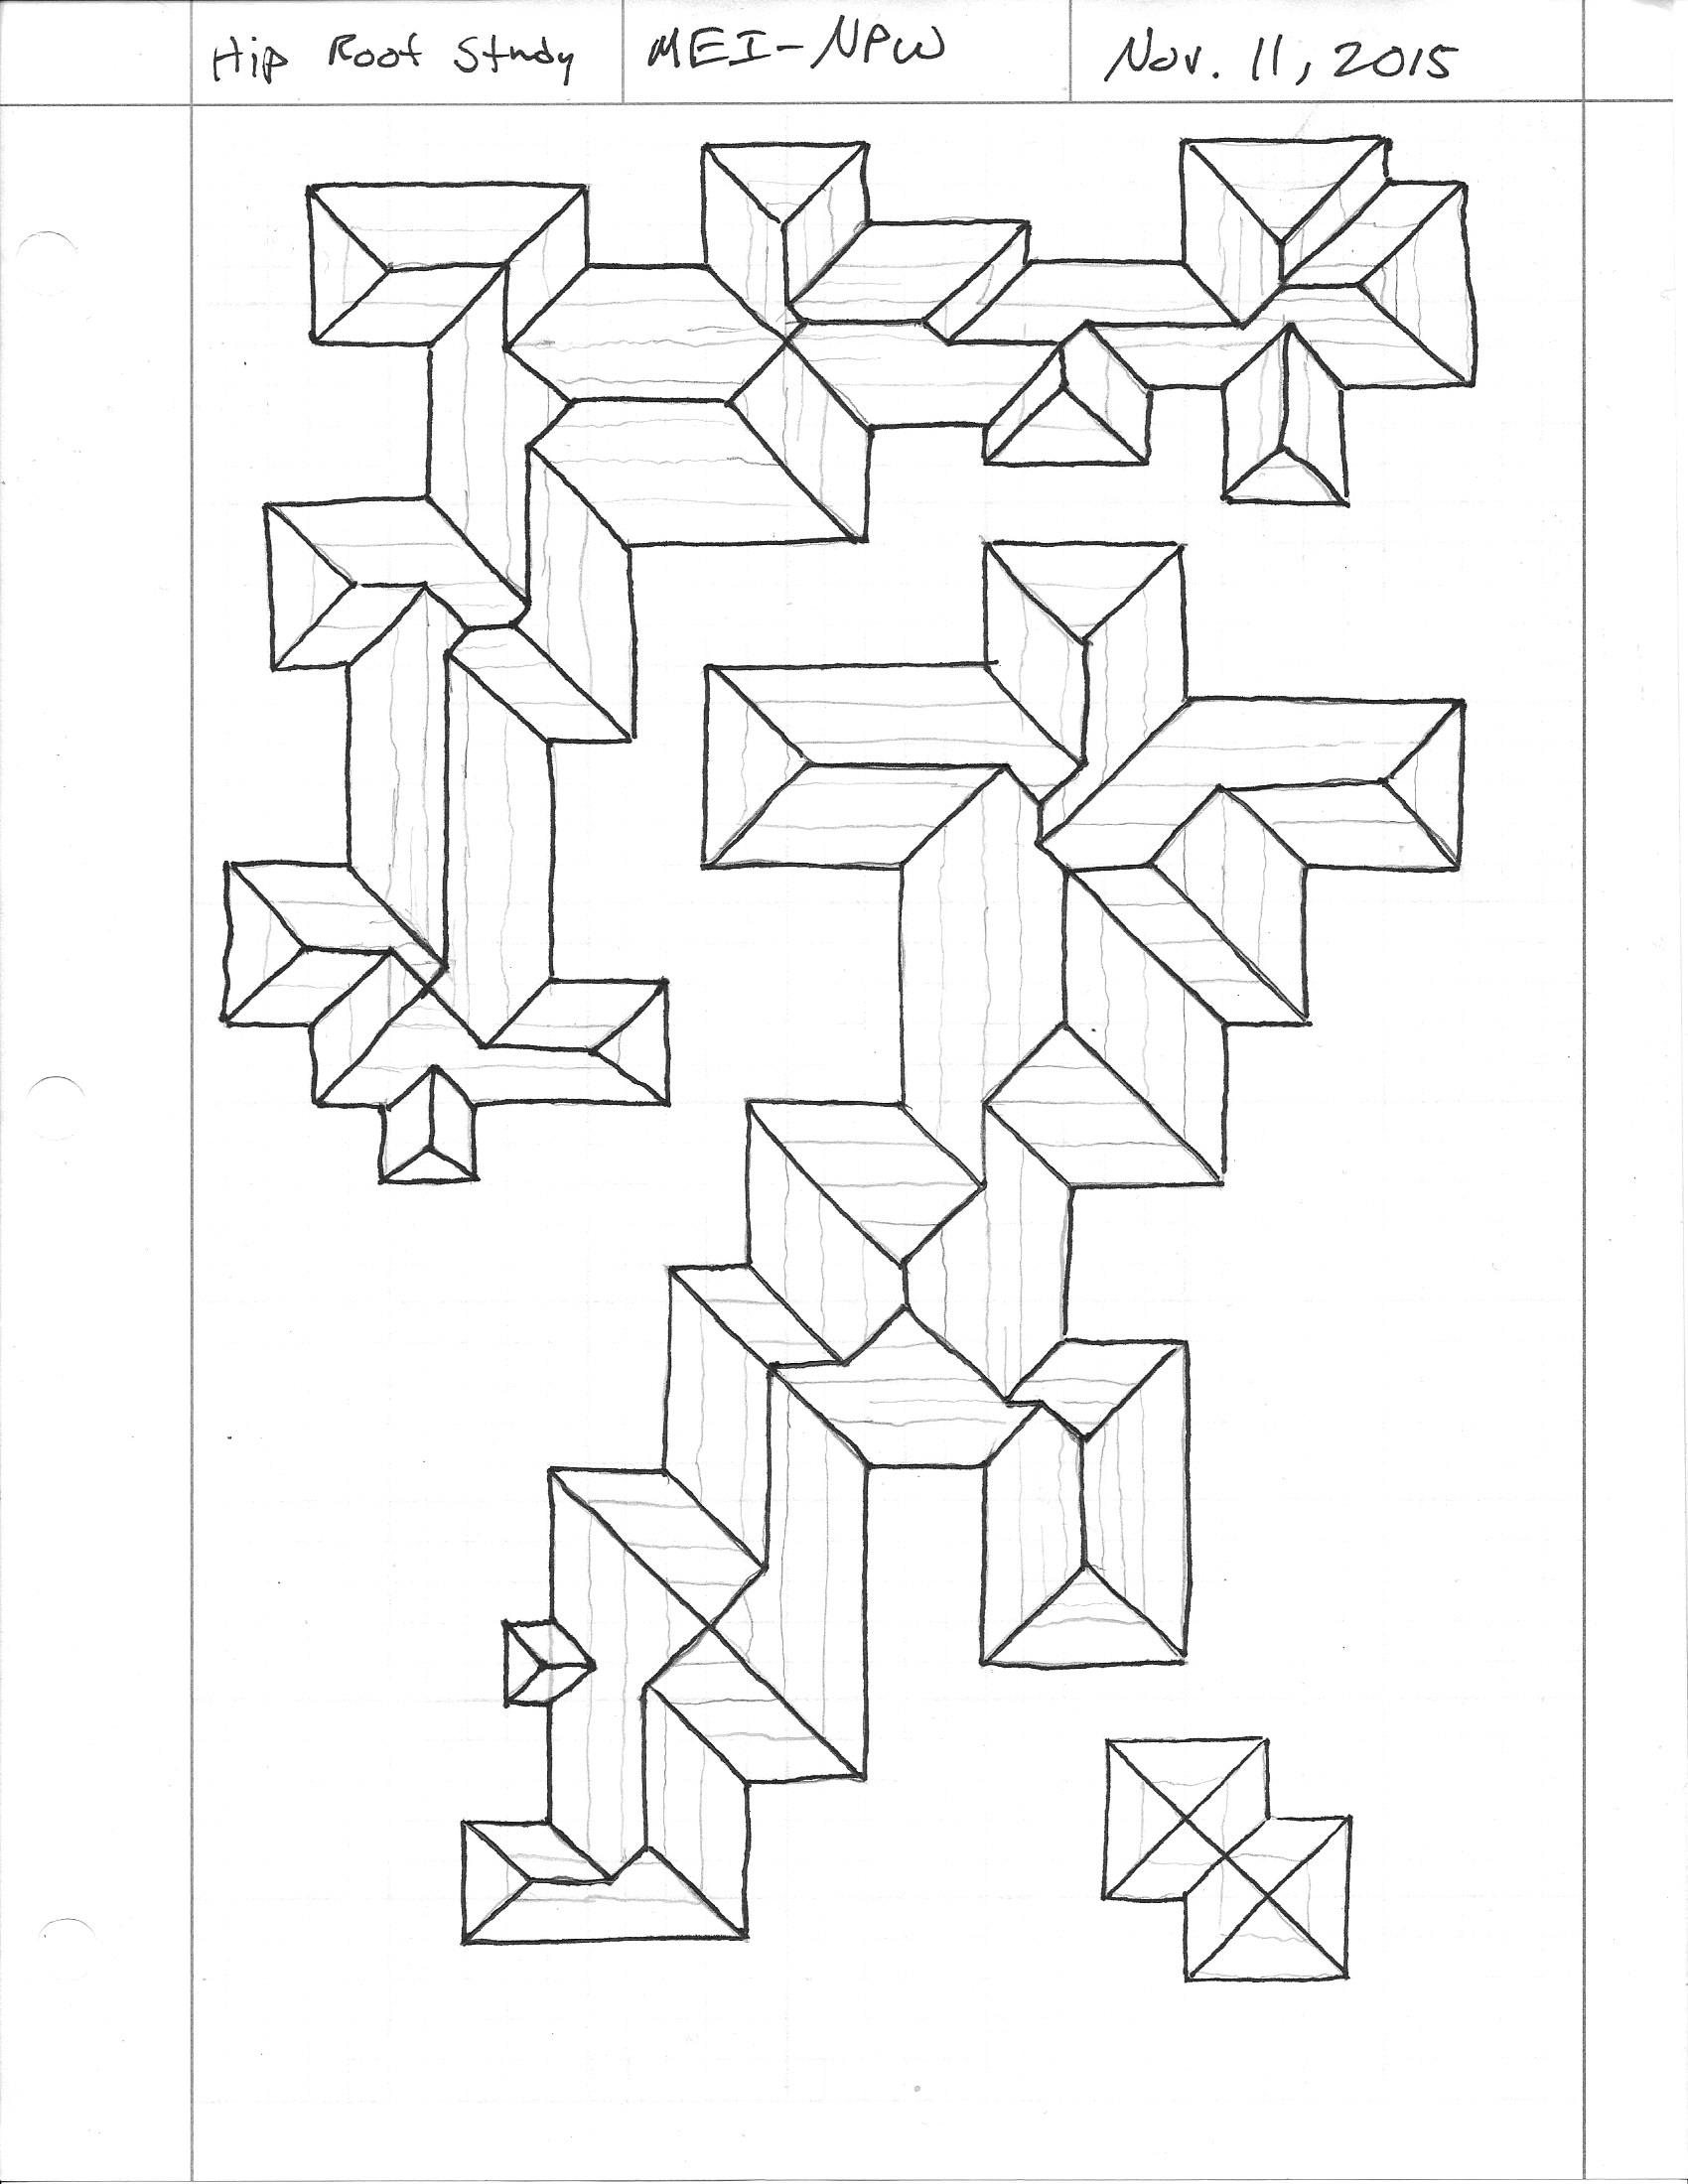
Just to determine the proper placement of the ridge and valley lines requires some serious algorithms. The technique I used to do it manually simply involves drawing isolines moving a fixed increment in from the ext. wall line. These are really no different than contour lines on a topographic map. The vertexes created by the intersection of these lines indicate the location of hip rafter, flying hip rafters and valley rafters. When the isolines merge into one line then you have a ridge board.
-
An interesting implementation of a straight line skeleton algorithm is at this link:
-
Version 1.1.1 - 11.14.2015
- Gable end trusses enabled for all monopitch truss types.
- Added energy/raised heels for monopitch trusses (3 variants: wedge, slider and vertical w/ strut).
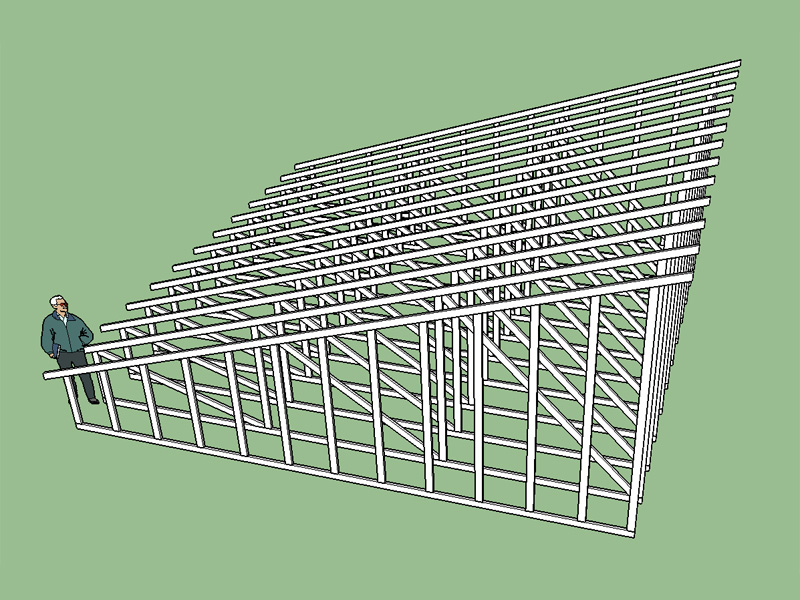
Currently there are only two versions of the monopitch truss available (2/2 and 3/3).
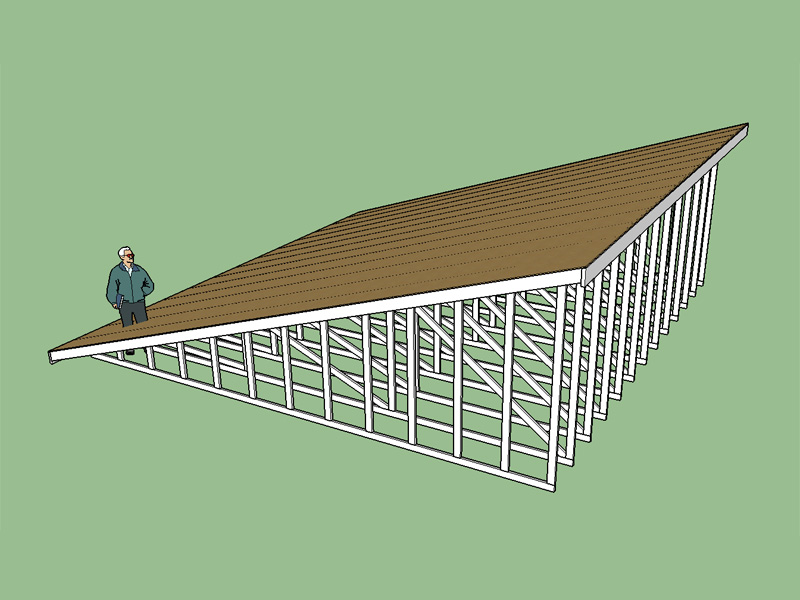
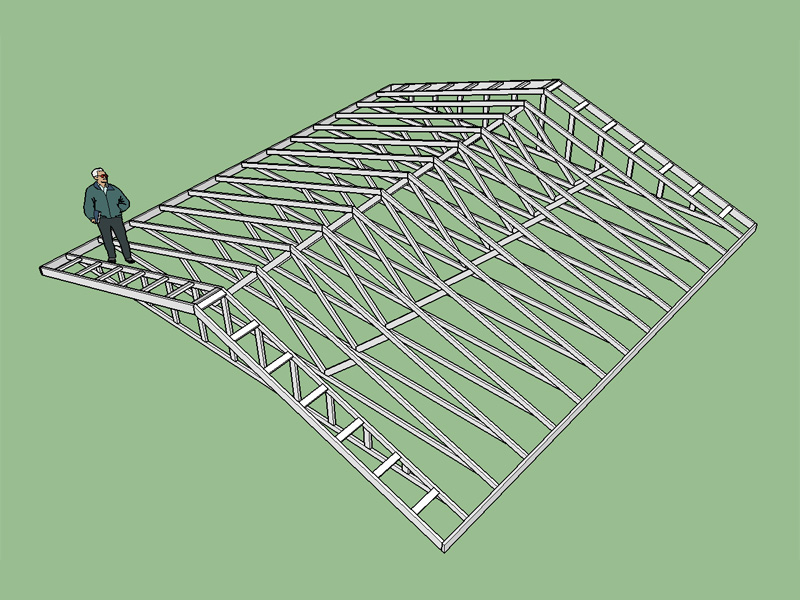
The truss set below shows a monopitch truss set with gable ends and a 36" raised heel.
-
I've also added advanced options for monopitch trusses (sheathing, rake and fascia).
-
Version 1.1.2 - 11.16.2015
Metric input enabled for monopitch truss types. -
Has anyone actually tried to manually create hip roof framing in SU. I had some questions about the geometry and the way certain angles come together so I started drawing a typical hip roof (rafters) and I quickly realized its not at all easy. I can probably do this sort of thing easier in AutoCAD or Solidworks but maybe that is because my familiarity with SU is still somewhat limited. The ability to create traditional hip rafter framing is now on my todo list for the plugin.
-
An excellent video series on drawing a hip roof in SU:
He pretty much has it down to an art. Now I just need to figure out how to mathematically model it so that all of this can be generated within a few seconds and three mouse clicks.
So far with trusses or any other group/component I am creating everything has been 90 degrees so it is simply a matter of drawing a profile and using the push/pull function. With some of these more complicated geometries it is going to get a lot more interesting.
-
Hi Nathaniel,
I made a few Dynamics of hips, valley creepers (see my warehouse page) may help in working out pitching points and angles, or help to formulate your ideas
https://3dwarehouse.sketchup.com/user.html?id=0838679030929007270242769philip
-
Oh, 'THAT' type of TRUSS, sorry I thought you meant something else.......
-
It probably is dependant on the building design what height the cuts are, unless you want to make them even and have no overhang. then the eaves could be the same height. Otherwise with overhangs it seems each building is a special case: whether you want to even up the roof edge height or not, how wide the overhangs are etc.
-
@pcmoor said:
Hi Nathaniel,
I made a few Dynamics of hips, valley creepers (see my warehouse page) may help in working out pitching points and angles, or help to formulate your ideas
https://3dwarehouse.sketchup.com/user.html?id=0838679030929007270242769philip
Do you make these models dynamic within Sketchup or code them in? I need to figure out how to make dynamic components using the API so far I'm not finding much documentation.
-
Given the slopes of the dual pitch truss and the span calculate the distance between the left bearing and the peak:
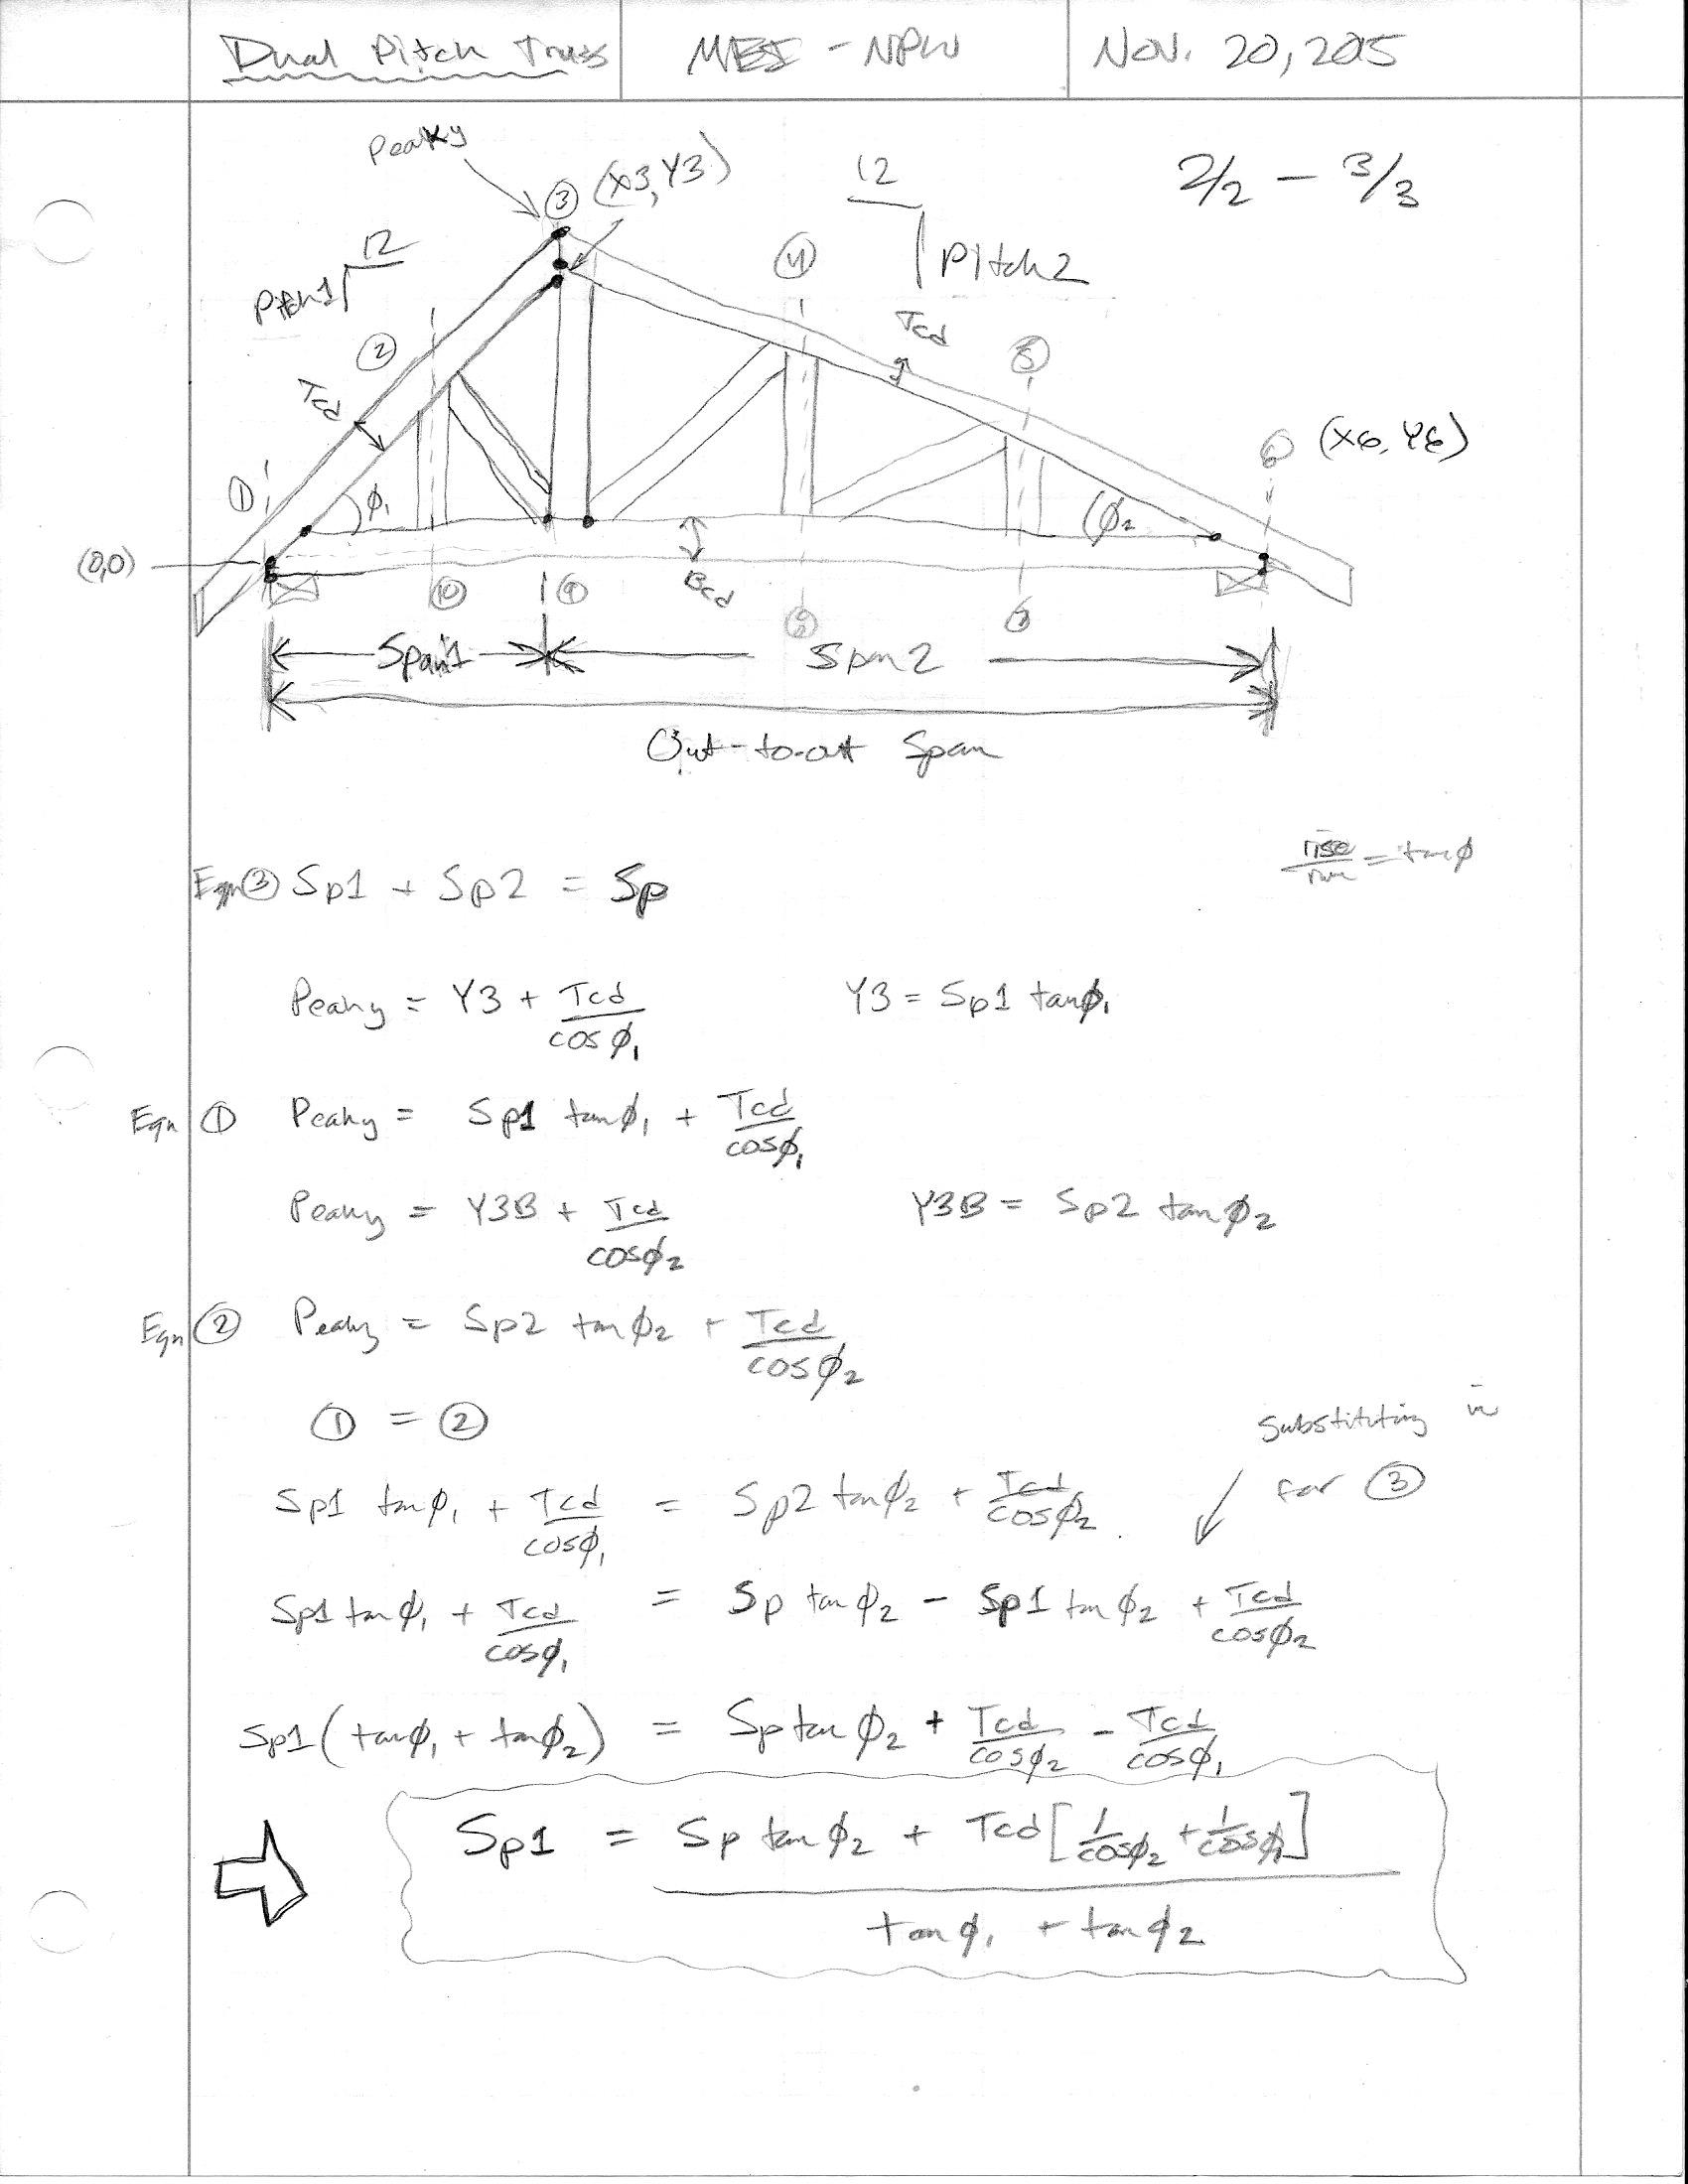
However, you might notice that we are assuming the buttcut and top chord depth is equivalent for both sides. If the slopes are different then this will mean that the heel heights will be different. Should the heel heights be the same?
Addendum:
After giving this some more thought the key for a continuous eave line is (ie. hip roofs) is the fascia. The fascia height is a function of the overhang, pitch, top chord depth and buttcut. I think the easiest is to default to equivalent buttcut and top chord depth for both left and right sides of the dual pitch roof and then give the option for independent overhang and raised heels for both sides this should give enough latitude to the designer so they can make any configuration possible.
-
Downloaded the new 2016 SketchUp and installed the plugin, no issues thus far so I'm going to say its 2016 compatible.
For now I'm going to stay with the current .rbs encryption method otherwise the plugin will not work with previous versions of SketchUp.
-
Outlookers enabled under advanced roof options for Common, Scissor and Attic truss types.
Not really sure what is the best treatment of the outlookers at the peak of the roof and consequently what is best way to space them. Measure them from the peak or the eave/fascia?
One thing worth noting here is that structural outlookers are also enabled but I have not yet coded in the dropped top chord gable end trusses that would match structural outlookers, something for another day. Due to the option of vertically or horizontally oriented outlookers the configuration of a dropped top chord gable end truss can take two configurations. For attic trusses this gets even more complicated at the gable end, hence I haven't even attempted the gable end truss option for attic truss types yet.
The hot items on the todo list right now are:
- Tail Bearing Trusses
- Gambrel Attic Trusses
- Dual Pitch Trusses
- Rafter Roof (Gable and Hip)
- Valley Truss Set
- Hip Truss Sets
If you feel like something should take precedence over these items please advise.
-
Version 1.1.3 - 11.21.2015
Outlookers enabled under advanced roof options for Common, Scissor and Attic truss types.
Gable end trusses enabled for (2/2, 4/4) scissor truss types.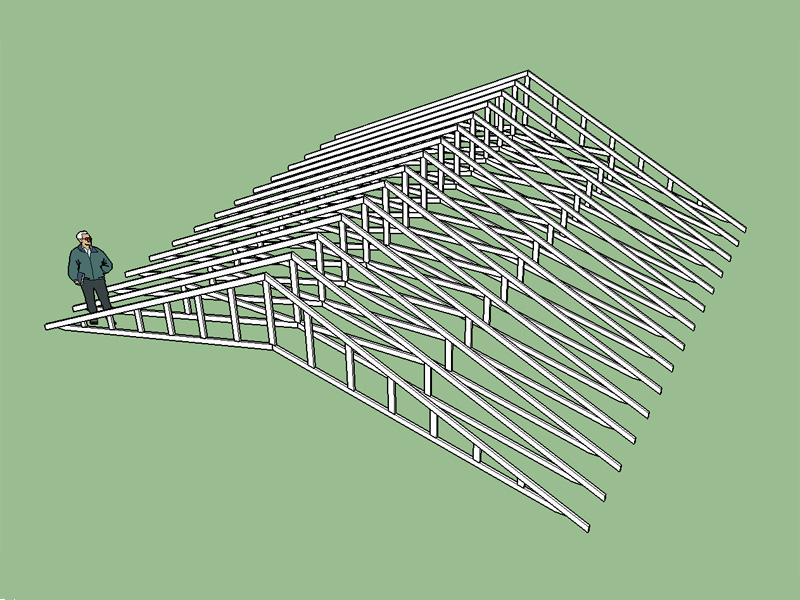
-
Very nice. Around here we just put a vertical block at the ridge behind the barge rafter and the first outlooker (outrigger) is spaced away from this. Also when a rafter is over the gable wall and the outrigger is structural (commonly it is), the lowest one is spaced away from the birdsmouth so the notch doesn't weaken the rafer so much..
-
Outlookers get a little complicated depending on whether they are structural or not. Typically around here we see them at 24" on center and they are usually structural. The top chord of the truss is dropped either 1.5" or 3.5" depending on if they are oriented horizontally or vertically. With structural lookouts the first lookout from the eave is usually non-structural since the dropped top chord truss will have a special slider attached to top chord to achieve the overhang. See image below:

Usually the sheeting goes on starting at the bottom so based on that the lookouts would be measured from the bottom edge of the sheeting so that they line up with the seams every 48".
I've seen a single vertical placed the ridge when the outlookers are vertical however what is common practice when the outlookers are horizontal?
Notice the different configuration of the top chord when the drop is only 1.5" (oriented flat).

If the overhang is zero then this slider or splice goes away.

-
A dropped top chord with flat orientation might look something like this (spliced top chord):

Without an overhang the gable end truss becomes (no splice or slider required):

Note that the outlookers would probably be spaced from the bottom at 24" on center, so this model is not quite correct.
Another interesting point to note is that if the overhang or top chord of the truss is a 2x4 and one wants to use structural 2x6 vertical outlookers at the gable end. How would that work, I don't think it would at least not easily. If the outlookers are structural and vertical I will constrain them to be the same depth as the top chord in order to simplify things. This applies to imperial or metric, units are not a factor.
I'm going to need some serious logic to properly deal with gable end trusses and outlookers in order to properly cover all of the options and possible configurations, especially when you throw raised heel trusses into the mix.
-
Vertical structural outlookers with 12" overhang and 16" gable overhang:

-
steam rolling ahead!


Advertisement