sketchucation logo sketchucation
    • Login
    ℹ️ Licensed Extensions | FredoBatch, ElevationProfile, FredoSketch, LayOps, MatSim and Pic2Shape will require license from Sept 1st More Info

    [Plugin] GKWare Cabinet Maker

    Scheduled Pinned Locked Moved Plugins
    625 Posts 67 Posters 410.3k Views 68 Watching
    Loading More Posts
    • Oldest to Newest
    • Newest to Oldest
    • Most Votes
    Reply
    • Reply as topic
    Log in to reply
    This topic has been deleted. Only users with topic management privileges can see it.
    • G Offline
      Garry K
      last edited by

      I will add that to the list of requests.

      Another request that I've had that would help you out is to provide a mechanism to add a cutout and or routed groove into any part. For instance, make a cutout in the back panel for plumbing, or make a cutout for a grommet for wiring in a side panel etc. You could then use this type of a mechanism and make a notch for the vertical rail.

      1 Reply Last reply Reply Quote 0
      • M Offline
        MySchizoBuddy
        last edited by

        Are you planning to add support for lockdowel fastening system or Ovvo

        1 Reply Last reply Reply Quote 0
        • G Offline
          Garry K
          last edited by

          When there is enough interest I often add feature requests.

          1 Reply Last reply Reply Quote 0
          • N Offline
            NBG
            last edited by

            while we speak of hardware support, I think for european customers the most common drawers and hinge systems are from Hettich and Blum. And I know that Blum (maybe Hettich too) has all the 3D components ready to use on their site.
            But I guess that's still a pretty big work to implement this in Cabmaker.

            1 Reply Last reply Reply Quote 0
            • G Offline
              Garry K
              last edited by

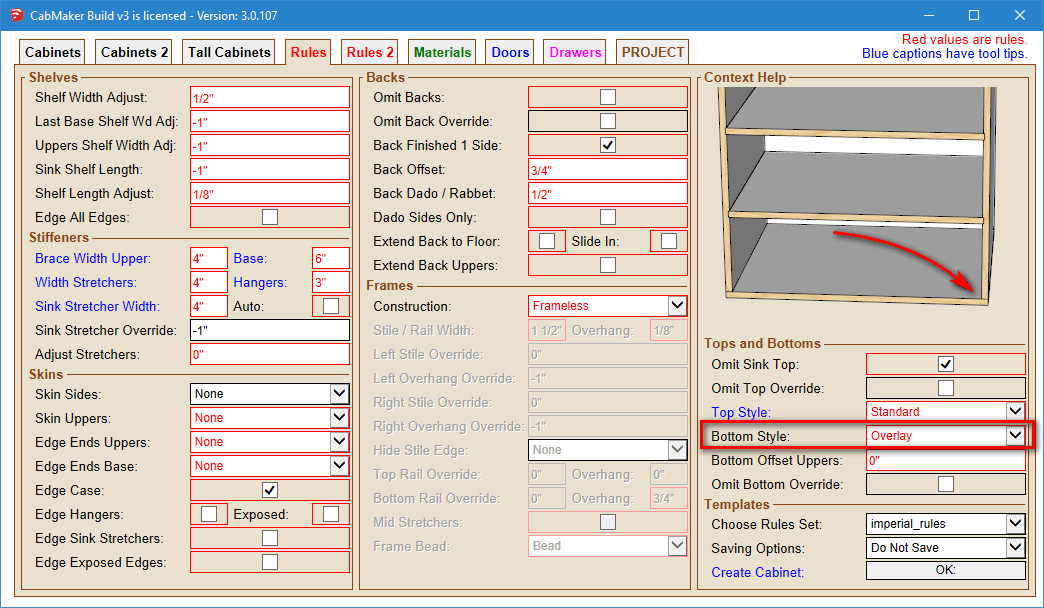
              Version 3.0.107 is now available from my web site.

              I have added a Bottom Overlay style. You can now sandwich the sides between bottom and top

              Overlay Bottom.png

              1 Reply Last reply Reply Quote 0
              • G Offline
                Garry K
                last edited by

                A new version of CabMaker is now available.

                Version 3.0.108 – Feb 7, 2018

                1. PROJECT info was not re read when switcthing models after an edit. Fixed.
                2. Stretchers had front edge banding with Face Frames and shouldn't have. Fixed.
                3. Adjustable shelves for tall cabinets came across to CutMaster Fixed Shelves. Fixed.
                4. Overlay bug for bottom when back is not dadoed into sides. Fixed.
                5. Added Case Back option to edge backside of cabinet when no back.
                6. Fixed pullout bug.

                A new version of CutMaster is also available from my website.

                1 Reply Last reply Reply Quote 0
                • utilerU Offline
                  utiler
                  last edited by

                  Hi Garry, just wondering if you can explain why this happens when i go to change a cabinet that I did in a drawing a few weeks ago?

                  Seems to change it back to another set of defaults!!


                  Cabmaker.wmv

                  purpose/expression/purpose/....

                  1 Reply Last reply Reply Quote 0
                  • G Offline
                    Garry K
                    last edited by

                    There was a bug back in that old version where the PROJECT settings become the same as a different model that you just edited in the the same Sketchup Session.

                    The work around is close sketchup - then open it and your old project and the cabinets should maintain their settings.

                    1 Reply Last reply Reply Quote 0
                    • utilerU Offline
                      utiler
                      last edited by

                      Thanks Garry, I did that and still the project settings have not reset.


                      2018-02-26_100719.jpg

                      purpose/expression/purpose/....

                      1 Reply Last reply Reply Quote 0
                      • G Offline
                        Garry K
                        last edited by

                        Version 1.0.67 is very old - I'm currently working on version 3.0.110

                        1 Reply Last reply Reply Quote 0
                        • G Offline
                          Garry K
                          last edited by

                          You can use it as long as you like. A number of users are still using 1.0.67 and are happy with it. Yes - all versions of software have some bugs. The question is if you can live with it or not.

                          1 Reply Last reply Reply Quote 0
                          • utilerU Offline
                            utiler
                            last edited by

                            Yes, I am aware that it is the free version.

                            So should it not be used?

                            purpose/expression/purpose/....

                            1 Reply Last reply Reply Quote 0
                            • utilerU Offline
                              utiler
                              last edited by

                              No worries ta. Just going back to an older job and updating the design has highlighted the issue. I'll see if I can work around it; if not I'll look to buy the full version [if bug free] even though I'd be only using it for conceptual modelling....

                              thanks for the explanation.!

                              purpose/expression/purpose/....

                              1 Reply Last reply Reply Quote 0
                              • G Offline
                                Garry K
                                last edited by

                                Version 3.0.110 is going to be released shortly.

                                1. Added Horizontal Grain for cabinet backs on a cabinet by cabinet basis.
                                2. Added Omit Left Side Dado for cabinet backs on a cabinet by cabinet basis.
                                3. Added Omit Right Side Dado for cabinet backs on a cabinet by cabinet basis.
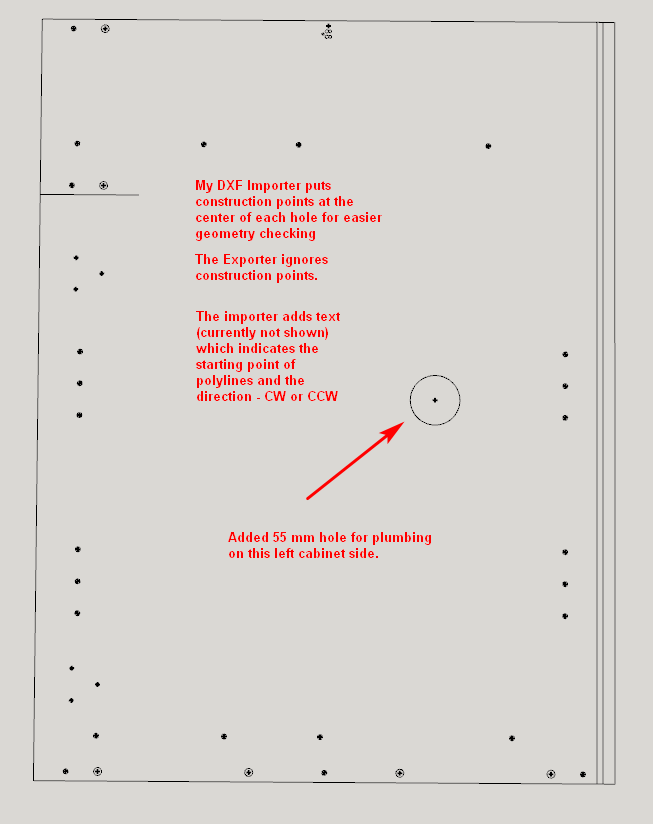
                                4. Added DXF Export. First import DXF files using the CabMaker DXF Import, then
                                  perform simple edits in Sketchup and finally using CabMaker DXF Export write them
                                  back to disk.

                                This example has the Omit Left Dado checked.

                                Omit Left Dado.png

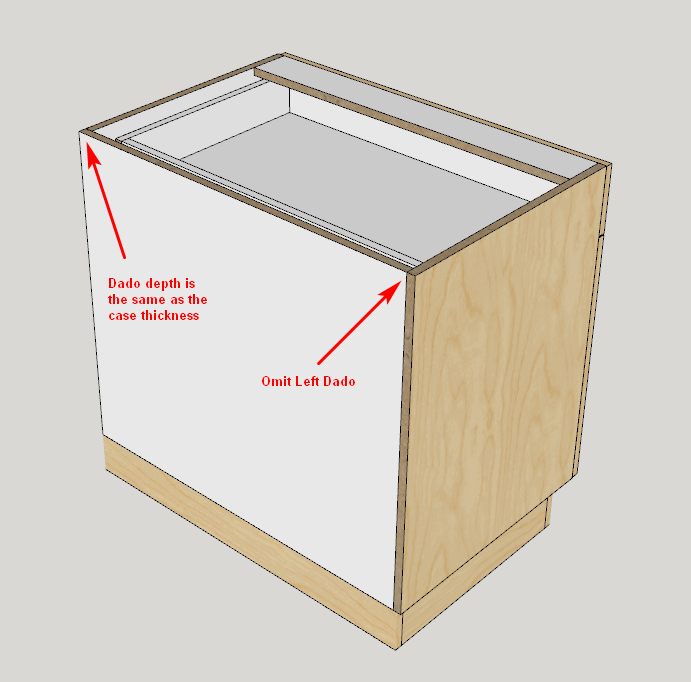
                                DXF importer and exporter allows you to easily add cutouts etc. to cabinet parts.

                                exporter.png

                                1 Reply Last reply Reply Quote 0
                                • G Offline
                                  Garry K
                                  last edited by

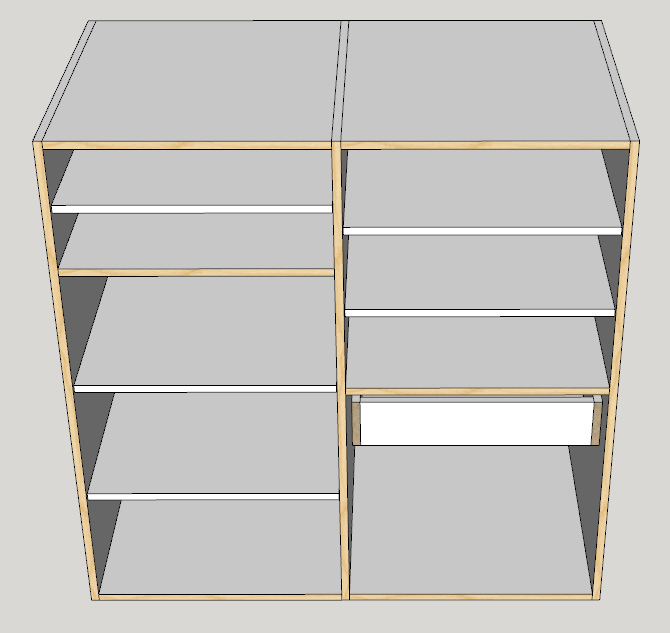
                                  Here is a split corner cabinet which is made up of 2 cabinets.

                                  split.png

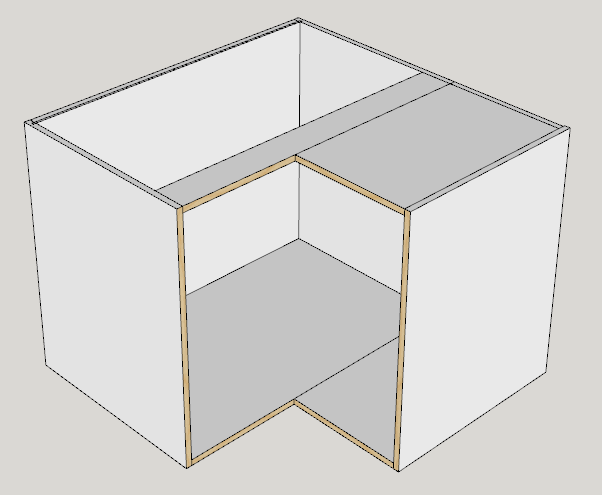
                                  One strategy is to have 1 door hinged on each cabinet using a Width adjustment.

                                  split 2.png

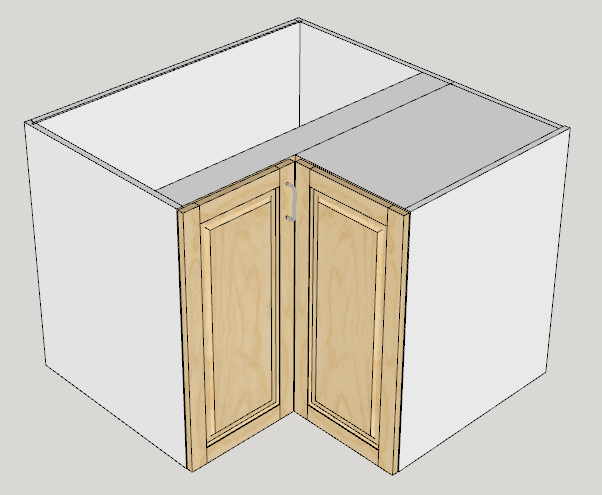
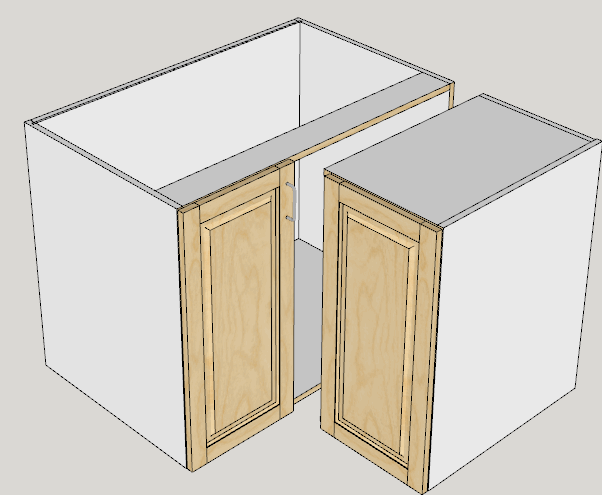
                                  This is looking at the 2 cabinets pulled apart. The cabinet on the left is a straight forward standard cabinet with 1 door hinged left and a width adjustment of -623 mm

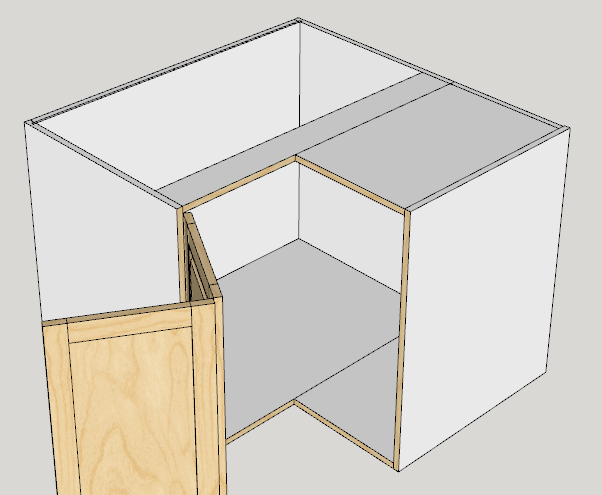
                                  The cabinet on the right is a half cabinet with full back, full top and the left side is ommited. In this case there is a single door right hand hinged with a small width adjustment of -39 mm which takes care of the missing left side and the thickness of the door.

                                  split 3.png

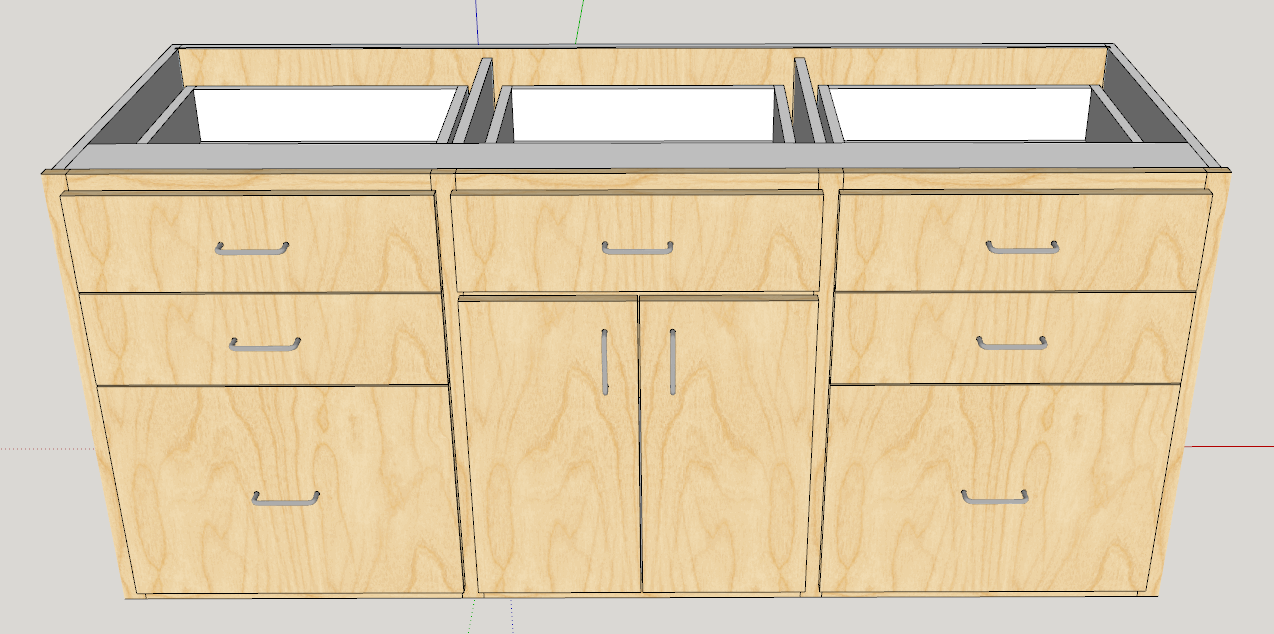
                                  In this example we have 2 cabinets both with 0 doors and a third return cabinet that has 0 depth.

                                  split 4.png

                                  1 Reply Last reply Reply Quote 0
                                  • G Offline
                                    Garry K
                                    last edited by

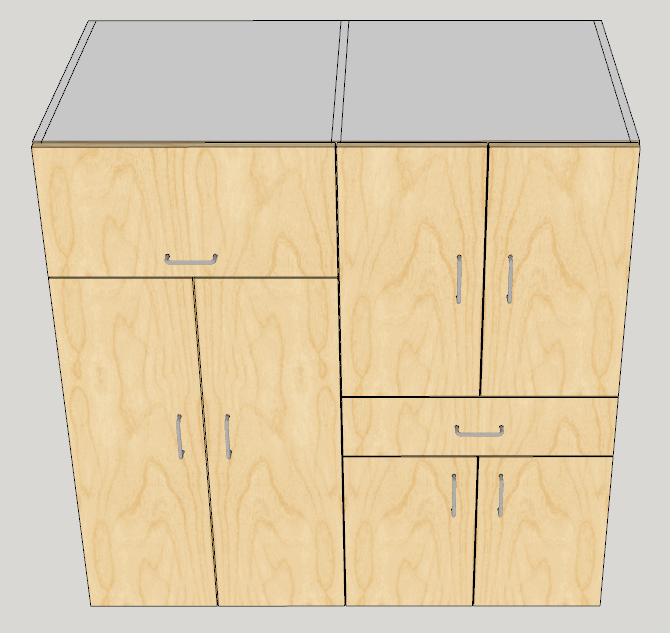
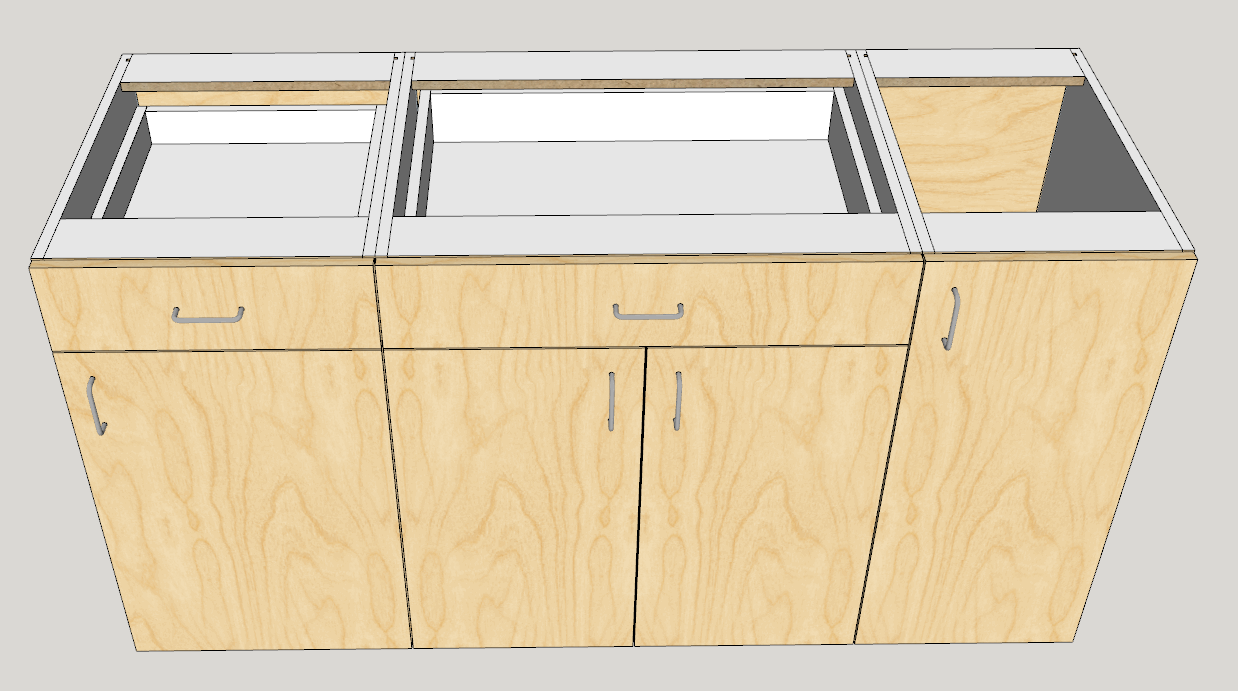
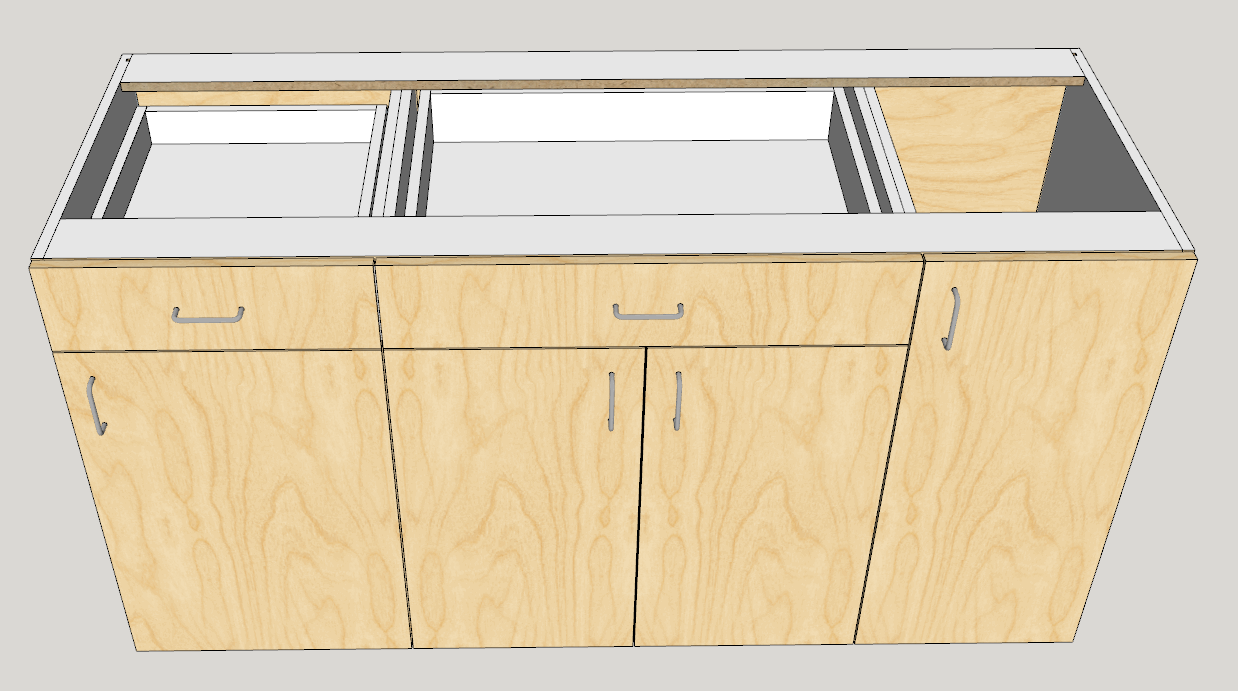
                                    Some closet manufacturers save on cost and weight by having 2 side by side cabinets sharing a common side.

                                    In CabMaker you can omit the left side of the second cabinet (right). Also set the Adjust Left Gap of the second cabinet (right) to half the thickness of the side. So set it to 9 mm for an 18 mm side. Likewise set the Adjust Right Gap of the first cabinet (left).

                                    Here are 2 images with and without door / drawer fronts.


                                    closet doors.png


                                    closet doors off.png

                                    1 Reply Last reply Reply Quote 0
                                    • G Offline
                                      Garry K
                                      last edited by

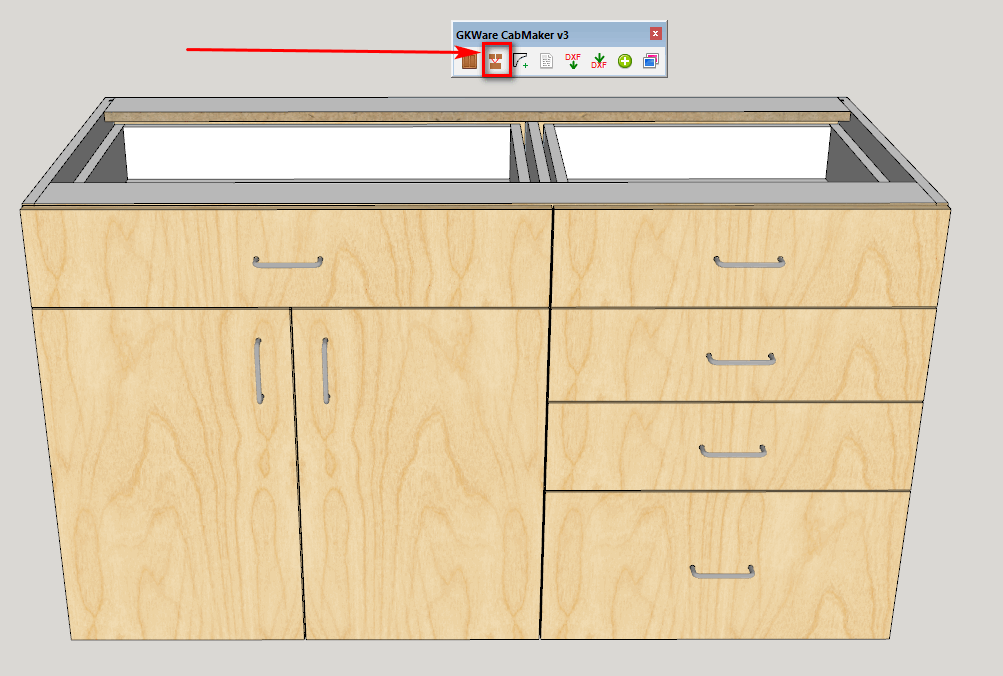
                                      I am now adding the ability to merge certain styles of cabinets together providing they have the same height and depth and are either Standard, Sink or Tall cabinets.

                                      There will be 2 types of merging - type 1 that will end up with double partitions which has a number of benefits and - type 2 that will end up with a single shared partition.

                                      For double partitions you simply have the cabinets touching, select 2 or more cabinets and then click the merge button.

                                      separate.png

                                      After the merge

                                      merged.png

                                      1 Reply Last reply Reply Quote 0
                                      • G Offline
                                        Garry K
                                        last edited by

                                        With a single partition and overlay doors you first adjust the side gaps. In this example the case thickness is 18 mm so you adjust the gap by 9 mm for each cabinet.

                                        If afterwards you need to edit 1 of the cabinets then edit all of them which will undo the merge and then redo these steps.

                                        mrege 2 cabinets.png

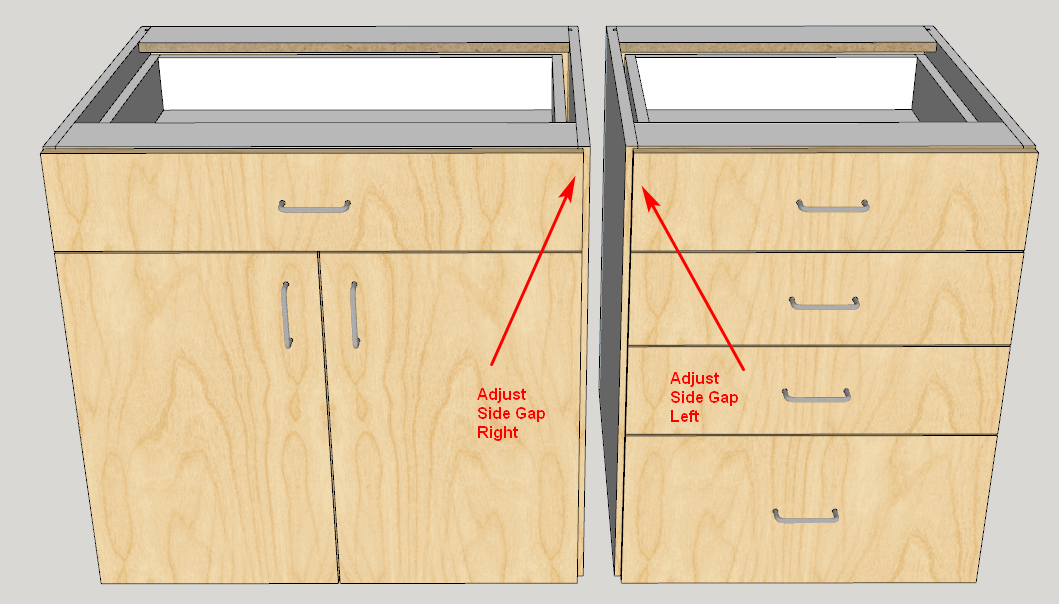
                                        For single partition you then position the cabinets so that the shared partition exactly overlaps.

                                        overlap 2 cabinets.png

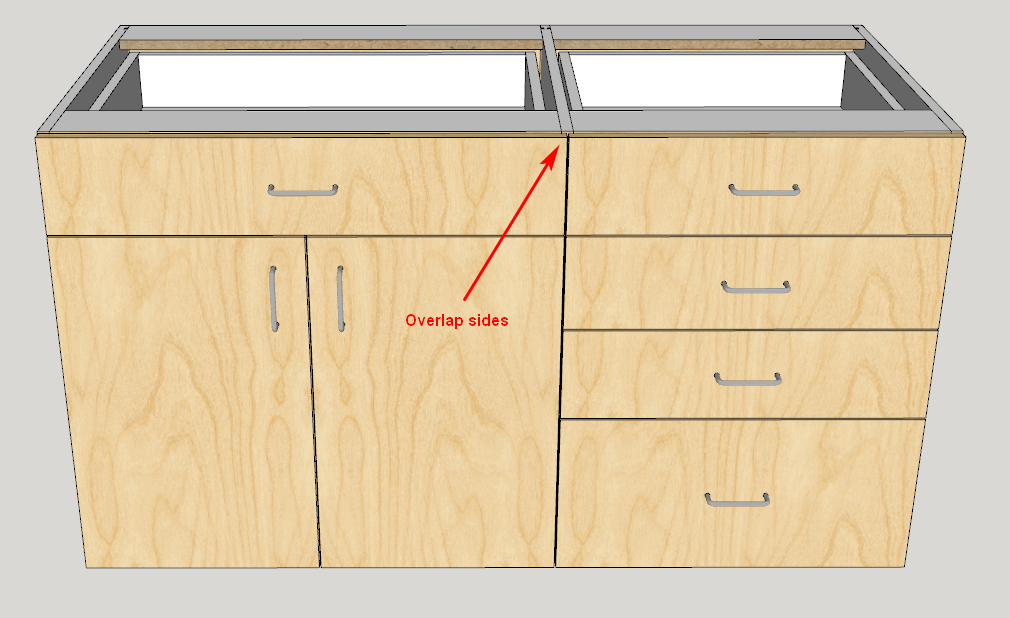
                                        Finally select both cabinets and click the new merge button. The back, bottom, hanger and split top (or standard top) merge.

                                        complete the merge.png

                                        1 Reply Last reply Reply Quote 0
                                        • G Offline
                                          Garry K
                                          last edited by

                                          New versions are now available on my website

                                          CabMaker 3.0.112
                                          CutMaster 3.0.1.67

                                          1 Reply Last reply Reply Quote 0
                                          • G Offline
                                            Garry K
                                            last edited by

                                            I'm now working on merging face frame cabinets.

                                            merge face frames.png

                                            1 Reply Last reply Reply Quote 0
                                            • 1
                                            • 2
                                            • 25
                                            • 26
                                            • 27
                                            • 28
                                            • 29
                                            • 30
                                            • 31
                                            • 32
                                            • 27 / 32
                                            • First post
                                              Last post
                                            Buy SketchPlus
                                            Buy SUbD
                                            Buy WrapR
                                            Buy eBook
                                            Buy Modelur
                                            Buy Vertex Tools
                                            Buy SketchCuisine
                                            Buy FormFonts

                                            Advertisement