Modeling Trains - learning Sketchup
-
Nice work, Jim. Welcome to the forums
-
Welcome to the forum!
Your image remebers me of Lz, a Forum member with the same hobby... you can have a look at his train models here:
http://sketchucation.com/forums/search.php?author_id=184097%26amp;sr=posts -
Hello and thanks for the welcome.
LZ certainly builds a compelling model.
I thought perhaps it would be of some interest to describe my process in a bit more detail....
Starting out, I picked the USRA 060 switch engine as my first subject for several reasons, I had fairly good drawings of it, it was reasonably simple (for a steam engine) and being much used by many railroads, it was fairly easy to find images of the operational machine and its components. The 060 is a switch or yard engine generally used at slow speeds to organize cars into trains and to break up trains and deliver cars to individual sidings. As a slow speed smaller engine it needs neither leading pilot wheels nor trailing wheels to support the firebox, hence the 060 designation – 0 pilot wheels, 6 drive wheels and 0 trailing wheels.
Not being sure how much data Sketchup, 3dMax or my computer could handle or how big the model would become were also reasons to start with a smaller project. I decided I would stick to externally visible features and would attempt to model all the principal external systems and hoped to provide sufficient information to make a credible model. Nothing internal is modeled such as pistons, boiler details or even cab controls and gages.
…so starting from the ground up there are wheels.

The wheels fit into a frame and tender trucks which also include the suspension elements and end pilot beams, couplers, foot boards and so on.

Running gear modeled includes the cylinders, valves, drive rods, valve gear and power reverse equipment. As with the remainder of the model, connecting bolts, nuts, washers, keys, wedges and so on are typically either simplified or omitted.

The model includes representations of the boiler, smoke box (silver front with the smoke stack), steam dome, two sand domes, the fire box and the ash pan at the back.
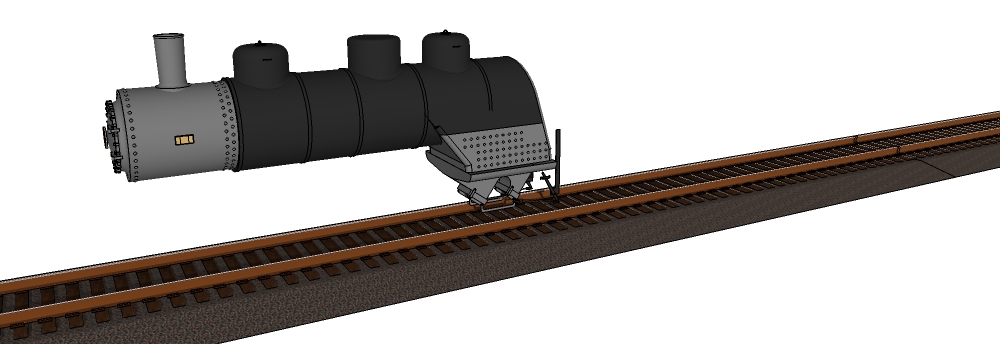
The brake system is represented with air pumps, air tanks, break cylinders, brake linkages and driving wheel brake shoes. I’ve omitted brake shoes on the tender wheels.

Rounding out the equipment, I’ve modeled foot boards, hand rails, a boiler water injection system, headlights and generator and of course, the bell and whistle.

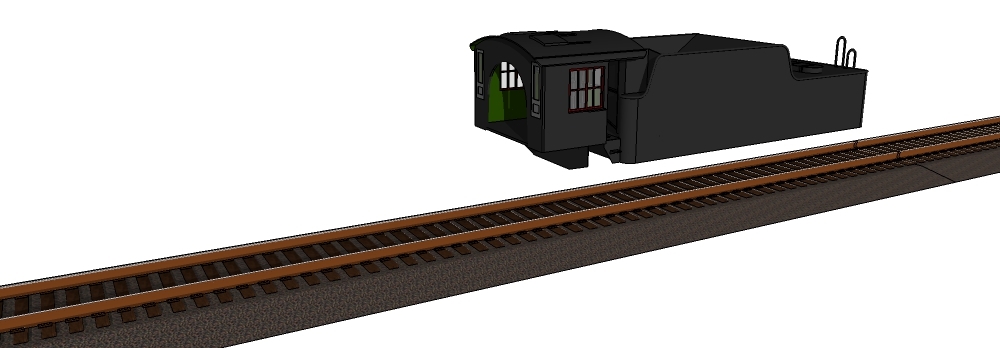
Of course a cab and body for the tender….
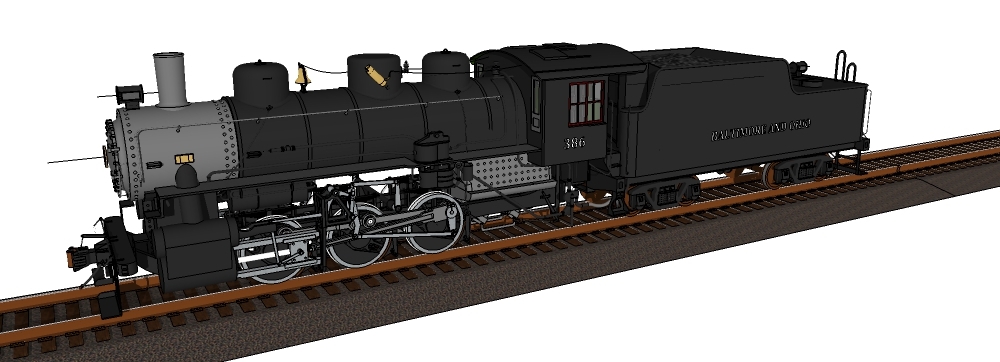
All coming together to complete the model switch engine.
Which 3dMax sees this way….
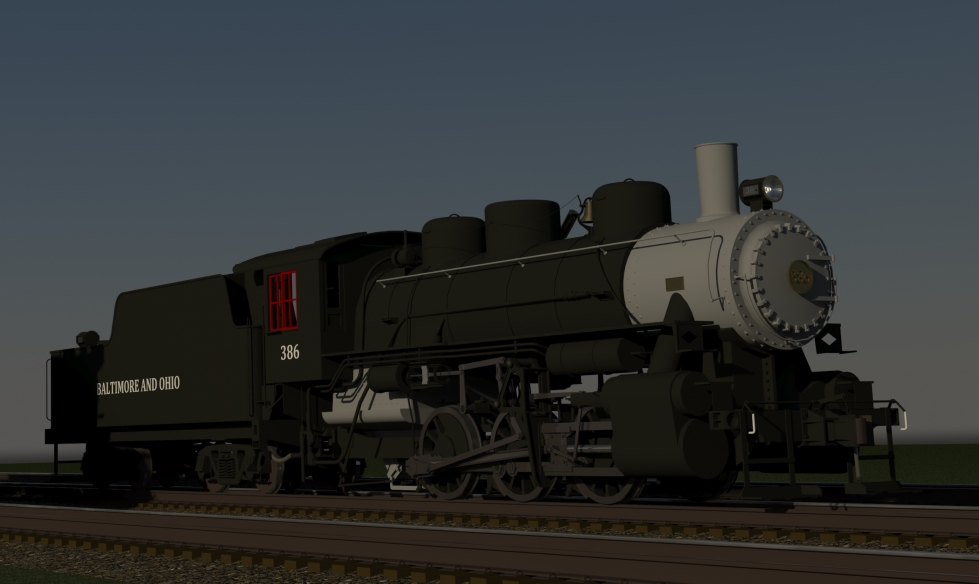
I found the process at once a struggle and rewarding in its results. The layer system used to organize the model turned out to be fairly complicated but coming from a CAD background I didn’t find the results either too useful or successful. In subsequent models I’ve worked to maintain and increase the level of detail but generally use components rather than layers to manage the work. As a result, they are easier to manage but can’t be broken apart visually as neatly as my little 060.
Jim
-
Layers in Sketchup are used to control the visibility of group and components, they don't separate the geometry. You don't have to choose between the use of components or layers for this task. (ALWAYS work on Layer0 and asign different Layers only to groups and components!)
-
Why do you say always create geometry on Layer0? For various types of solutions I often create geometry on other layers and have never run into any problems.
It can help to turn on / off visibility for a bunch of layers at the same time. I mostly use Layer0 as a temporary layer and then move the geometry where I want it.
-
layer 0 holds all raw geometry drawn.
other layers hold the wrapping containers for this geometry.
placing raw geometry on layers A and then having some of that geometry on layer B and C as grouped objects is like watching Inception in reverse.
that's not to say your wrong. it is just against convention to do so.
-
Hmmmm....I've never used Layers. Thought about checking them out once or twice but never got around to it. I should probably put them on my list (just as soon as I find that dang list
 )
)@Jim - Really nice detailing on your model. Would really like to see some hidden line shots
-
Hello again,
I believe I understand what you folks are saying about layers / components / base content and agree that it would work better if the base graphics were all on a single layer - why not Layer0?
Are the following what you meant by hidden line images?
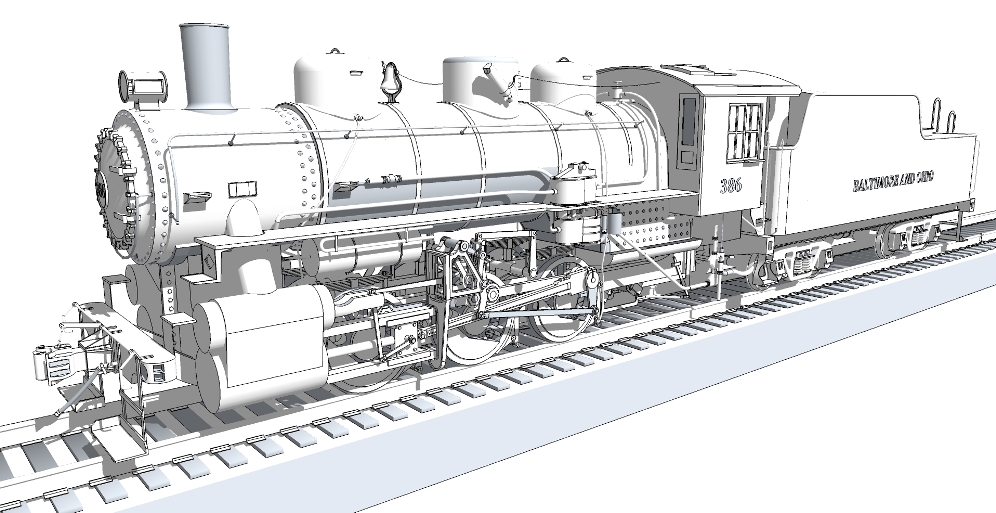
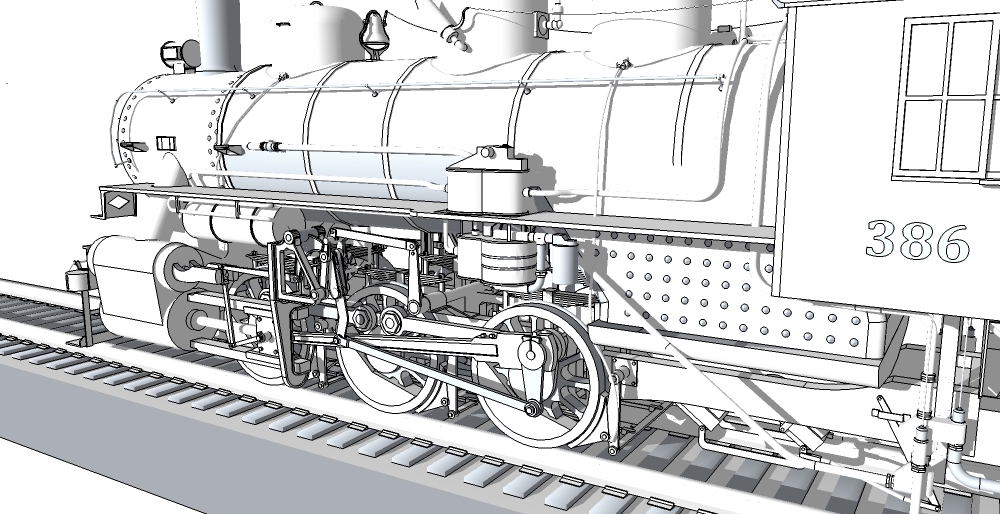
Perhaps it will also help to keep in mind that my first idea in developing this model was to create background information for a series of railroad historic buildings and structures. I knew I could download cars and so on off the net, but felt that if it's a railroad station, shouldn't there be a train of the correct type and vintage. For example, there was the bridge shown in the first image and below.
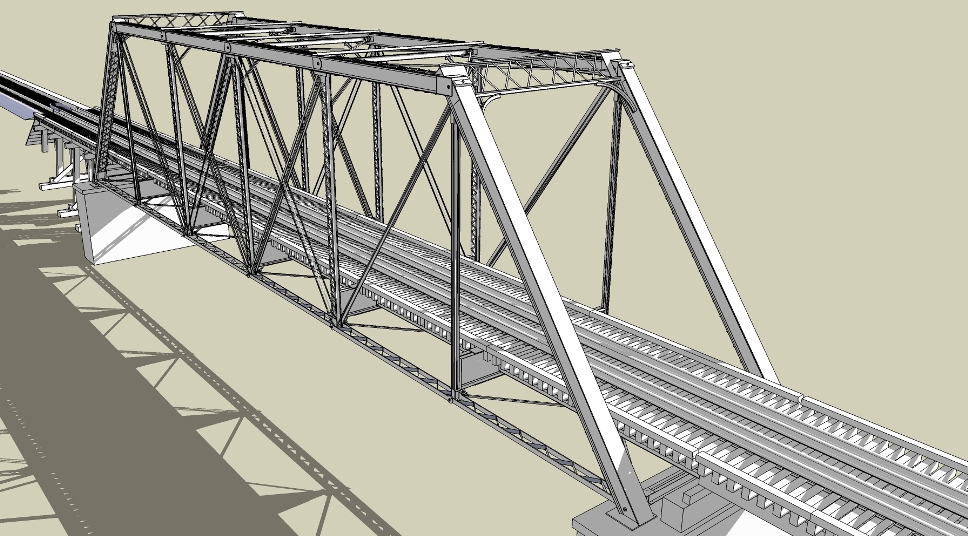
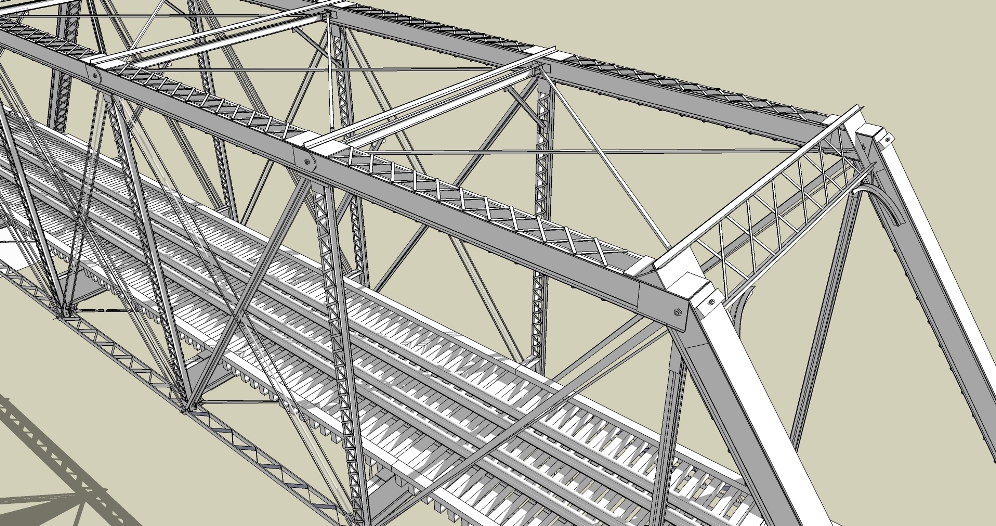
Once I got started, well, there had to be box cars, hoppers, cobboses... you know how it goes.
Thanks for looking
Jim
-
Welcome to the forum Jim. Great modeling

John
-
Beautiful modeling, Jim.
-
It looks real, Jim.
-
Great modelling!
-
@la_rr_architect said:
Are the following what you meant by hidden line images?
Jim
Monochrome, yes, but with hidden lines turned on also. Helps give us an insight into your modeling techniques, something always of interest to your fellow modelers here.
-
Sure, no worries.
Here's a view with hidden geometry.
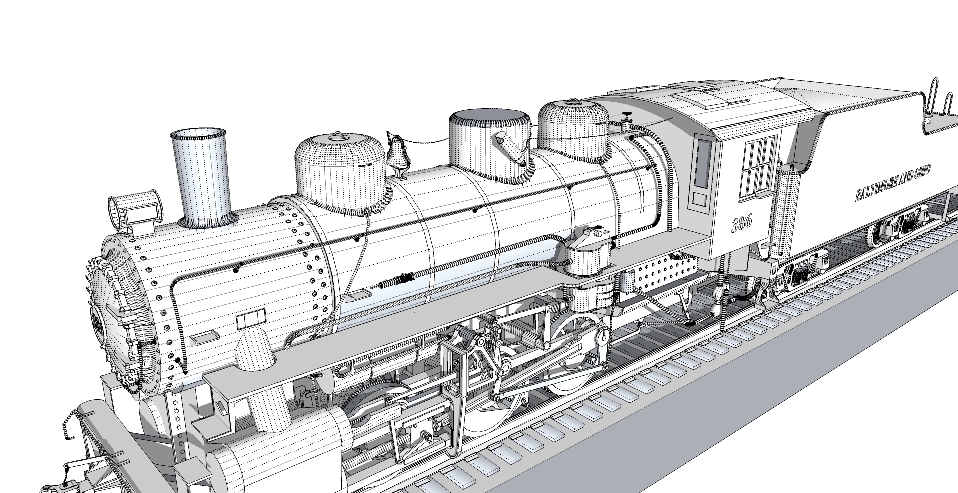
I think the modeling is pretty straight forward, but I certainly would be interested in feedback.
One challenge I really fought with and didn't totally solve was the fillet between the sand and steam domes and the top of the boiler. I calculated the intersection of the boiler and domes and used an offset from the intersection line to create a saddle shaped circular follow me tube, pushed it into place and manually deleted the less useful polygons.
A lot of effort for a less than totally compelling result.
One word about my modeling. I'm one of those old guys, in more ways than one, who would never use a power tool where a manual one will work. As a result, I've never used any of the Ruby extensions and seldom use warehouse components.
Anyhow, that's how I got here...
Jim
-
...here's a sub assembly from the tender as well. Perhaps it will also shed some light.
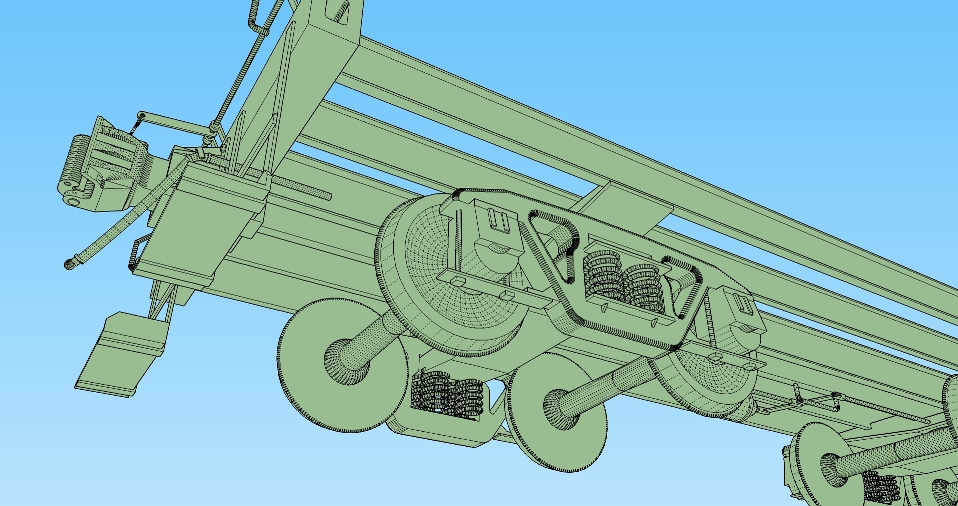
From the Model statistics panel I see that the entire model has:
5 edges
178 componentsAnd when nested components are shown:
2641 component instances
389,900 +/- edges
167,000 +/- facesJim
-
Sounds like we have something in common - I too am one of those "old guys", and I use very few plugins/extensions. Do you really not use any of the extensions
 ?
?One suggestion - I noticed that there are some reversed faces in your model. I don't render, but others have pointed out that reversed faces can adversely affect a render (plus it's generally considered good modeling practice to not have any of those pretty blue faces showing
 )
)Really looking forward to seeing more of your outstanding work
-
Excellent modeling!
The renders looks a little dark on my monitor, however.
-
@tadema said:
Welcome to the forum Jim. Great modeling

John
+1
 , texturing is too clean and needs more attention IMO, it is too flat and clean.
 -
Very cool result!

@unknownuser said:
I've never used any of the Ruby extensions
Maybe with them you should made 2 trains in the same time!

It's good or bad, the same pleasure, i don't know!
-
Hello everyone,
Thanks for looking and your helpful, provocative observations.
Hellnbak, you’re correct, I have run into the occasional problem with back facing polygons and have been attempting to ferret them out of my models. The 060 was one of my first and has been reworked several times, but still a few backward faces… so it goes.
Bryan, Thanks and there’s probably no reason to start adjusting your monitor. These images are a tad dark. This occurs for two reasons. 3dMax and I are still pretty much on mutually suspicious terms and don’t entirely get along and also, I do like the effect of late evening or early morning light. I like the added redness, the way the low shadows fall on the model and to be honest, the reduced light which hides a fairly wild lack of detail on my models. At present, I’m working down to about 1 inch detail, I’m afraid that if I push things to the next level the size of my models will go up by an order of magnitude.
Majid, You’re are mostly right about the level of texture. In my defense, I again site my lack of intimate familiarity with Max but also claim that the goal of the images is not to create a hyper realistic image but rather to evoke the feeling of large scale railroading as seen in the photos made in the 30’s, 40’s and 50’s when large steam powered monsters roamed the earth. It is one reason I try not to get too close to my subjects.
One question that someone may be able to answer. If I model SU surfaces with textures, I can edit or change the texture in Max however if I use a solid color in SU all I can do with the imported file is change the color, I can’t apply a texture to it. Any idea what gives?
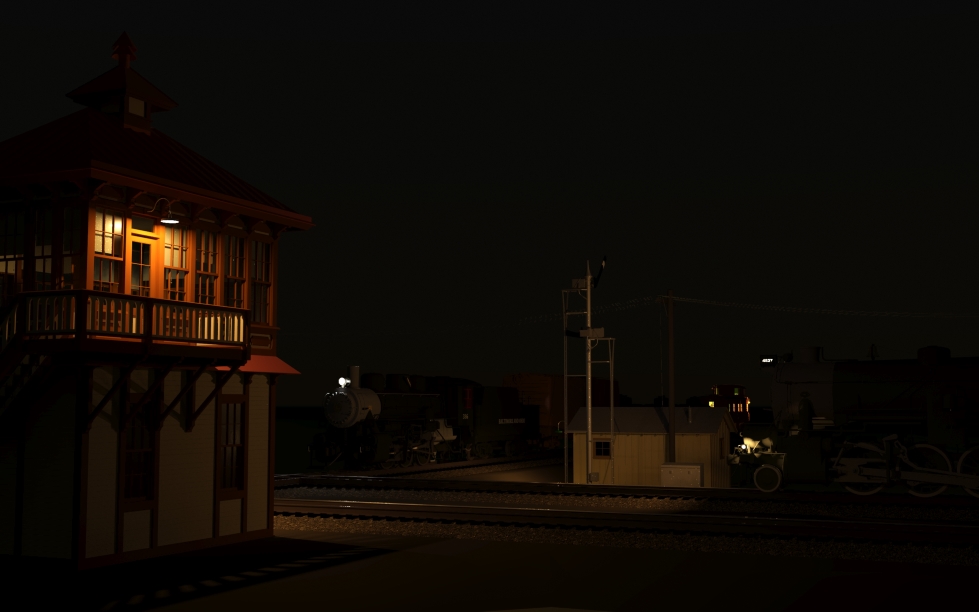
In any case, get ready for another dark image… really dark. This scene features a pair of locomotives at a cross track. The crossing is guarded by a signal tower (yellow building in the foreground) in order to minimize the chance of the obvious accident. The crossing and tower are generally historic. The scene is illuminated by the two locomotive’s headlamps and a handful of 60W bulbs.
Thanks again everyone
Jim
Advertisement


