Problems with a half-torus
-
Ok, so it's a desktop printer. The reason I asked is on that kind of printer, the printer will need some kind of support to hold up the bell shape while printing. The support material is made of the same plastic, and you'll have to remove it by hand.
You should be aware of this, as you may need to make your design to take support removal into account. Here is an image of a T-rex head with support material:

...and the same model with the support material removed.

The gap under your bell shape is pretty small, and if it needs to be cleaned out you may be better off making the base and the bell shape in two different pieces that snap together.
If you were making this on a commercial powder printer, you could just remove the support powder with compressed air...easy peasy.

-
@d12dozr said:
Ok, so it's a desktop printer. The reason I asked is on that kind of printer, the printer will need some kind of support to hold up the bell shape while printing. The support material is made of the same plastic, and you'll have to remove it by hand.
You should be aware of this, as you may need to make your design to take support removal into account. Here is an image of a T-rex head with support material:
The gap under your bell shape is pretty small, and if it needs to be cleaned out you may be better off making the base and the bell shape in two different pieces that snap together.
If you were making this on a commercial powder printer, you could just remove the support powder with compressed air...easy peasy.
OK... that's a curve ball...
 What are the rules for support material then? I think it's fairly obvious I know zilch about 3D printing.
But... the snap-together idea would make it easier to assemble, on the car, hunched over, in a tight space (this is designed to go on a 1976 mini car). I imagine there is some kind of template for clicky catch arrangement?
-
Do yourself a favor and learn a little...watch the videos on this page, or at least the Filament printing one. Heck, spend $5 and get the ebook in my signature. #ShamelessPlug In a few hours you'll understand a lot more about how the process works, and how models need to be made in order to be printable, and you can keep all of your hair

There's not a template for making a snap fit, but here's a hint. You'll want to leave a ~0.3mm gap in between the parts to allow the parts to fit tightly, but not so tight they won't fit together.
-
@pilou said:
I have for habit to wait 6 month before use a new version!

Color by Z and Random Painter by Chris Fullmer (don't know if they works inside the 2015 !
[attachment=0:2dlsulxo]<!-- ia0 -->donutsv6.jpg<!-- ia0 -->[/attachment:2dlsulxo]Eh Pilou! Looks like you like colours

-
@d12dozr said:
Do yourself a favor and learn a little...watch the videos on this page, or at least the Filament printing one. Heck, spend $5 and get the ebook in my signature. #ShamelessPlug In a few hours you'll understand a lot more about how the process works, and how models need to be made in order to be printable, and you can keep all of your hair
There's not a template for making a snap fit, but here's a hint. You'll want to leave a ~0.3mm gap in between the parts to allow the parts to fit tightly, but not so tight they won't fit together.
Well I bit the bullet and bought your book for the grand sum of less than a pint of beer
I've had another thought: If I made them screw together it would make it easier for assembly and disassembly. Time for a look into creating threads in SU  do I set the same kind of ~0.3mm tolerance for threads? I'll go look around.
 -
@d12dozr said:
Do yourself a favor and learn a little...watch the videos on this page, or at least the Filament printing one. Heck, spend $5 and get the ebook in my signature. #ShamelessPlug
Just bought it also. Looking to buy a small 3d printer soon so finding your book came just at the right time, thanks

-
@teig said:
Well I bit the bullet and bought your book for the grand sum of less than a pint of beer
I've had another thought: If I made them screw together it would make it easier for assembly and disassembly. Time for a look into creating threads in SU do I set the same kind of ~0.3mm tolerance for threads? I'll go look around.Thanks!
For making threads, I'd start a little higher, like 0.5mm. You may have to tweak that after printing and testing though. You may be able to find and repurpose a model with threads from the 3D Warehouse or Thingiverse. I explain how to do that in Chapter 5.
@cadmunkey said:
Just bought it also. Looking to buy a small 3d printer soon so finding your book came just at the right time, thanks
Thank you too, I hope it helps you!

-
@d12dozr said:
Teig, I would encourage you to finish the model in Sketchup so there is no more work after 3D printing. You almost had it there once, you can do it again.
The beauty of 3D printing is a finished model, straight off the printer.I've done another 3 hours tonight putting the vents in
 I was having a real problem with the push up on the [inner] vent hole intersecting the underneath of the bellmouth until I realised I'd been overthinking it
 Then I had a fun time figuring out the scale tool, I think I've managed to restore it to 120mm outside diameter
@d12dozr said:
The gap under your bell shape is pretty small, and if it needs to be cleaned out you may be better off making the base and the bell shape in two different pieces that snap together.
If you were making this on a commercial powder printer, you could just remove the support powder with compressed air...easy peasy.
So I don't need the supporting material if I go to a commercial printer? I'm starting to think that it might be the better option.
-
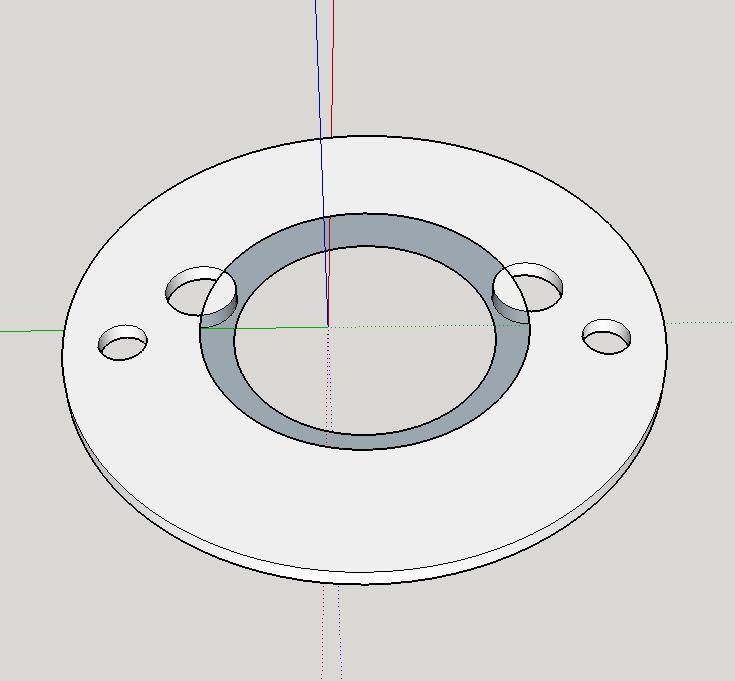
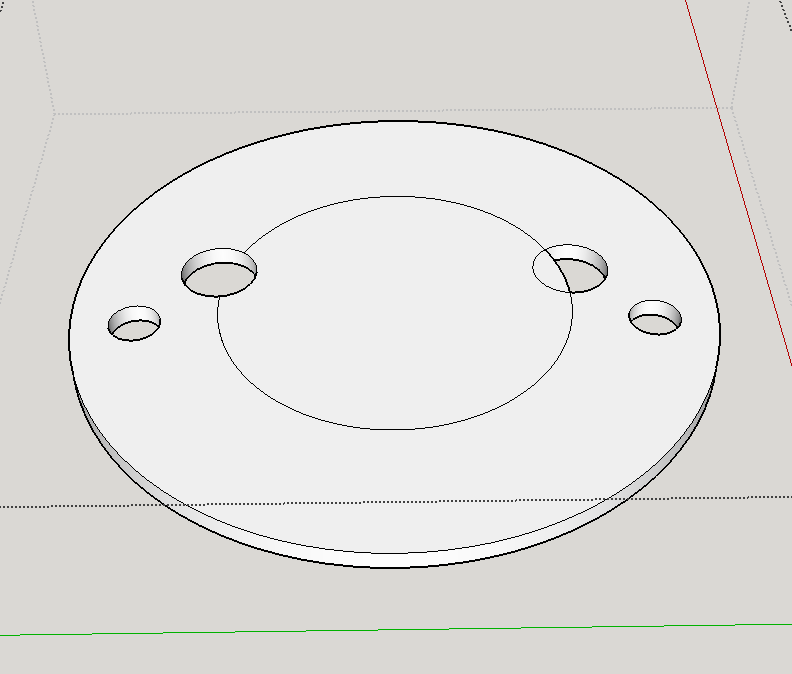
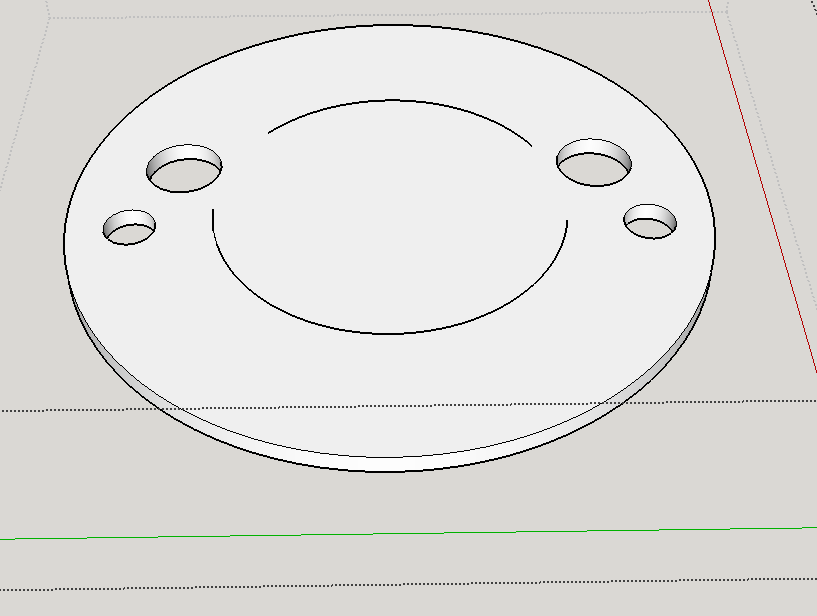
A couple of things to note.
The faces inside your vent holes should be reversed, look up the hole it should be white.
I noticed your model was getting a lot of Clipping (when things sort of disappear when moving around or zooming in).
Two things are causing this and can be easily eliminated.
Your model is a long way, relatively speaking, from the origin. Working away from the origin can cause problems so it's best to stay near them as much as possible.
You must have changed the model origin at some stage too, best to reset that unless you specifically need it the way it is.
So if it was me, I would right click on one of the axes in open space and select reset. Then move your Group to that origin, explode the group to remove any possible oddities with the group origin, flip the two reversed faces and finally select all of it and make it a component. -
What is exactly this piece ? It's a real one ?
And you have no diffilculties to work with it at the initial size?
It's pasted welded? (hole disc under the girl's shoes)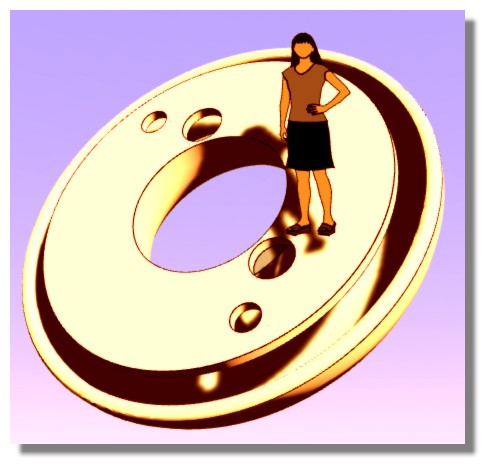
-
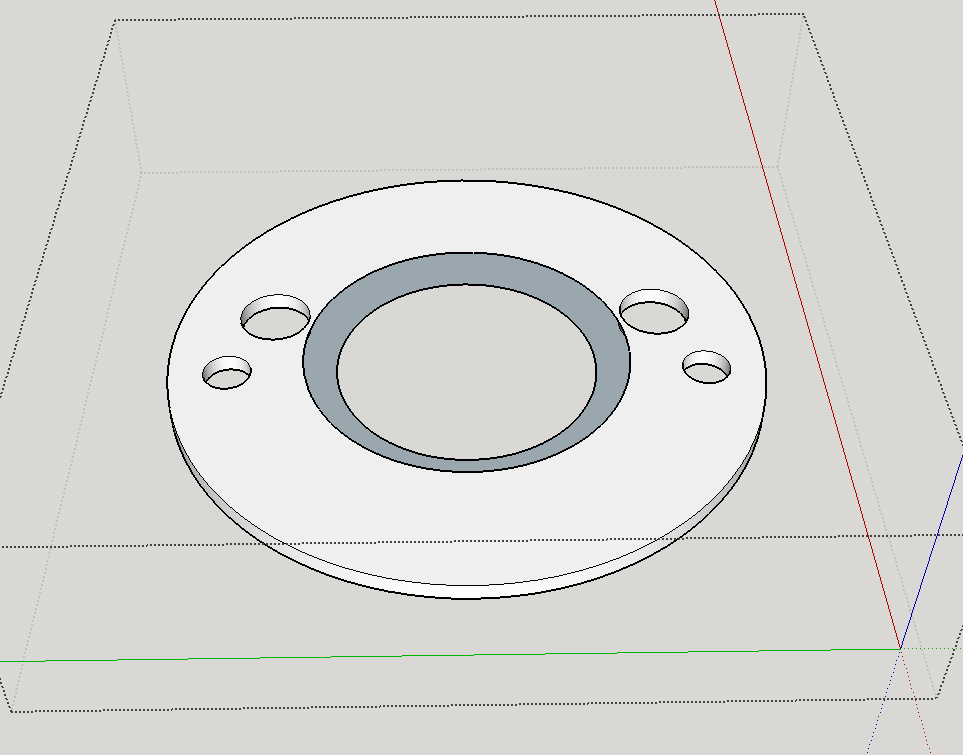
Somehow your holes ended up in an odd position, partially showing insides of the bell shape. You know (if you need it all to be one group), you can temporarily group parts to keep them from sticking and you can hide parts easily that way. I'd group the bell portion, hide it, then clean up the rest.
I'd fill (by drawing a line on the edge) that middle hole, group, and copy it. Then remove all the lines of the hole, making a solid surface. Move your vent holes where you need them. Paste that circle back in. Explode and flip, then clean up. Or redraw that circle. It helps if you draw over the origin or have a centered guide or circle for redrawing perfectly aligned circles.

-
@box said:
A couple of things to note.
The faces inside your vent holes should be reversed, look up the hole it should be white.
I noticed your model was getting a lot of Clipping (when things sort of disappear when moving around or zooming in).
Two things are causing this and can be easily eliminated.
Your model is a long way, relatively speaking, from the origin. Working away from the origin can cause problems so it's best to stay near them as much as possible.
You must have changed the model origin at some stage too, best to reset that unless you specifically need it the way it is.
So if it was me, I would right click on one of the axes in open space and select reset. Then move your Group to that origin, explode the group to remove any possible oddities with the group origin, flip the two reversed faces and finally select all of it and make it a component.Yes, it moved from the origin when I scaled it, I had the origin bang centre at first. I don't know how to put it back right in the centre
-
@pbacot said:
Somehow your holes ended up in an odd position, partially showing insides of the bell shape
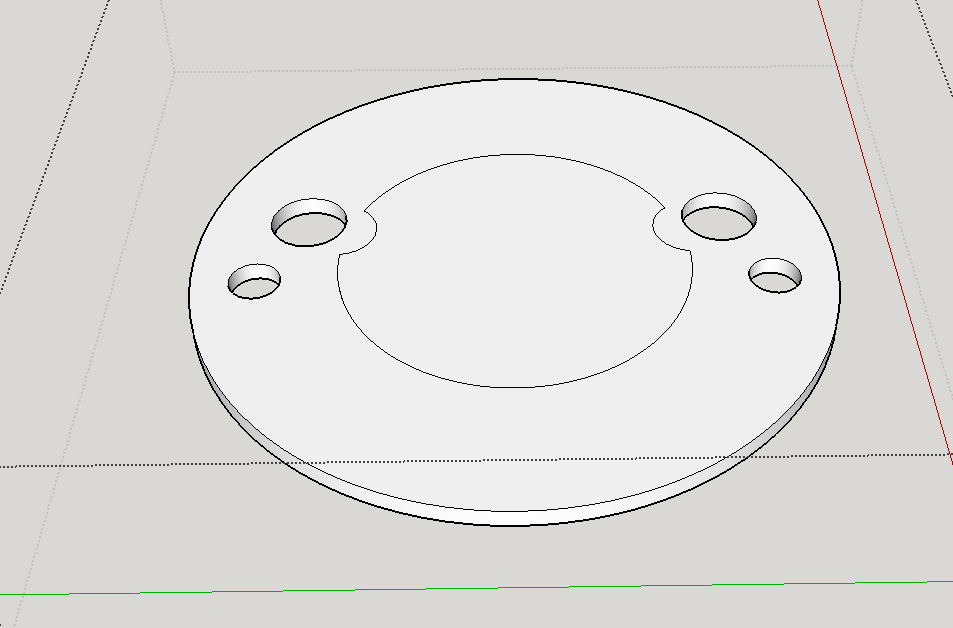
This is a bellmouth, it goes on outside of a carburettor - the rounded edges boost the adjoint of air that can be drawn in by ~6%. The two inner holes are atmospheric balance vents so have to be where they are.
-
@pilou said:
What is exactly this piece ? It's a real one ?
And you have no diffilculties to work with it at the initial size?
It's pasted welded? (hole disc under the girl's shoes)[attachment=0:q0dj7w24]<!-- ia0 -->curious.jpg<!-- ia0 -->[/attachment:q0dj7w24]
Sorry Pilou, I'm not sure you mean by "pasted welded". It's not too bad to work on at that size (even using the track pad on the Macbook Pro (I don't have a mouse)), it was no easier to work on when I multiplied it to 100x.
-
@teig said:
@pbacot said:
Somehow your holes ended up in an odd position, partially showing insides of the bell shape
This is a bellmouth, it goes on outside of a carburettor - the rounded edges boost the adjoint of air that can be drawn in by ~6%. The two inner holes are atmospheric balance vents so have to be where they are.
So it's a case of reversing those two little faces. I get it now, I guess.
-
@teig said:
@box said:
A couple of things to note.
The faces inside your vent holes should be reversed, look up the hole it should be white.
I noticed your model was getting a lot of Clipping (when things sort of disappear when moving around or zooming in).
Two things are causing this and can be easily eliminated.
Your model is a long way, relatively speaking, from the origin. Working away from the origin can cause problems so it's best to stay near them as much as possible.
You must have changed the model origin at some stage too, best to reset that unless you specifically need it the way it is.
So if it was me, I would right click on one of the axes in open space and select reset. Then move your Group to that origin, explode the group to remove any possible oddities with the group origin, flip the two reversed faces and finally select all of it and make it a component.Yes, it moved from the origin when I scaled it, I had the origin bang centre at first. I don't know how to put it back right in the centre
Edit: fixed my axes now
-
Sub Stack11v6solidFinal.skp
@pbacot said:@teig said:
@pbacot said:
Somehow your holes ended up in an odd position, partially showing insides of the bell shape
This is a bellmouth, it goes on outside of a carburettor - the rounded edges boost the adjoint of air that can be drawn in by ~6%. The two inner holes are atmospheric balance vents so have to be where they are.
So it's a case of reversing those two little faces. I get it now, I guess.
I tried reversing the faces of the holes but they just went darker (indicates the inside I understand) so I'm not sure what to do?
Sub Stack11v6solidFinal.skp -
No, I meant this bit.
-
@teig said:
(I don't have a mouse)
Buy a cheap 3 button mouse, the type with the scroll wheel as the third button immediately. You will never look back. You can zoom/orbit/pan all at the same time while using other tools.
-
@unknownuser said:
it was no easier to work on when I multiplied it to 100x.
First: SU don't like these mini measures because operations between volumes generally fall!
(cut, boolean diff etc)Second: When you use a render this one takes many more time than with more normal unites!
That was the case for your object!
Third: try to import your object in an existing scene!
@unknownuser said:
"pasted welded".
In the reality how these 2 parts are built? Fondry ? (except the 3D Printing)


Advertisement