sketchucation logo sketchucation
    • 登入
    Oops, your profile's looking a bit empty! To help us tailor your experience, please fill in key details like your SketchUp version, skill level, operating system, and more. Update and save your info on your profile page today!
    ⚠️ Important | Libfredo 15.6b introduces important bugfixes for Fredo's Extensions Update

    Problems with a half-torus

    已排程 已置頂 已鎖定 已移動 Newbie Forum
    sketchup
    156 貼文 11 Posters 11.8k 瀏覽 11 Watching
    正在載入更多貼文
    • 從舊到新
    • 從新到舊
    • 最多點贊
    回覆
    • 在新貼文中回覆
    登入後回覆
    此主題已被刪除。只有擁有主題管理權限的使用者可以查看。
    • TeigT 離線
      Teig
      最後由 編輯

      The strengthening of the throat-base was giving me some grief until I had a eureka moment and put the channels for the air vents underneath. Took about 20 minutes to draw, a far cry from a month ago when it took me 8 hours to get an outline 😄

      1 條回覆 最後回覆 回覆 引用 0
      • TeigT 離線
        Teig
        最後由 編輯

        I wonder what's wrong now... It's a long night on shift and started drawing an elbow, it's an exercise really with the general (virtual) notion being to mount the bellmouth up out of the way. So I started fiddling and came up with this:

        Elbow v1.jpg

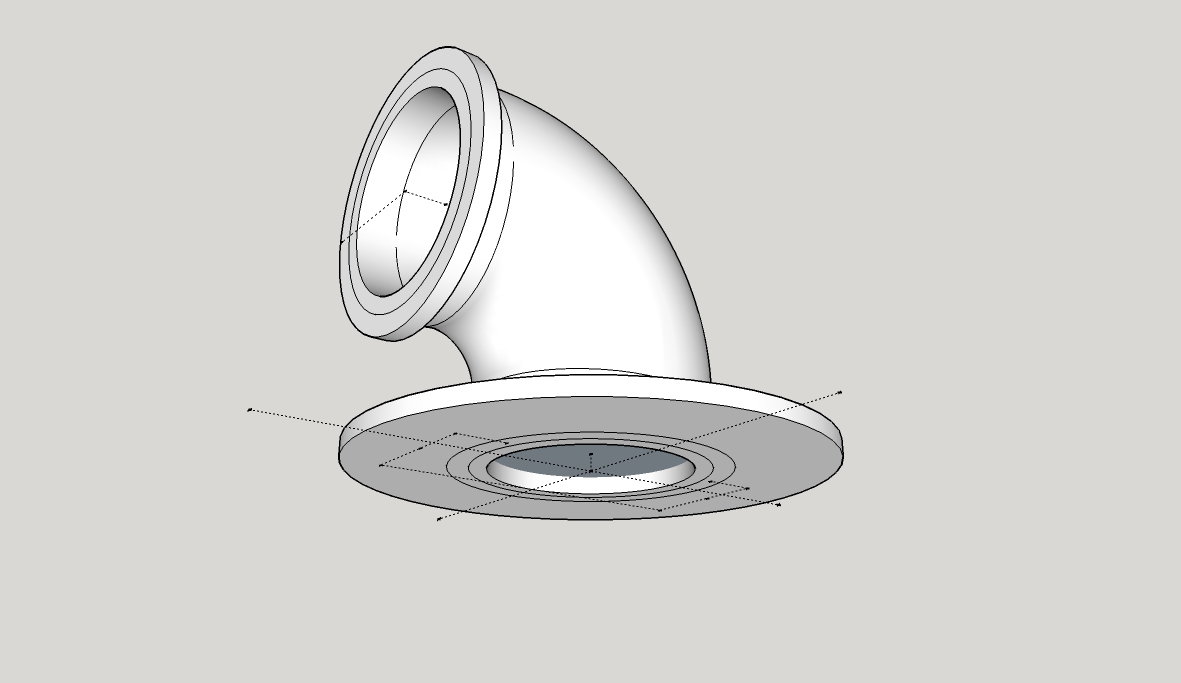
        It gave me a bit of bother trying to draw the support flanges, the result being it's not solid. I'm being told I'll need to manually remove faults. That's my latest problem, I've duplicated and scaled up trying to use the 'Dave R' technique but it doesn't work, SolidSolver unable to fix it. Anyone for some guidance on this one?

        Elbow.skp

        1 條回覆 最後回覆 回覆 引用 0
        • BoxB 離線
          Box
          最後由 編輯

          If you intersect the top face of the flange with the collar you can remove the face you can see in the tube. Then a bit of cleanup of some stray lines and it is a solid.
          I can give it to you fixed if you want it.

          I just noticed it is a group, so edits on the big one won't flow to the small one.

          1 條回覆 最後回覆 回覆 引用 0
          • TeigT 離線
            Teig
            最後由 編輯

            Oh fiddle! I should have done it as a component.... 😡 I'll try and figure out what you mean Box, I may be back soon... 😄

            1 條回覆 最後回覆 回覆 引用 0
            • TeigT 離線
              Teig
              最後由 編輯

              Strewth! How do you intersect them? There's a trio of choices, with face, with model and with selection, none seem to work.

              1 條回覆 最後回覆 回覆 引用 0
              • TeigT 離線
                Teig
                最後由 編輯

                @box said:

                I can give it to you fixed if you want it.

                Yes please Box! My grey matter is frazzled 😄

                1 條回覆 最後回覆 回覆 引用 0
                • BoxB 離線
                  Box
                  最後由 編輯

                  Here, I'll give you this gif, and see how you go.
                  But remember to make it a component this time.

                  Edit:if you are wondering what the first context menu was, it was just the intersect face one, but it was off screen so a moved down and did it again to get it where you could see it.


                  With selection.gif

                  1 條回覆 最後回覆 回覆 引用 0
                  • TeigT 離線
                    Teig
                    最後由 編輯

                    And I thank you once again Box, I did what you said, couldn't see what you could see to understand why it worked bu the result is solid! 😄

                    Elbow.skp

                    1 條回覆 最後回覆 回覆 引用 0
                    • BoxB 離線
                      Box
                      最後由 編輯

                      On your original when you look into the pipe you see a blue face, this it the back side of the top face of the flange, so by intersecting that face you can remove the part blocking your airflow, and then removing the other edge/ring gets rid of an internal face.


                      Inner Face.gif

                      1 條回覆 最後回覆 回覆 引用 0
                      • TeigT 離線
                        Teig
                        最後由 編輯

                        I knew immediately I'd have internal face when I pulled 'backwards' didn't know to get rid though. I do now 😄 Onwards and upwards, time of home soon for some sleepsssss. Once again, TVM Box.

                        1 條回覆 最後回覆 回覆 引用 0
                        • TeigT 離線
                          Teig
                          最後由 編輯

                          Been playing again tonight and seem to have nailed it 😄

                          Elbow5star.jpg

                          Elbow.skp

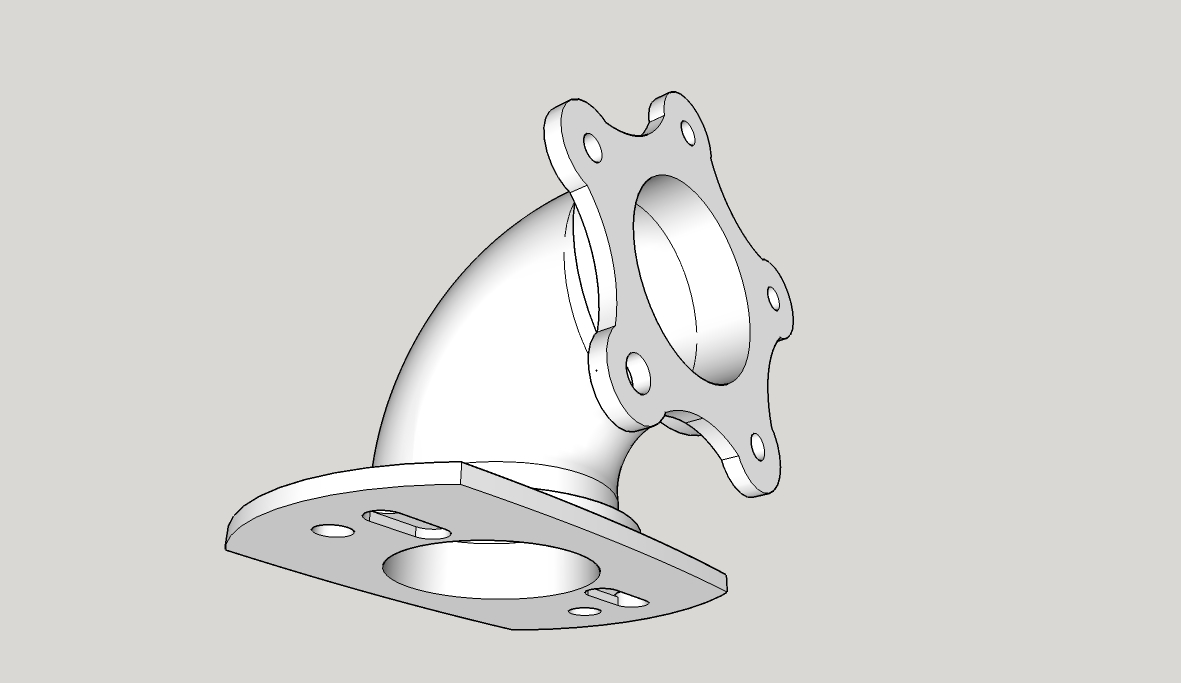
                          Now to get rid of the five star mount and think about how to draw a snap-on clip type system. I've drawn loads of bellmouths of various sizes; it'd be really cool to be able to clip-on clip-off different ones and be able to compare the difference in the torque/power response immediately 🤓

                          1 條回覆 最後回覆 回覆 引用 0
                          • D 離線
                            d12dozr
                            最後由 編輯

                            Superb, Teig! It's neat to watch your progression from the beginning of the thread to now 👍

                            3D Printing with SketchUp Book
                            http://goo.gl/f7ooYh

                            1 條回覆 最後回覆 回覆 引用 0
                            • BoxB 離線
                              Box
                              最後由 編輯

                              Indeed is is good to see.
                              Have you thought about a keyhole type slide fitting.
                              Slide it on and a simple quick release split pin to lock it.

                              1 條回覆 最後回覆 回覆 引用 0
                              • TeigT 離線
                                Teig
                                最後由 編輯

                                Or R-pins for more simplicity? Yes, good idea. I've been looking around at plastic snap-clips for ideas but that might be simpler.

                                1 條回覆 最後回覆 回覆 引用 0
                                • TeigT 離線
                                  Teig
                                  最後由 編輯

                                  @d12dozr said:

                                  Superb, Teig! It's neat to watch your progression from the beginning of the thread to now 👍

                                  I did that myself at the weekend, looked back to the start of the thread that is, my comical first-attempts put a smile on my face 😄

                                  1 條回覆 最後回覆 回覆 引用 0
                                  • TeigT 離線
                                    Teig
                                    最後由 編輯

                                    @box said:

                                    Have you thought about a keyhole type slide fitting.
                                    Slide it on and a simple quick release split pin to lock it.

                                    I'm not sure what you had in mind Box, but I've knocked this together as a concept, can anyone see why it wouldn't work?

                                    Split pin Catch.jpg

                                    Split pin Catch.skp

                                    I know the split pin isn't long enough but I can't figure out how to stretch it and it's only for demo.

                                    1 條回覆 最後回覆 回覆 引用 0
                                    • TeigT 離線
                                      Teig
                                      最後由 編輯

                                      An hour later and I've managed to attach the clips to my model:

                                      Elbow for Catch System.jpg

                                      Solid Inspector2 is reporting them as solid, SolidSolver is saying I need to select one or other. How would I go about combining the three components into one solid?

                                      Elbow for Catch System.skp

                                      1 條回覆 最後回覆 回覆 引用 0
                                      • TIGT 離線
                                        TIG Moderator
                                        最後由 編輯

                                        Assuming the main part is a solid [group it and see its Entity Info...] you'll need to 'merge' the 'clips'
                                        Note:
                                        The 'clip' on the right is not in the same relationship to the pipe as the left 'clip'.
                                        I assume it should be...
                                        Also the back edge of the clips intersect oddly with the pipe-part and their backside radius does not match the pipe's either [see image] - it will mean far more tweaking later on...
                                        Fix those and then with the parts in the same context use 'intersect'.
                                        You should then be able to use SolidInspector/SolidSolver OR add a SectionPlane to look inside and erase the unwanted faces/edges.


                                        Capture.PNG

                                        TIG

                                        1 條回覆 最後回覆 回覆 引用 0
                                        • D 離線
                                          d12dozr
                                          最後由 編輯

                                          Even easier than using Intersect with Model would be to make the elbow a solid group, the select all 3 groups, Right Click > Outer Shell to combine them into a solid group.

                                          3D Printing with SketchUp Book
                                          http://goo.gl/f7ooYh

                                          1 條回覆 最後回覆 回覆 引用 0
                                          • TIGT 離線
                                            TIG Moderator
                                            最後由 編輯

                                            @d12dozr said:

                                            Even easier than using Intersect with Model would be to make the elbow a solid group, the select all 3 groups, Right Click > Outer Shell to combine them into a solid group.
                                            But, isn't that a Pro only Solids feature ?

                                            TIG

                                            1 條回覆 最後回覆 回覆 引用 0
                                            • 1
                                            • 2
                                            • 3
                                            • 4
                                            • 5
                                            • 6
                                            • 7
                                            • 8
                                            • 5 / 8
                                            • 第一個貼文
                                              最後的貼文
                                            Buy SketchPlus
                                            Buy SUbD
                                            Buy WrapR
                                            Buy eBook
                                            Buy Modelur
                                            Buy Vertex Tools
                                            Buy SketchCuisine
                                            Buy FormFonts

                                            Advertisement